Do you like retro games, Mario, Contra, and many more. For a lot of us it brings back memories of long hours glued to the TV. Today we’re going to relive those days by installing RetroPie on a Raspberry Pi.
I also wanted it to be compact enough to be able to carry along during trips. So, let’s make a compact wireless RetroPie gaming console.
Now a Raspberry Pi can be powered using a power-bank, which in itself makes it portable. But to be able to play games on the go we will need a few parts.
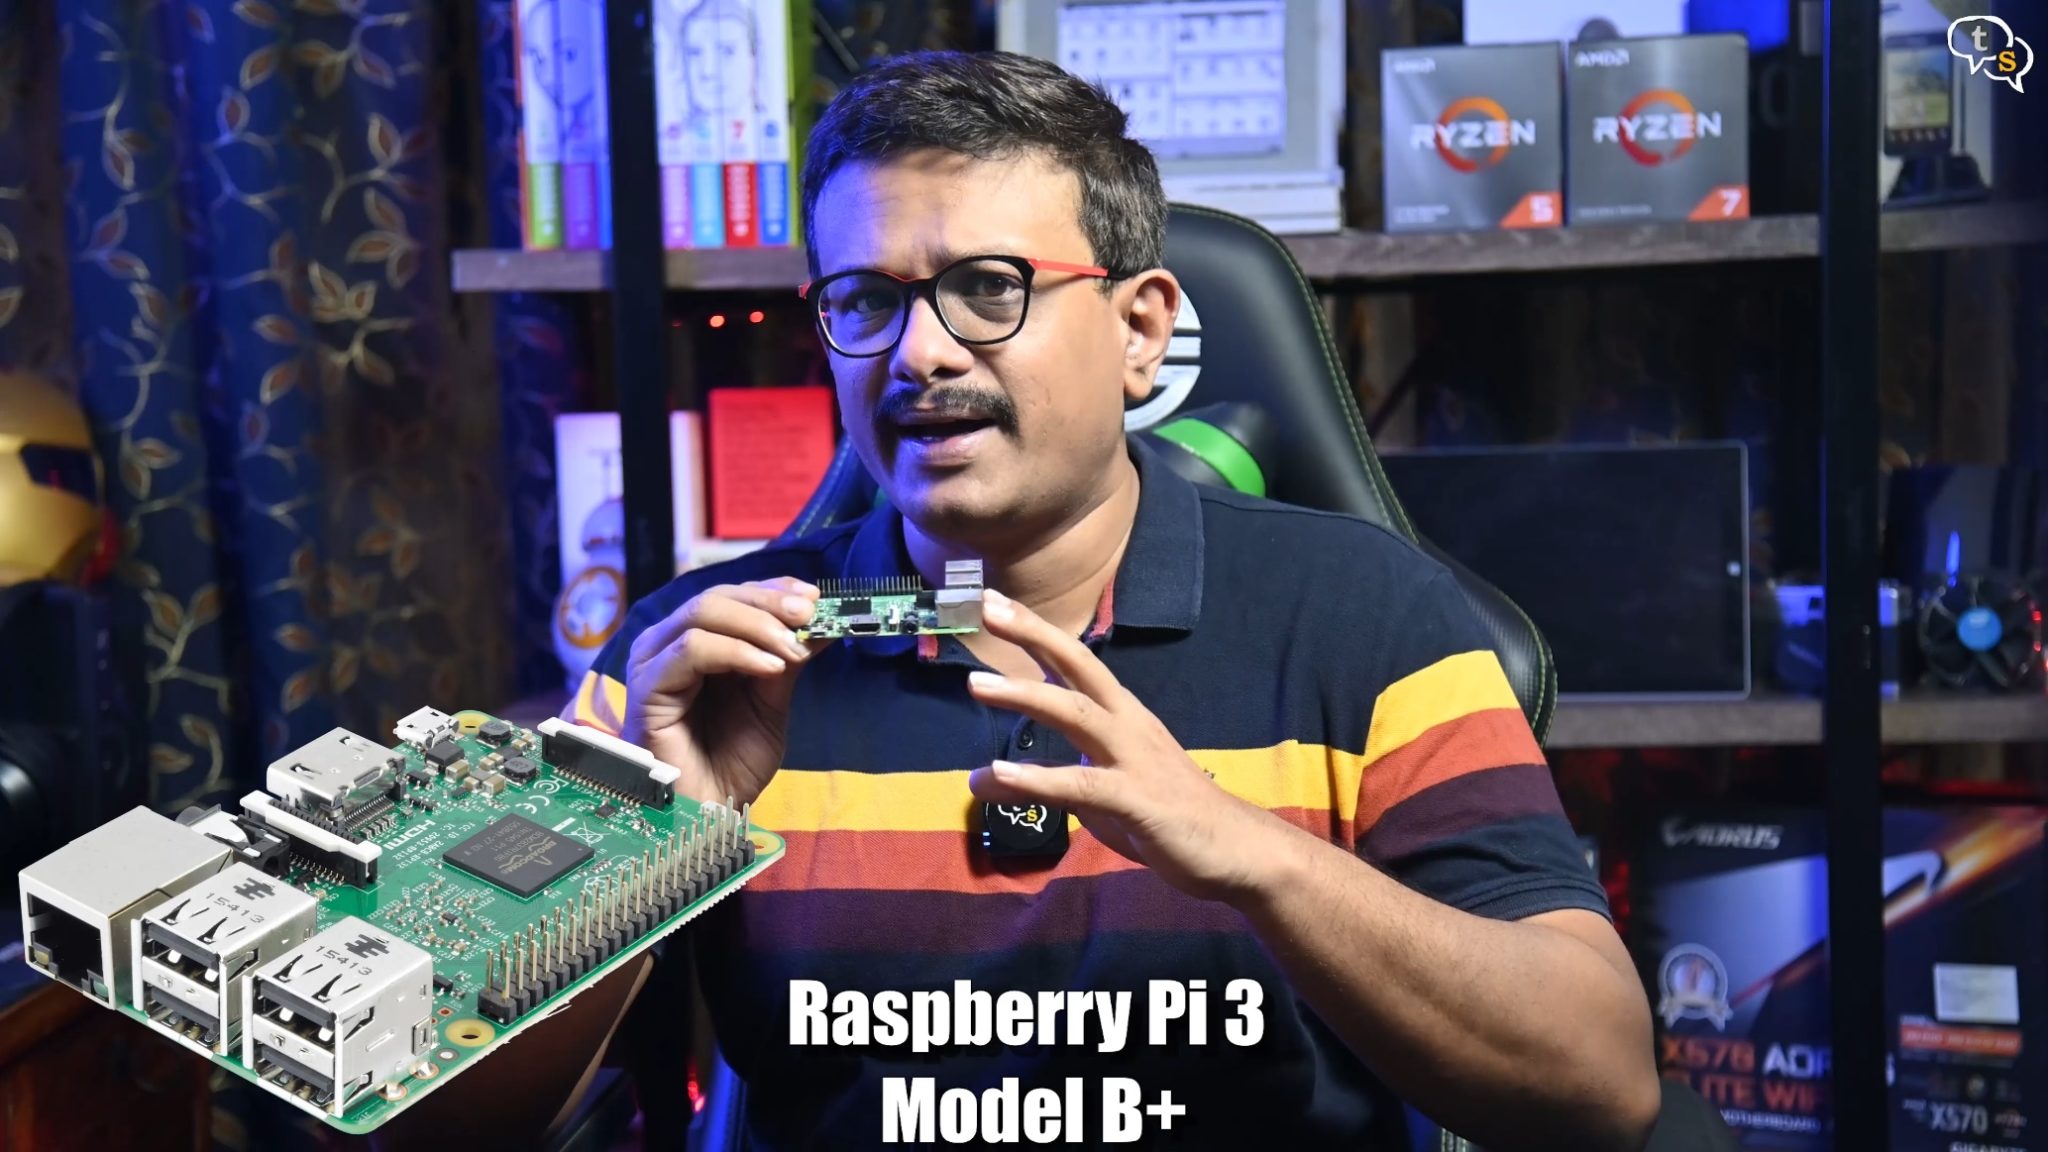
Of course, number one is the Raspberry Pi. I’m using the pi 3b+ as it’s the only one I have.
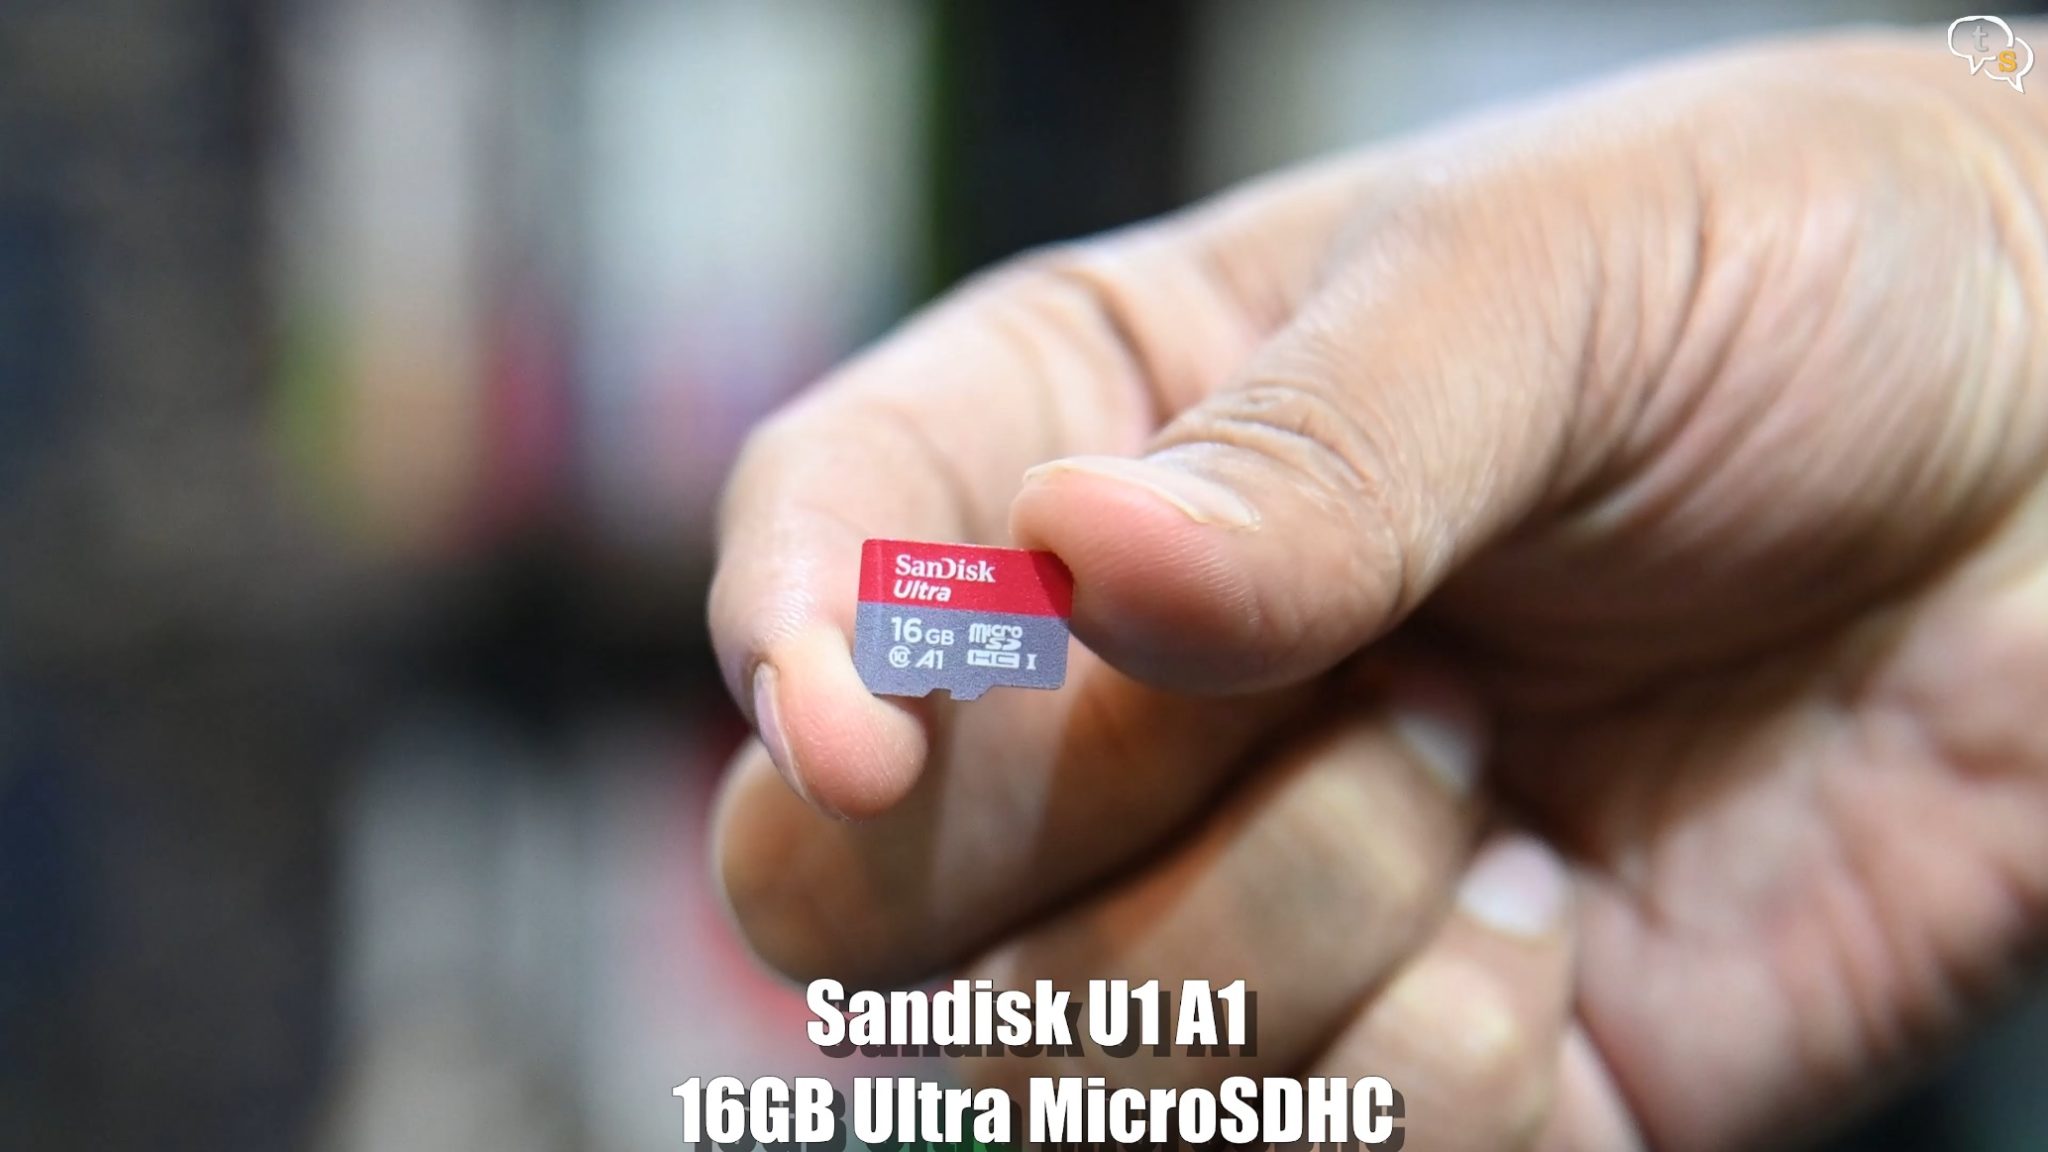
A memory card to store the RetroPie installation and also the ROM’s, I have a 16 GB card, I would suggest a minimum 8GB card. You can add bigger ones such as 32 or 64 GB if you want to add more games.
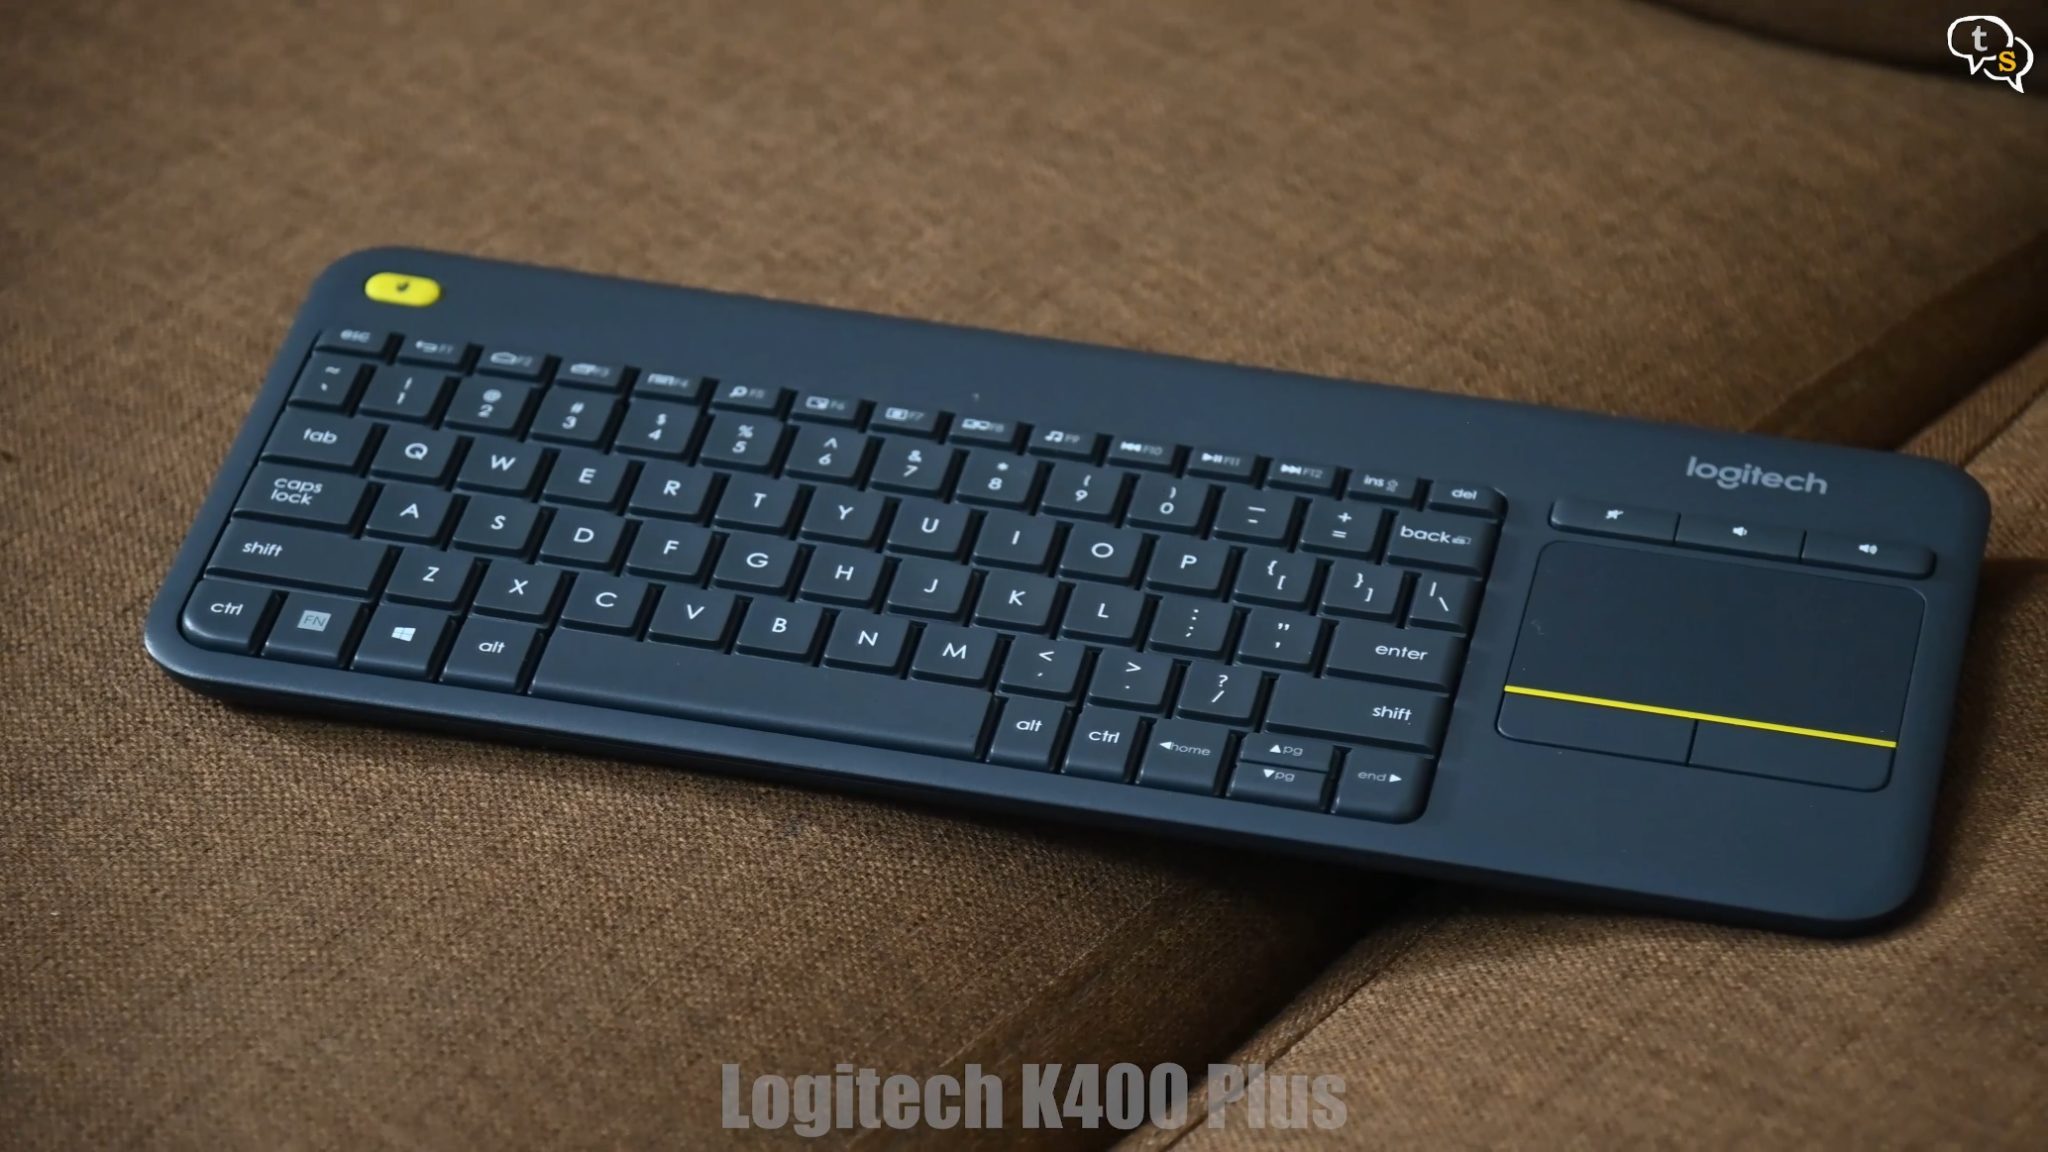
Keyboard, I have this wireless keyboard. You can use a wired USB keyboard instead.
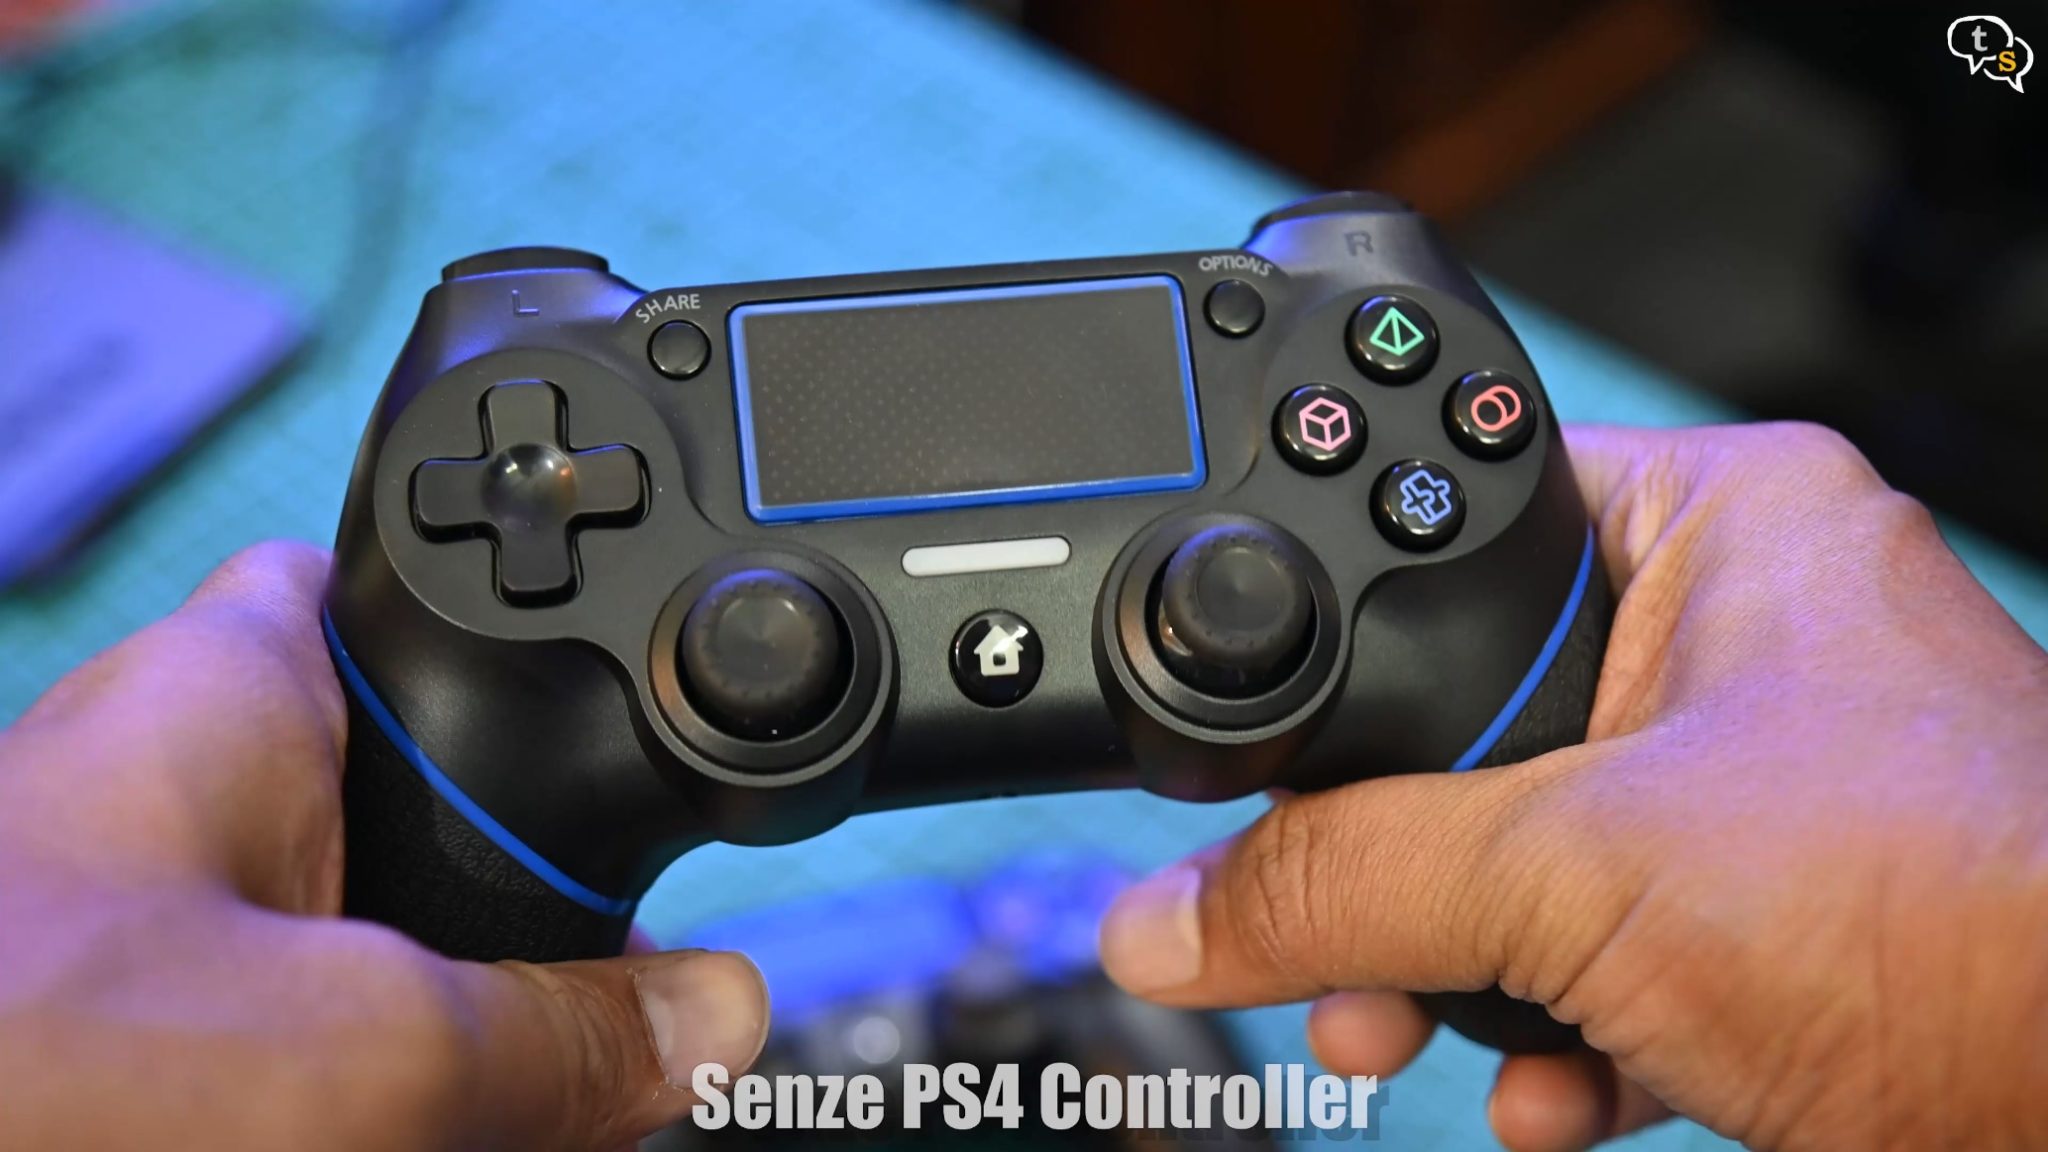
A gamepad, as you would be gaming and gaming using a gamepad is easier.
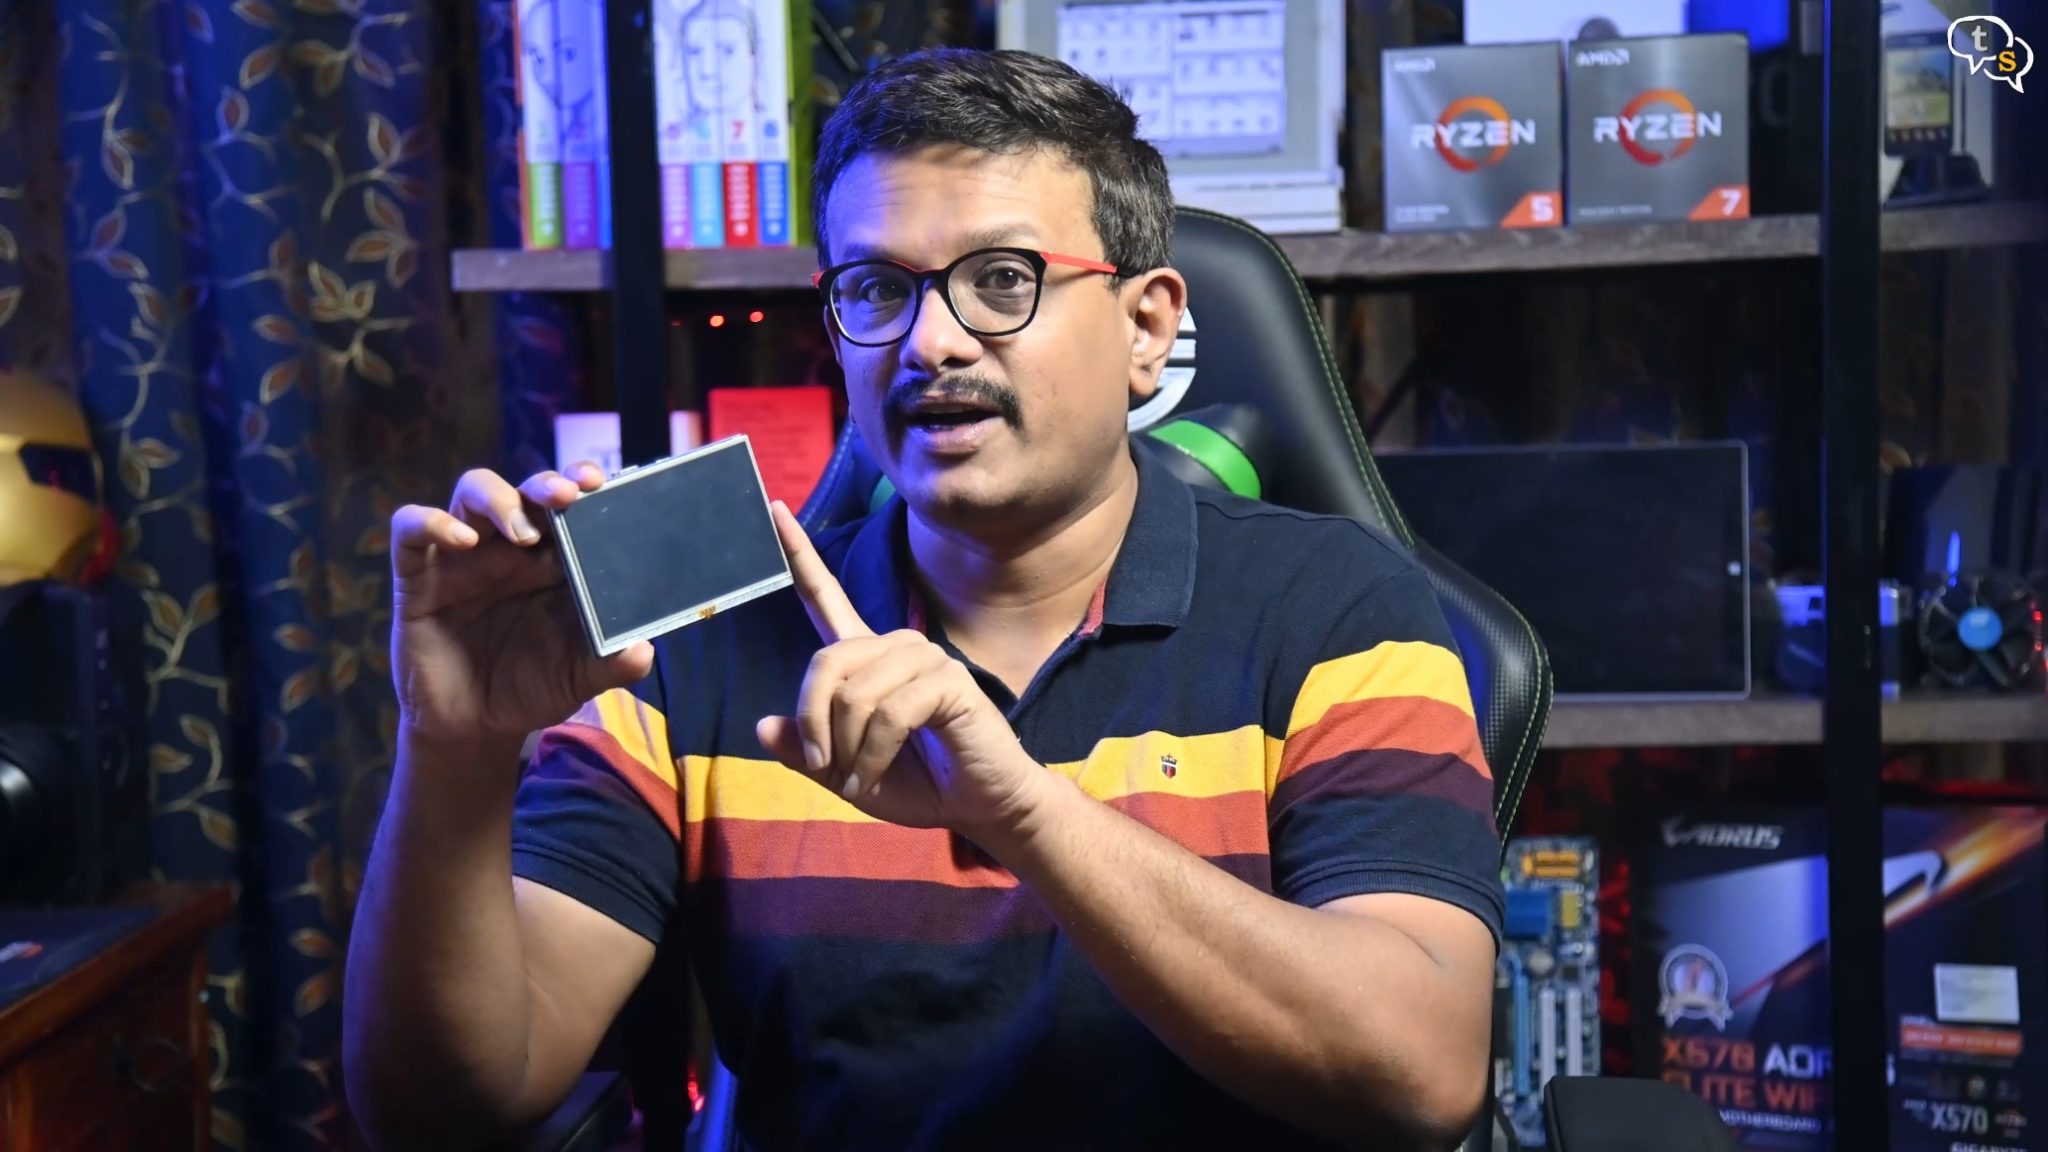
A display, I have this 5-inch display with me which is also a touch screen. We don’t need the touch functionality but it’s a bonus. *optional
If you don’t want to use a portable display, you can just connect the Raspberry Pi to your TV directly using the HDMI port.
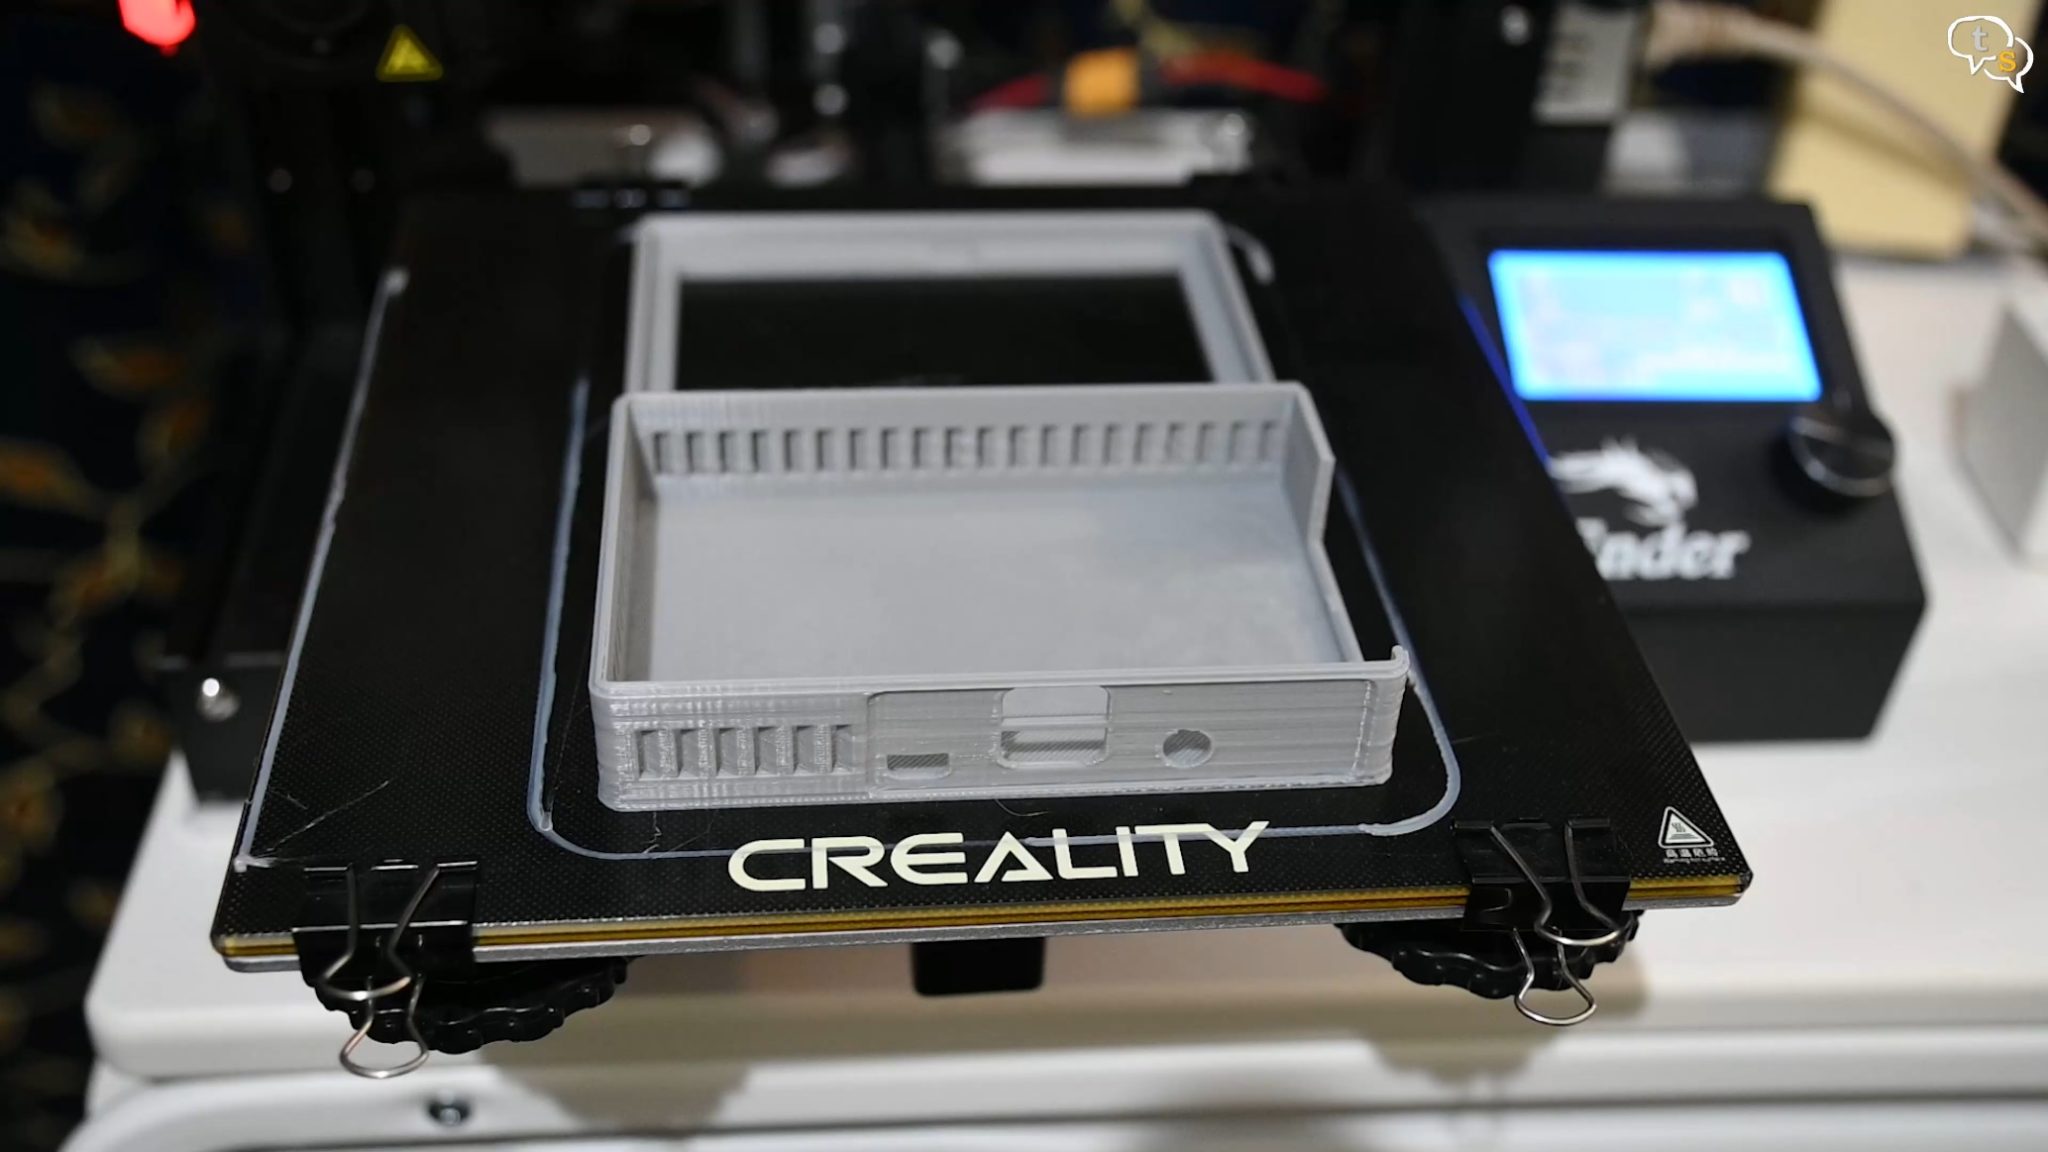
If you’re using the display, you will need a case to put all of it together, this one is 3d printed but not designed by me. The stl is available in the description. *optional
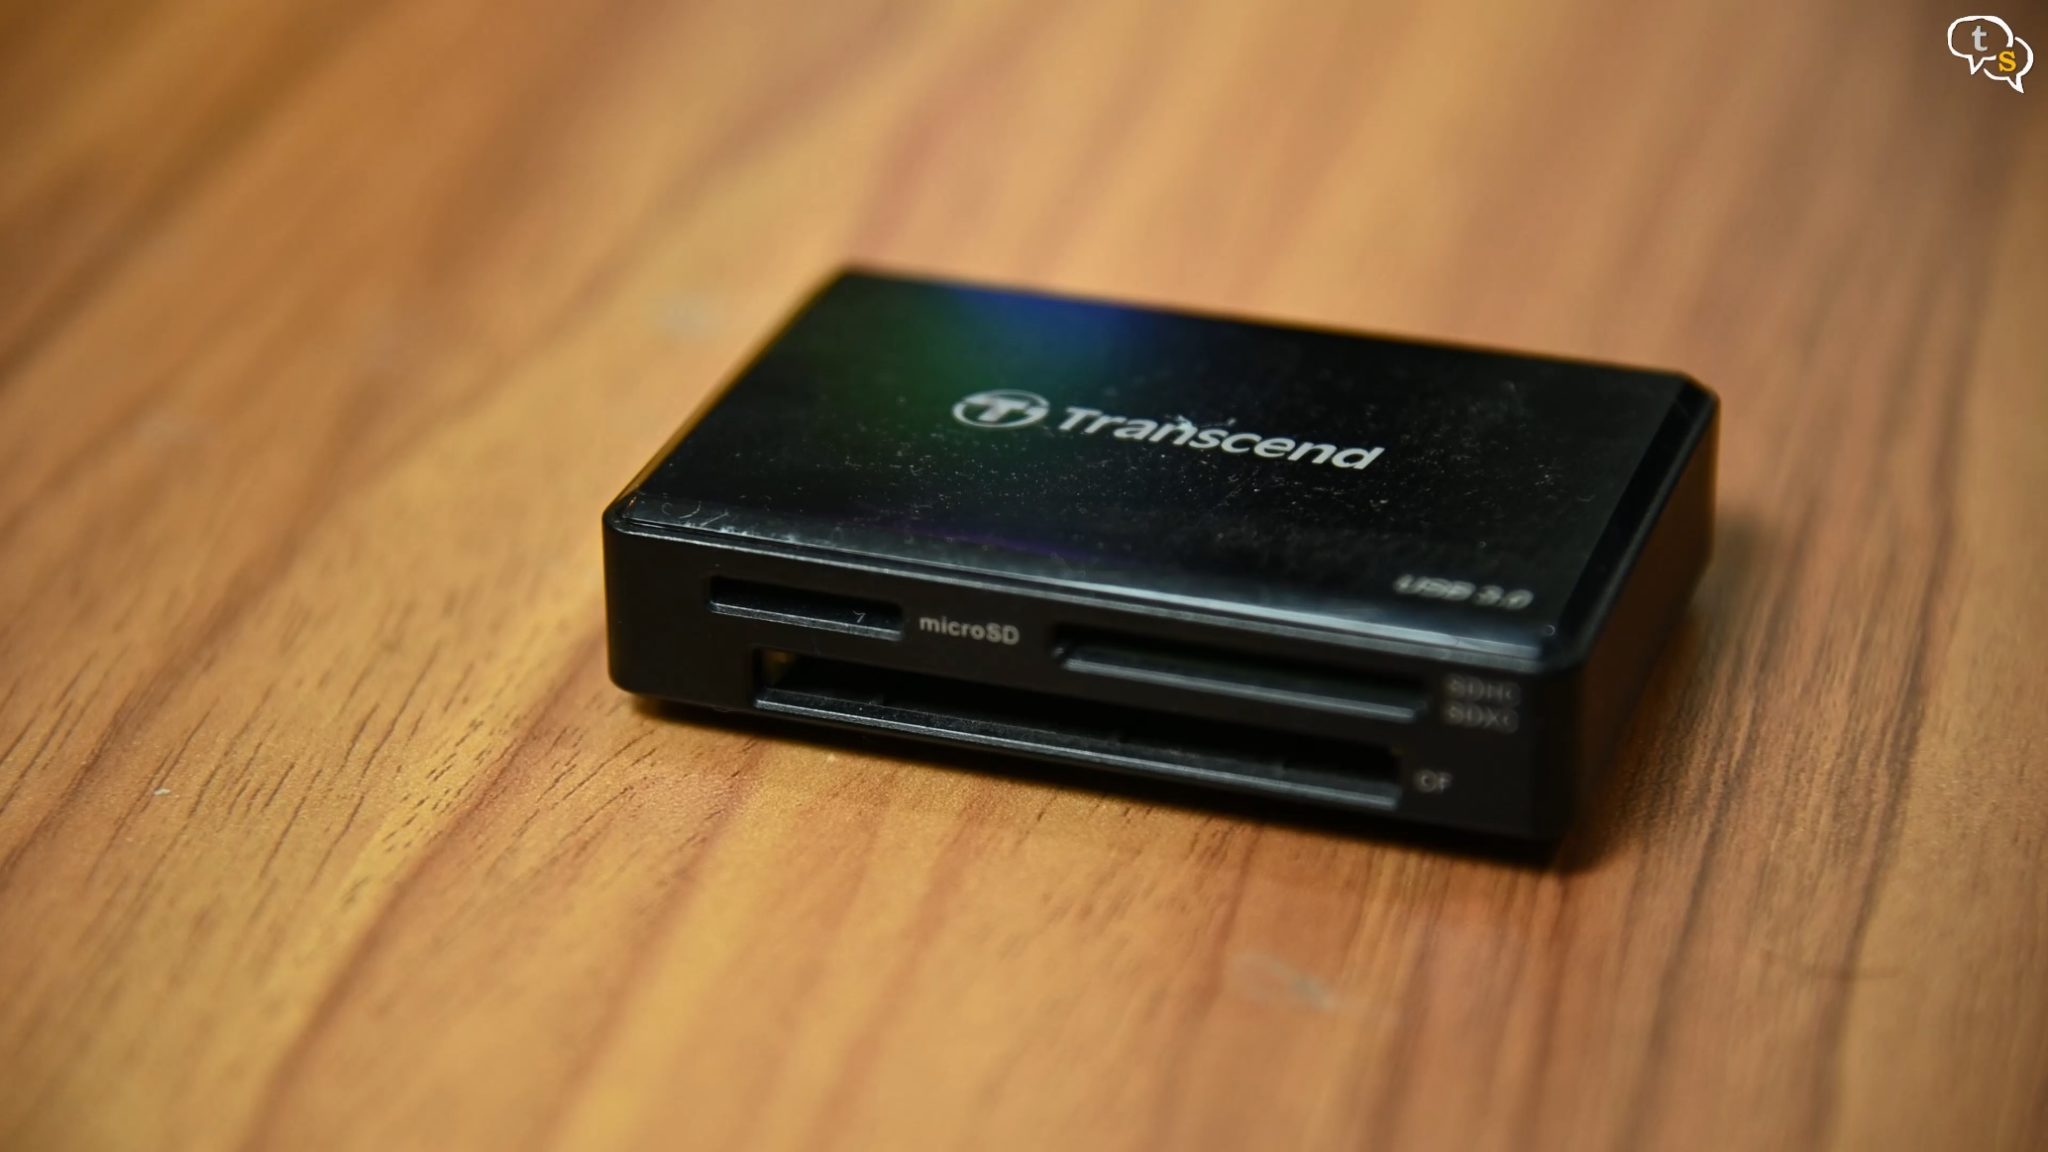
A micro-sd card reader to flash the downloaded RetroPie image.
Now to get on with the installation.
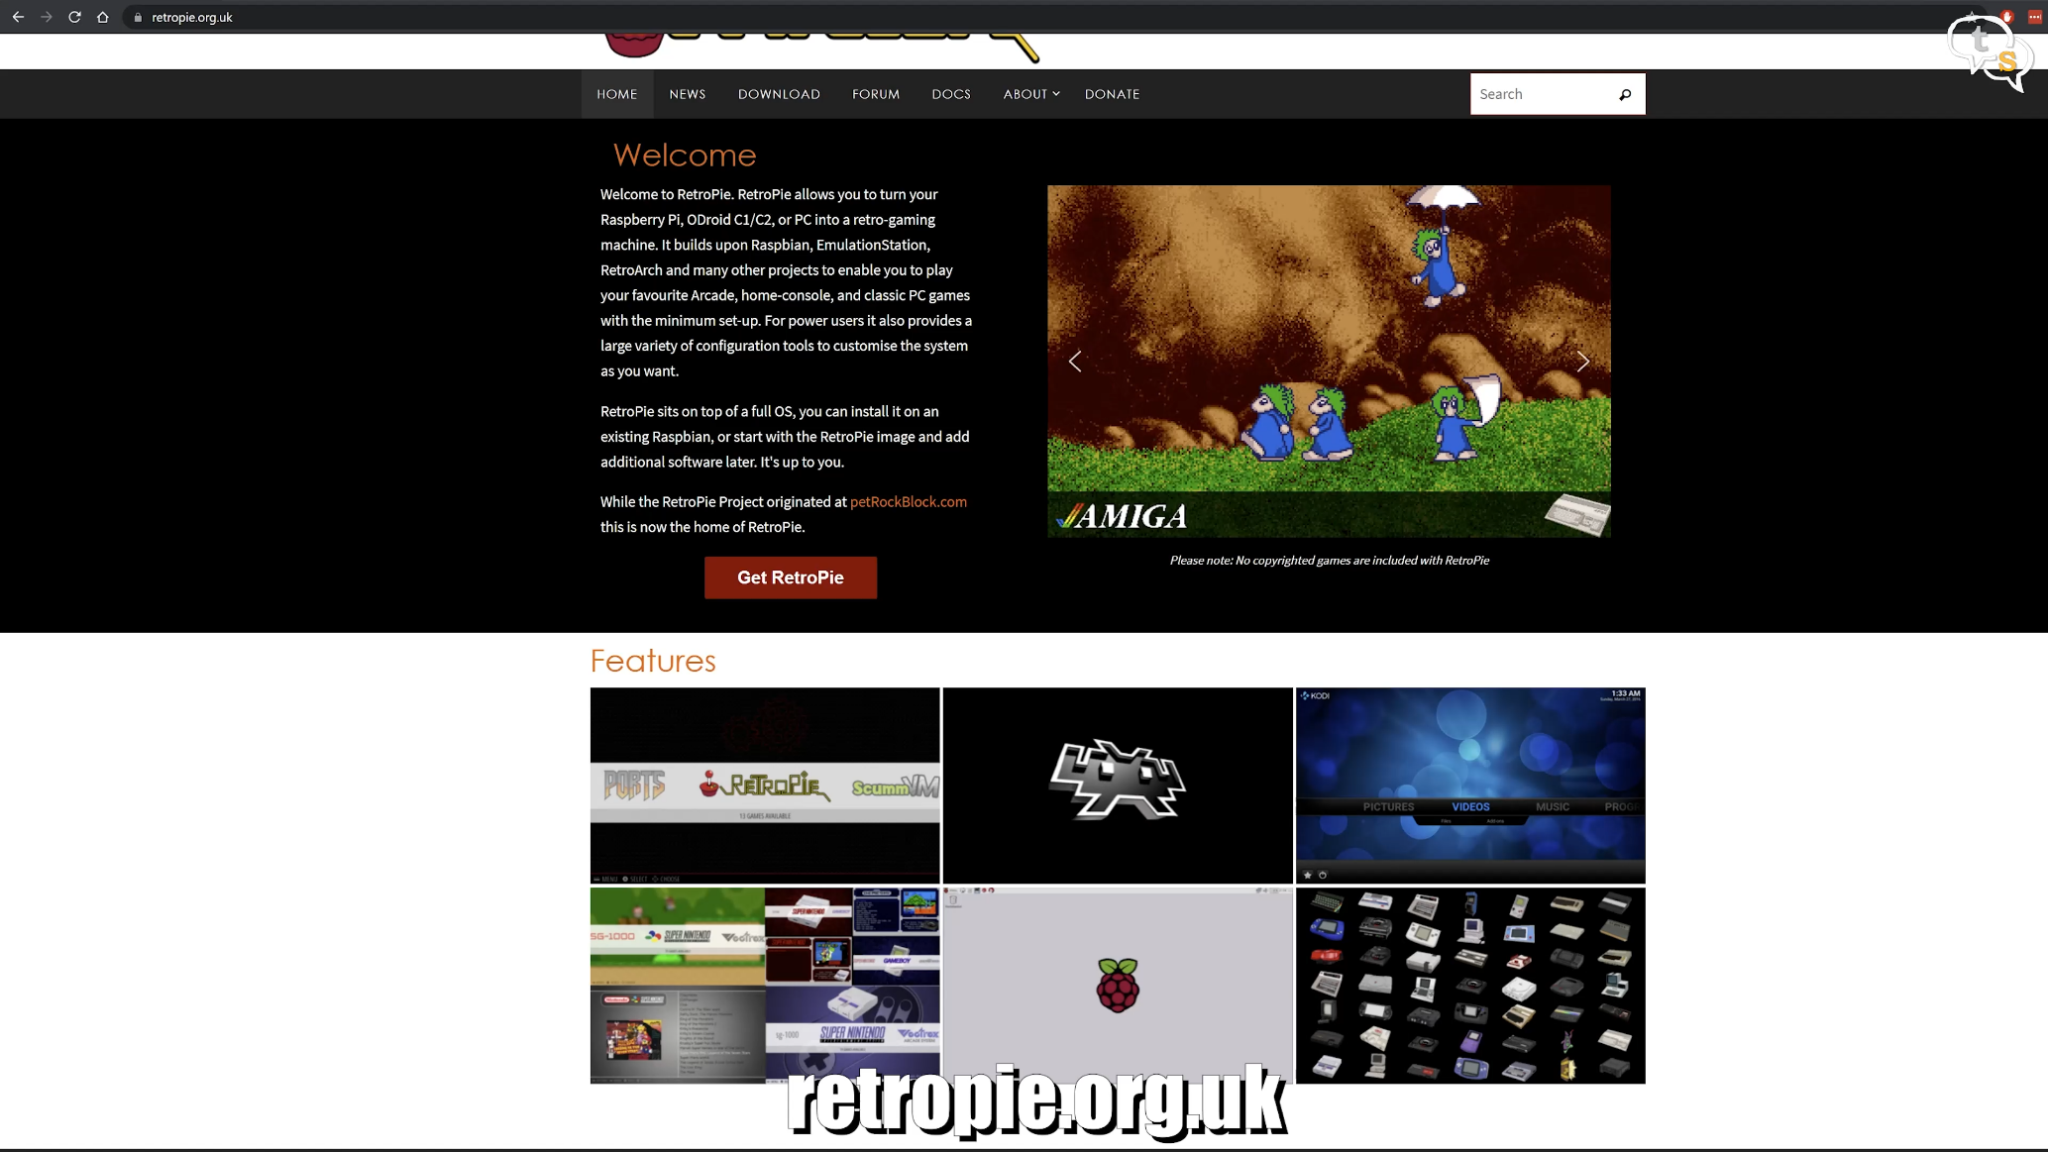
Getting Retro pie onto a memory is not that difficult. Download the image off the RetroPie website which can be found at RetroPie.org.uk. Click on Get RetroPie.
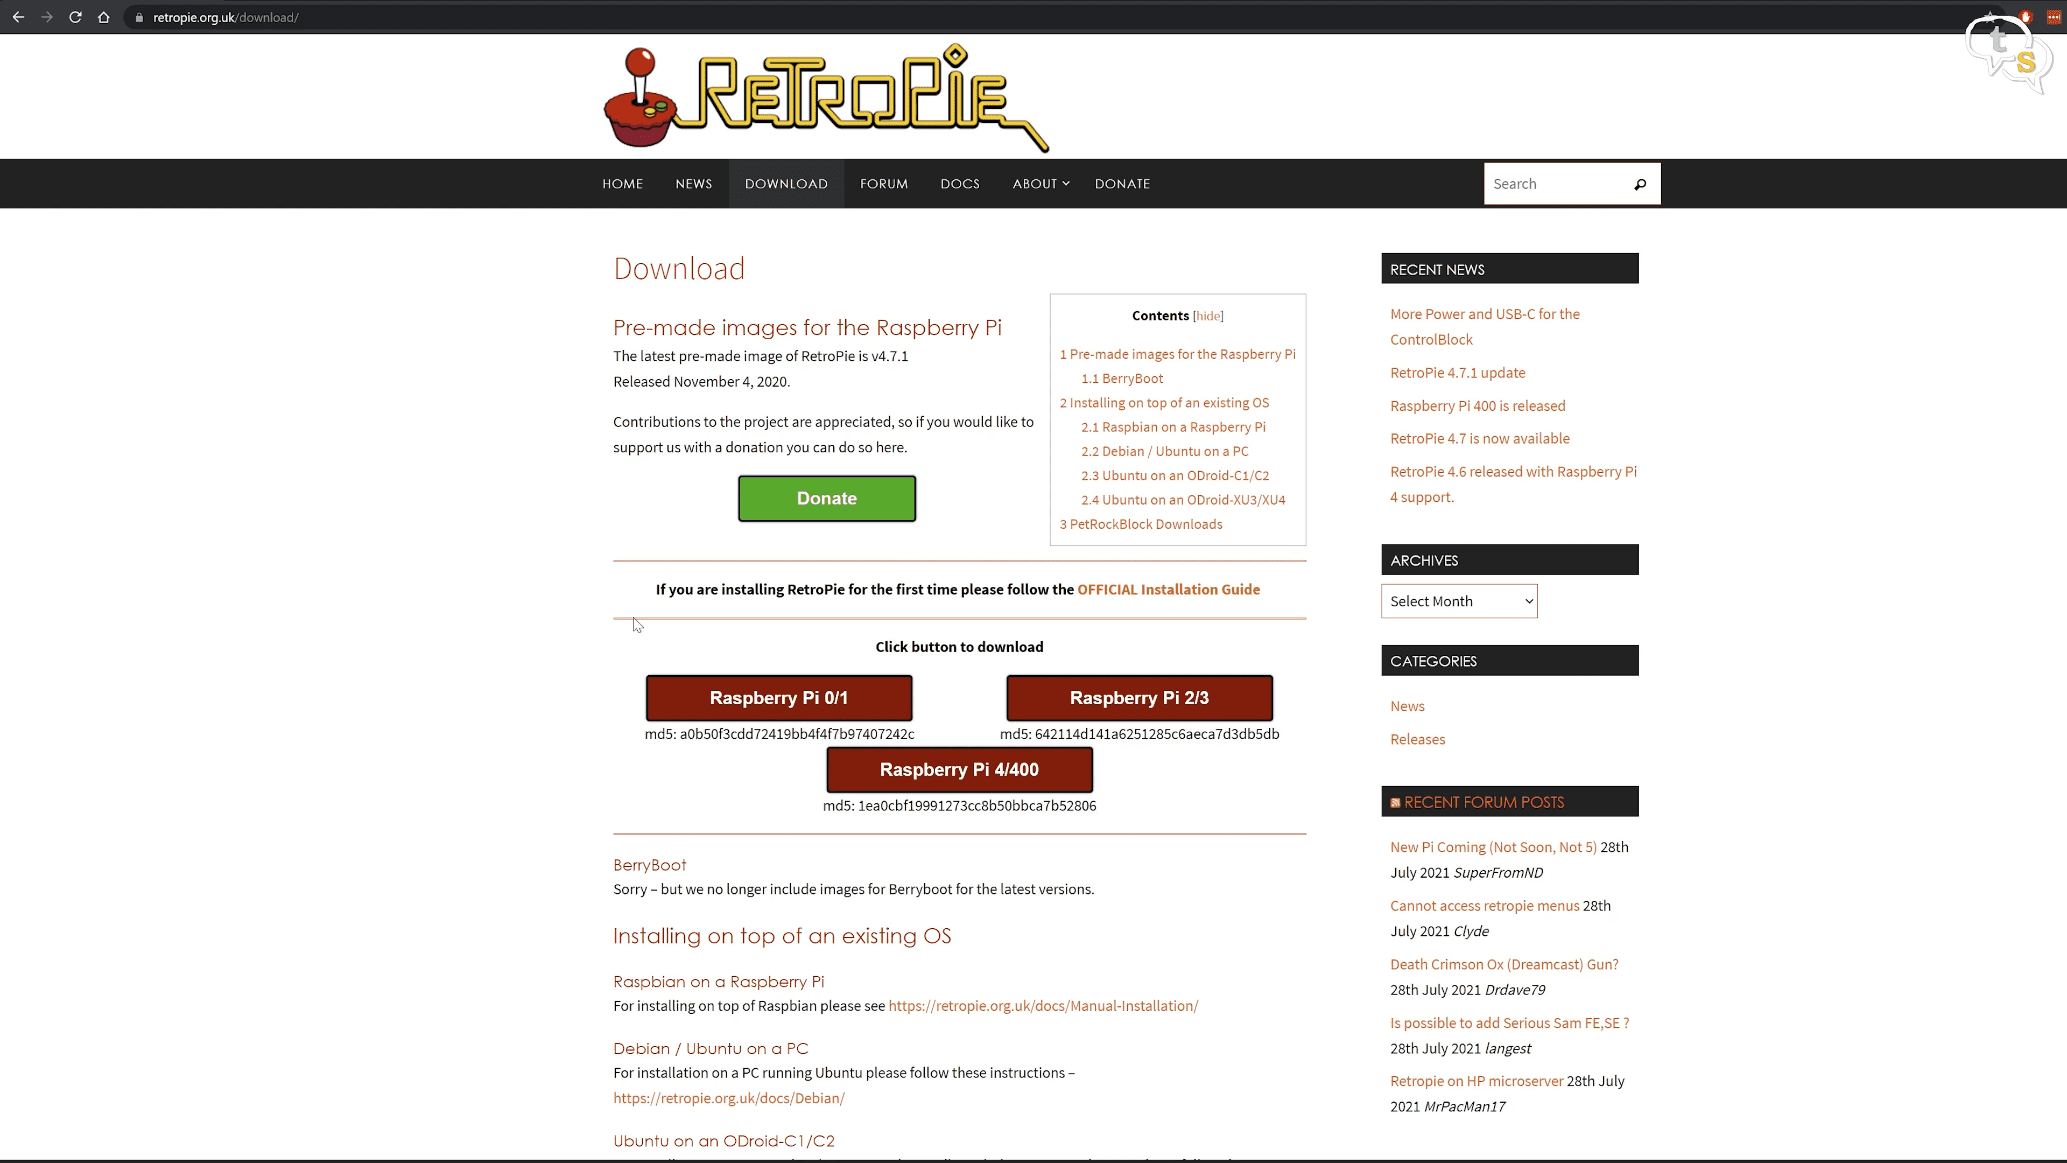
Download the image as per the Raspberry Pi model you have. I have a 3B+ so Raspberry Pi 2 / 3 should be the one for me.
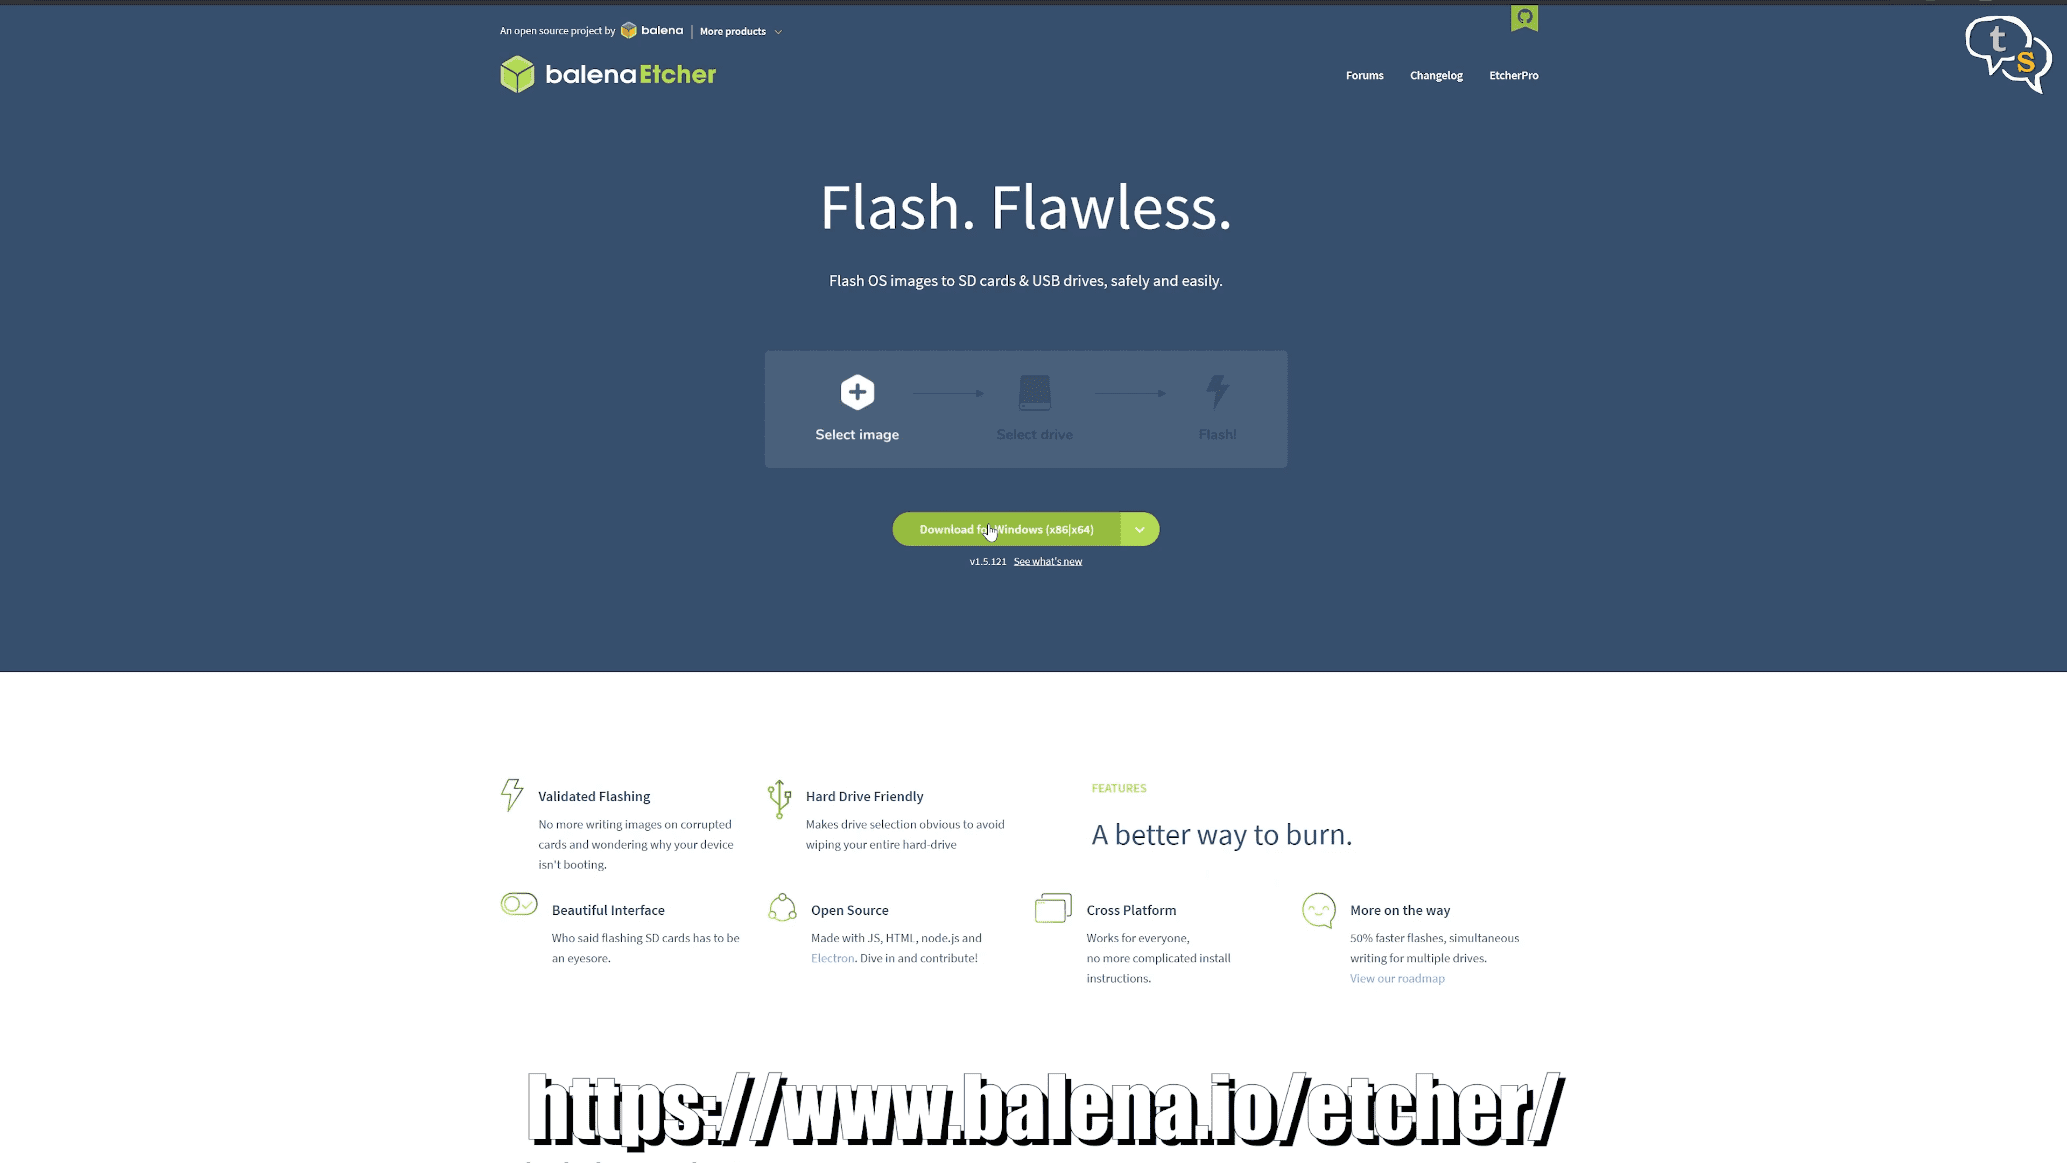
Once the file is downloaded, we have to flash the image to the micro-sd card. We need a tool like balena etcher. Download from the website, install, and open it up.
Insert microsd card into a card reader,
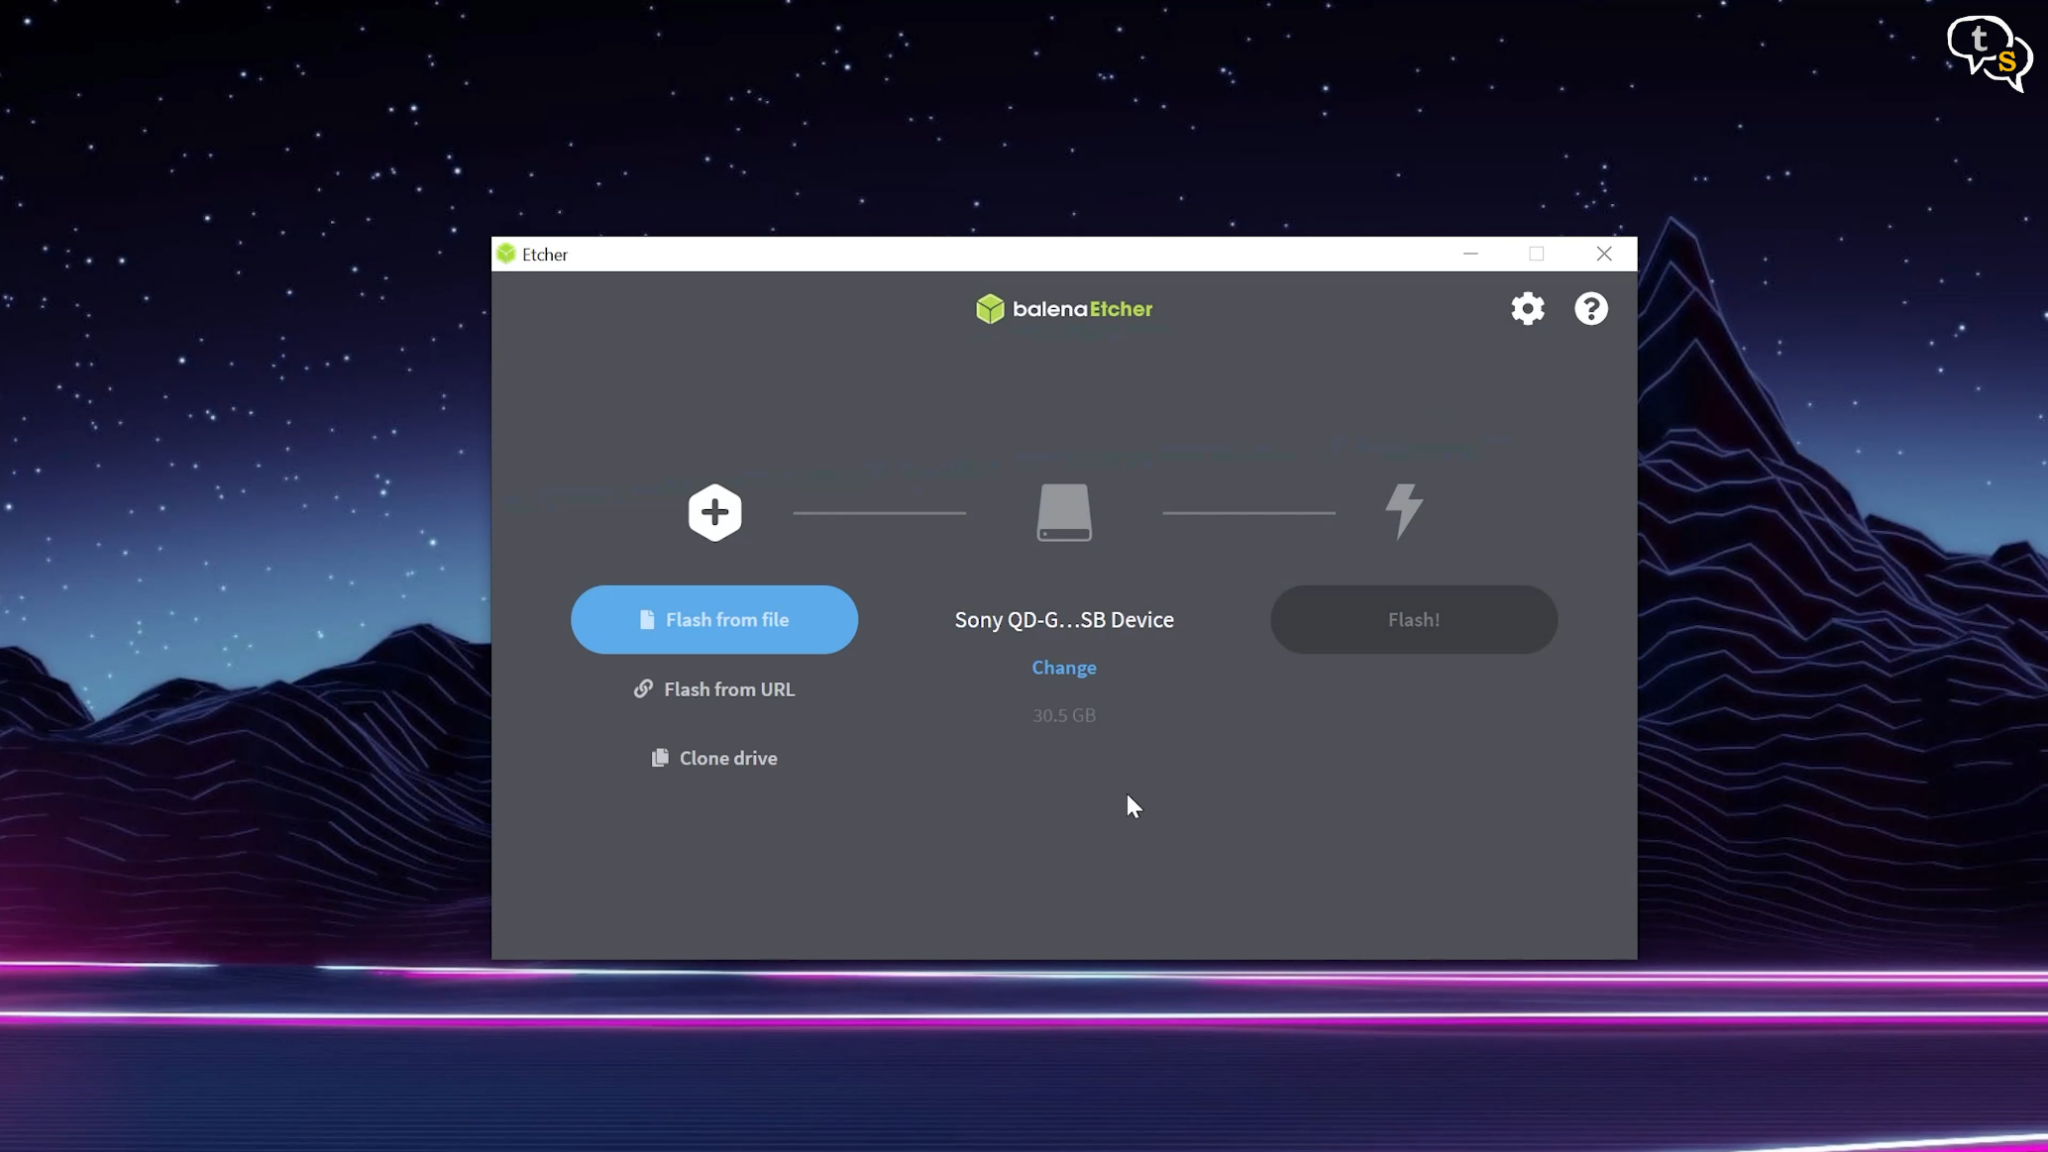
The first option is to select an image, select the downloaded file as is, don’t try extracting it. Second, select the memory card. Make sure you’re selecting the correct card as the drive will be formatted.
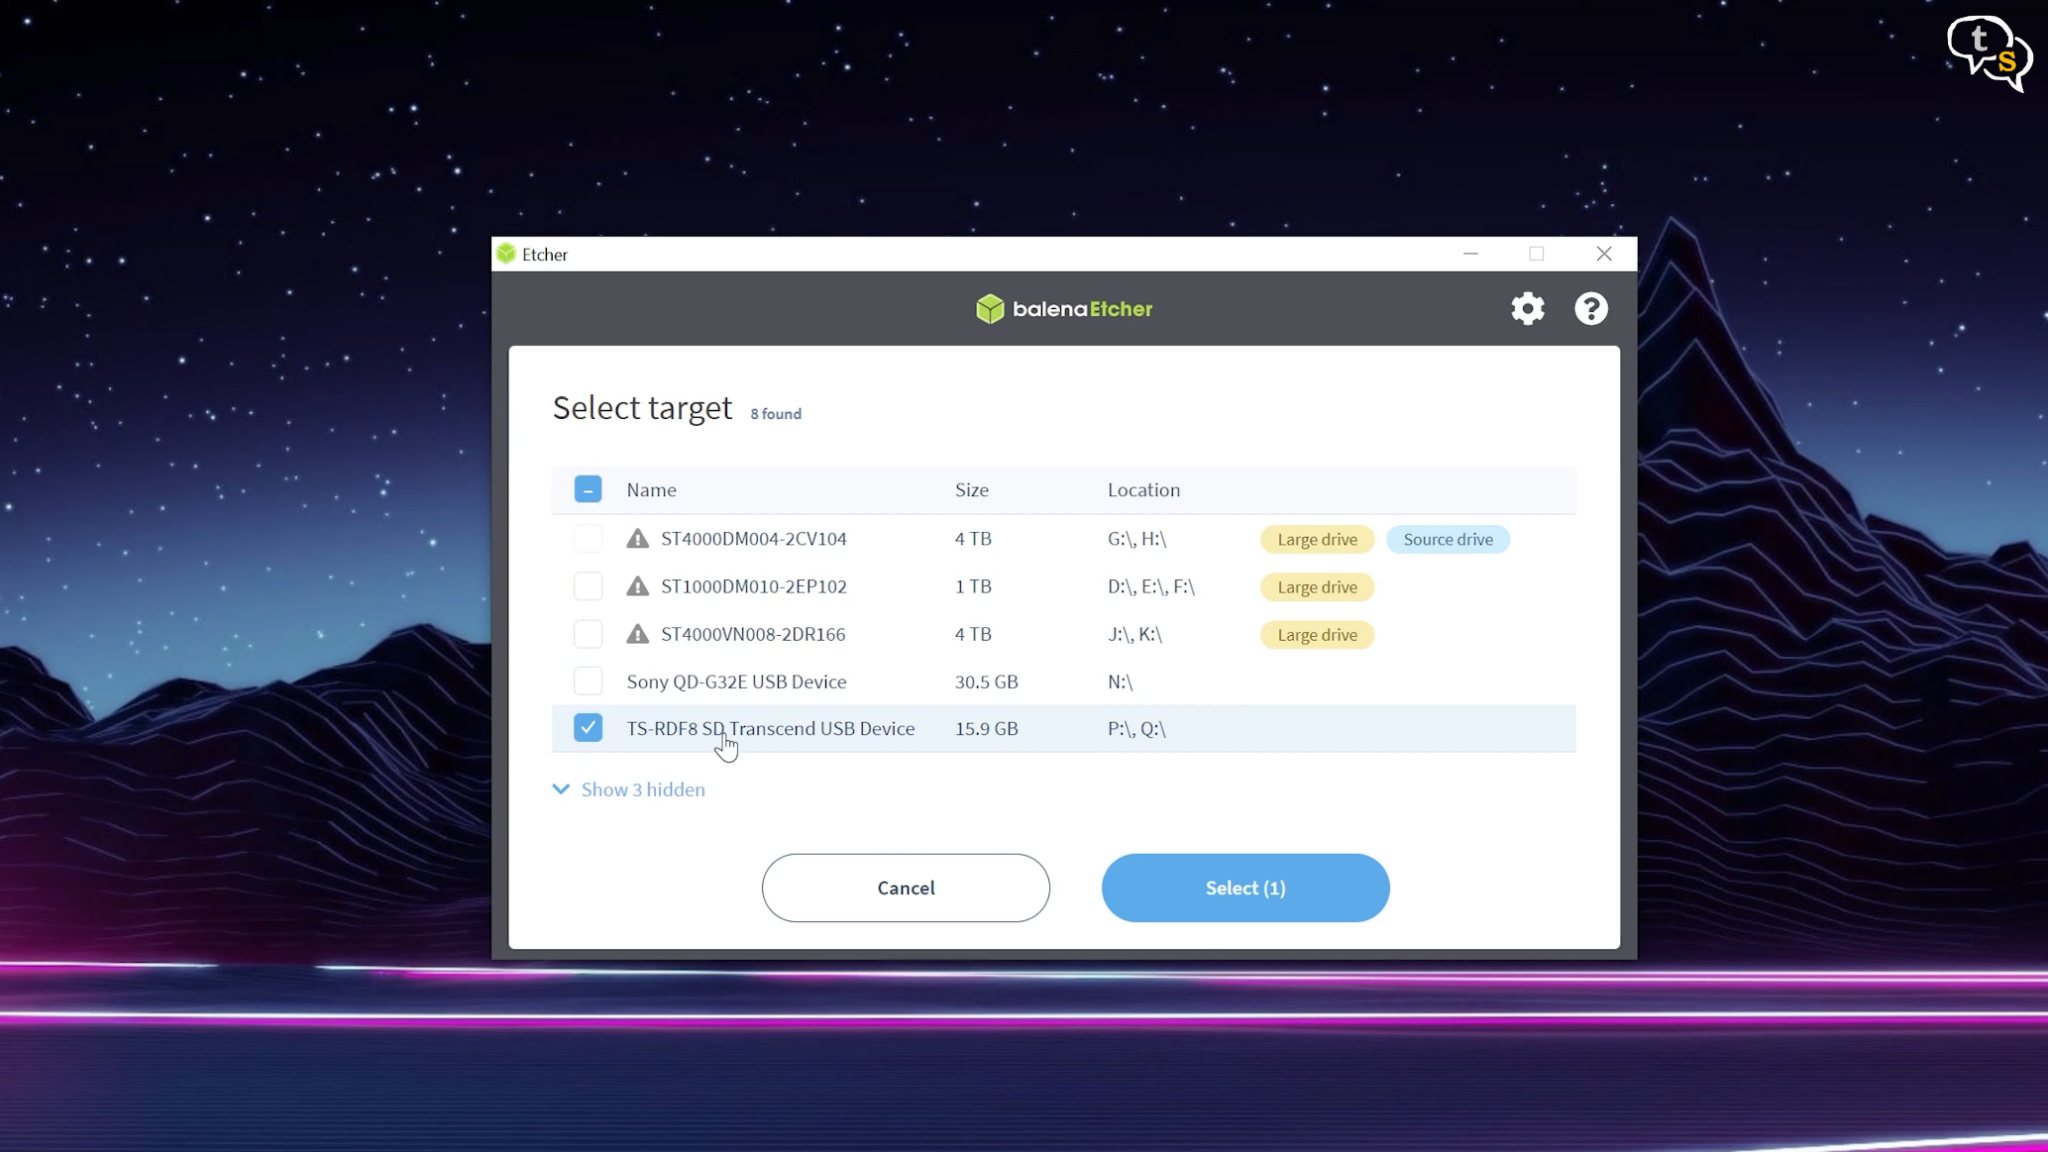
It keeps showing my camera’s XQD reader as default, but I need to select the transcend memory card reader and select the 16 gb card. You would select the card you are installing to.
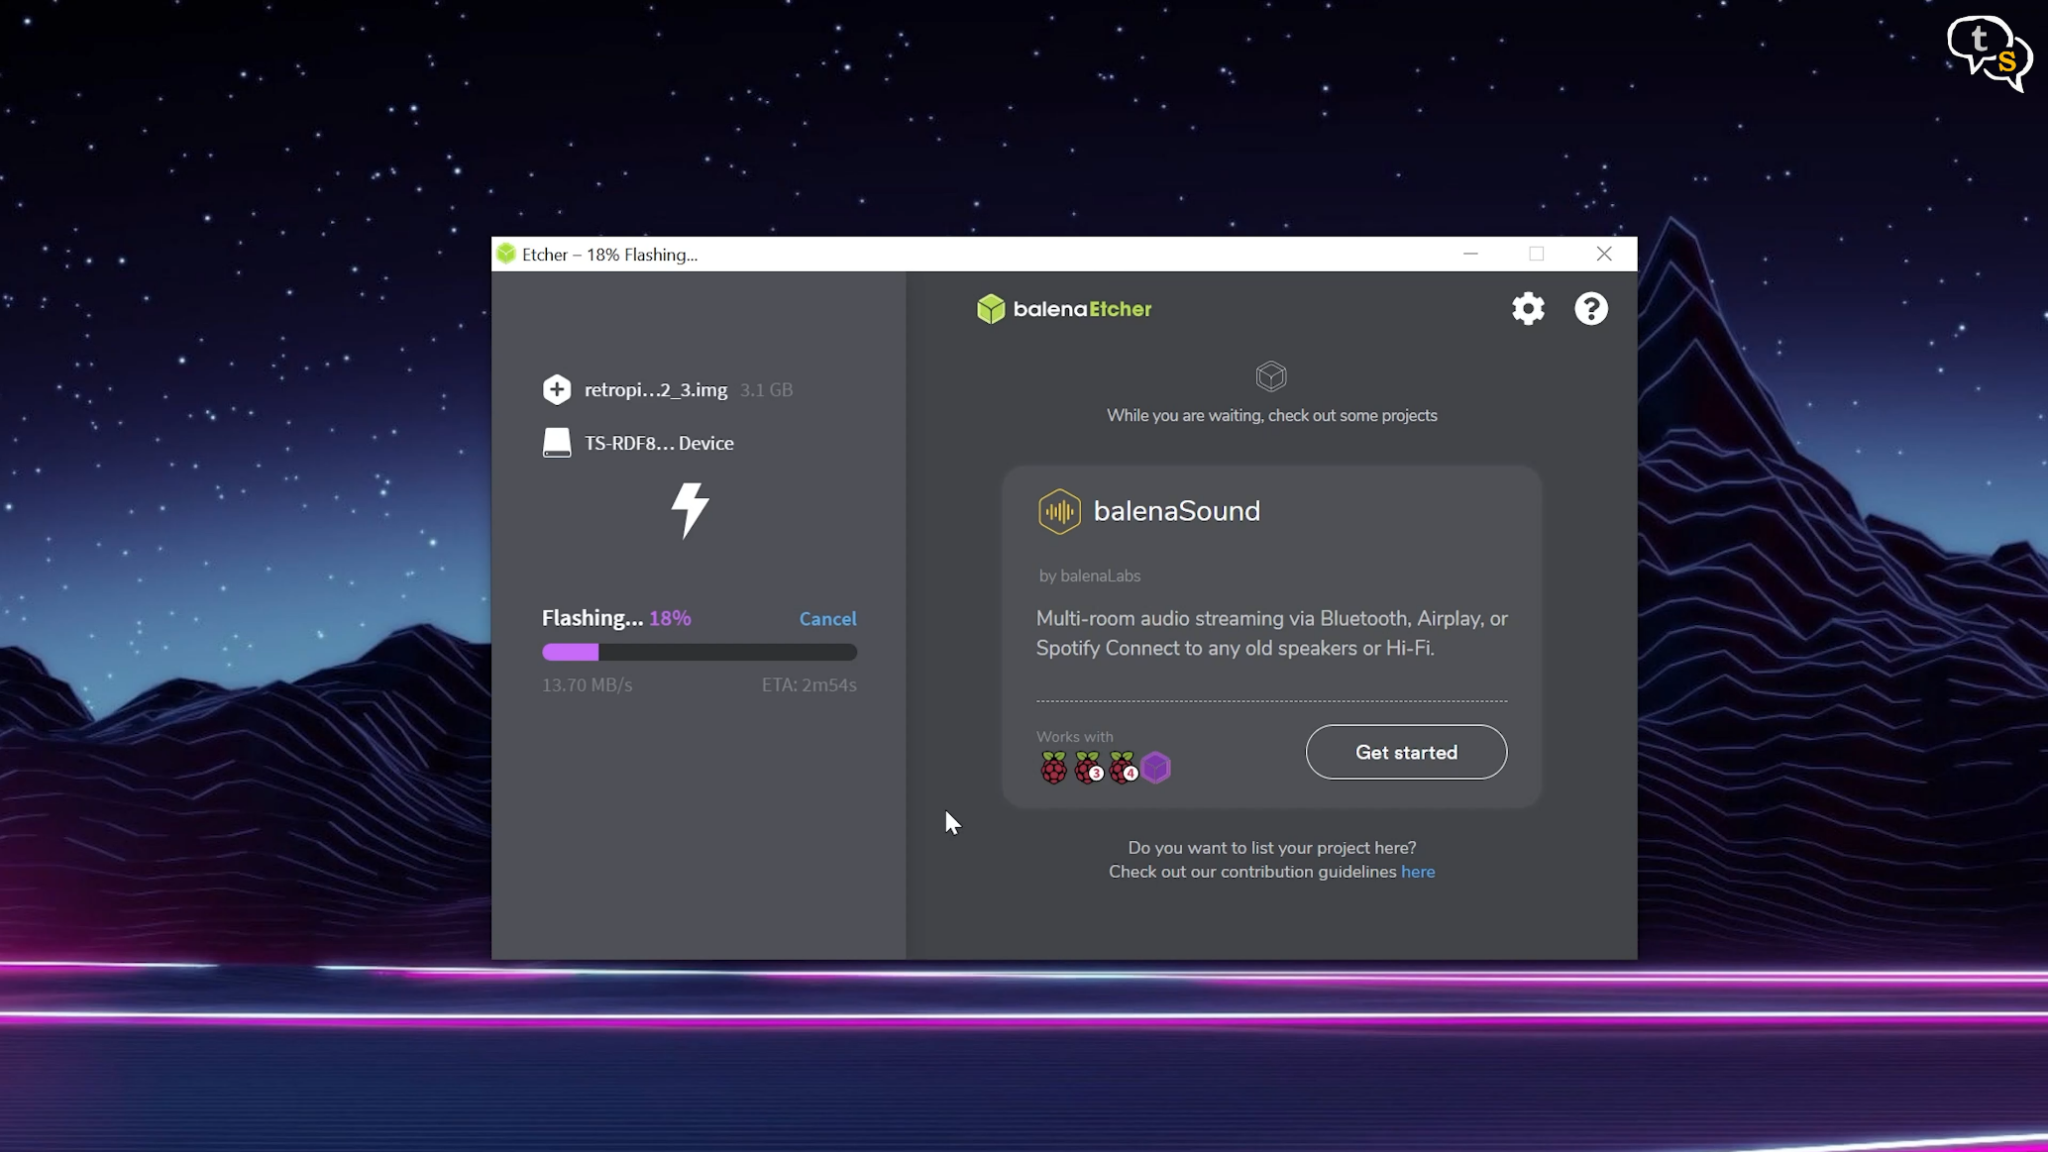
The software would decompress the image and write to the memory card. Why we use this software and not directly copy the files to the memory card is because the card needs to be partitioned with the correct sizes and each set of files would be written to the appropriate partition.
The software automates the process, making it much easier to install.
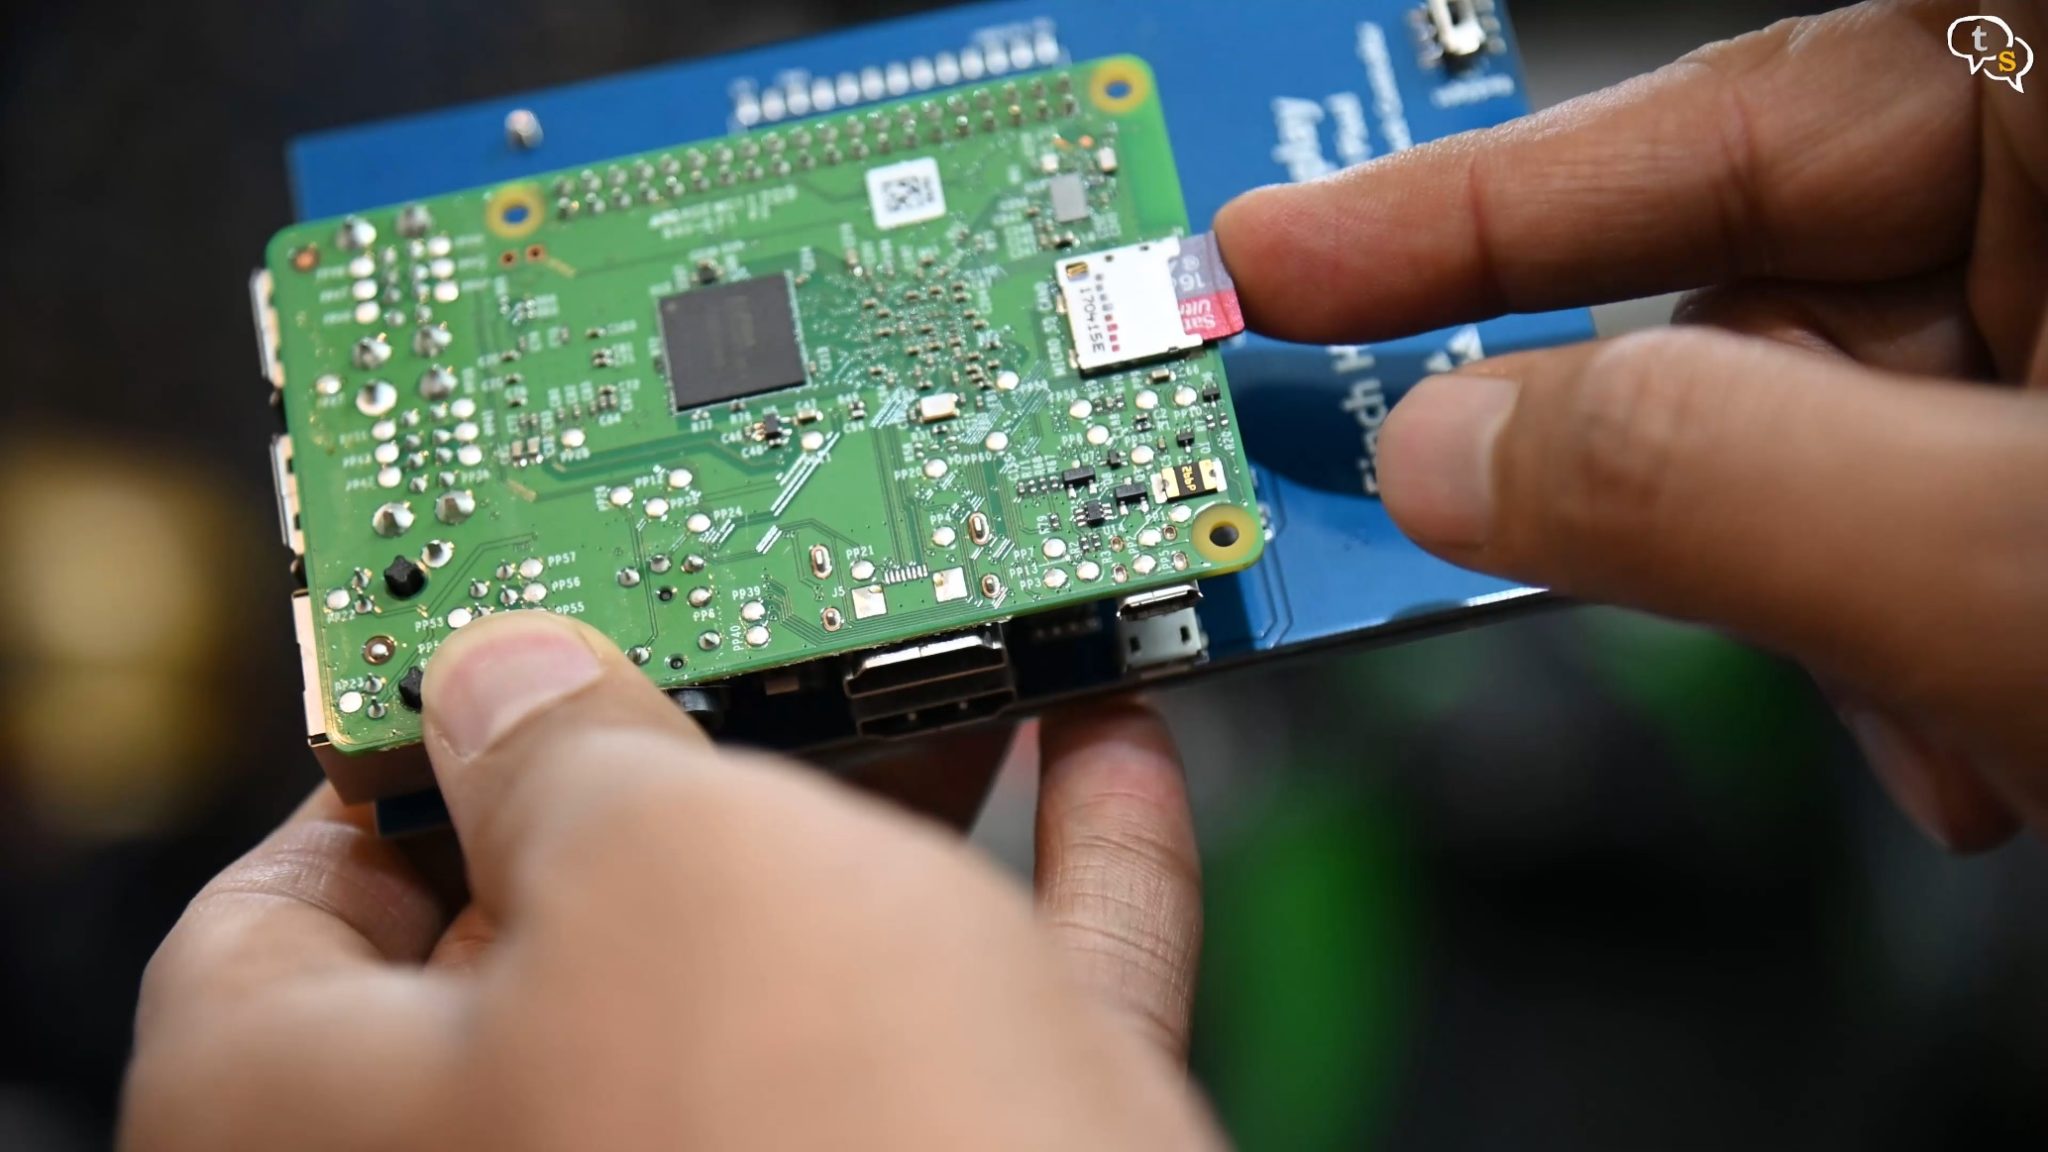
Flashing is complete, now to insert the memory card into the Raspberry Pi and complete the installation.
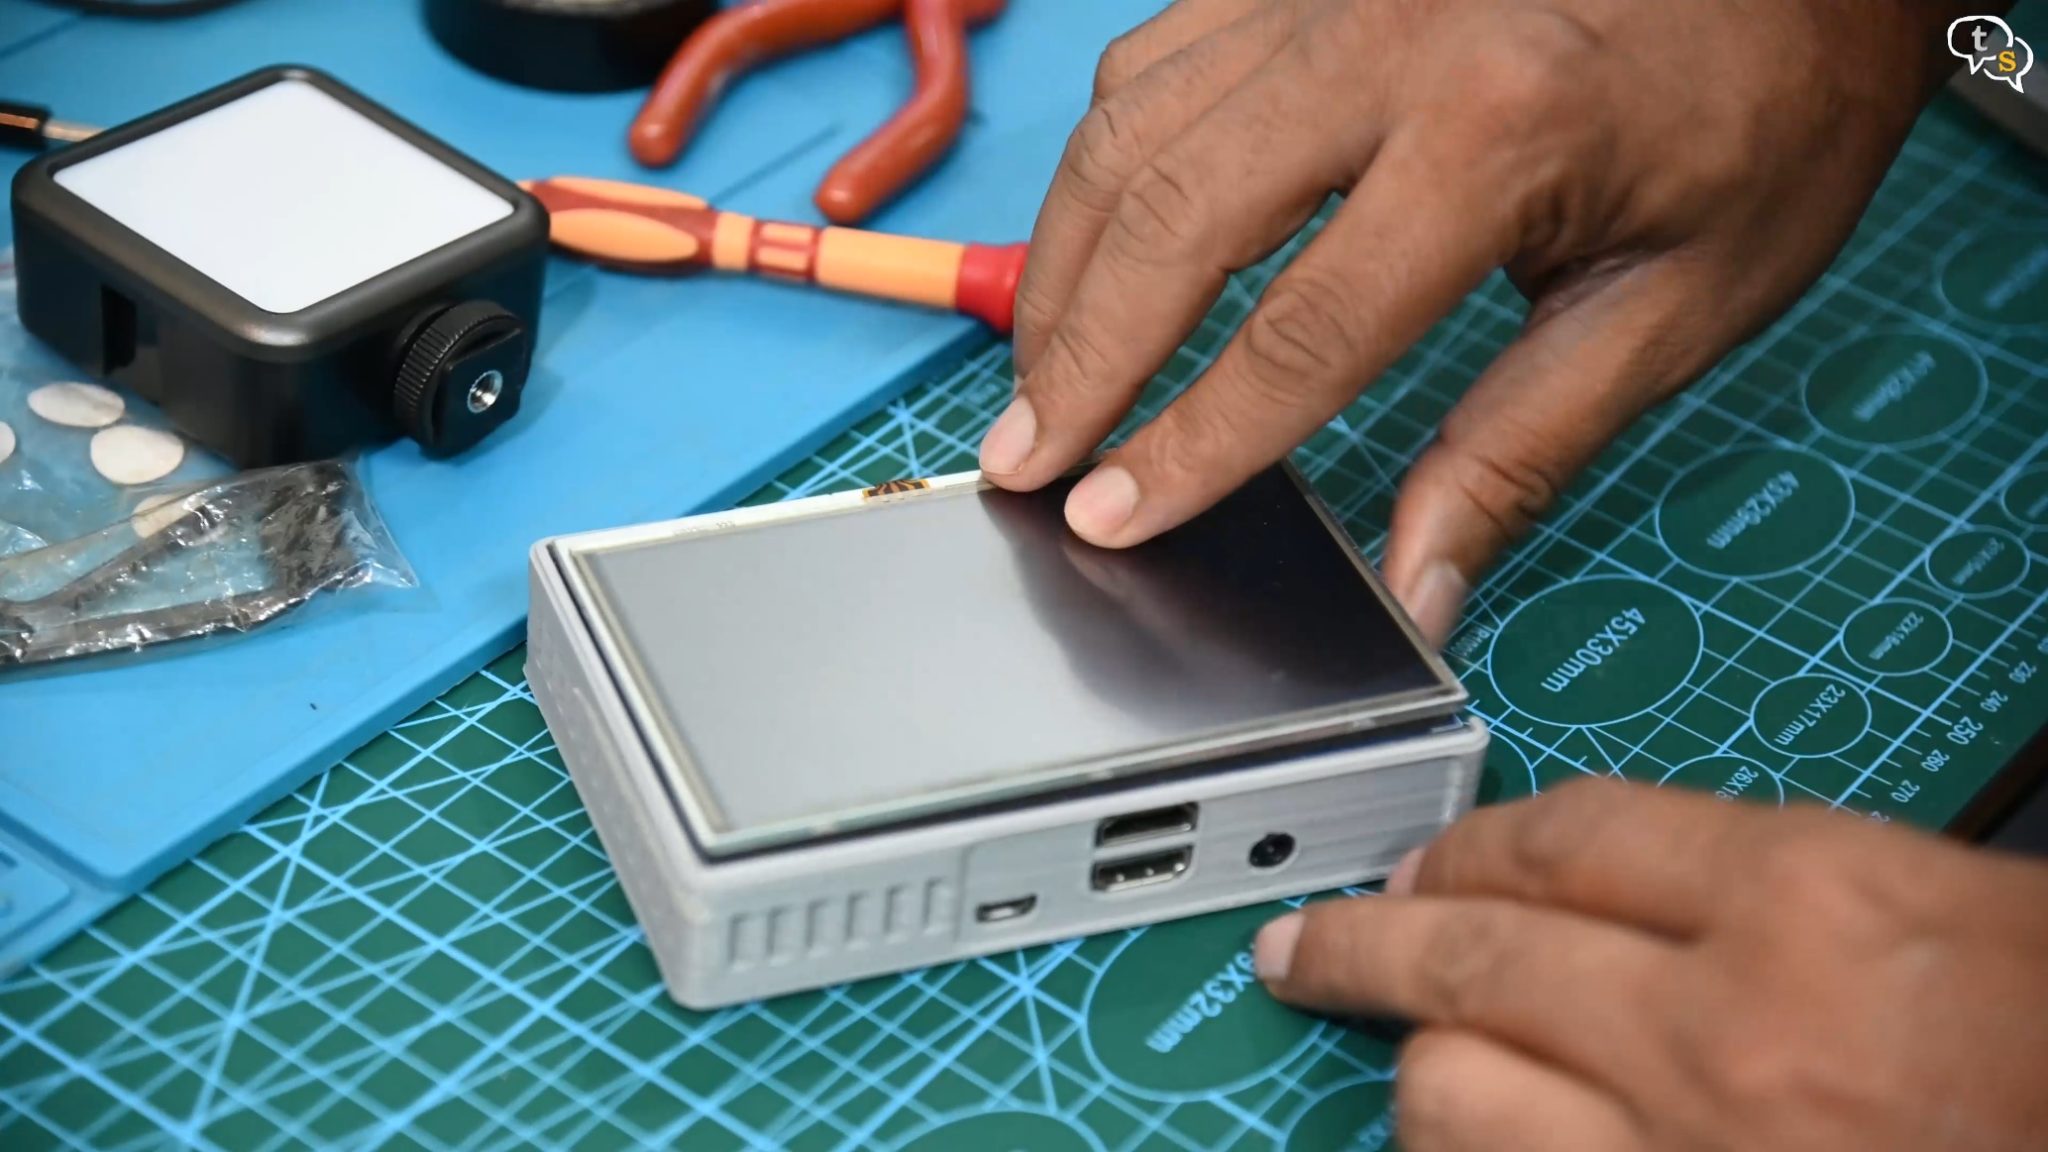
I’m placing it into the case I had 3d printed, if you want to know how I set up the display for the Raspberry Pi, you can watch the video here.
I’m surprised that the Raspberry Pi sits within this case quite snugly. And to send the display signals it comes with a HDMI to HDMI connector.
Now here it is, all we need now is power, which I’m connecting to the PC temporarily.
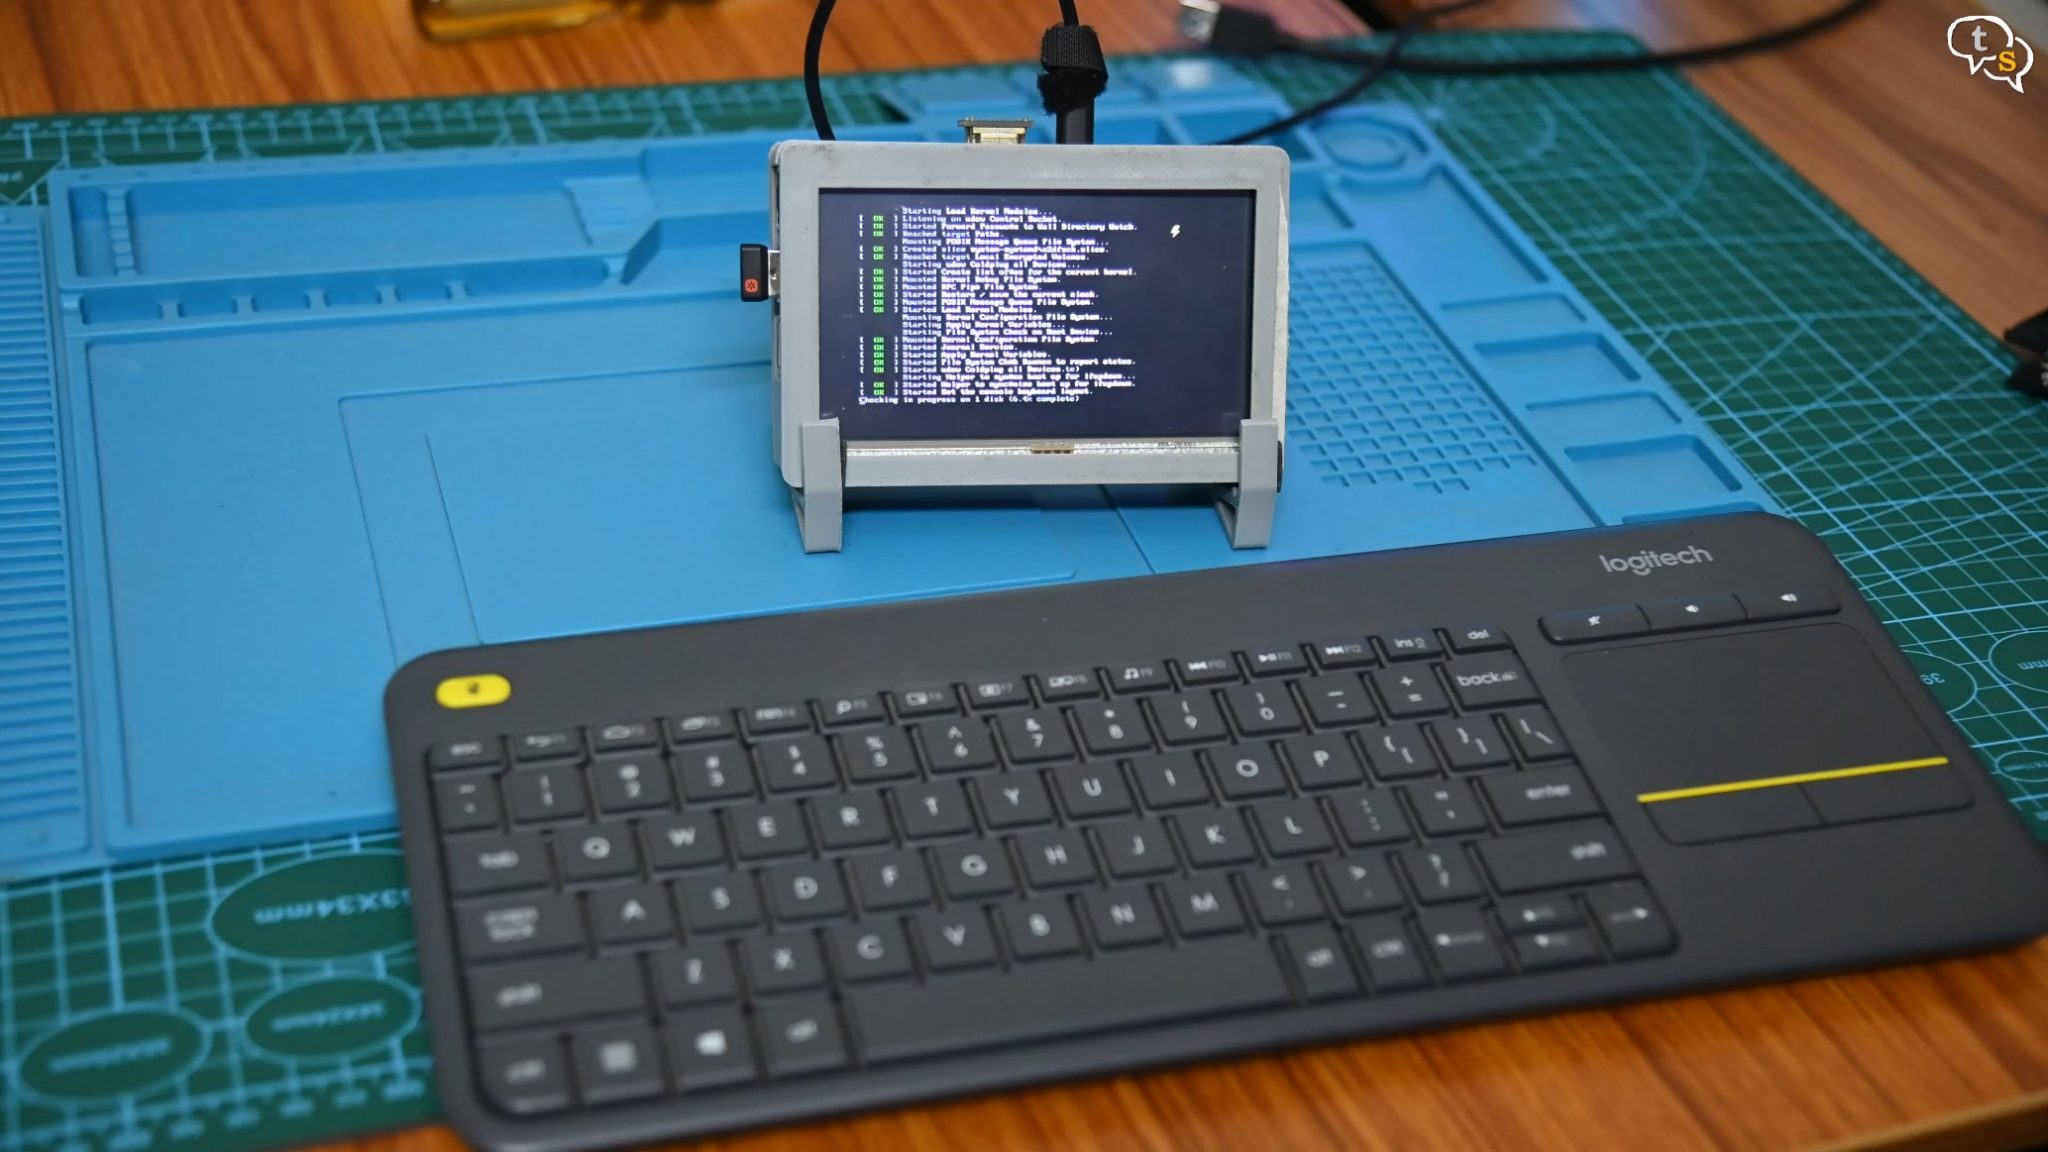
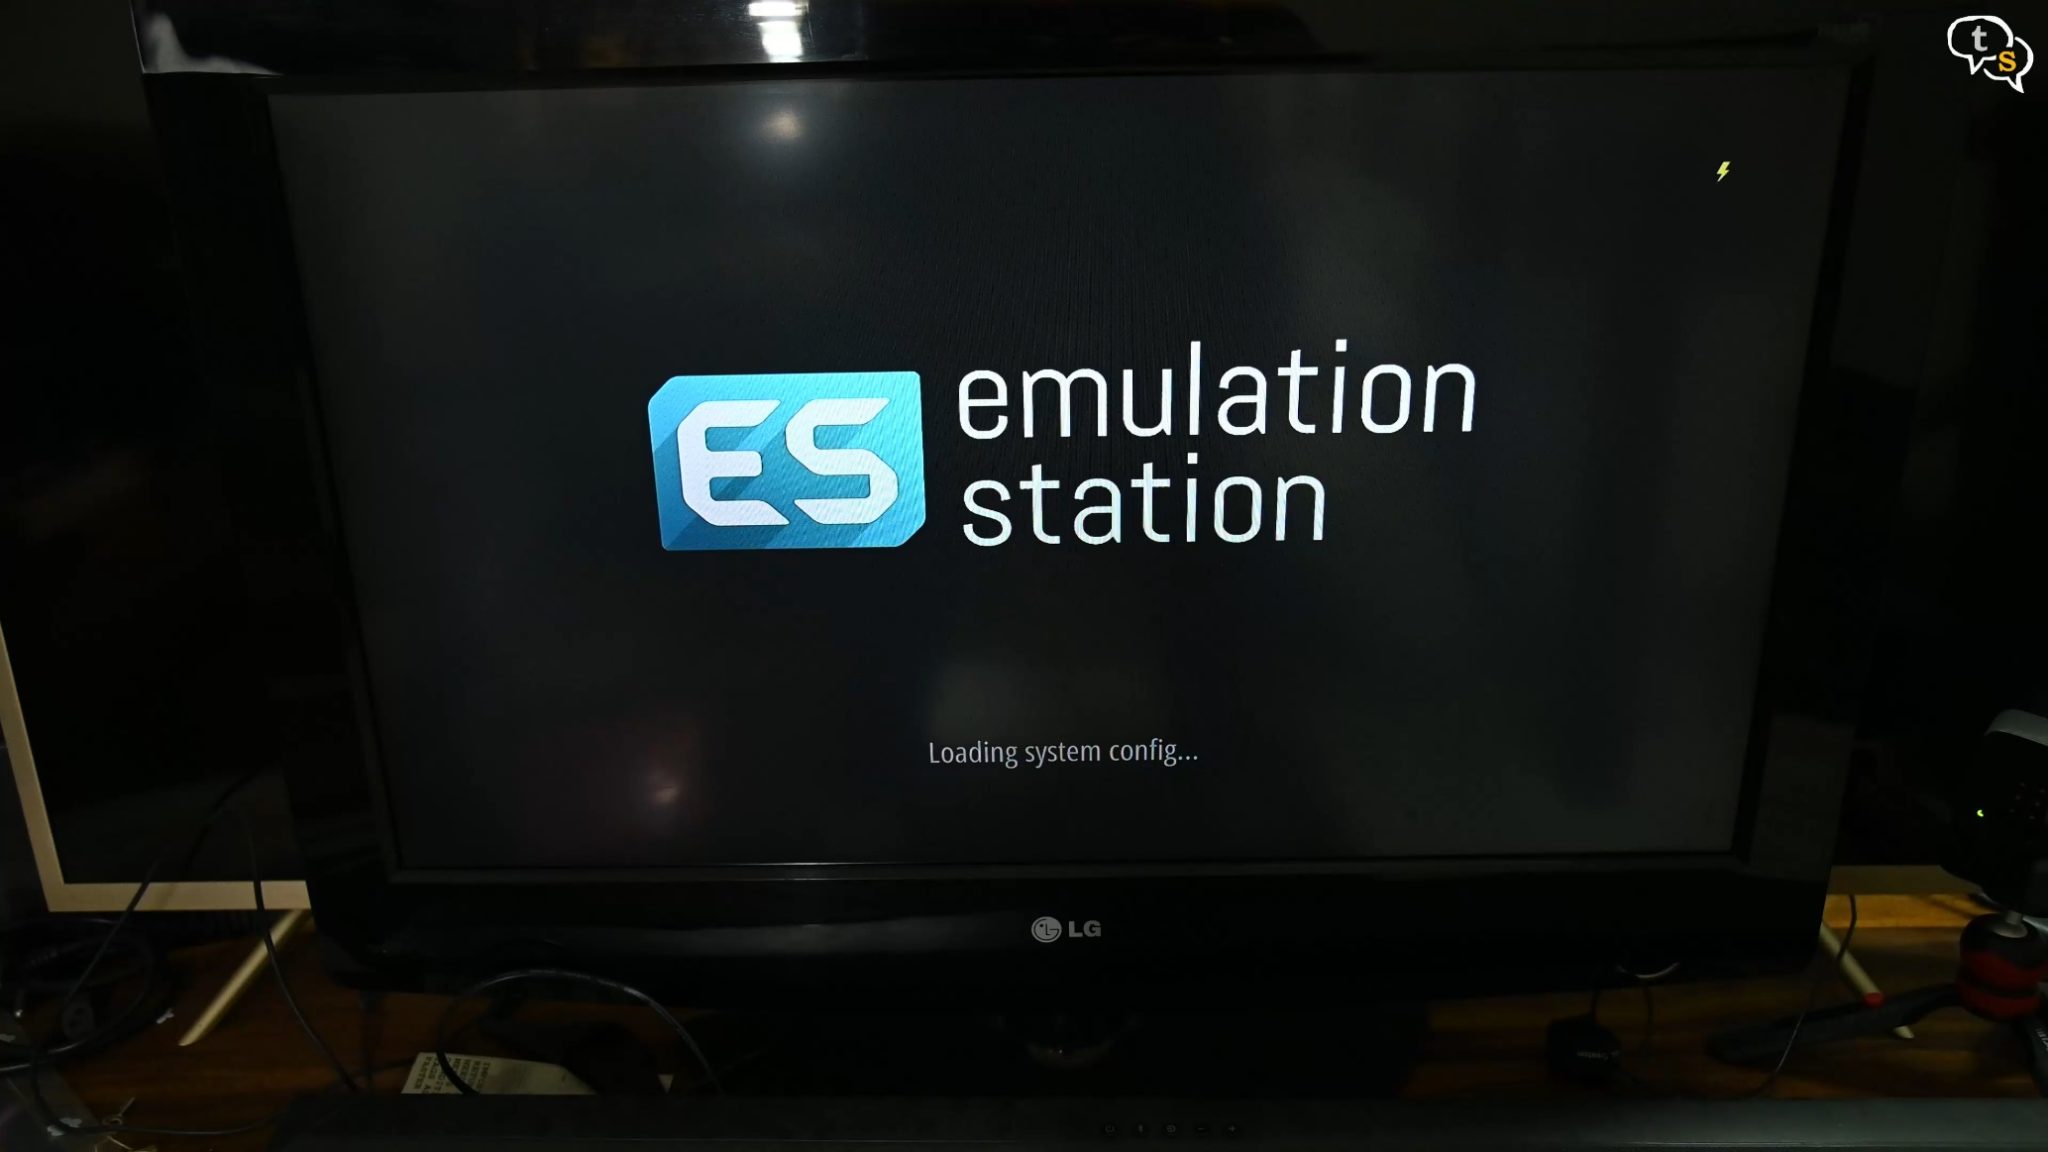
The Raspberry Pi starts booting into RetroPie.
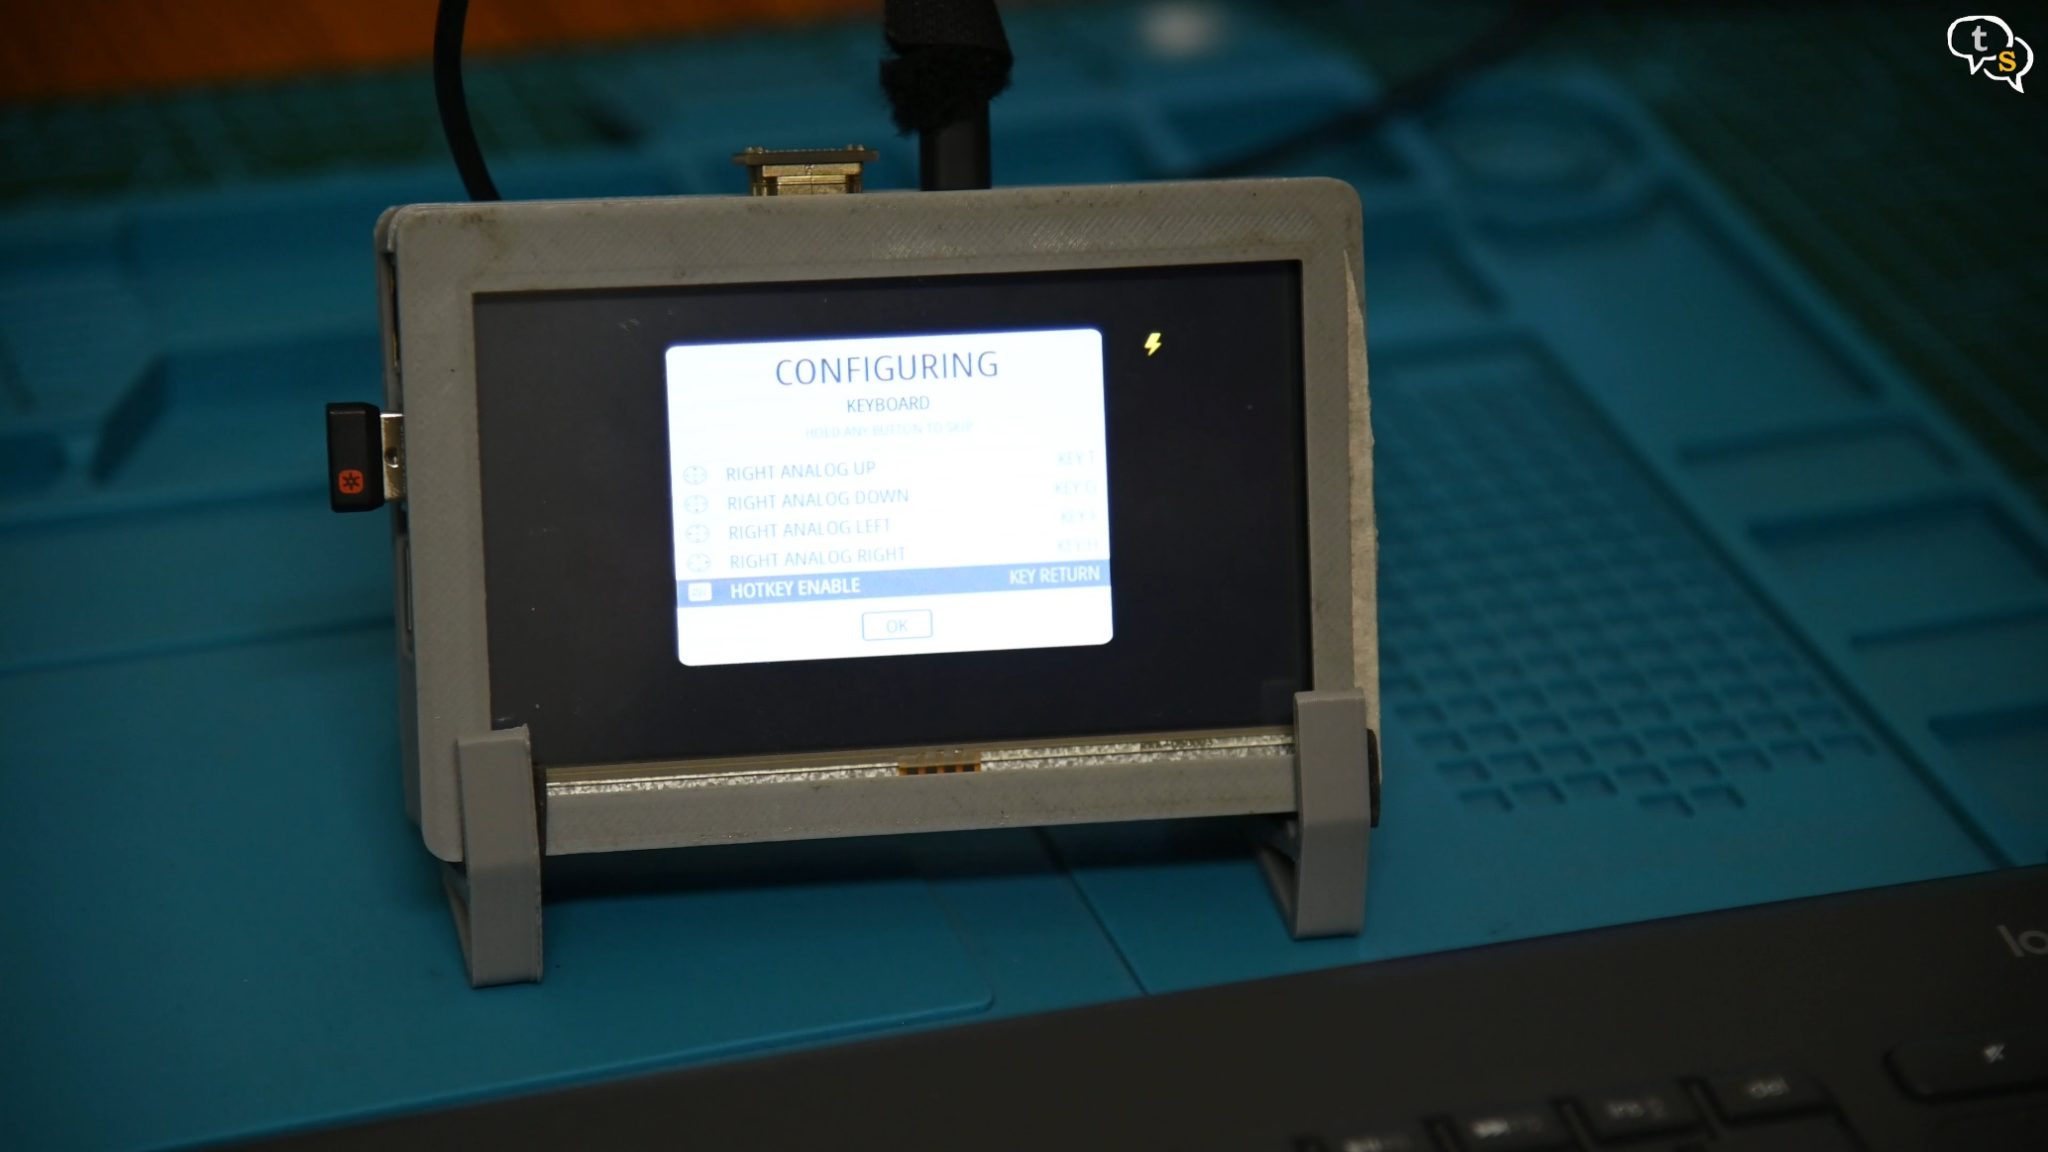
Once you’re on the welcome screen, and if you have a keyboard attached, tap on a key to start setting up key assignments. Keys for up down left right, A B etc.
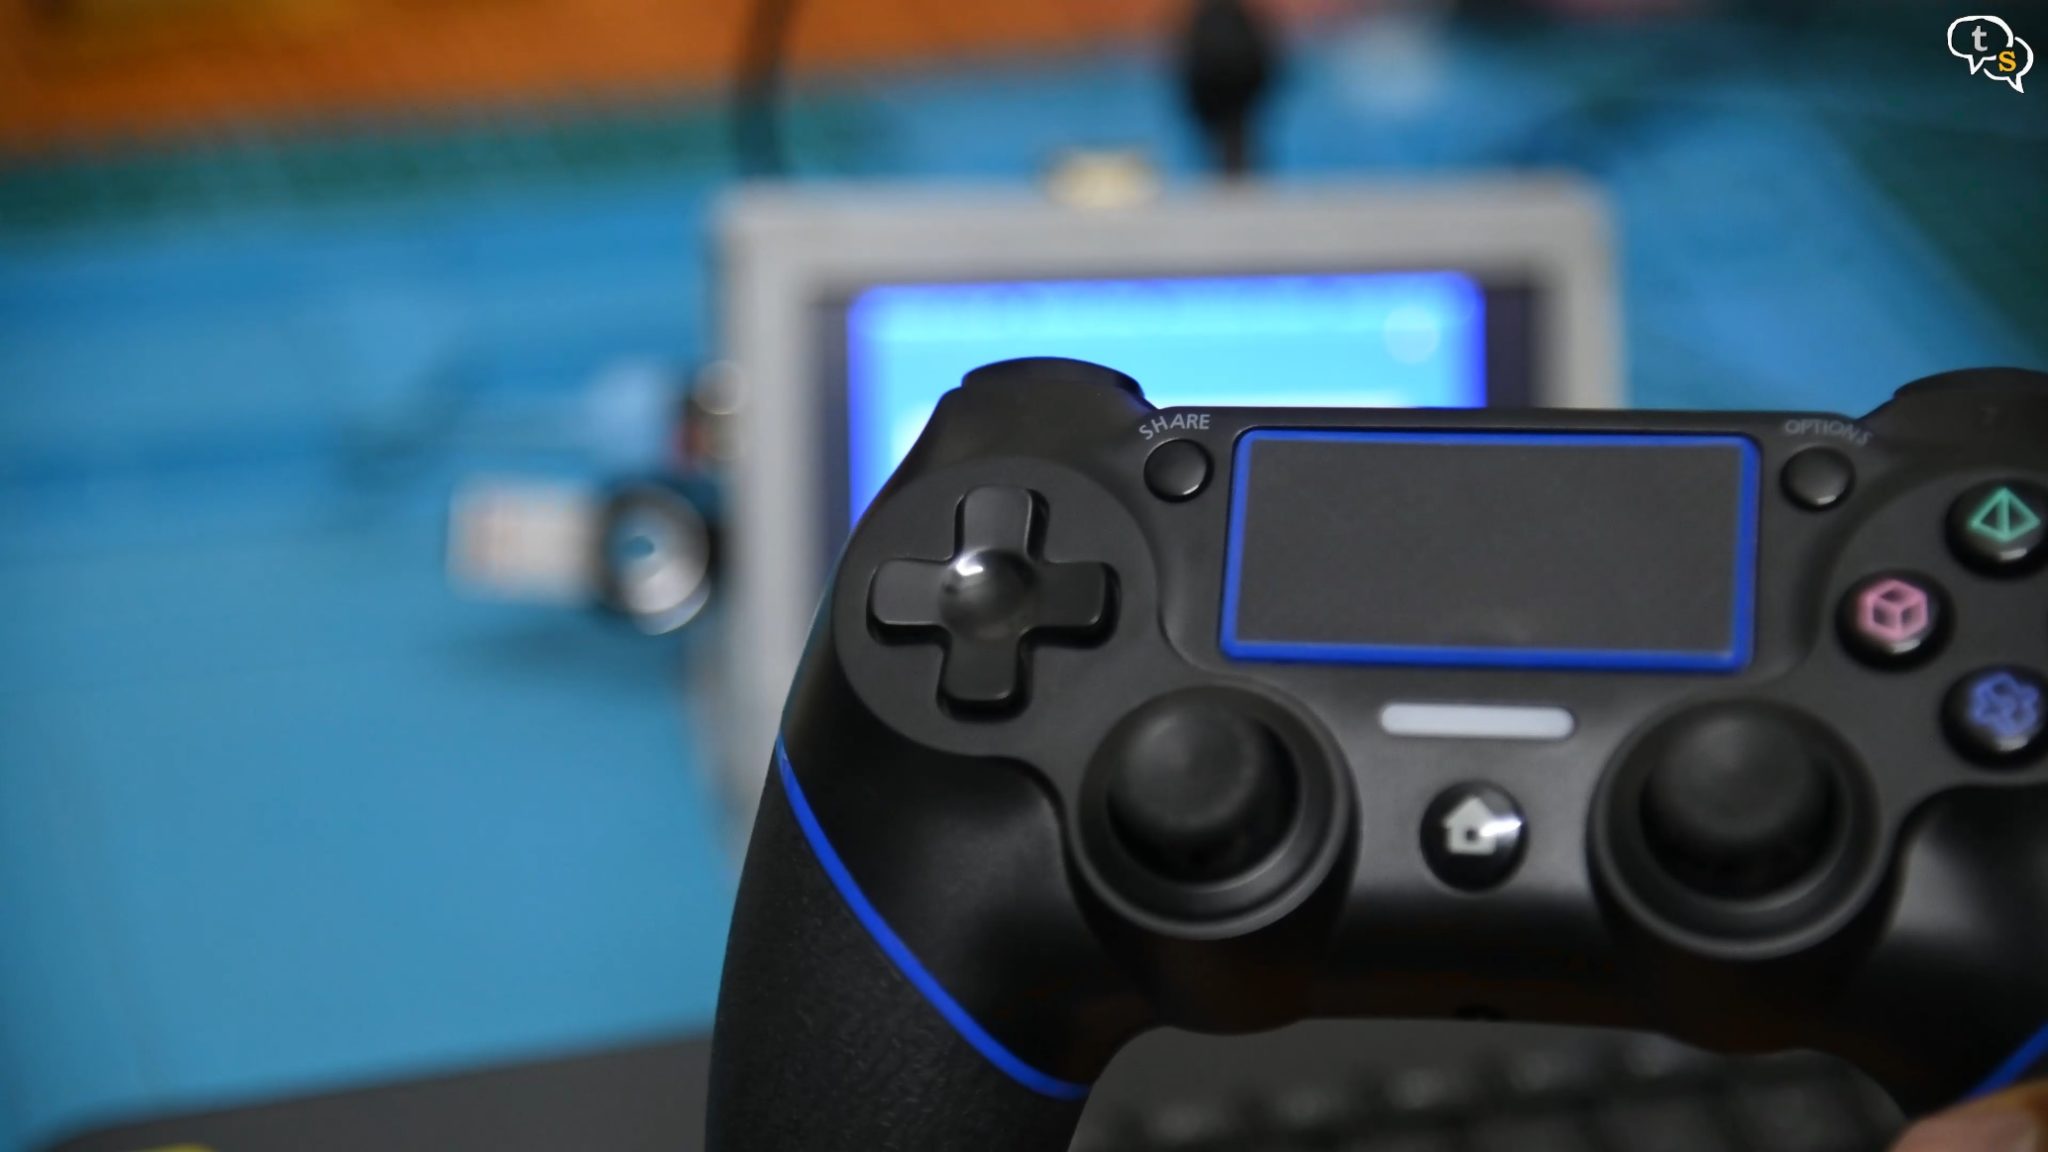
Now to keep it wireless and ease gaming a wireless gamepad would be more comfortable to use.
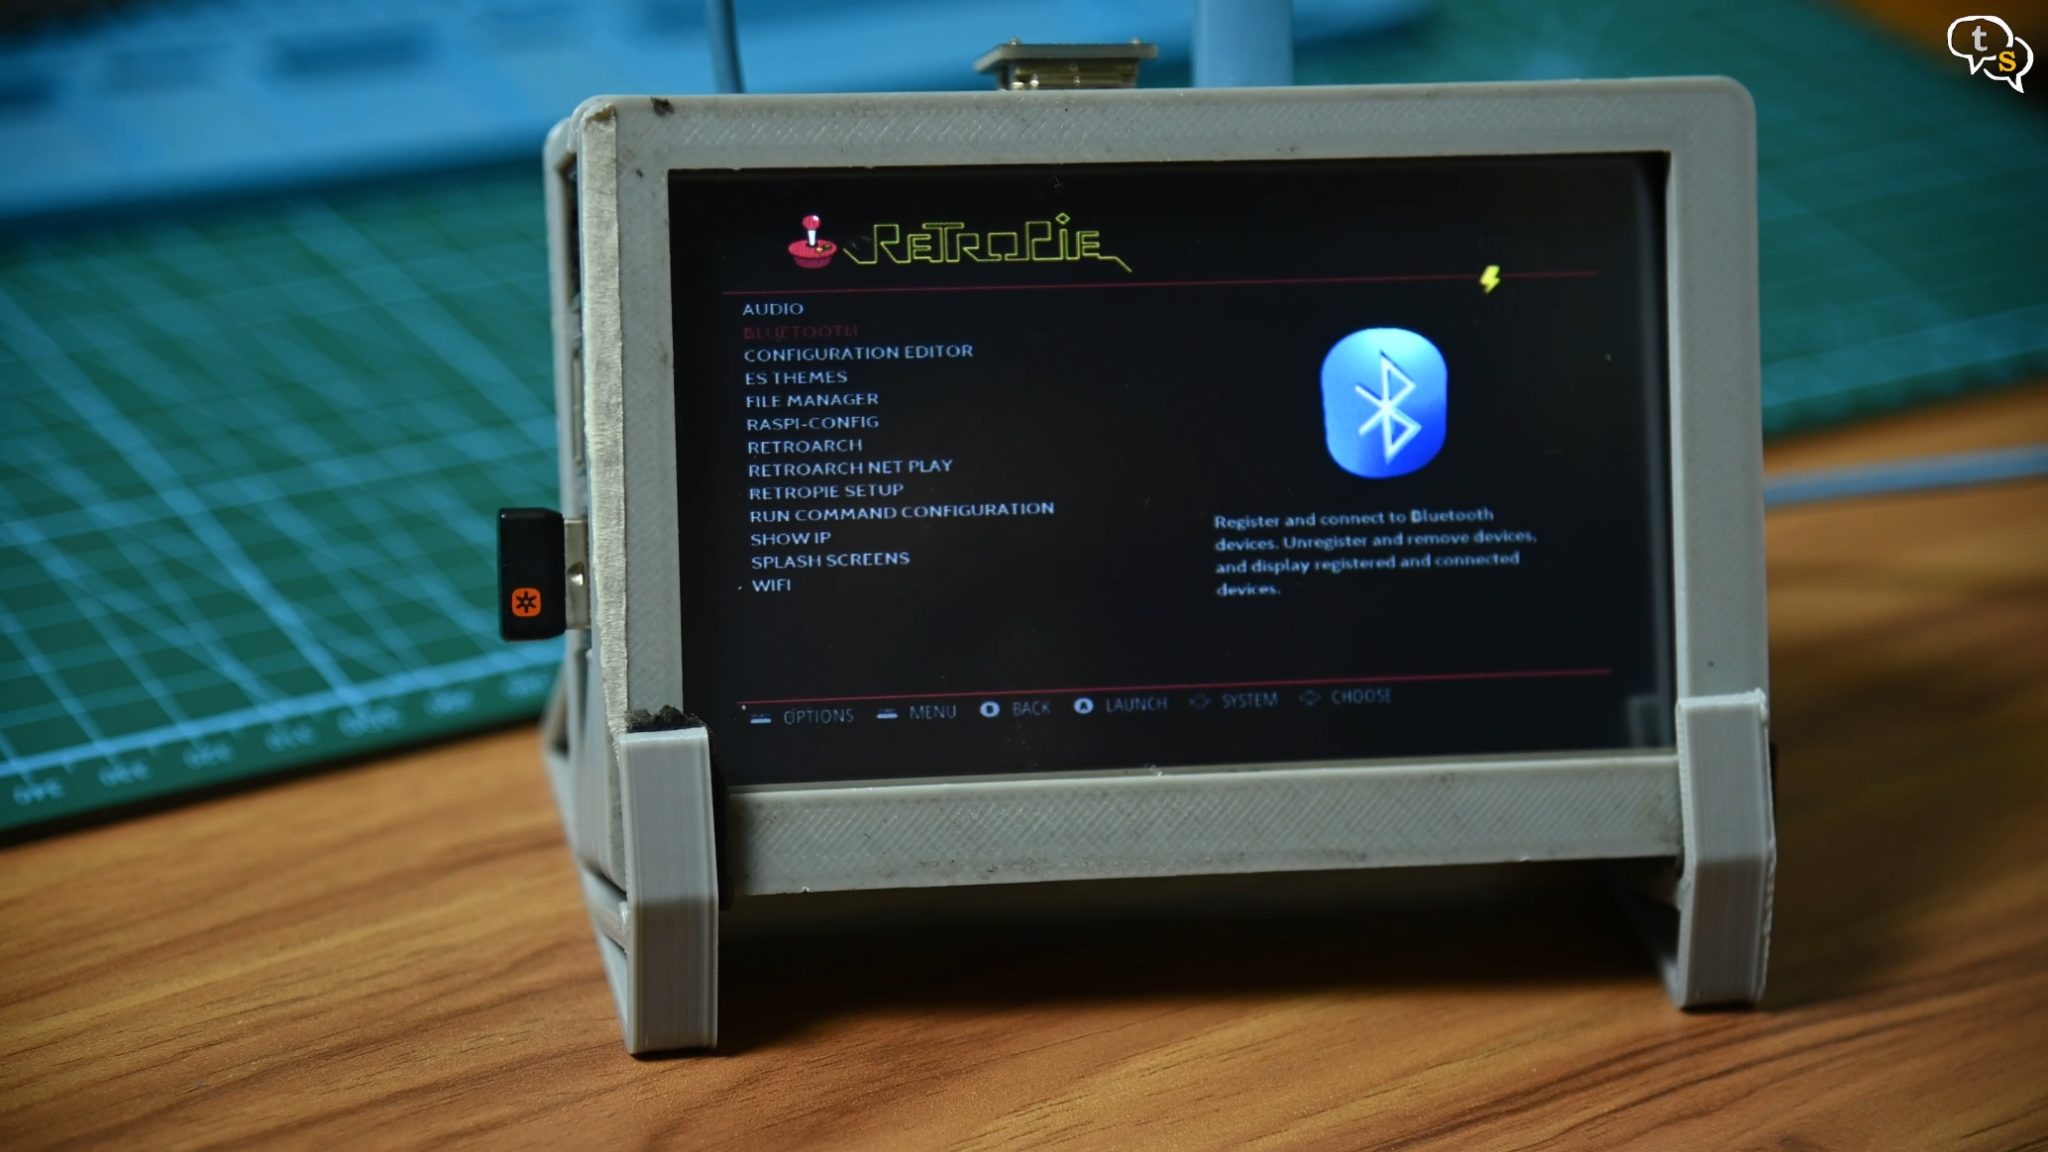
Open up configuration which is activated by hitting the A key you had set up earlier, the RetroPie displays options that are configurable.
Select Bluetooth from the list and the Bluetooth configuration screen opens.
Now select register and connect to Bluetooth Device.
Make sure your gamepad is in pairing mode.
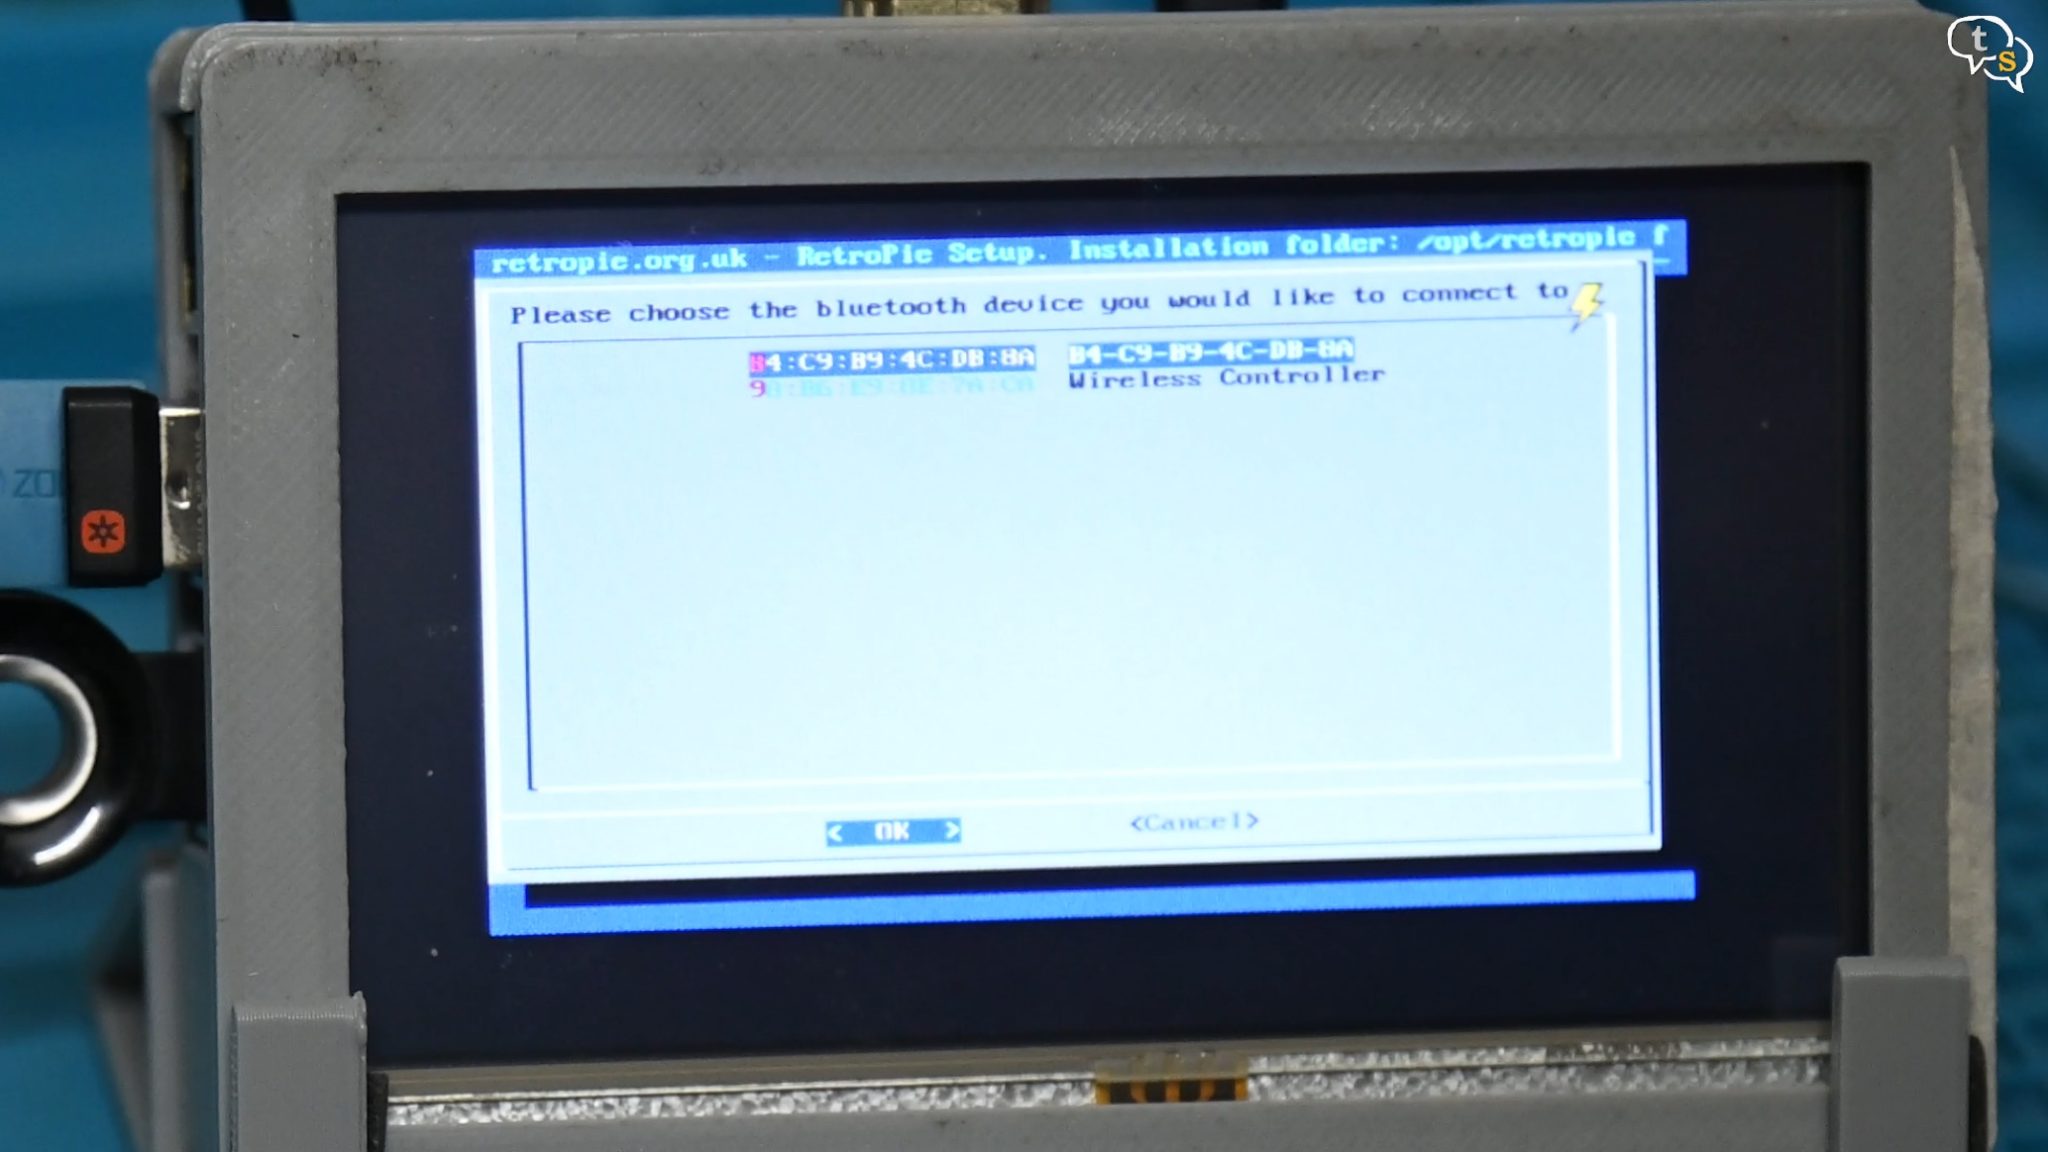
Select wireless controller or in the discovered devices list, it could be different as per the brand of your controller.
And the controller is now paired, but you can’t still use it in retro pie, and it has to be configured.
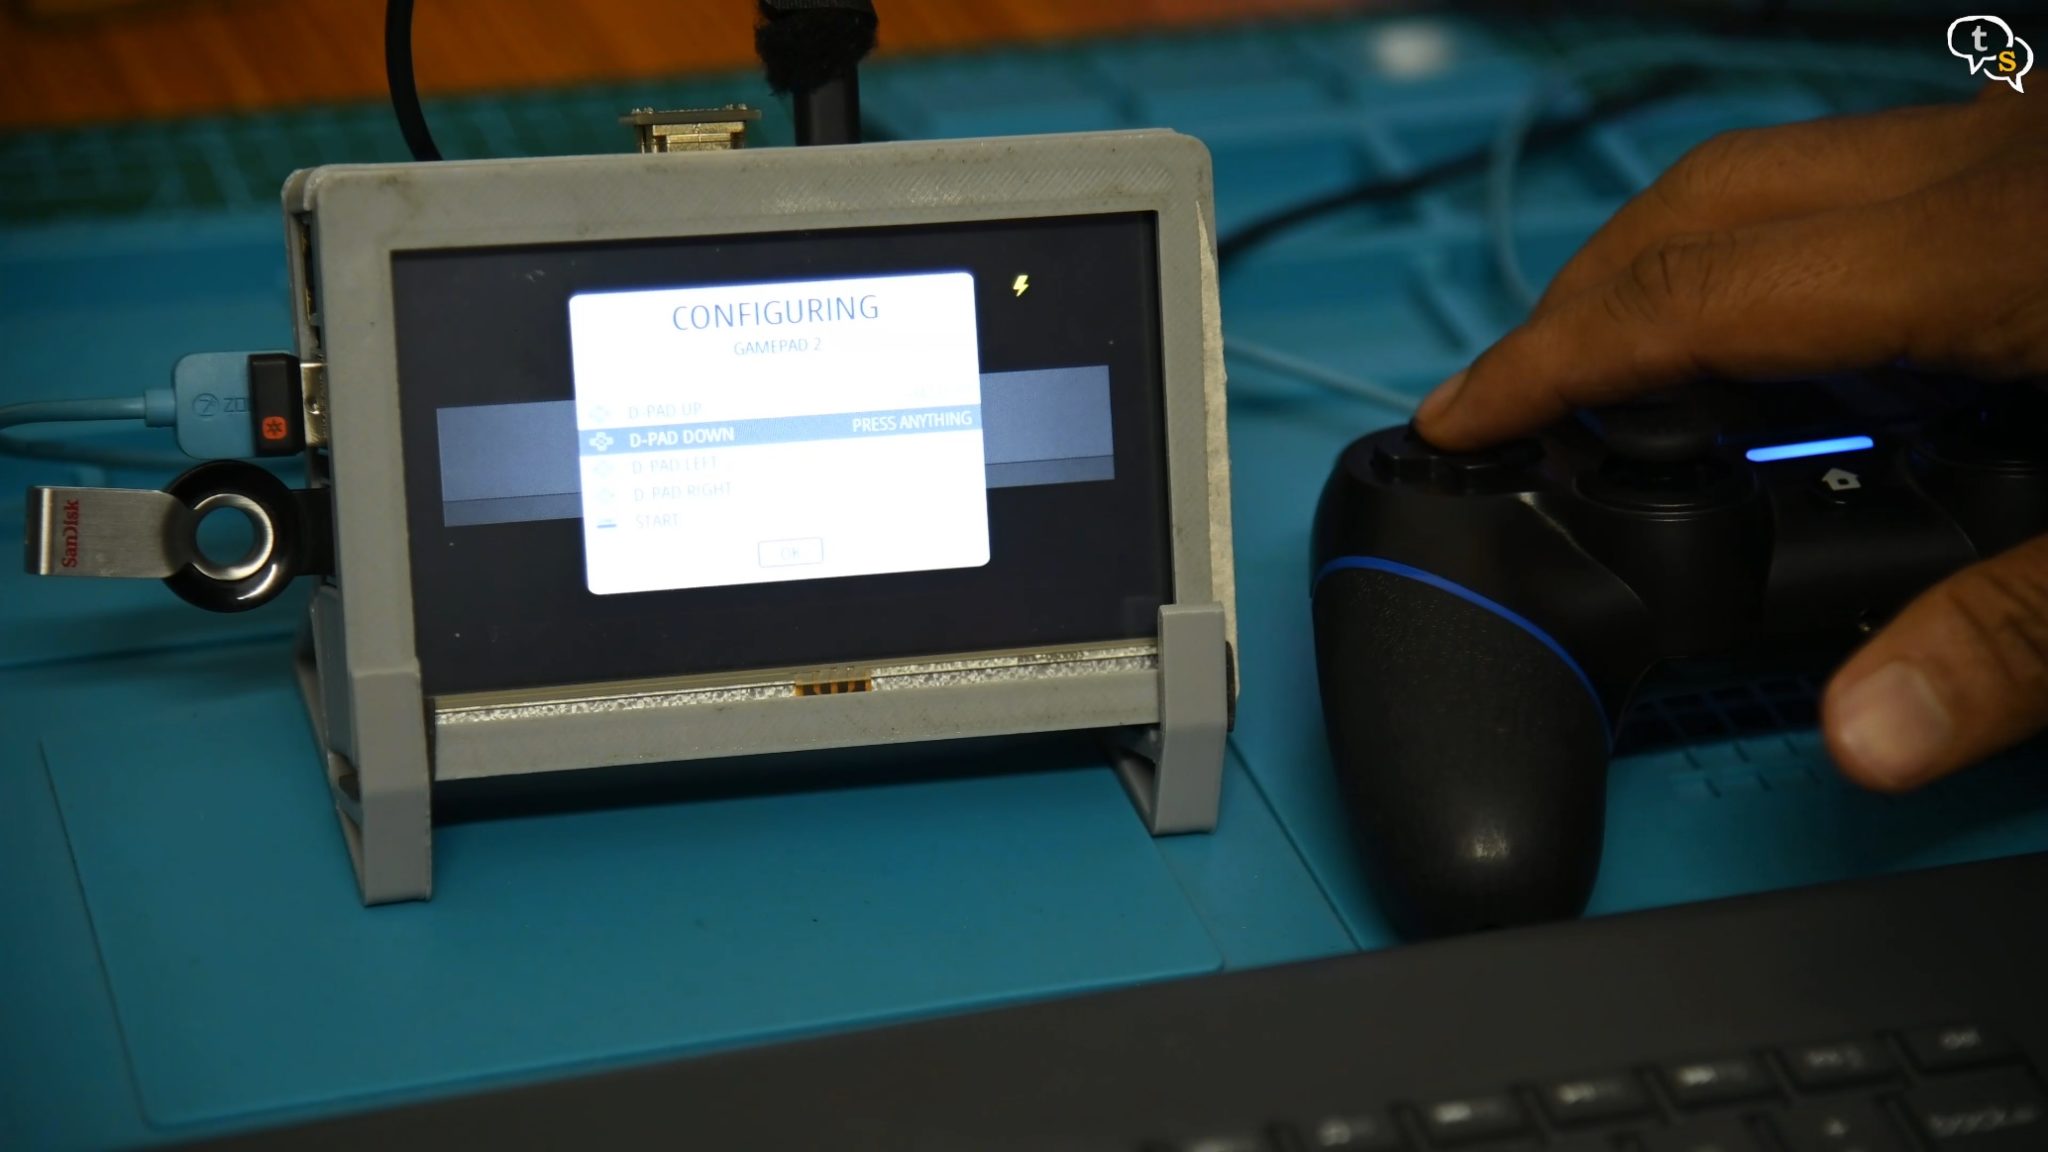
Open the main menu and select configure input, tap a key on the gamepad to initiate configuration, and as per the options displayed on screen press up, down left right etc as you had configured the keyboard.
Here’s where I had problems trying to get games off a USB flash drive onto the Raspberry Pi. I didn’t want to always remove the micro-sd card to add games as it is a bit cumbersome because of the case.
Ah, but there is another way which is simple and much faster.
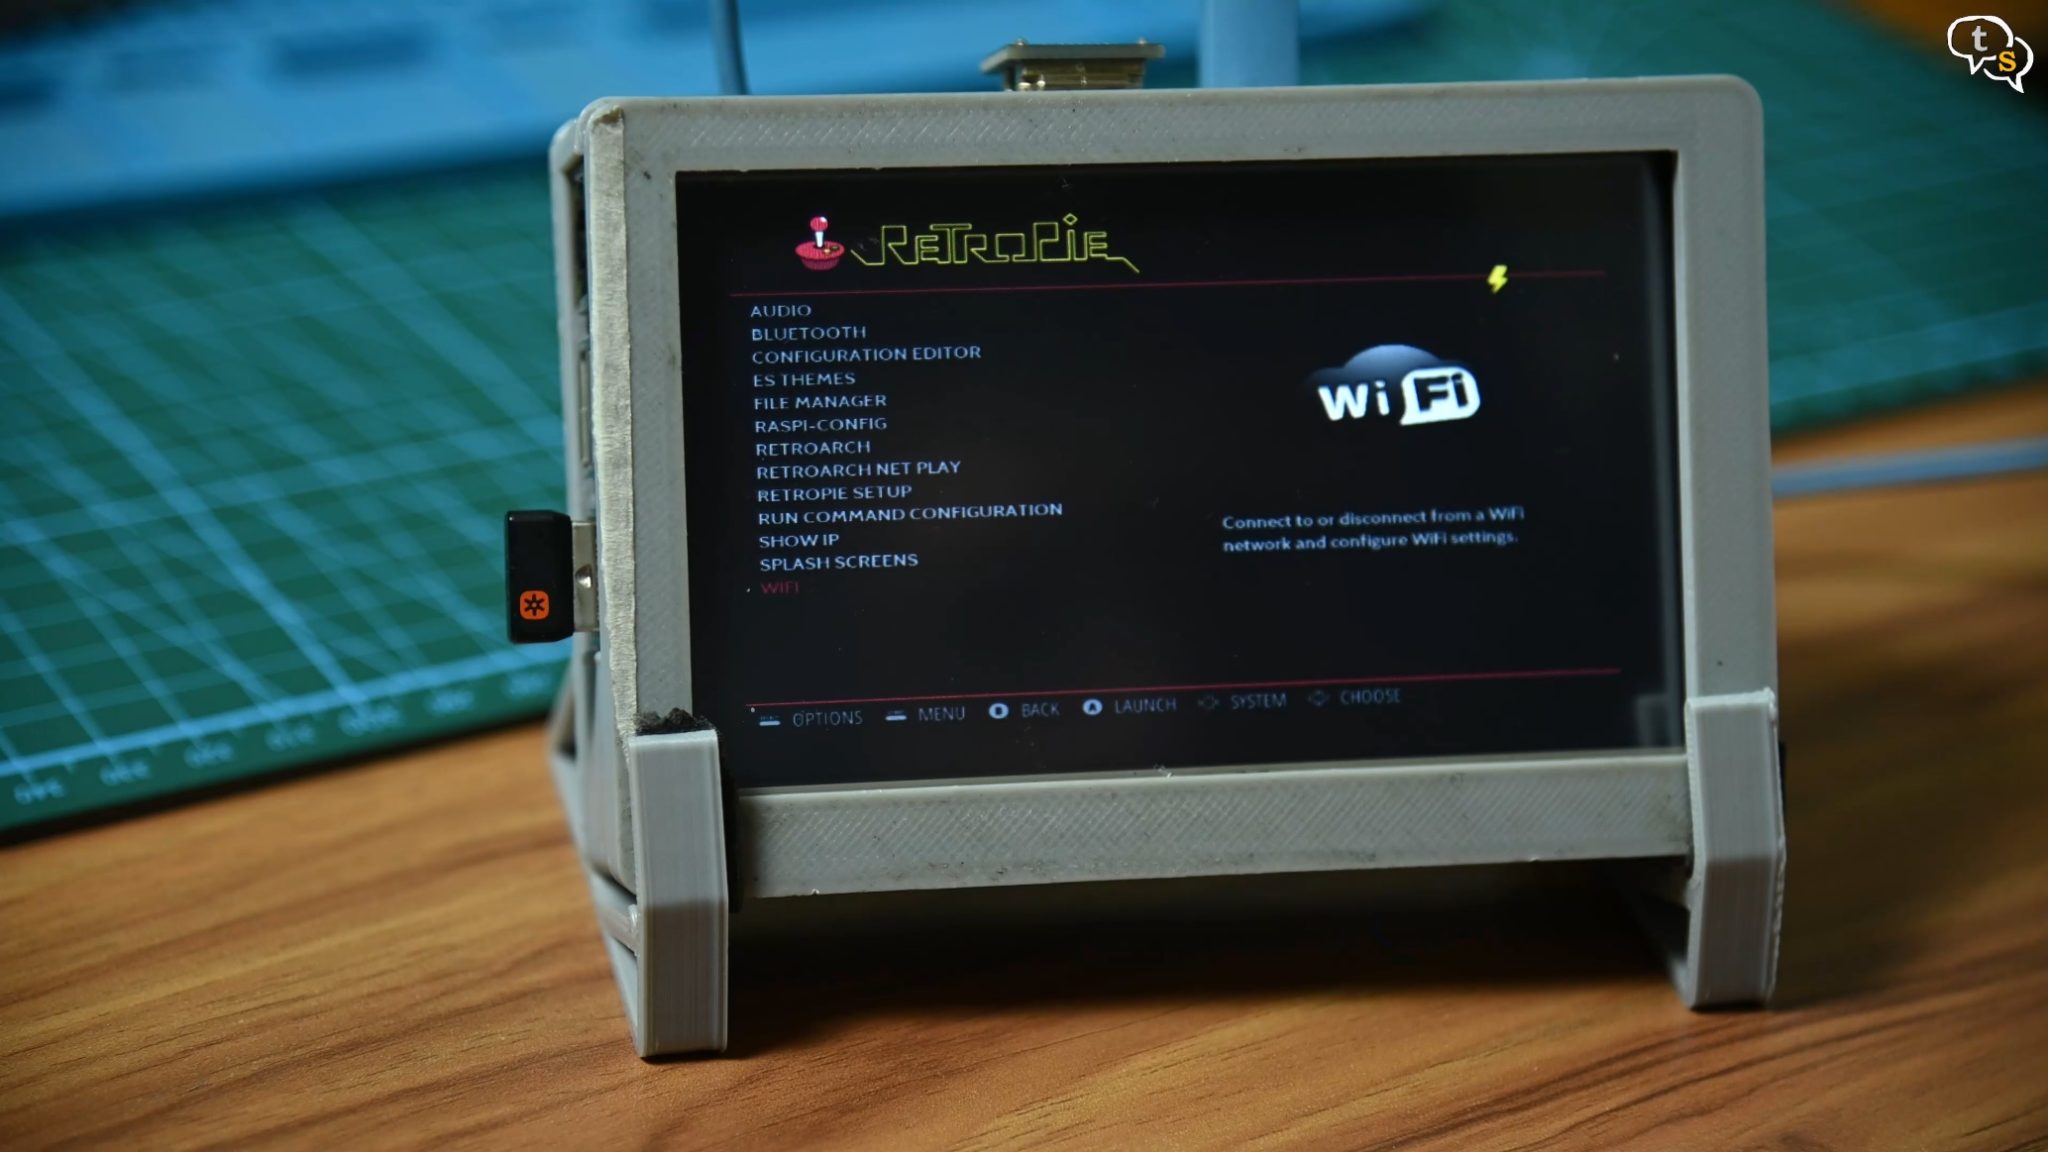
First we need to connect the Raspberry Pi to Wi-Fi.
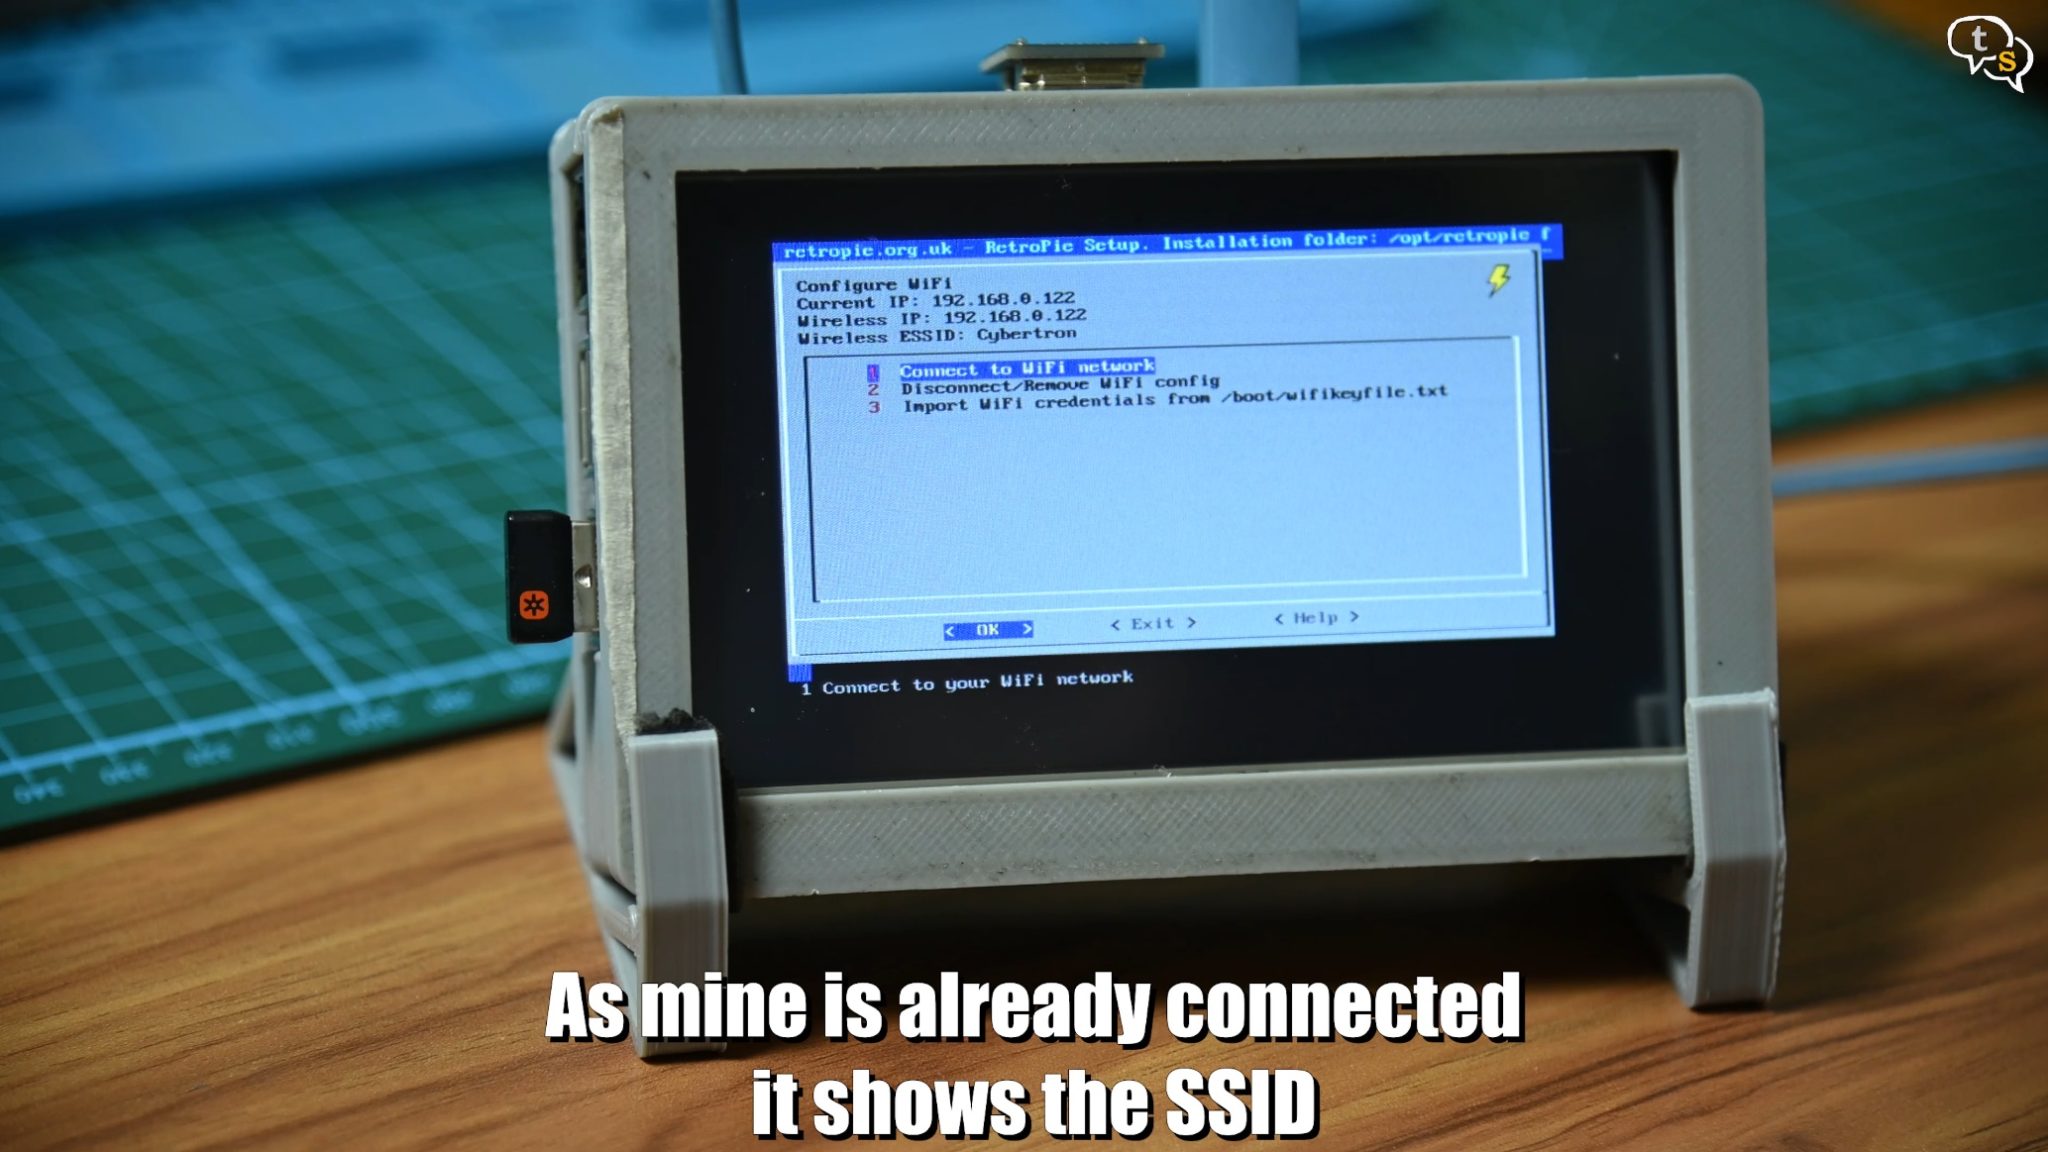
Select Wi-Fi in the list, manually add the SSID and password and your device should connect.
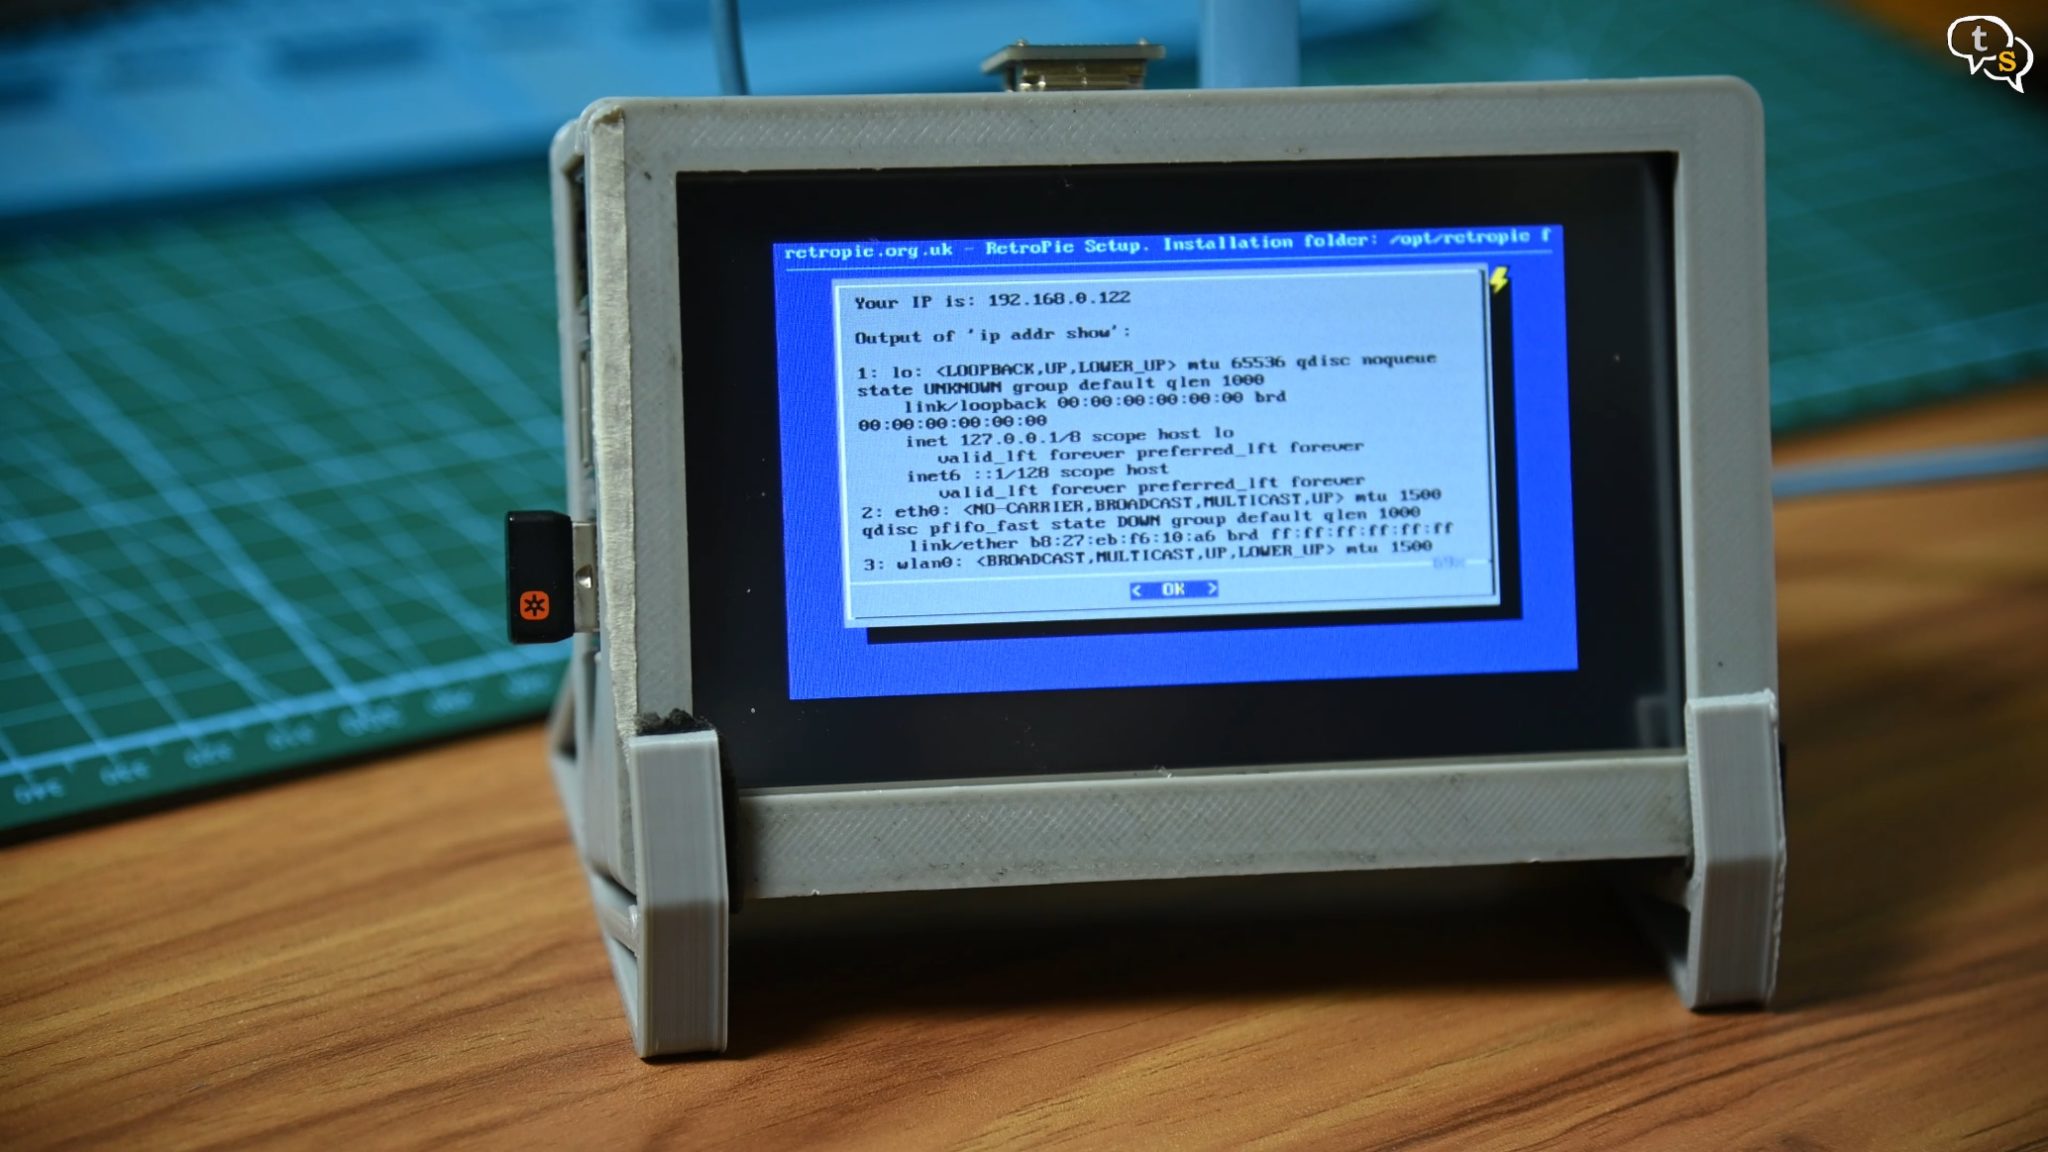
Open up the configuration, select Show IP from the list. Now you have the IP address displayed. Make sure to connect the Raspberry Pi to Wi-Fi or hardwire using ethernet.
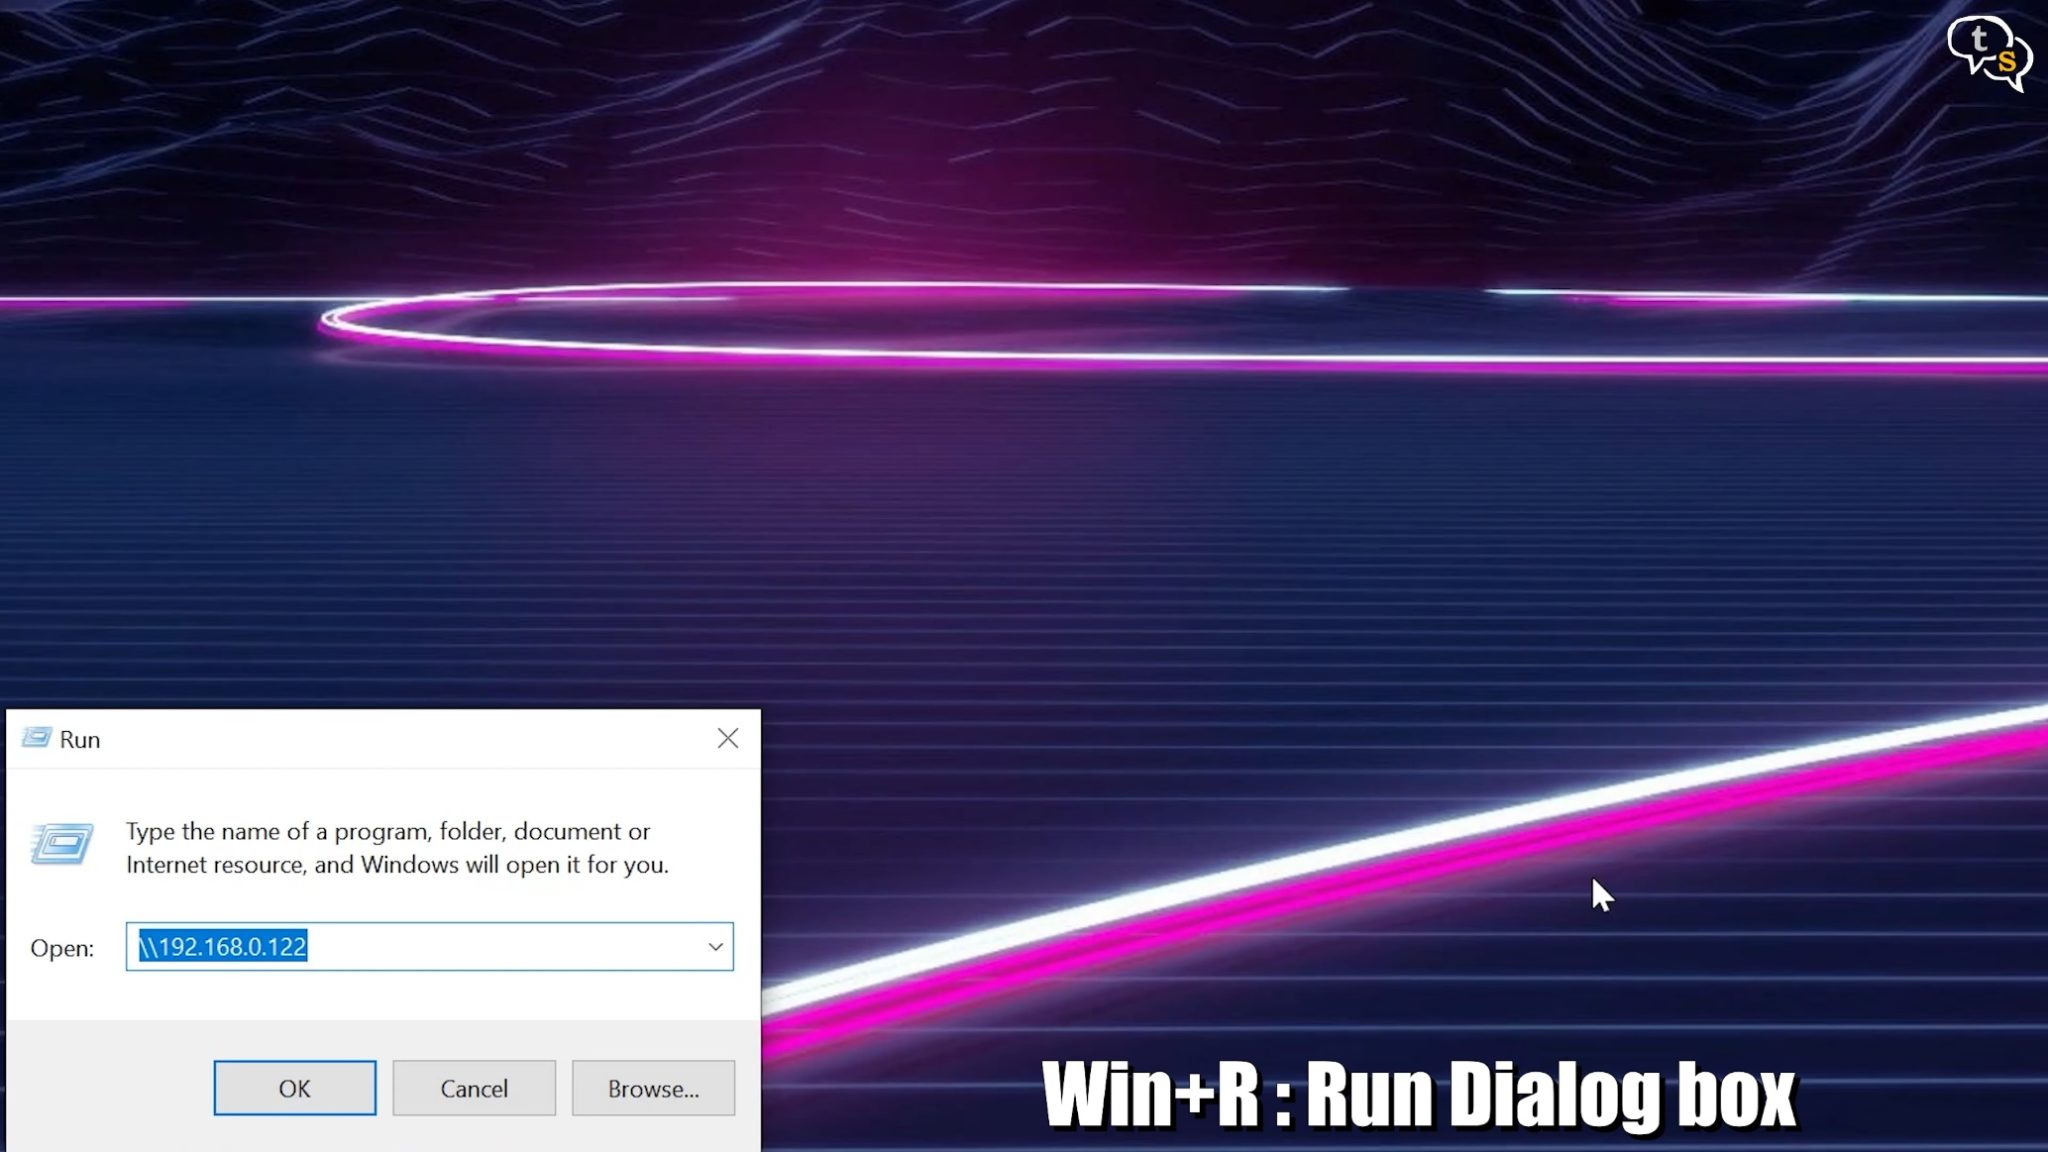
On windows, hold down windows key +R and the run dialog opens. Enter two forward slashes and the Ip address you copied down.
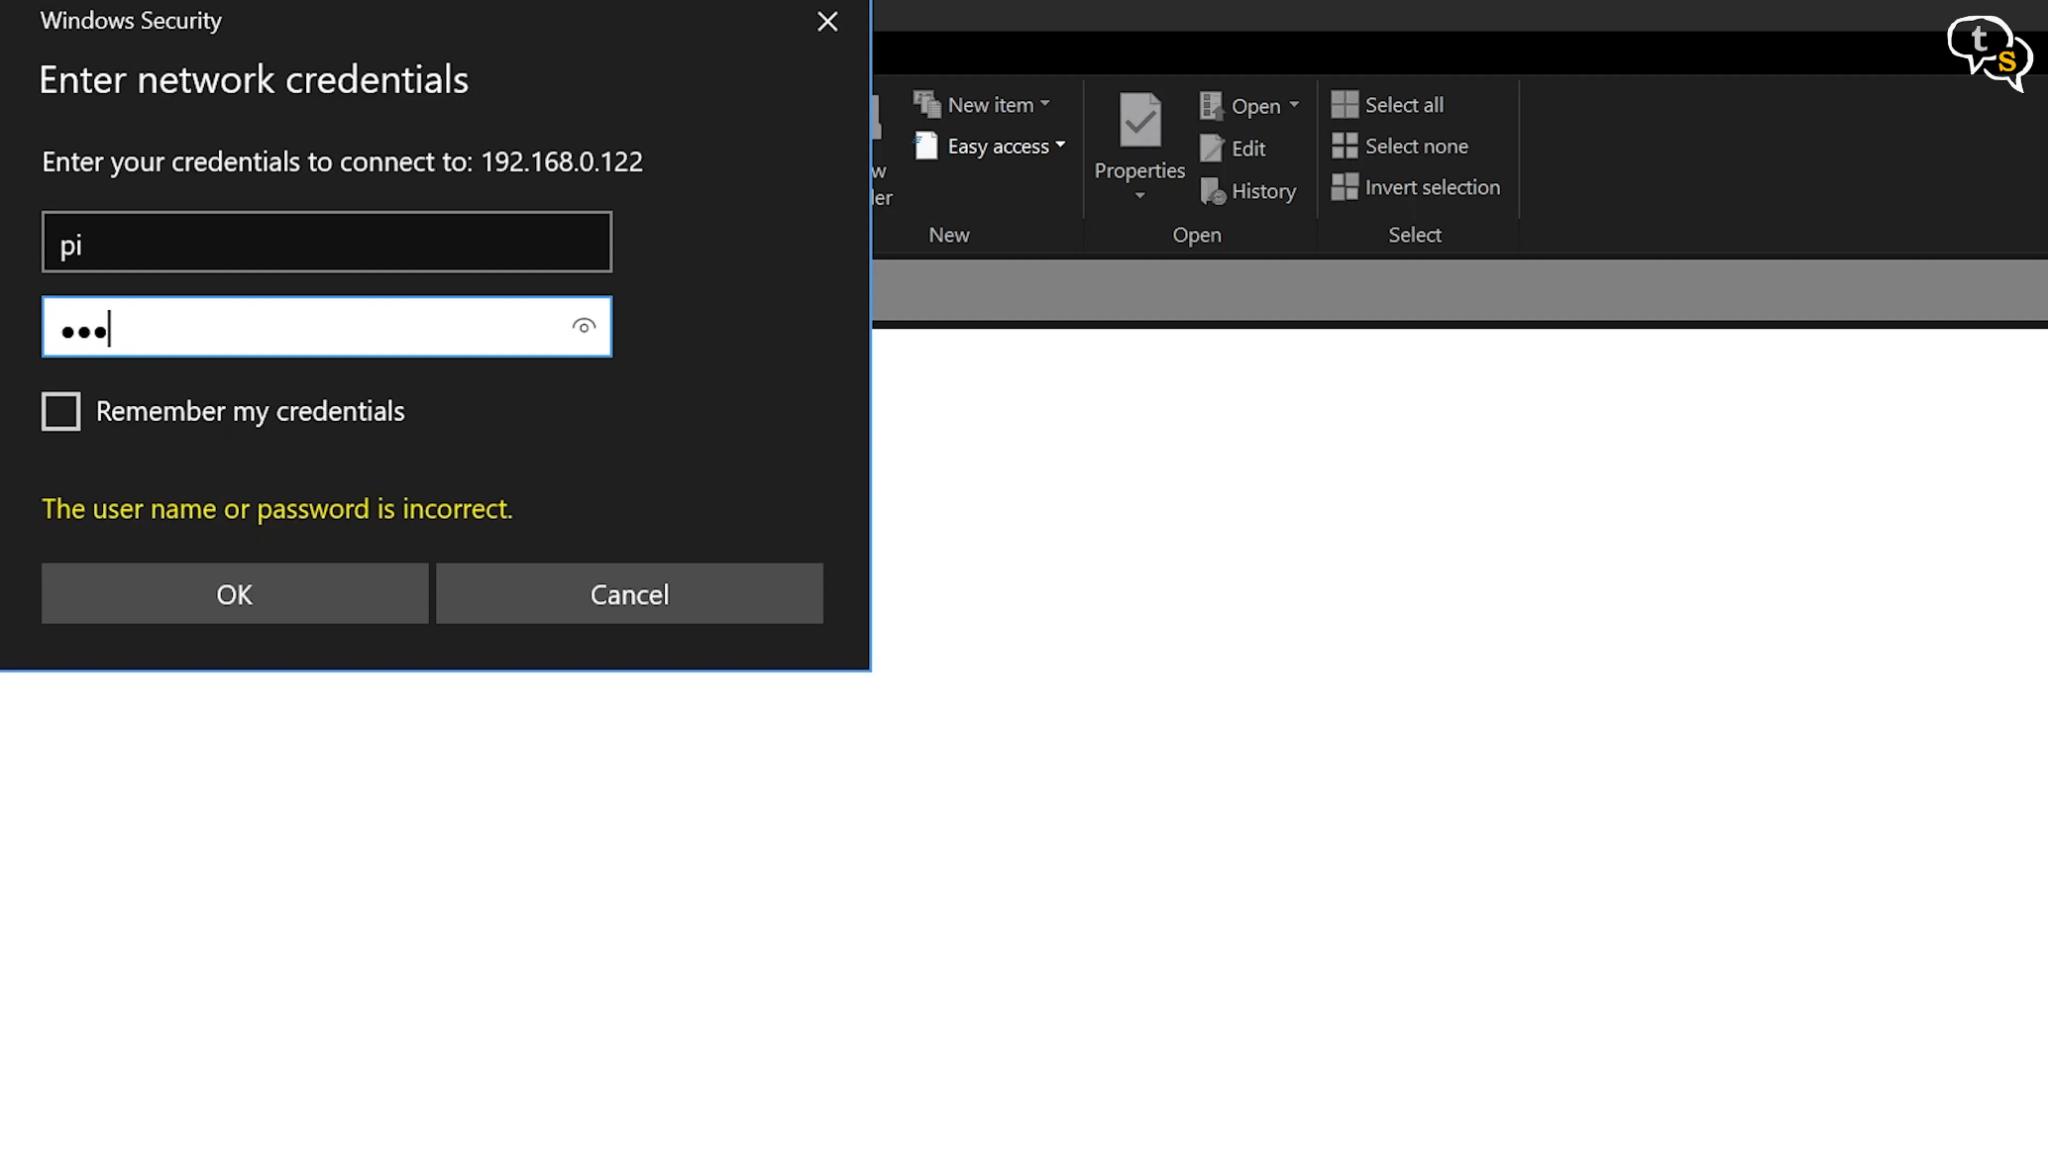
A dialog box might pop up asking for the username and password, enter “pi” as username and “raspberry” as the password and now you can see the folders and files on the Raspberry Pi.

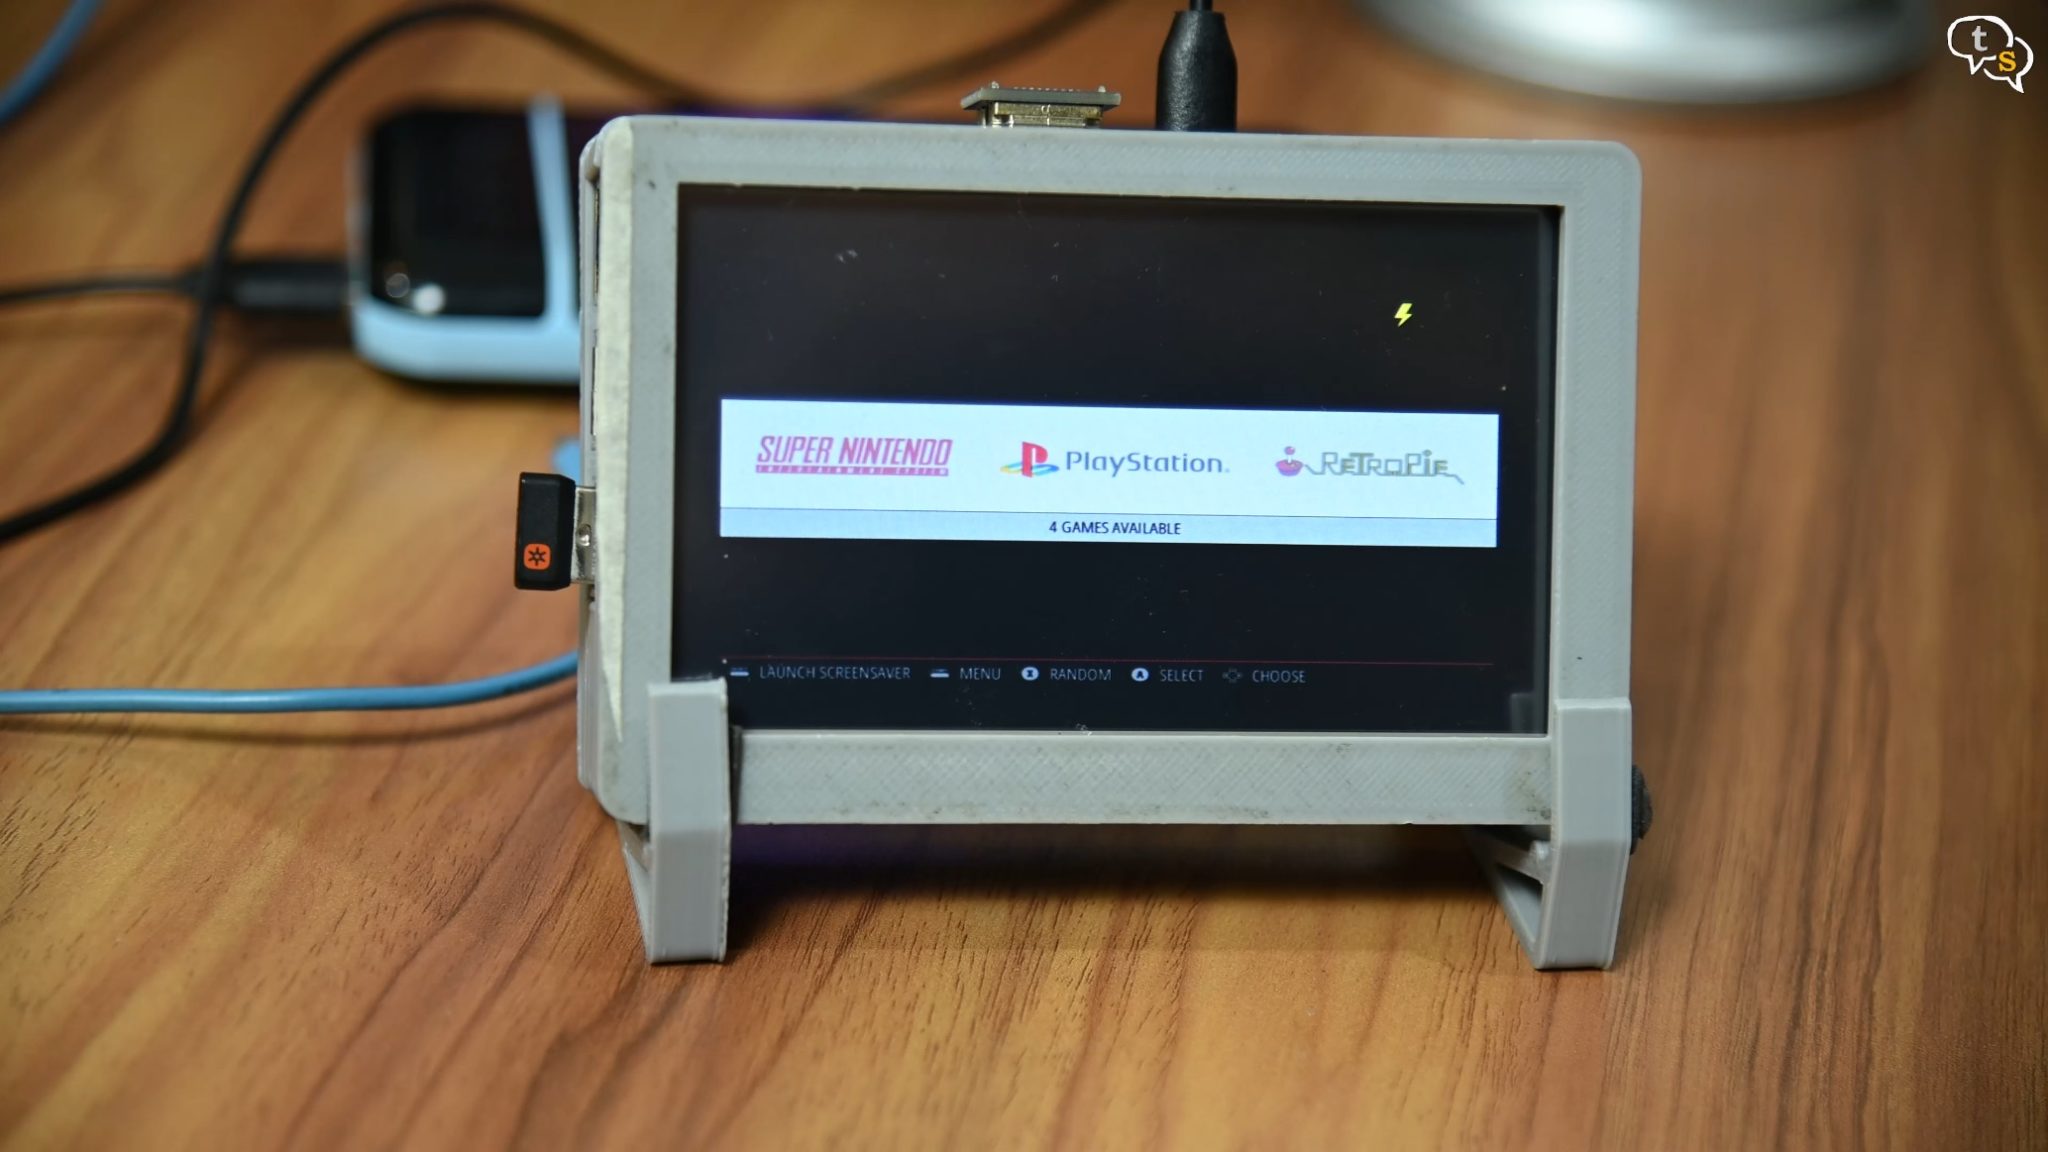
Open the ROMS folder and you should see a list of emulators supported by RetroPie.
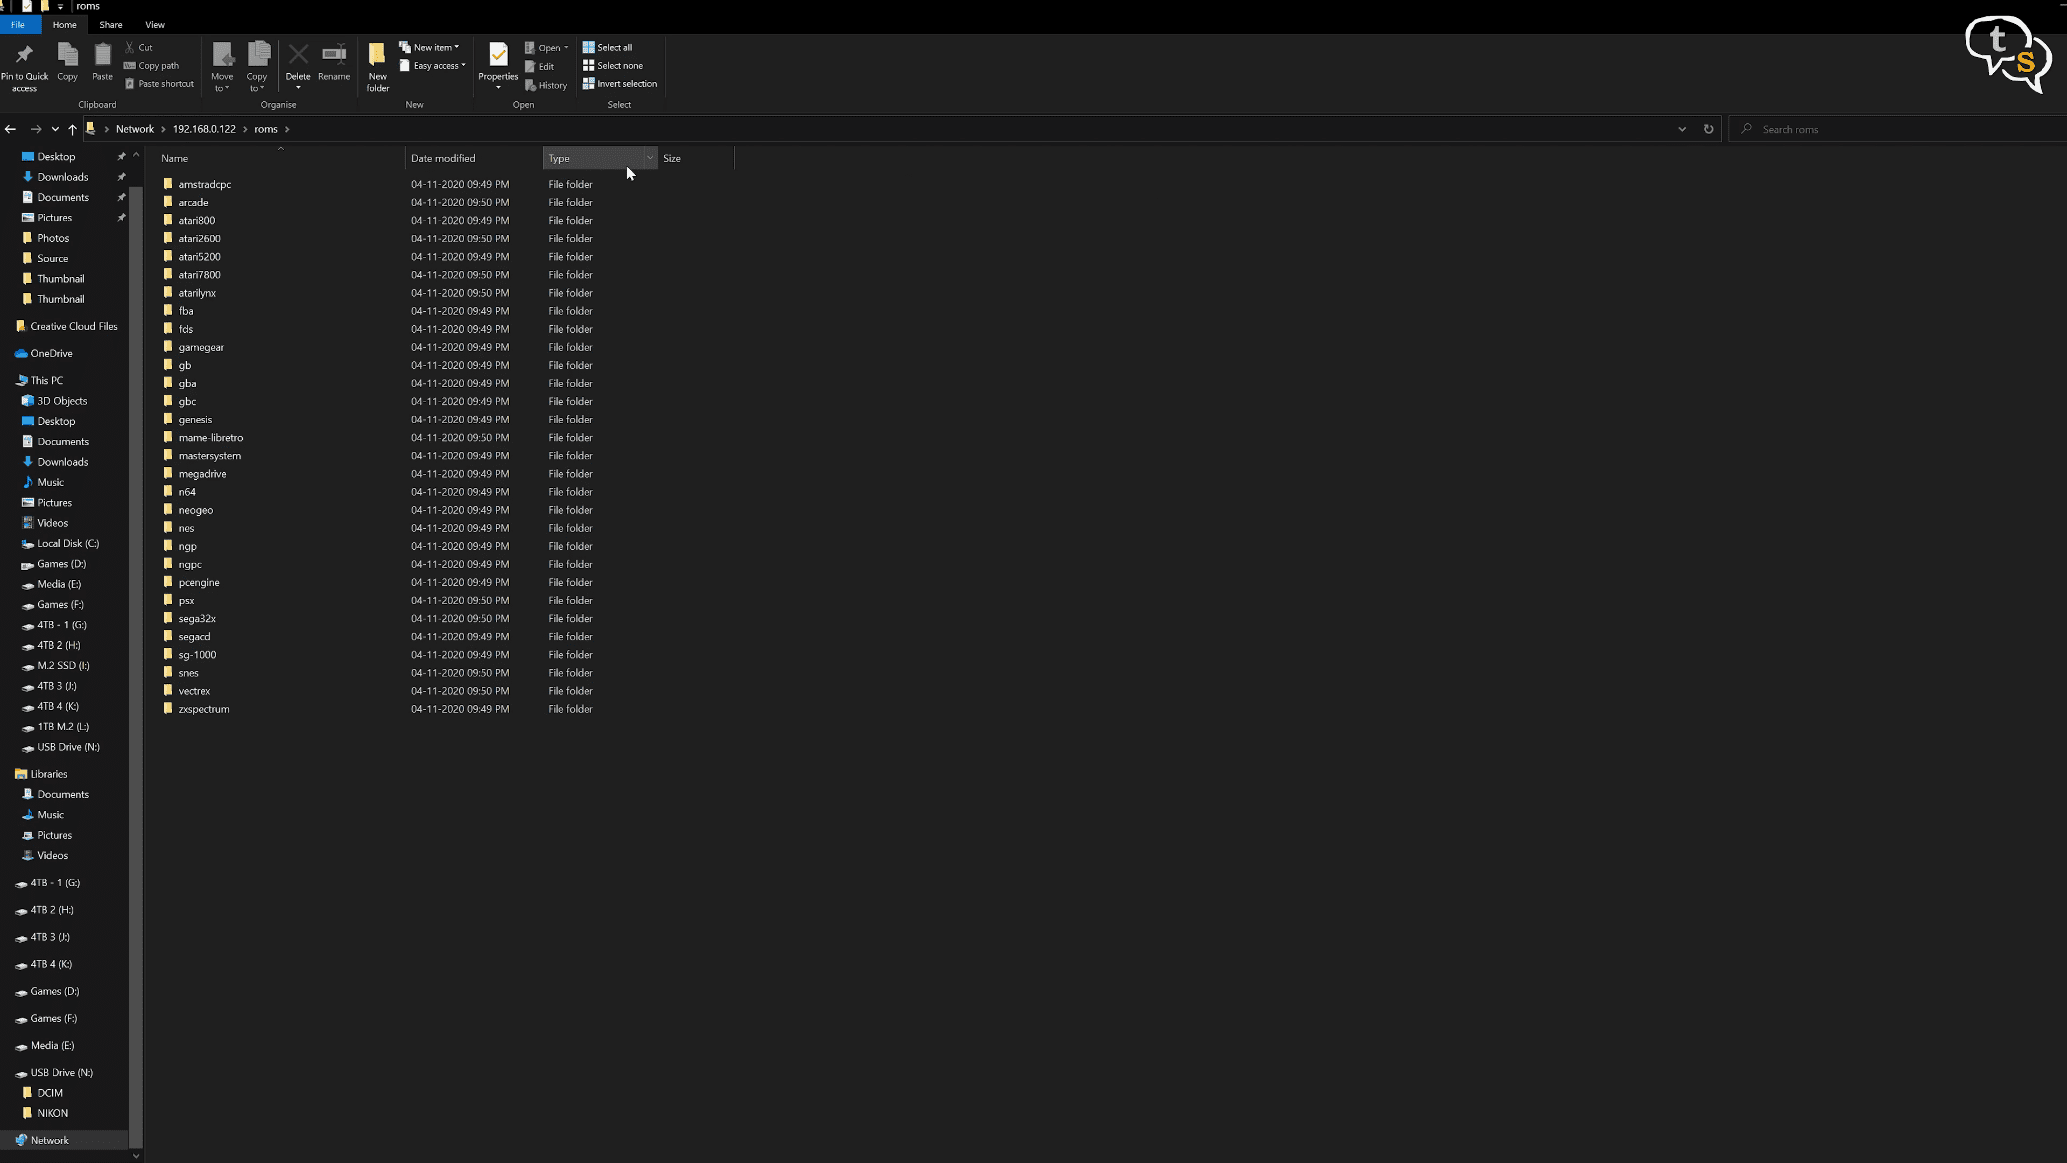
Download the appropriate ROMS and copy them to their respective folders.
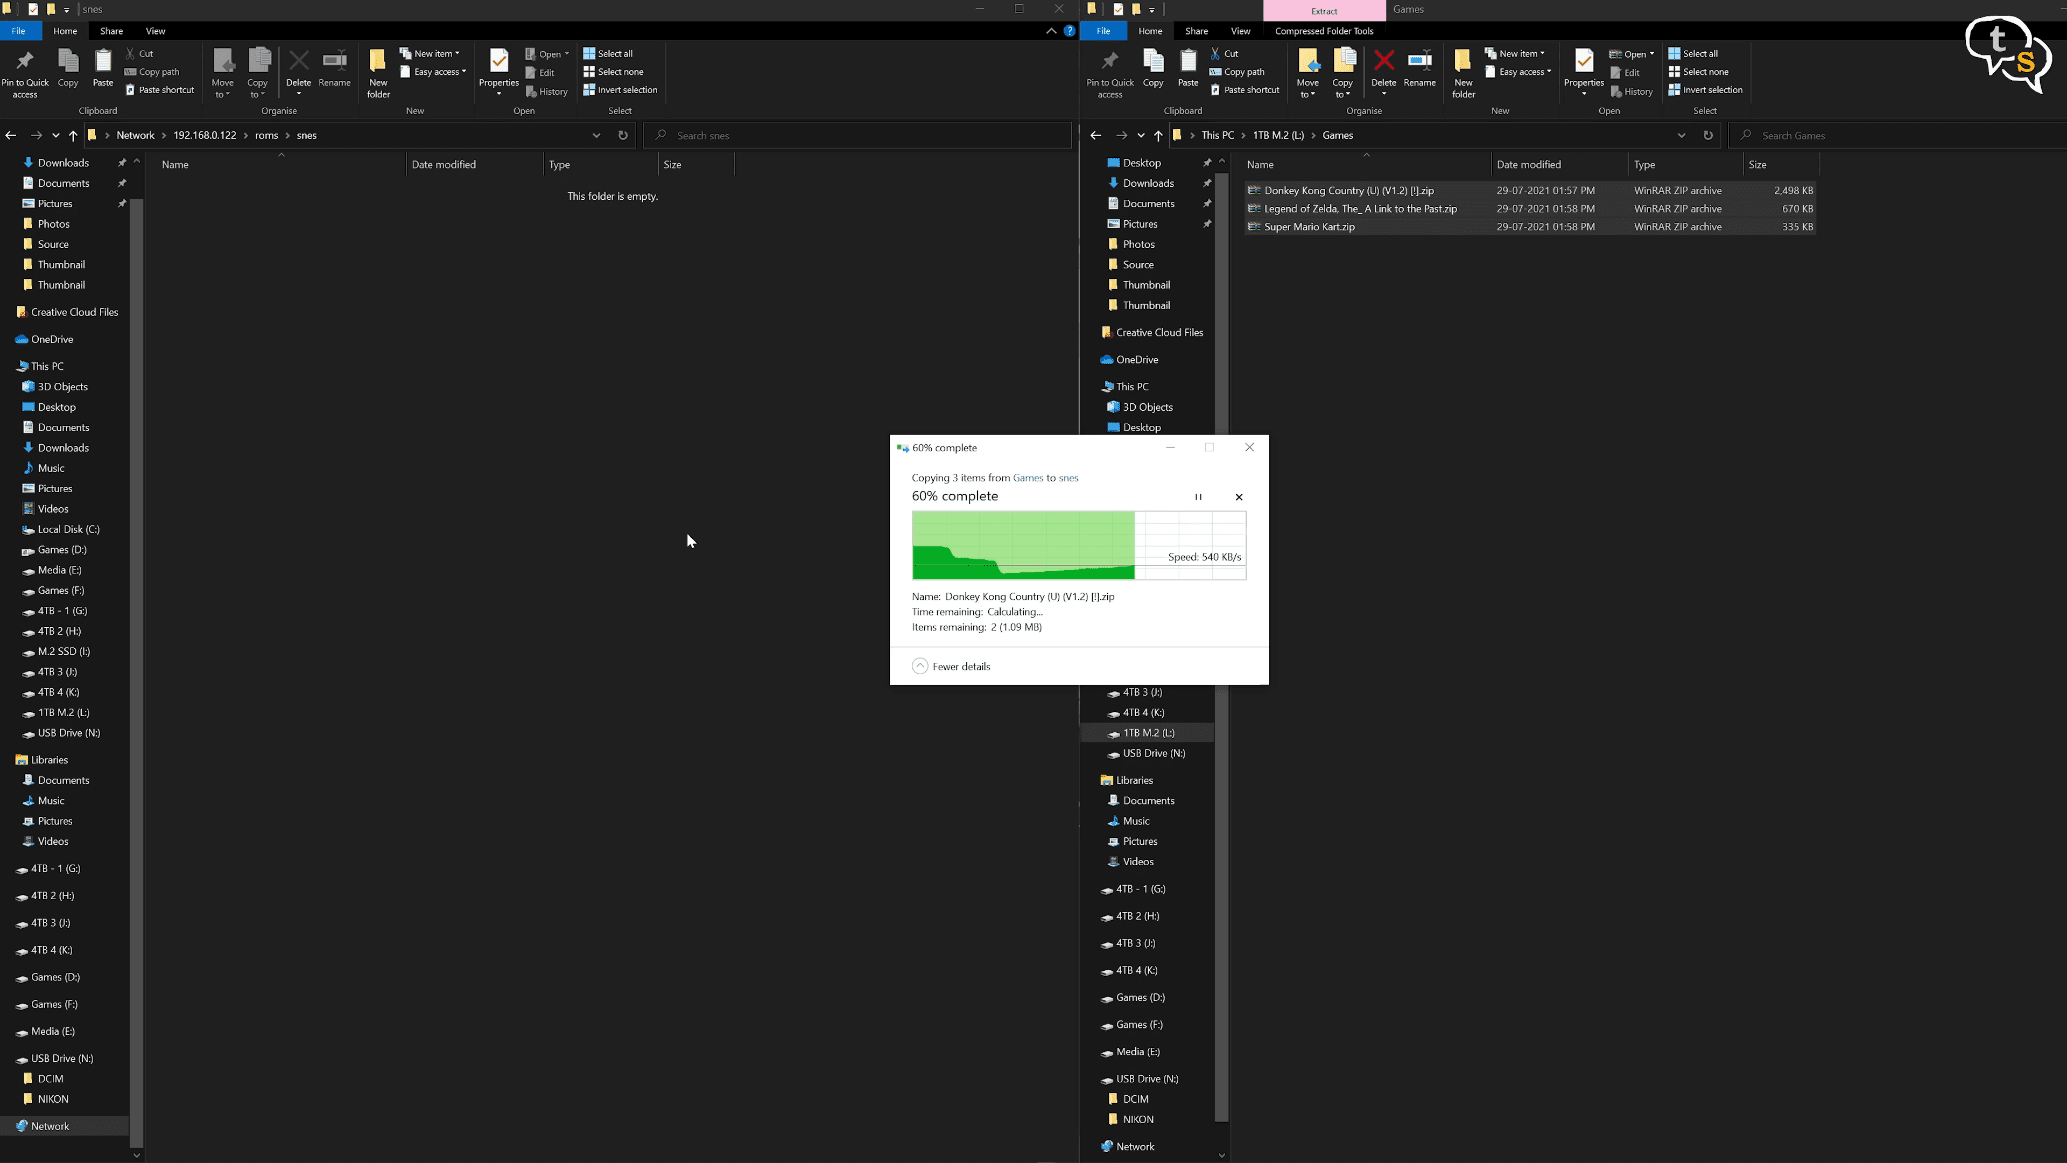
So SNES ROMS to SNES, game boy to gb folder etc.
Once done restart the emulator and you should now see the name of the emulators for the ROMS you have copied.

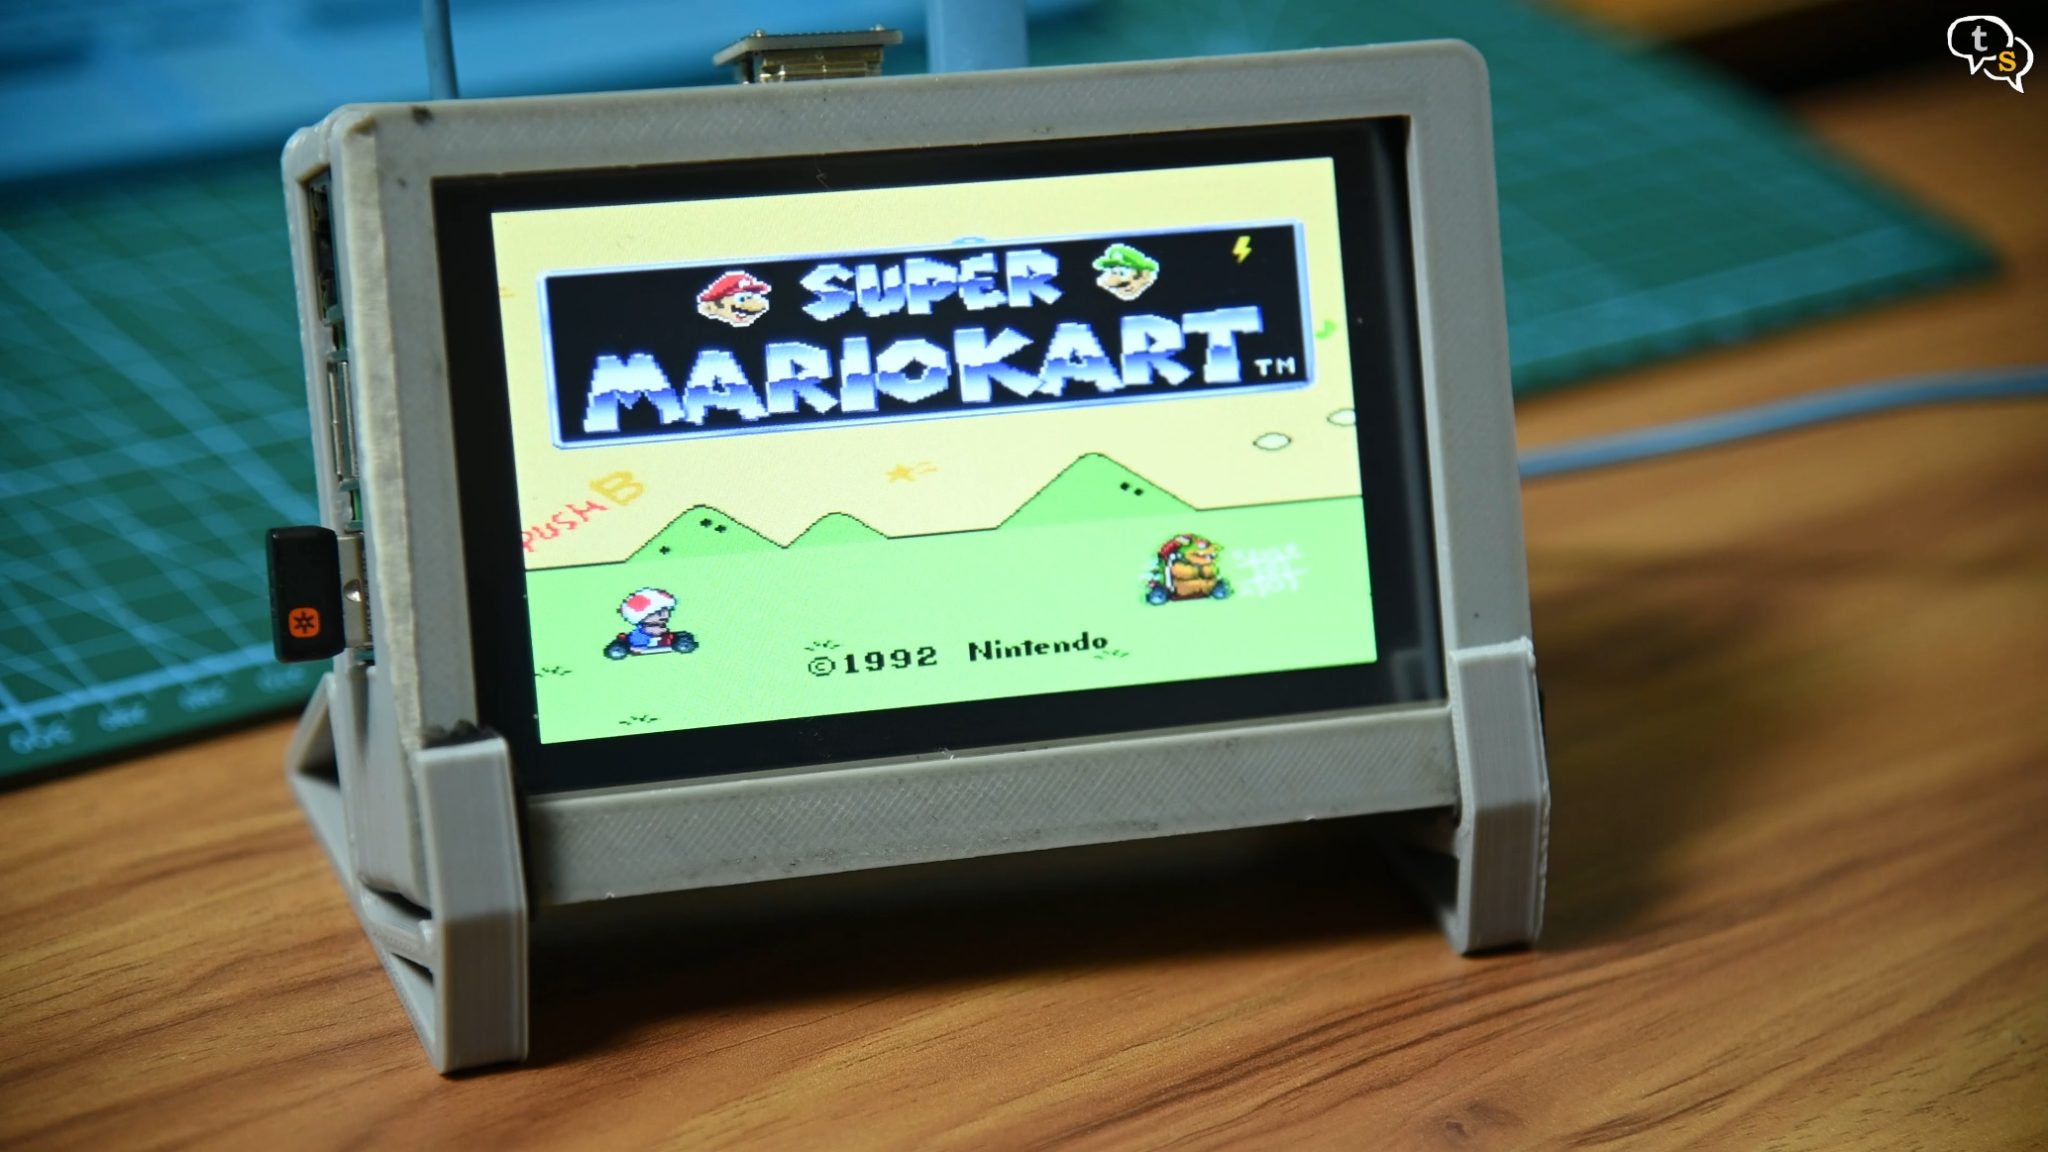
Open the emulator name and you can see a list of games. Select one and the game starts playing.
So, there are multiple systems RetroPie supports and just add the ROMS to the corresponding folder and done.
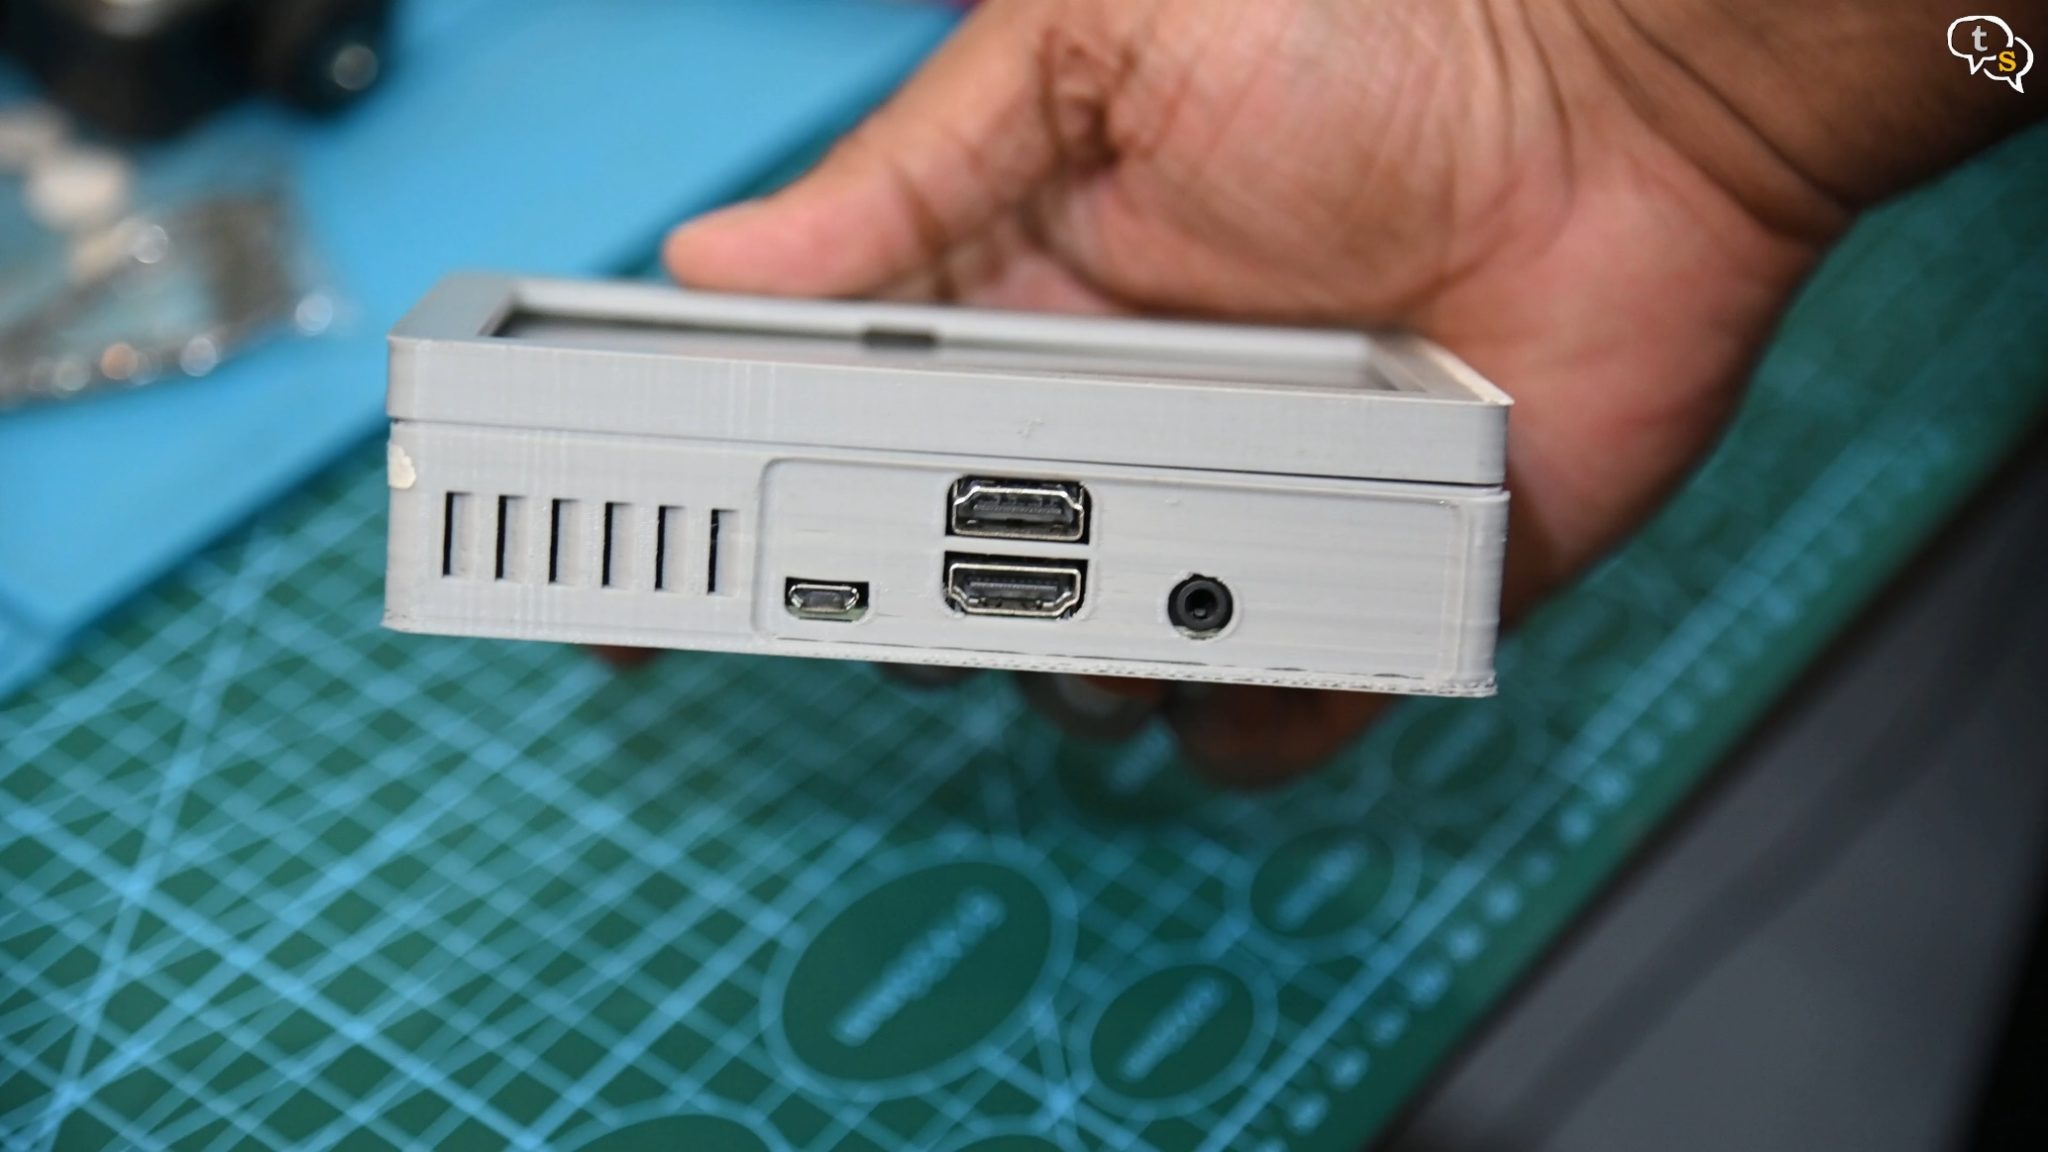
You can listen to audio using the 3.5 mm headphone jack or via a Bluetooth headset.
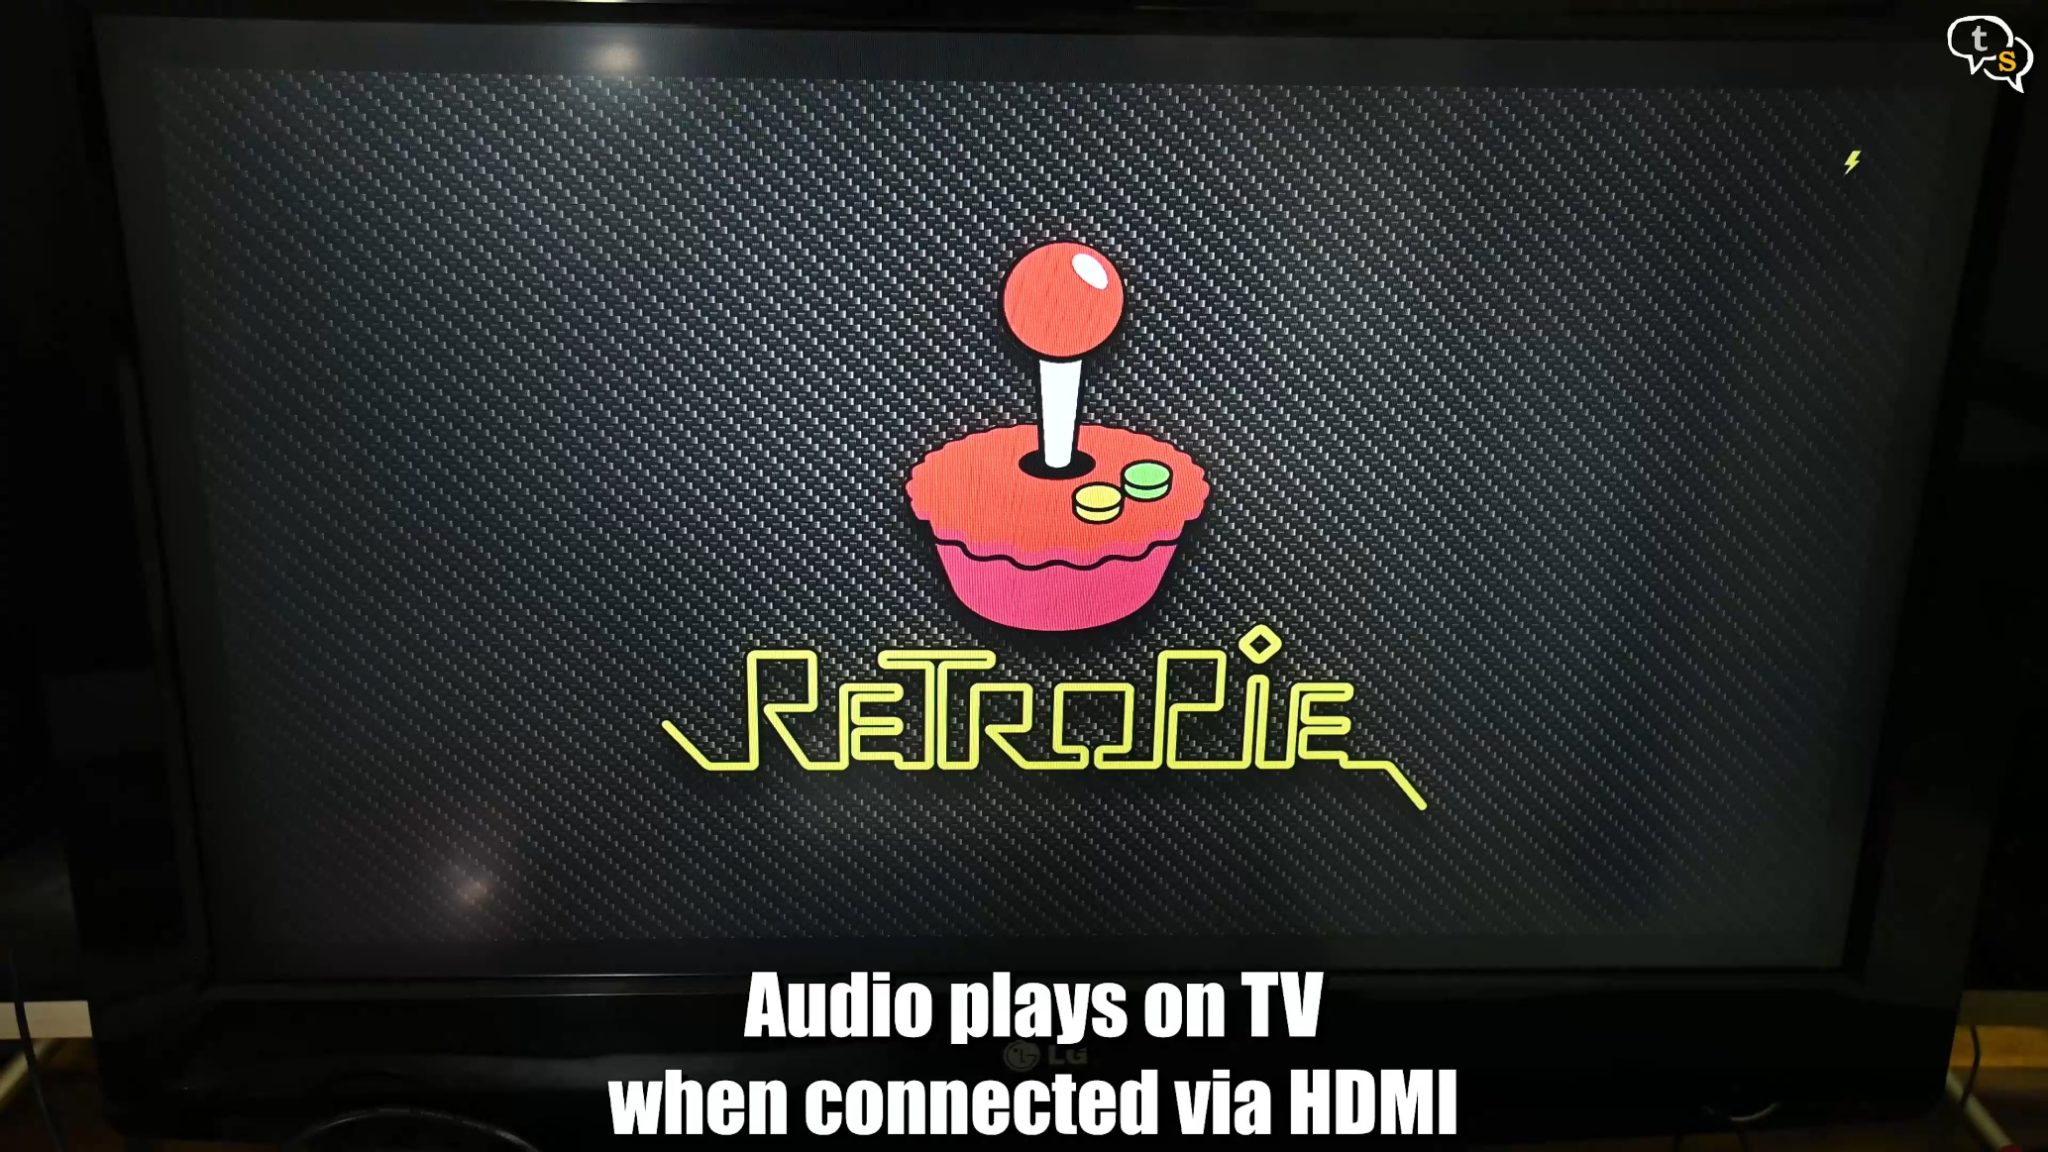
You can also connect to a TV using a HDMI cable for big screen gaming.
As it is not legal to share ROM’s I’m not providing links to them. Just search [system name] ROMS and you should find them. There are tons of sites where ROMS are available but be careful as a lot of them are spammy and can contain viruses. So just a word of warning.
Now let’s try this out with a power bank, it works.
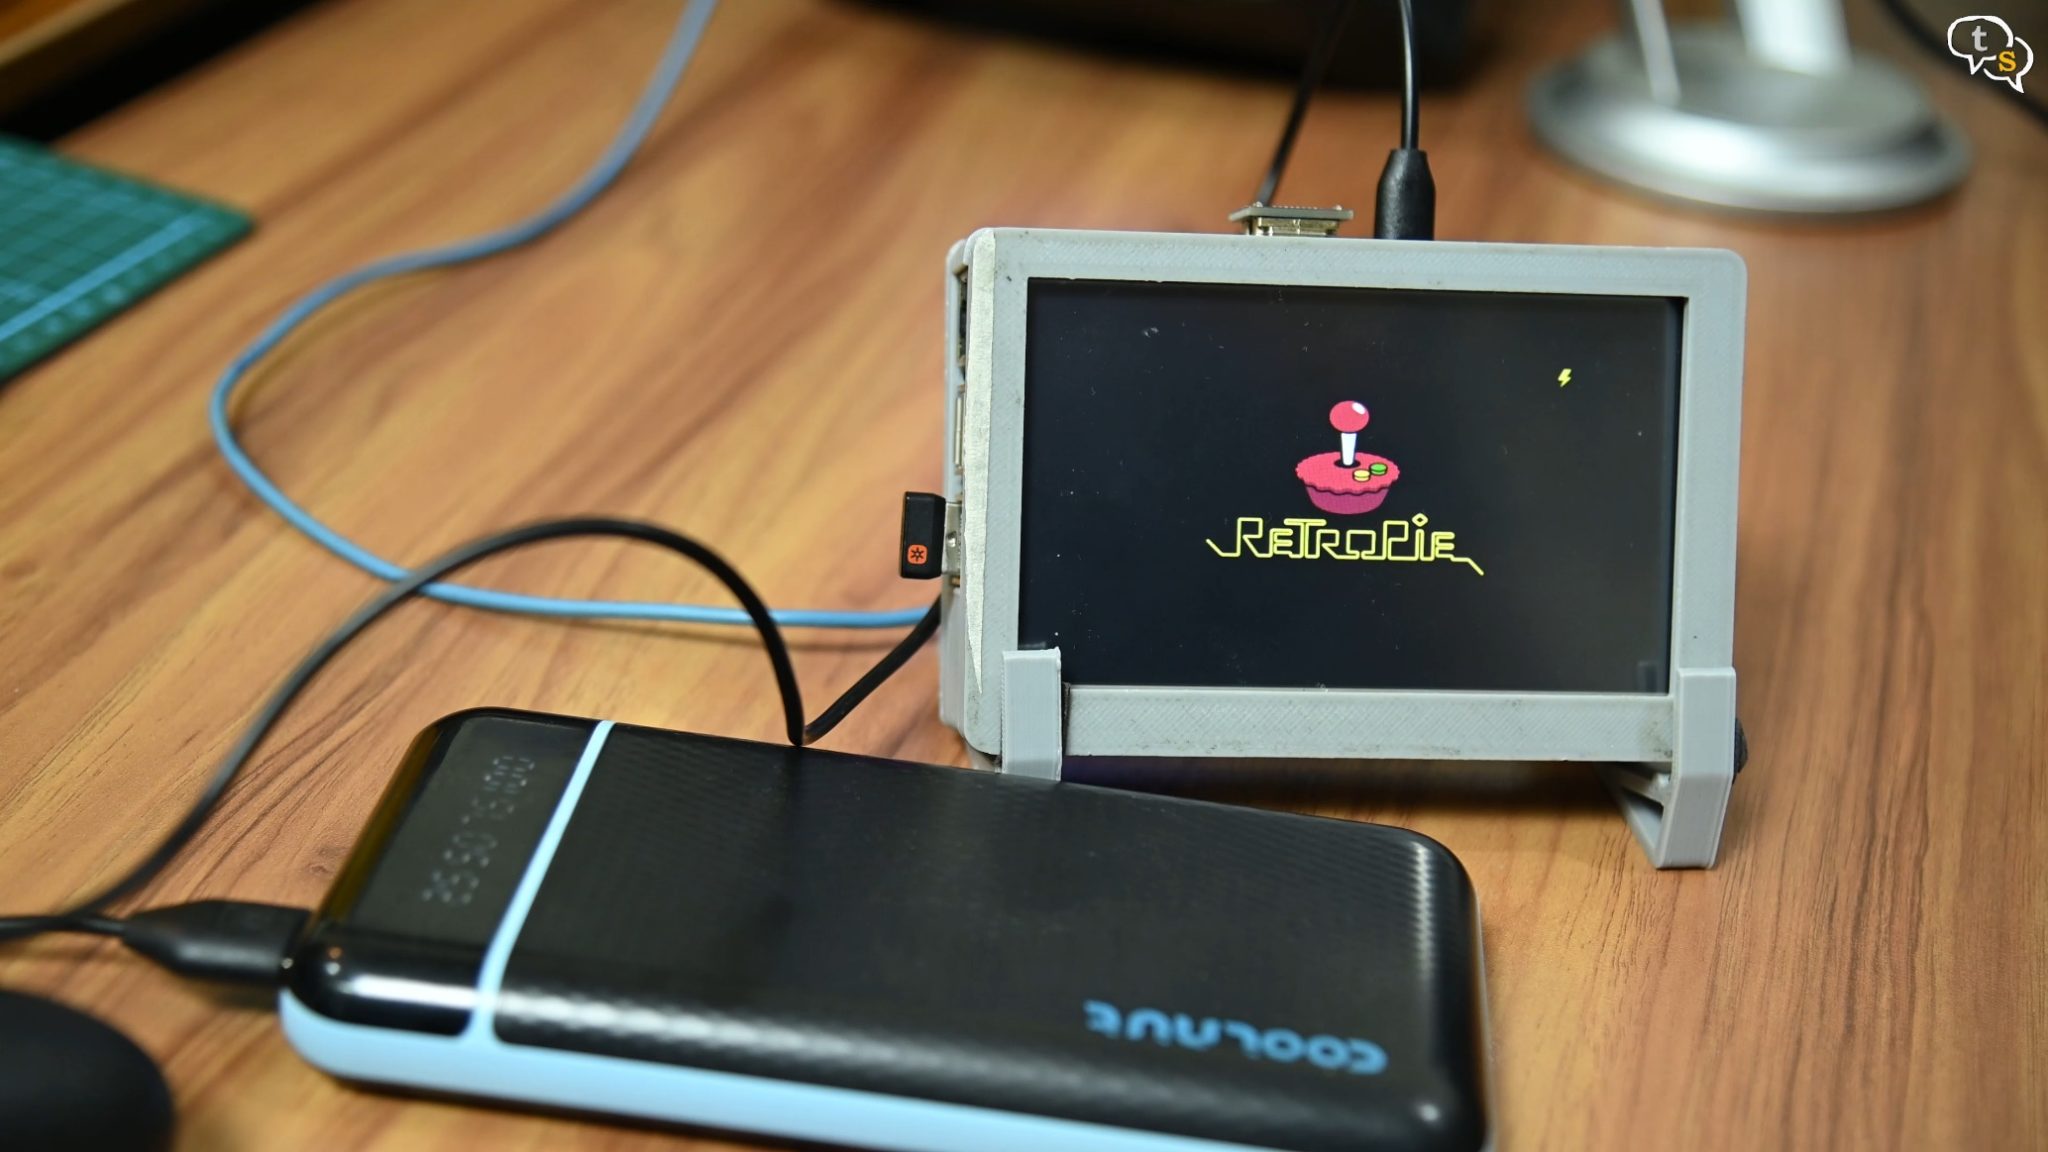
Now sure how long it will last but if you connect it to your car’s USB output it can keep the device almost indefinitely. And everything powers off a single micro-USB cable, the Raspberry Pi and the display.
I will have to check how the temps are and if it throttles, but it works and is effectively a portable gaming system. Wireless gamepad and wireless audio allow playing comfortably from a distance. You could use a bigger screen too, if you want but the case, I’ve shared will not fit bigger screens.
Some DIYr’s make their own arcade cabinets using RetroPie and custom controllers.
I’ve shared the Raspberry Pi, the 5-inch screen and also the stl for the case I’ve used if you want to make one for yourself.
So if you like retro games, and with the Raspberry Pi not being that expensive it’s a great DIY retro gaming console. You would use it directly with a TV if you don’t want to carry it around.