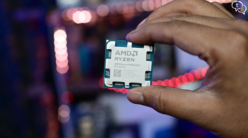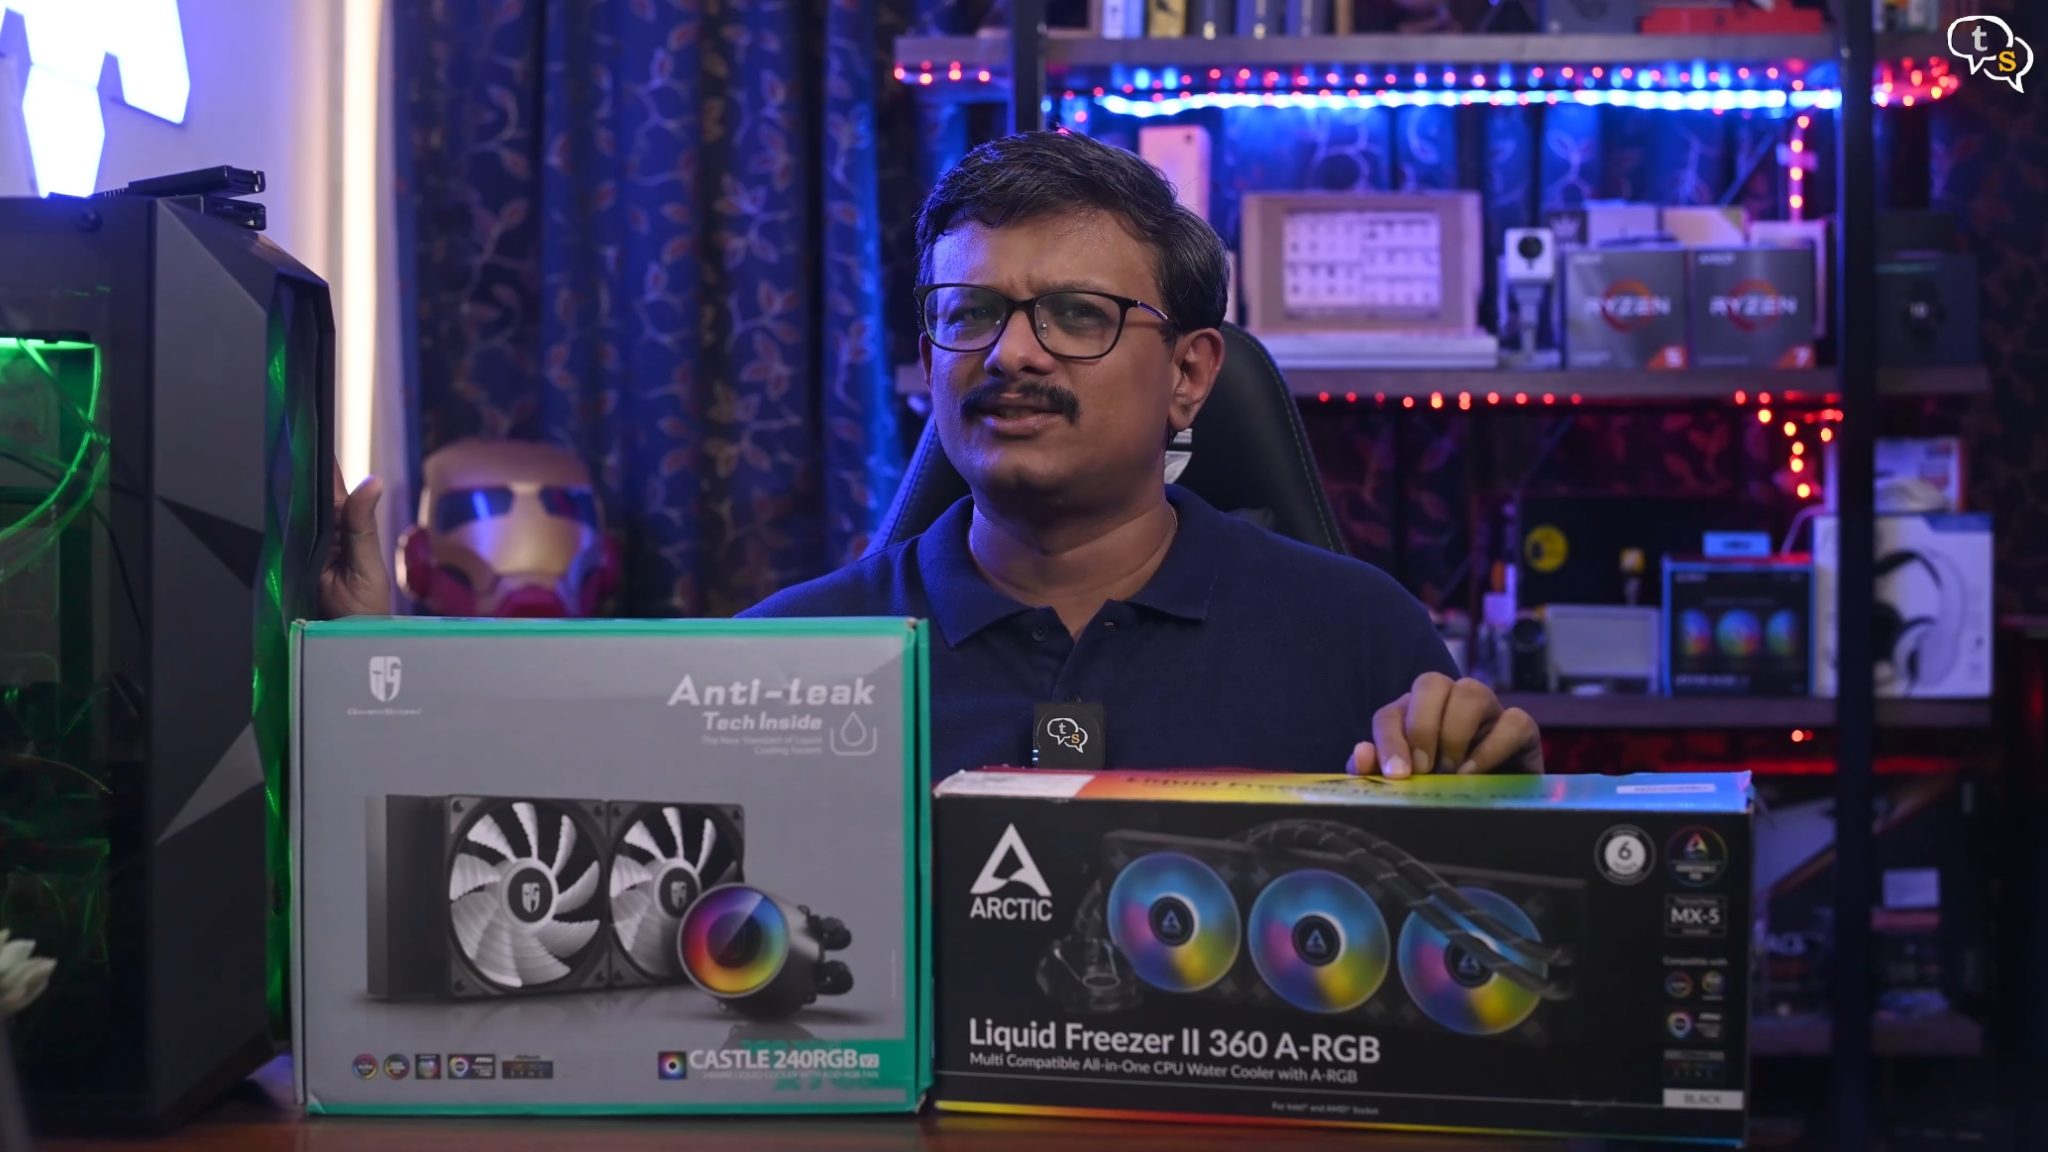
I’m using an AMD 5800X in my main desktop, and this processor is known to run notoriously hot. The Deepcool Castle 240 RGB does it’s best to keep temperatures under control, but on full load it just crosses the 90-degree mark. As the temps increase, there are chances of the processor throttling and you get lower performance. To rectify that I’m upgrading to the Arctic Liquid Freezer II 360 A-RGB, I’ve heard a lot of nice things about this cooler so let’s test it out and see if it performs better than the Deepcool castle 240.
This is the Arctic Liquid Freezer II 360 A-RGB, that’s a mouthful. It is compatible with both Intel and AMD sockets but be informed it doesn’t support Threadripper. This is the ARGB variant, there is a SKU available without RGB if you don’t need it and save a bit of money.
It’s compatible with most manufacturer RGB software, like ASUS Aura Sync, Gigabyte’s RGB Fusion, MSI Mystic Light and ASrock Polychrome Sync.
This is the black version. A 6-year Limited warranty is offered by Arctic.
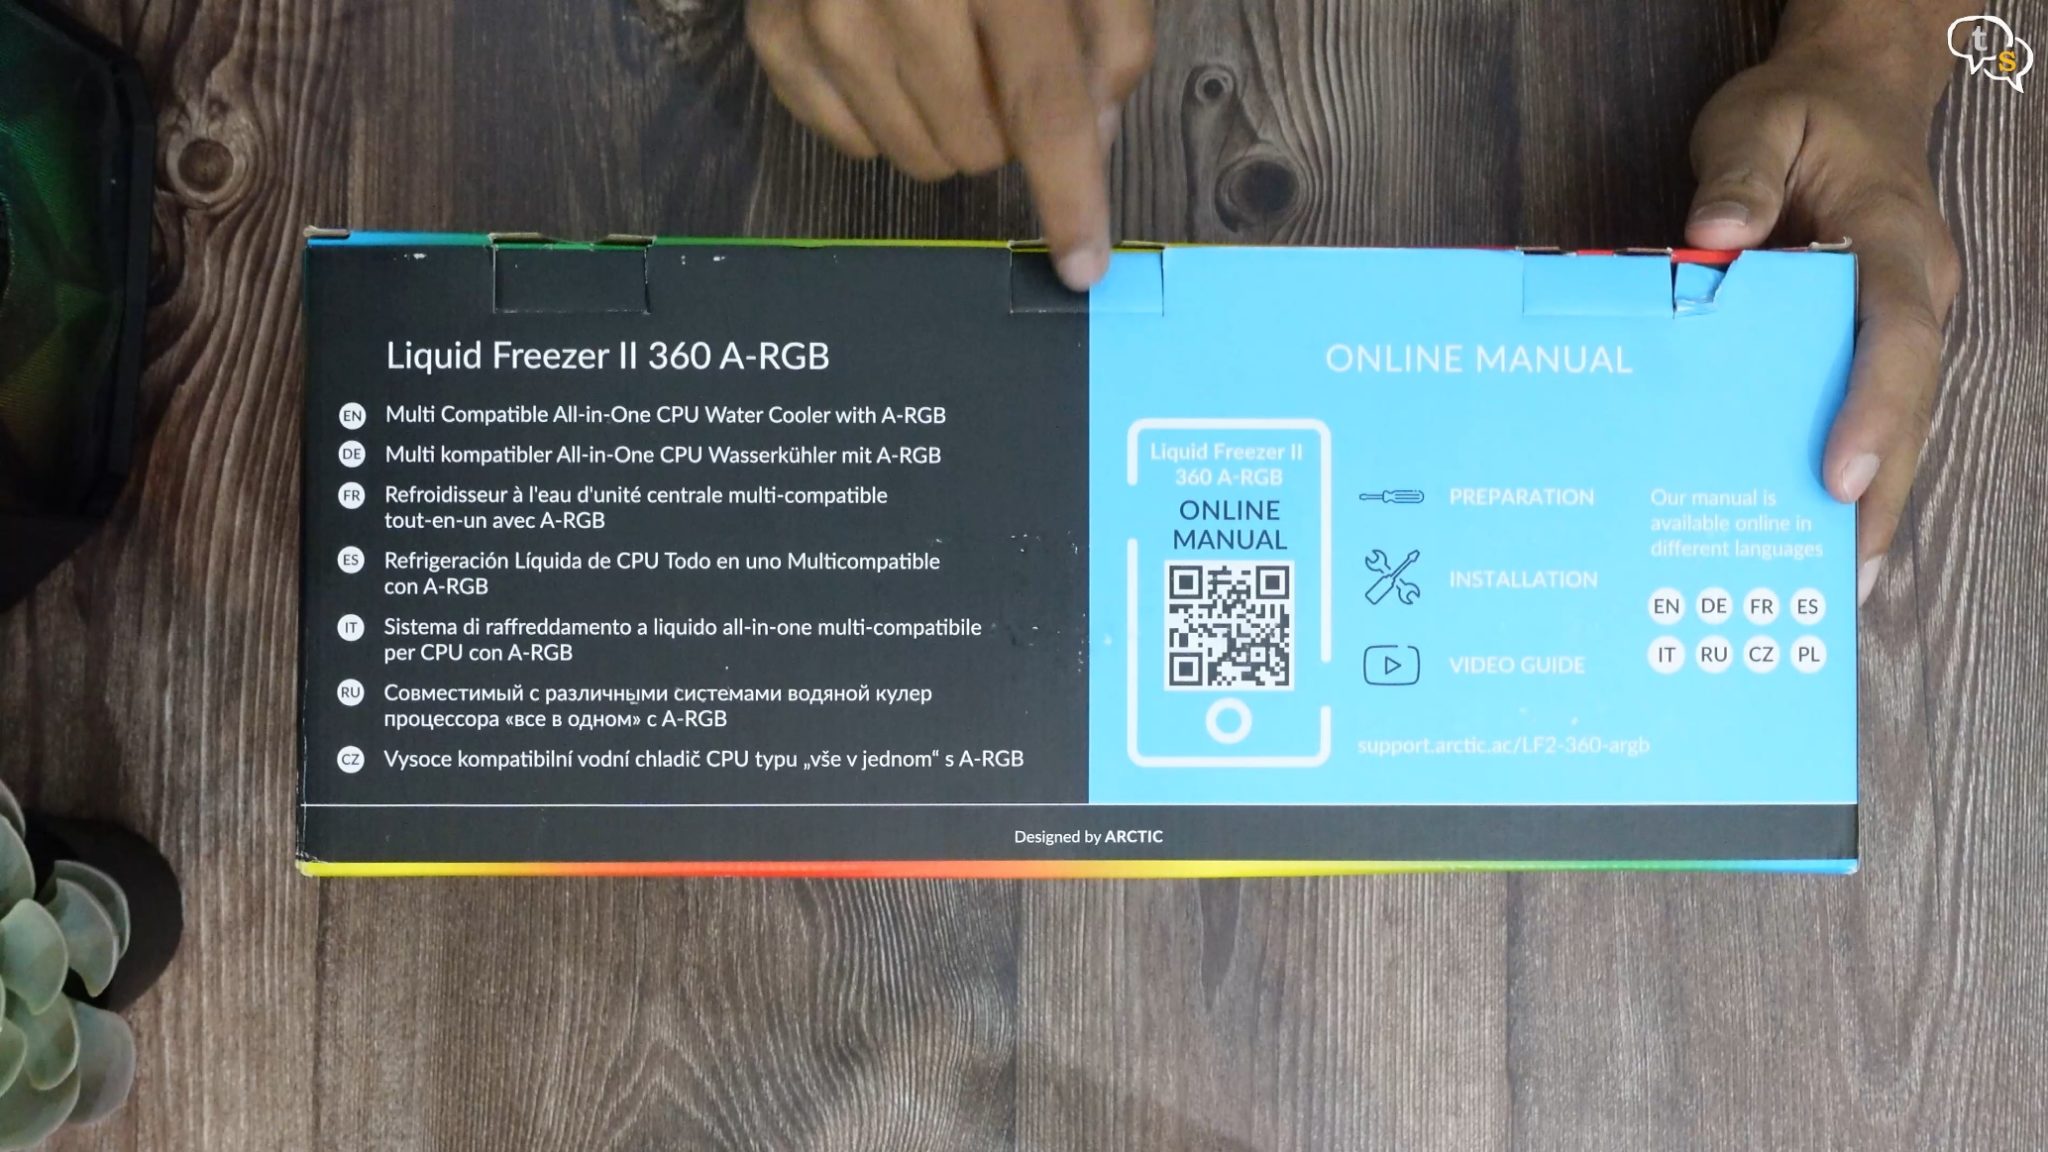
There is no manual in the box, and this QR code here redirects you to their website. So, you will need a device on hand to have the manual accessible.
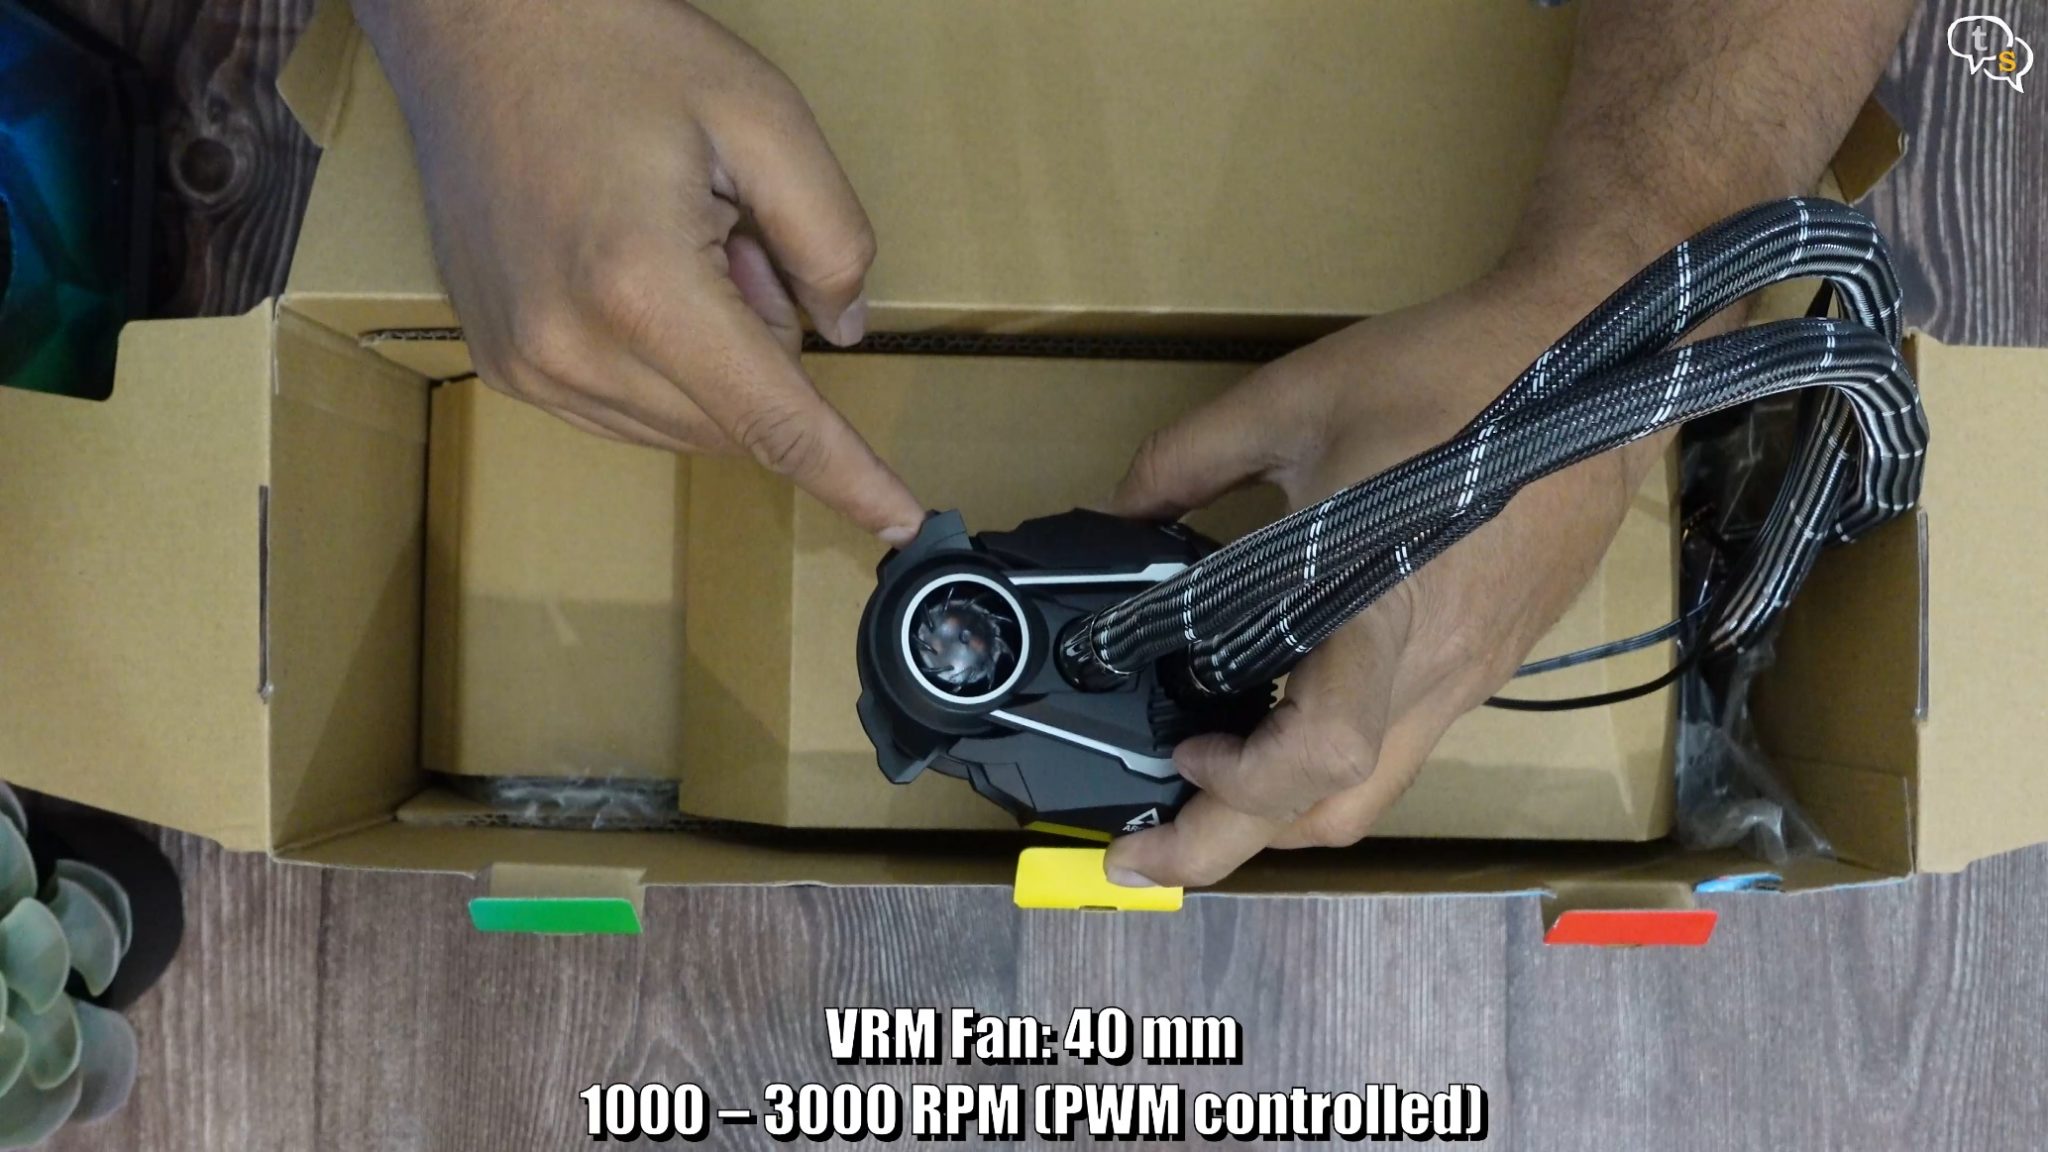
Let’s open up the box and we have access to the pump first. This here is a small embedded fan which helps keep the VRM’s cool. Have not seen that on any other cooler. It’s a 40mm blower and can run at speeds between 1000-3000 RPM. As pumps generally block air supply to the VRM heatsinks this would help keep the motherboard’s power delivery system cool.
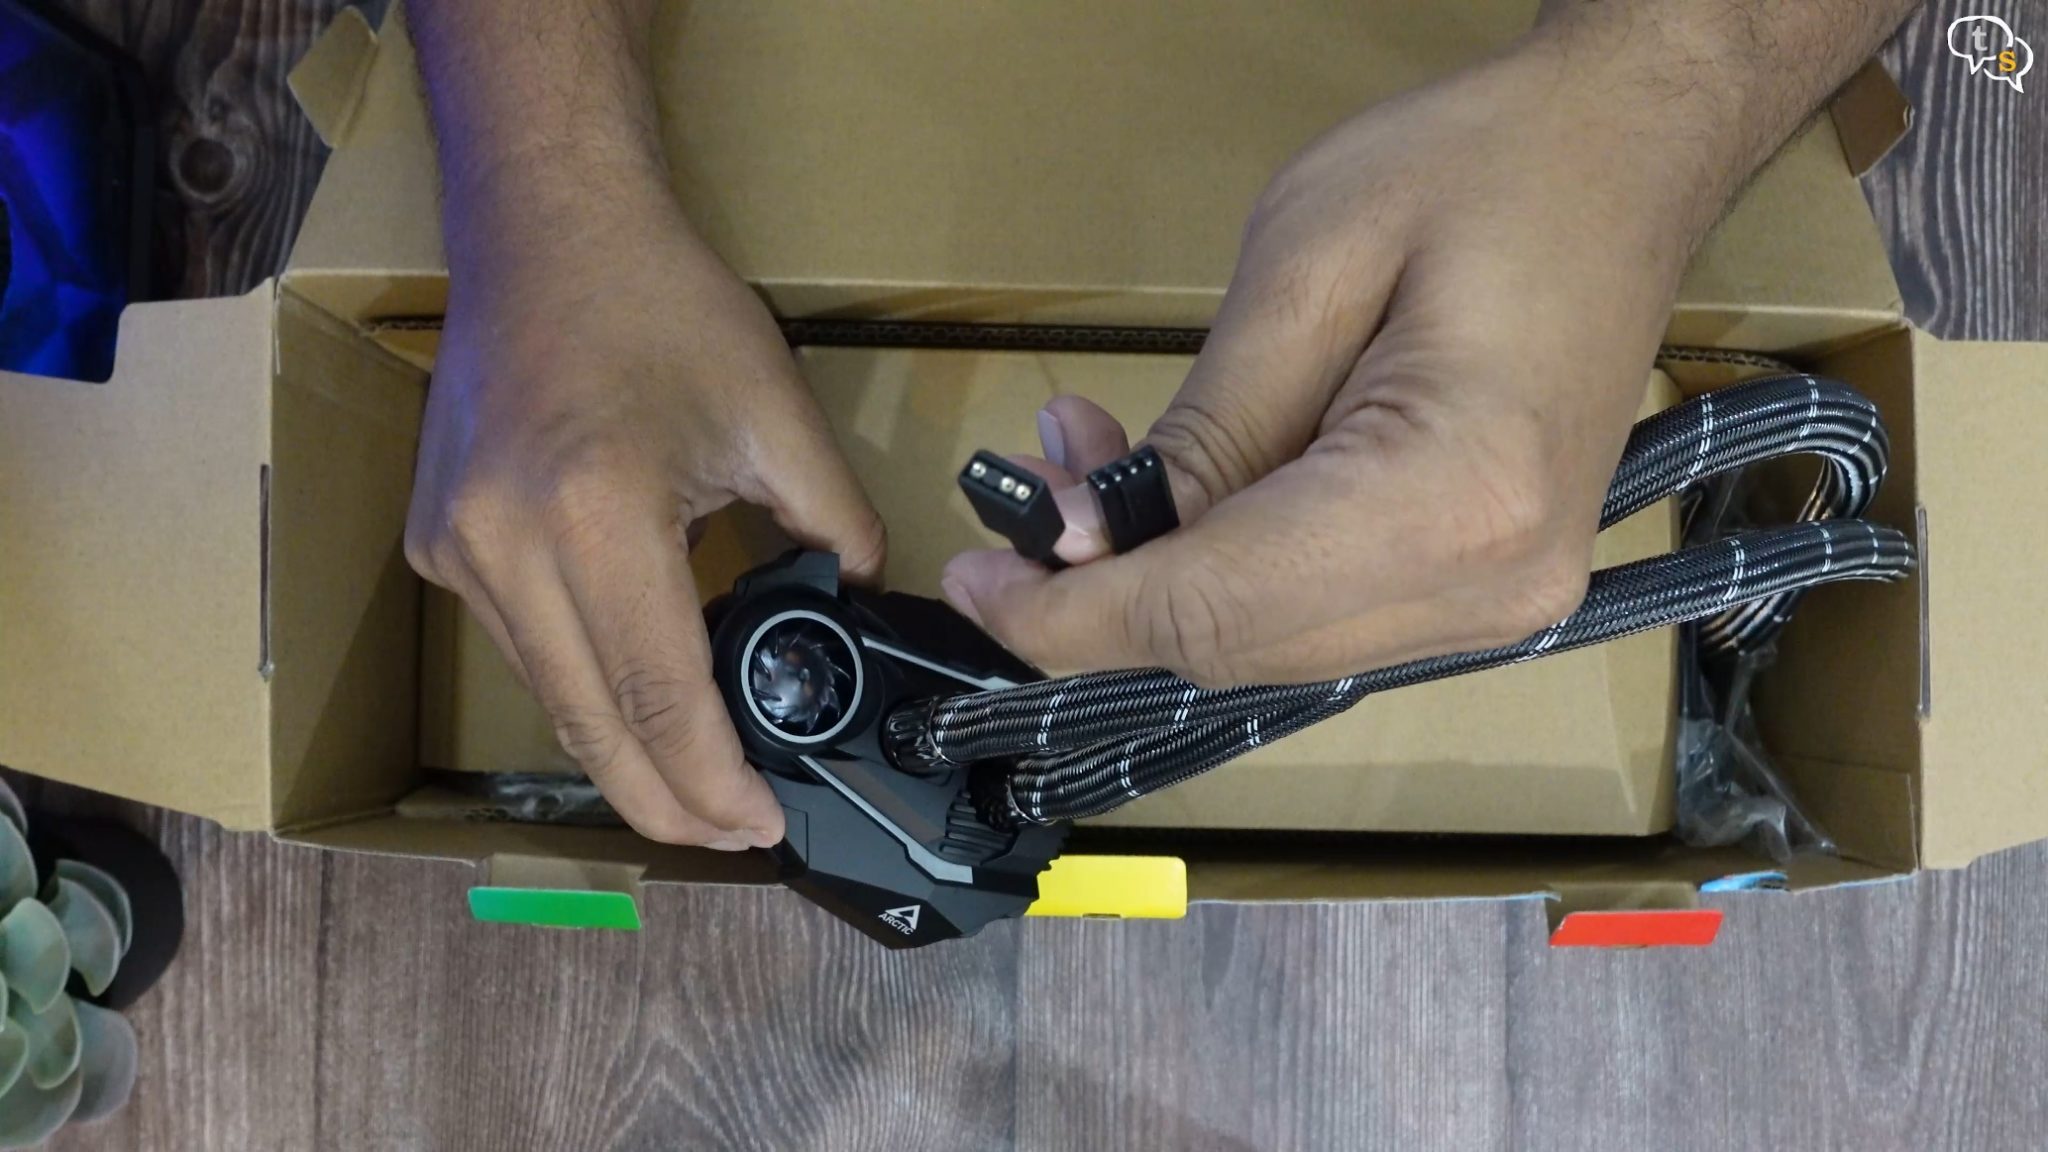
These are the ARGB and PWM connectors, there’s something special about these too, which I will get to in a bit.
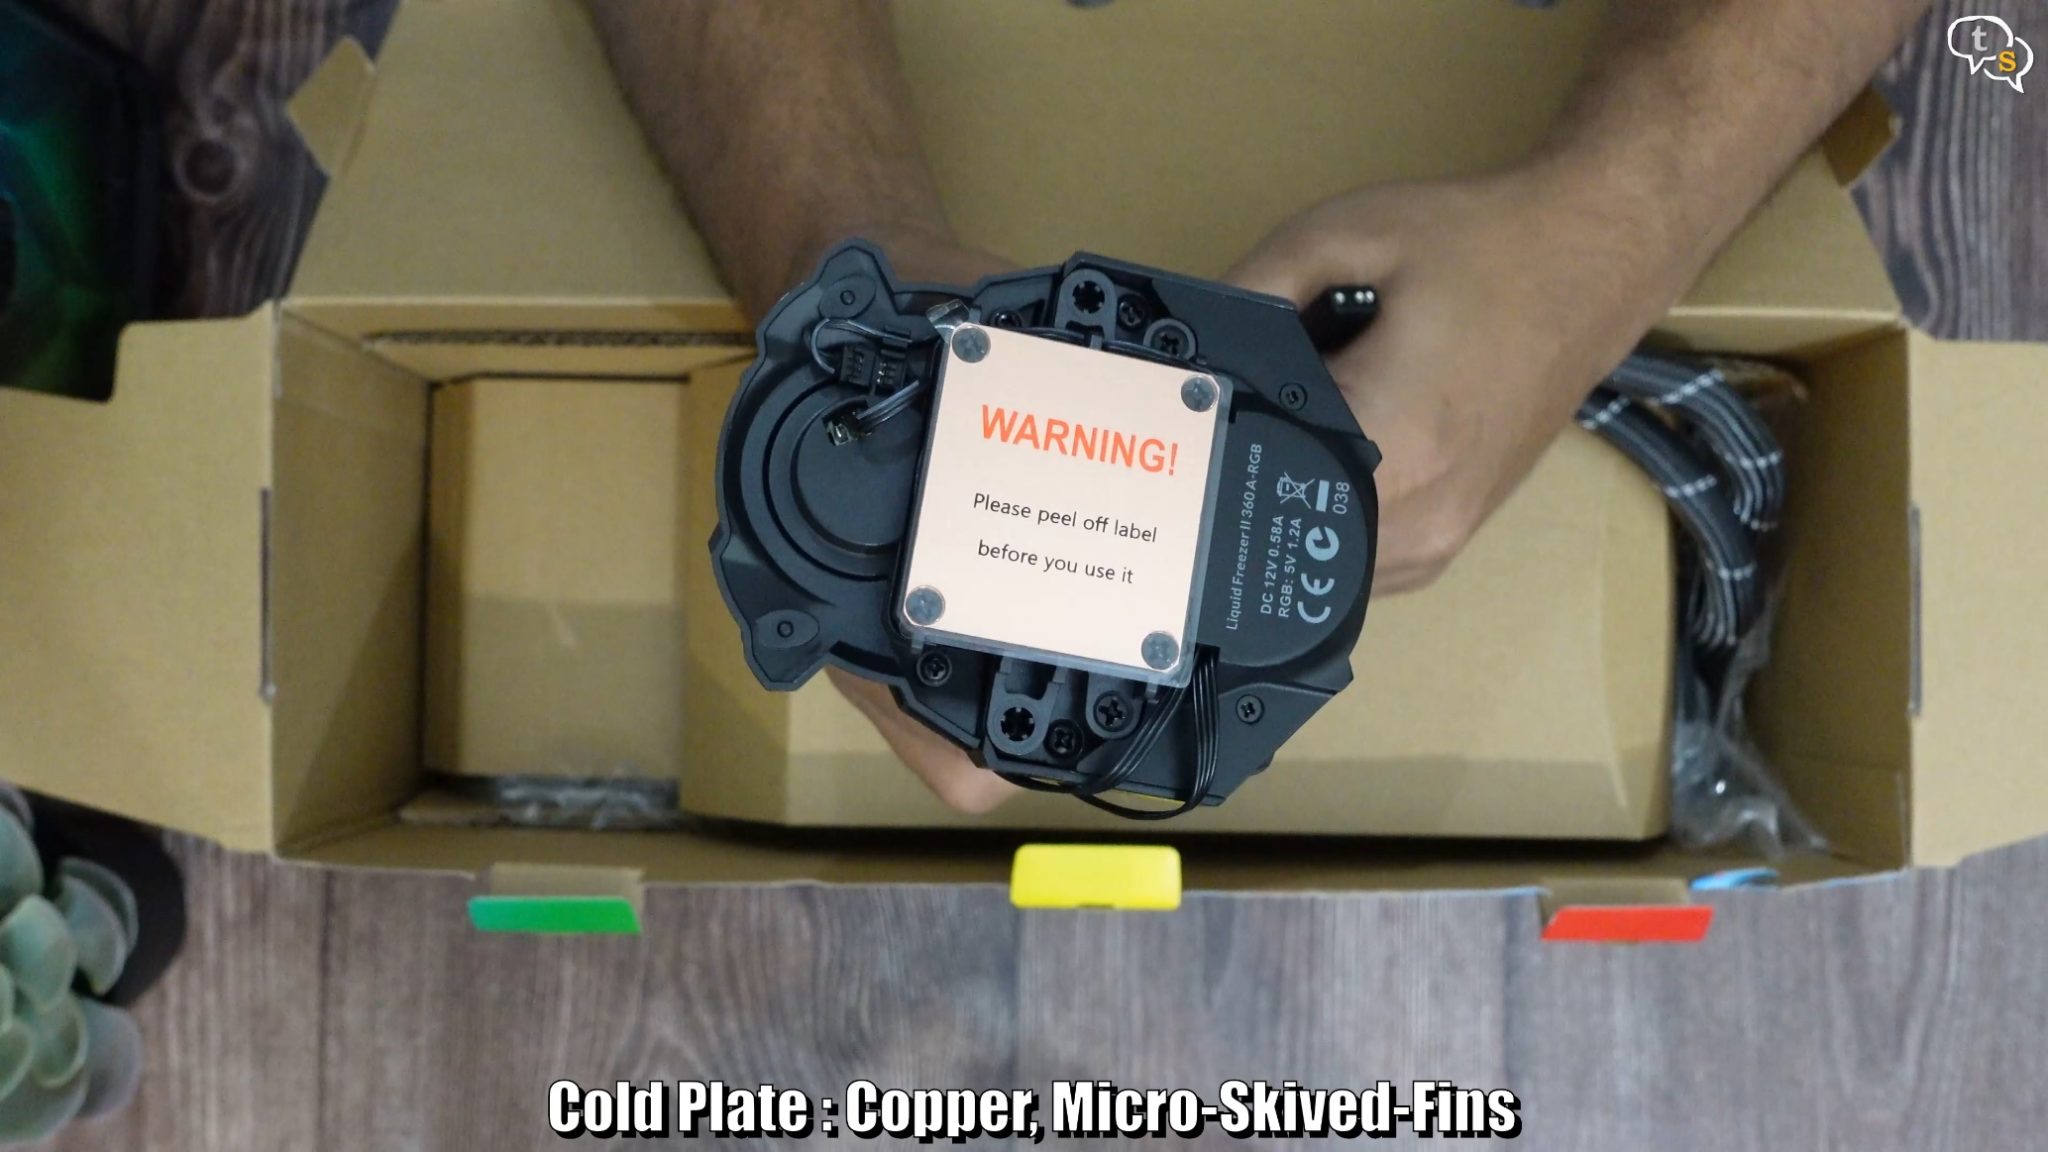
Here’s the cold plate, which internally has micro-skived fins. The size of the copper plate offers solid coverage for current intel and AMD processors. Not sure about LGA 1700 socket support though, mostly it will not.
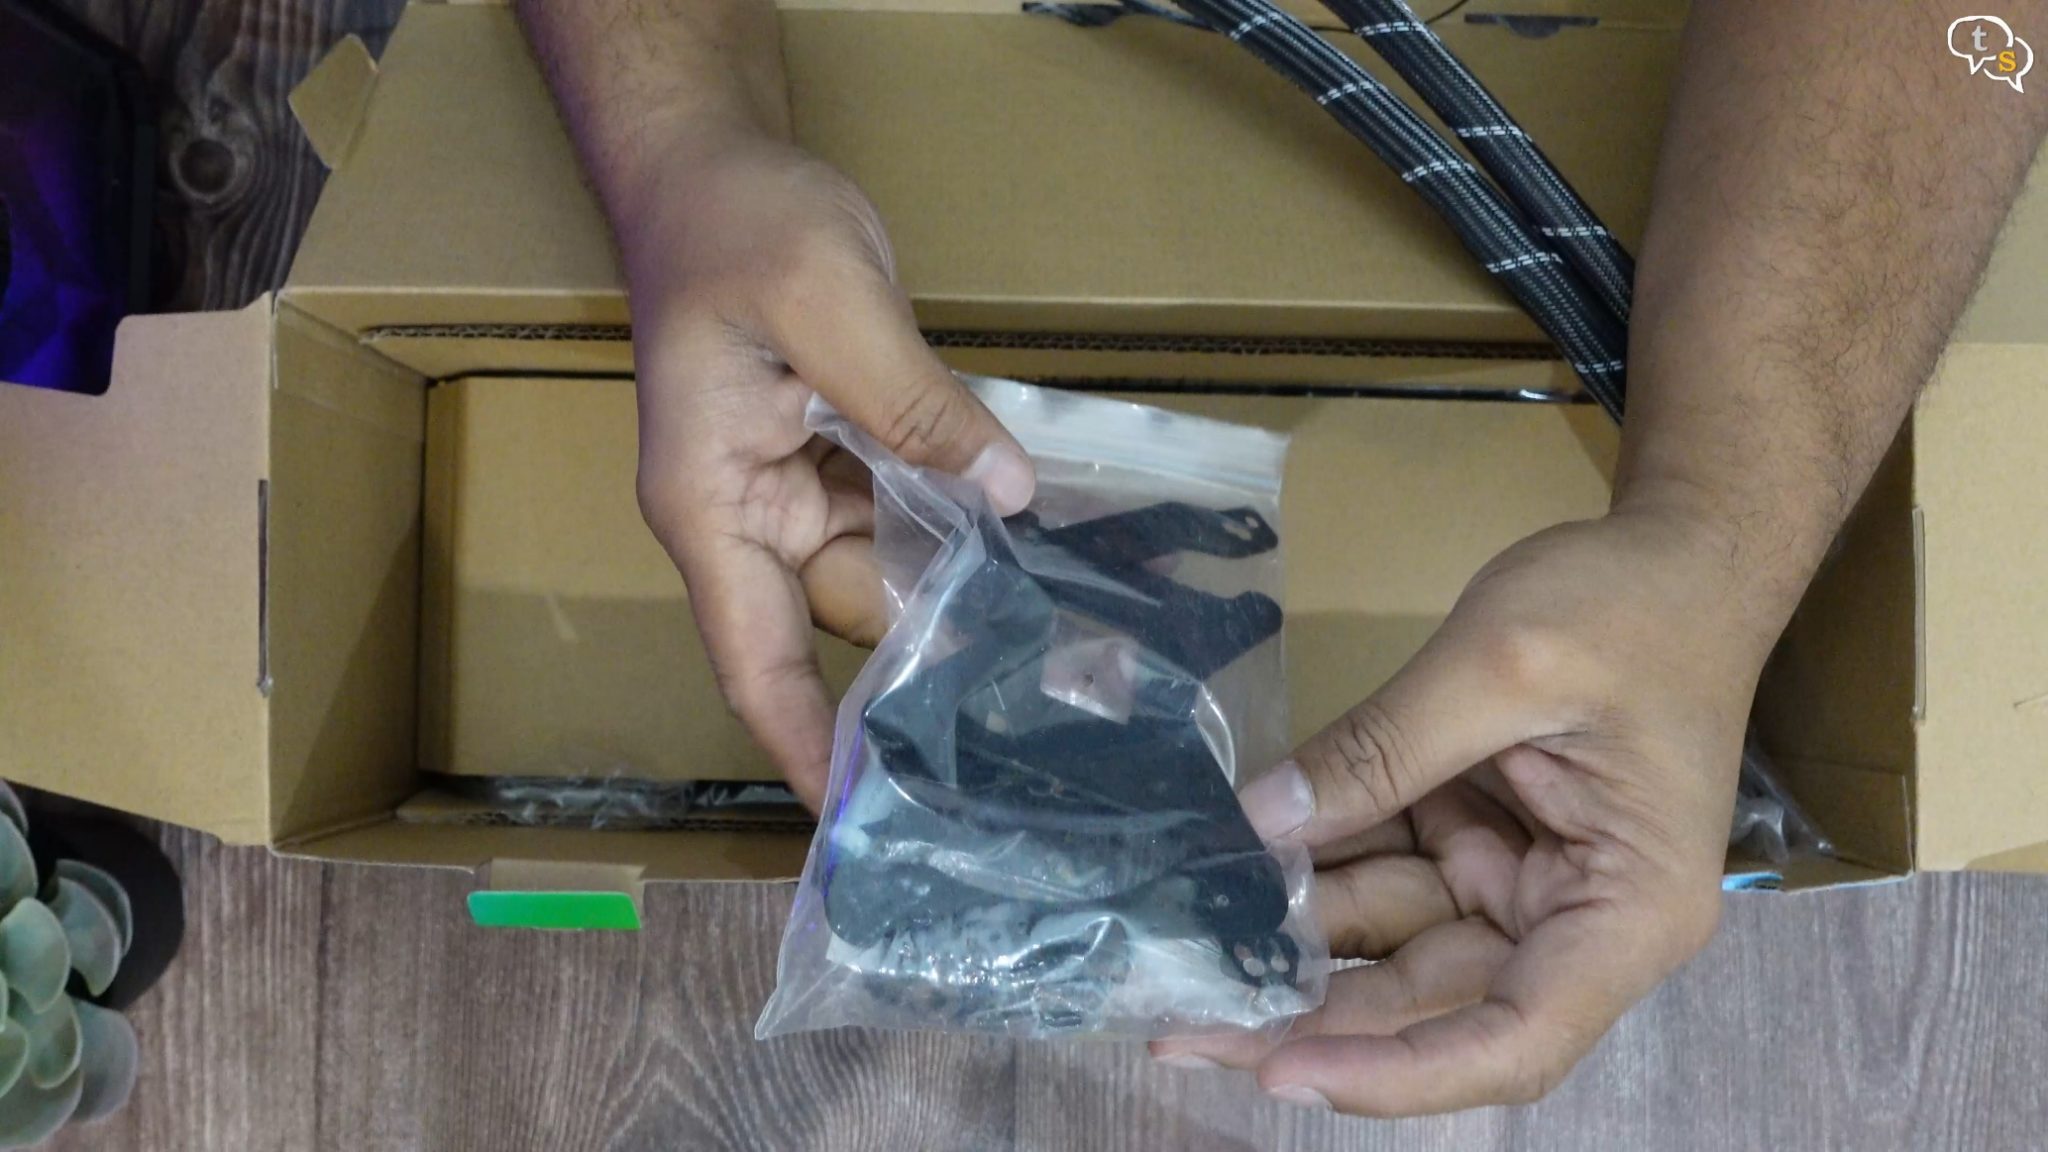
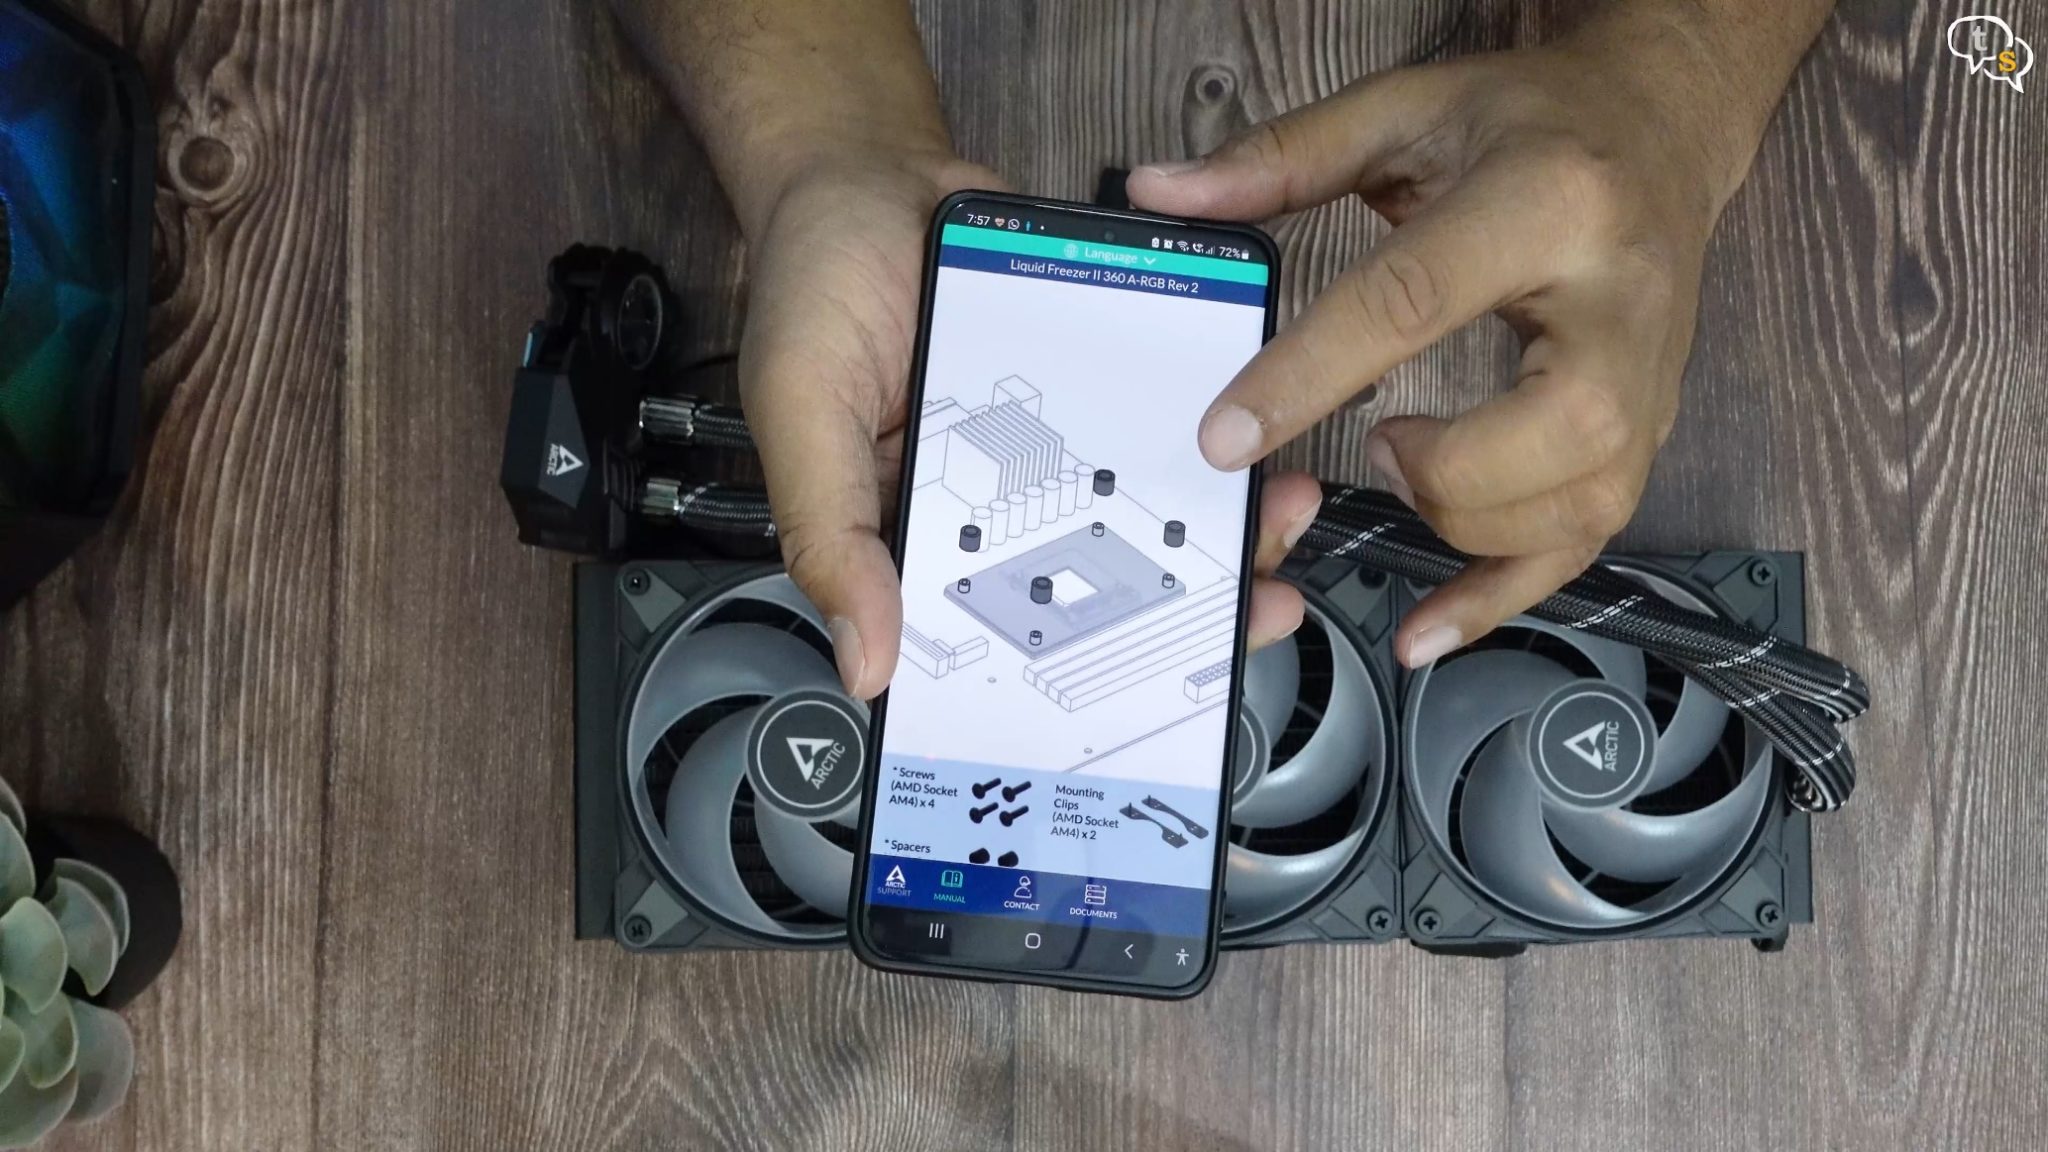
Here’s a set of mounting hardware for both AMD and Intel, choose appropriately.

It comes with a small 0.8 gram tube of MX-5 thermal paste which is one of the best thermal pastes from Arctic. They say it’s good enough for two installations, if you use the small dot method.
These are the mounting screws and other hardware.
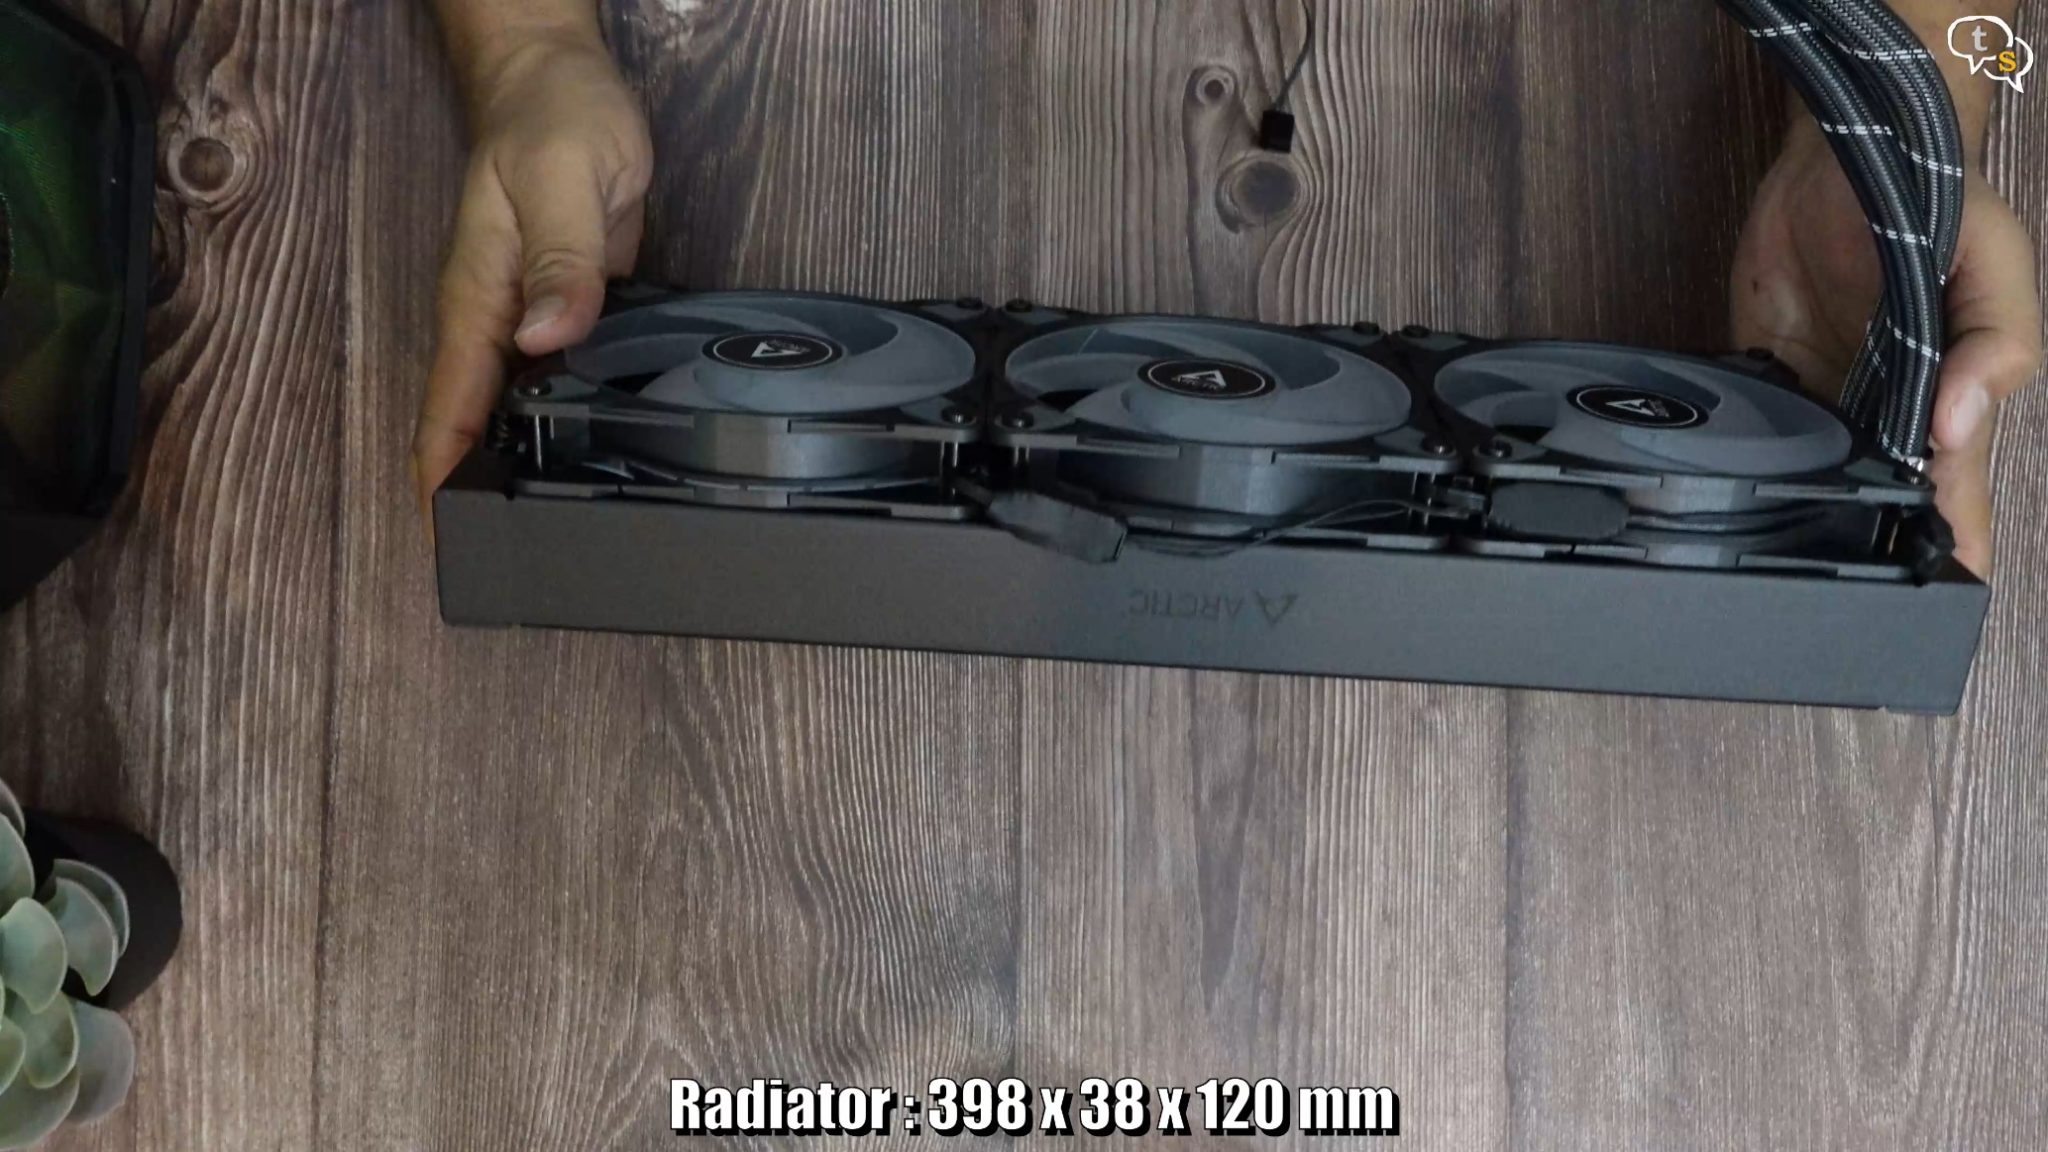
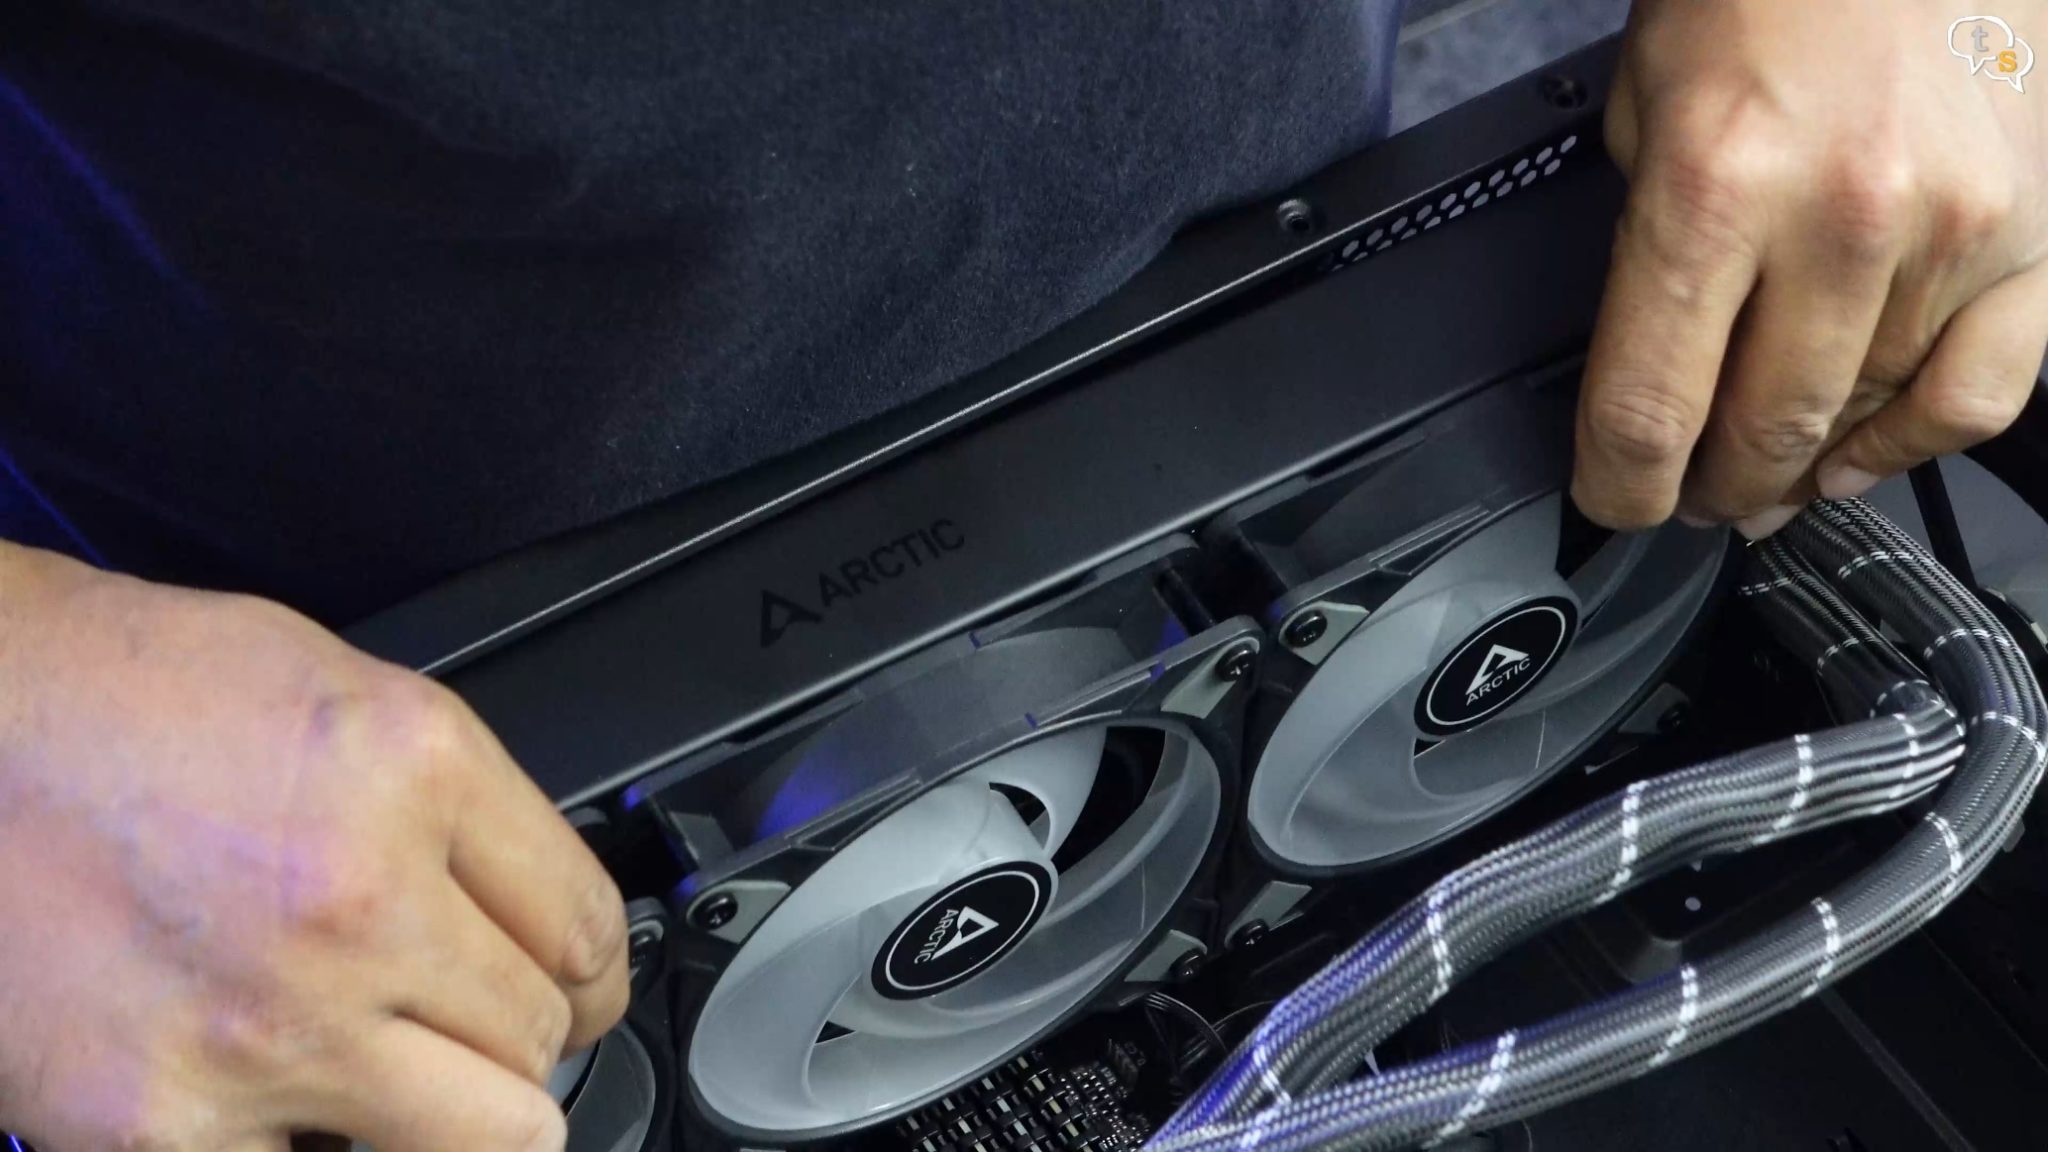
Let’s get to the radiator, whoa this is one thick radiator. It’s all black and comes with the fans pre-installed in an exhaust configuration. The radiator is 38mm thick and has the Arctic logo on it.
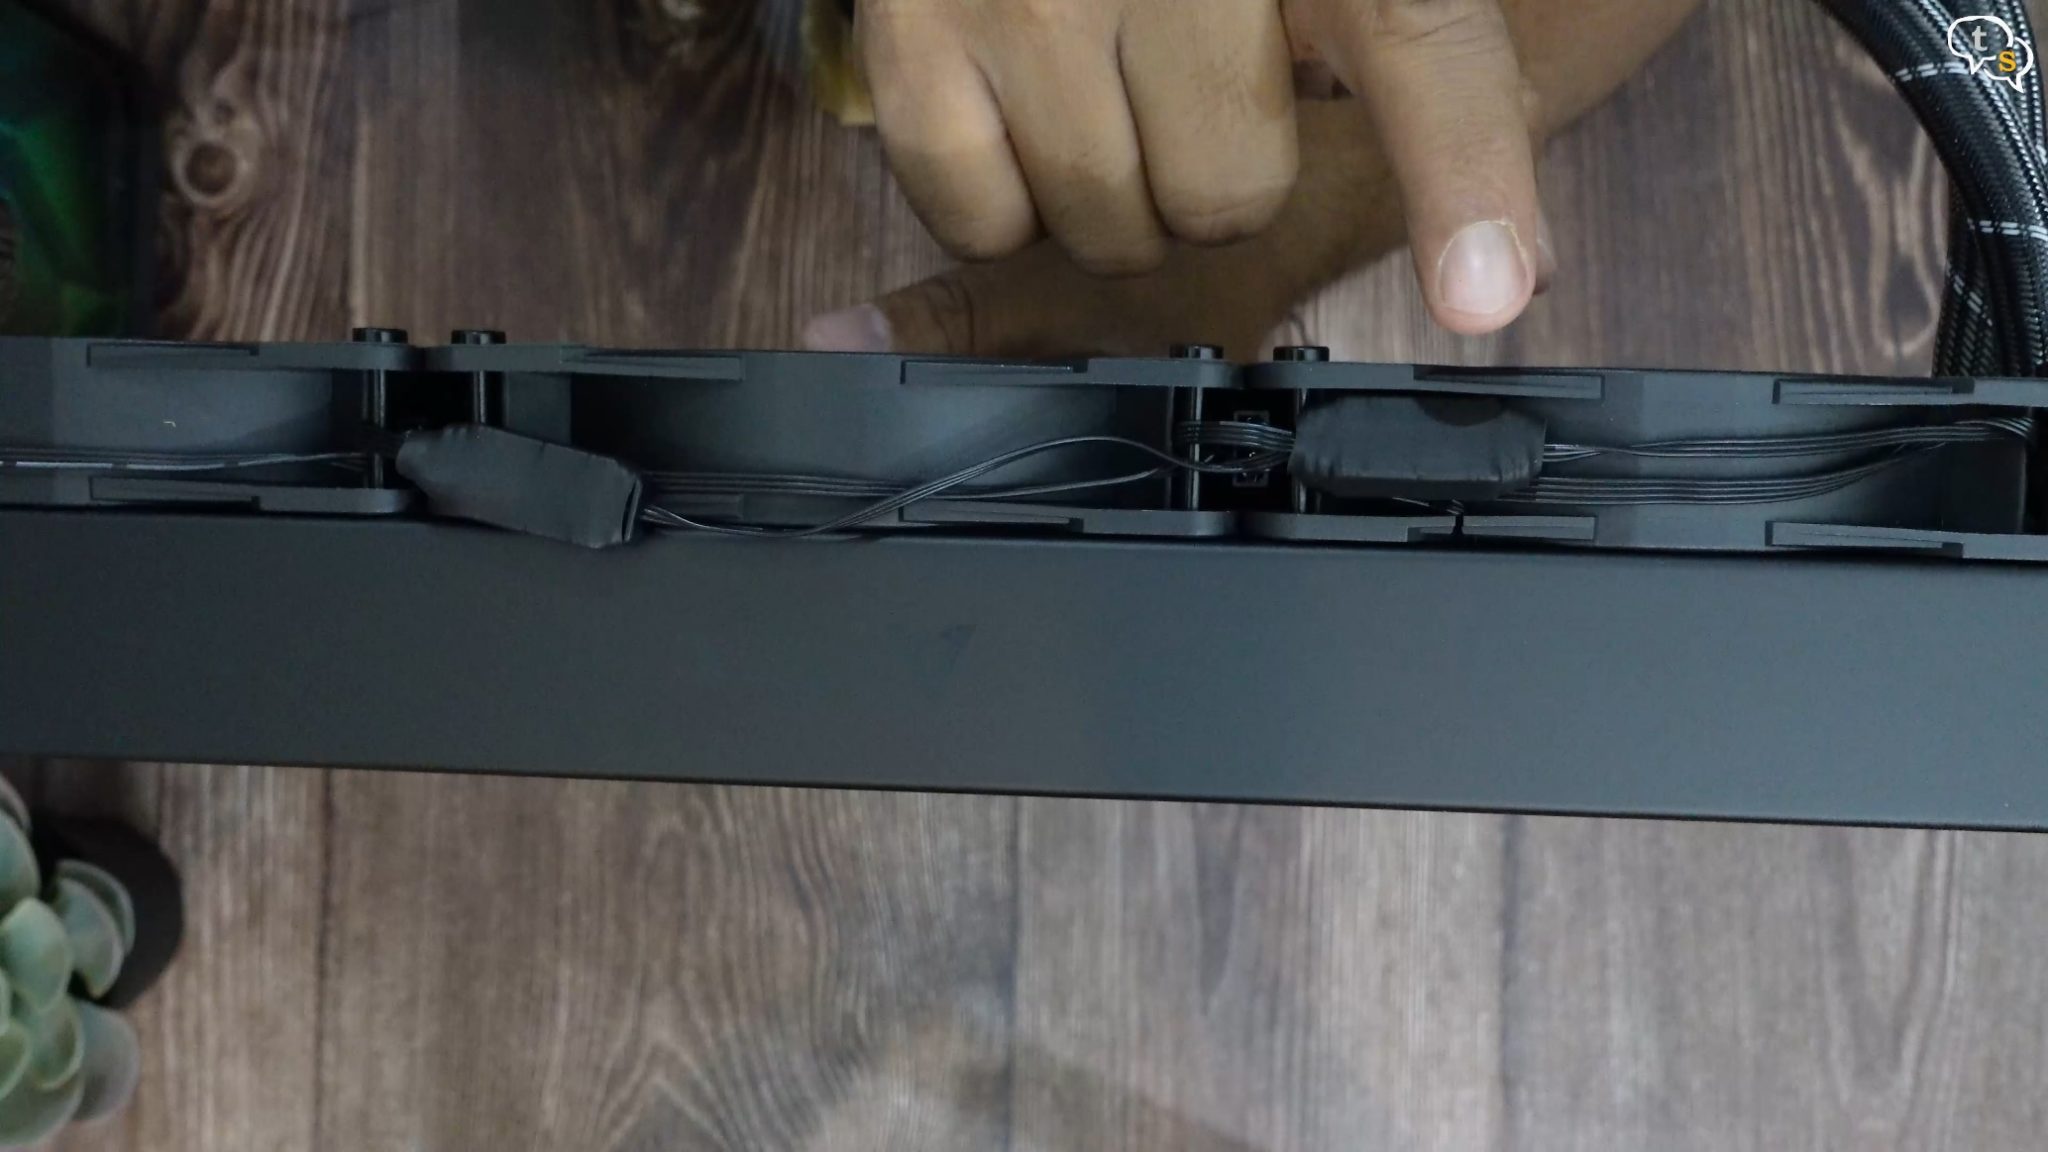
The fans have integrated cable management, as visible here they’re daisy chained and have shrink wrap over the connectors. All that runs through the fibre tubes and terminates to one ARGB and one PWM connector. No hubs required, just connect these to the motherboard and the pump, fans and RGB all work, reducing clutter. My Deepcool castle 240 provided two hubs one for RGB and the other for PWM and had three sets of wires for each running to these hubs. The single cable on the Arctic Liquid cool 360 makes cable management so much easier.
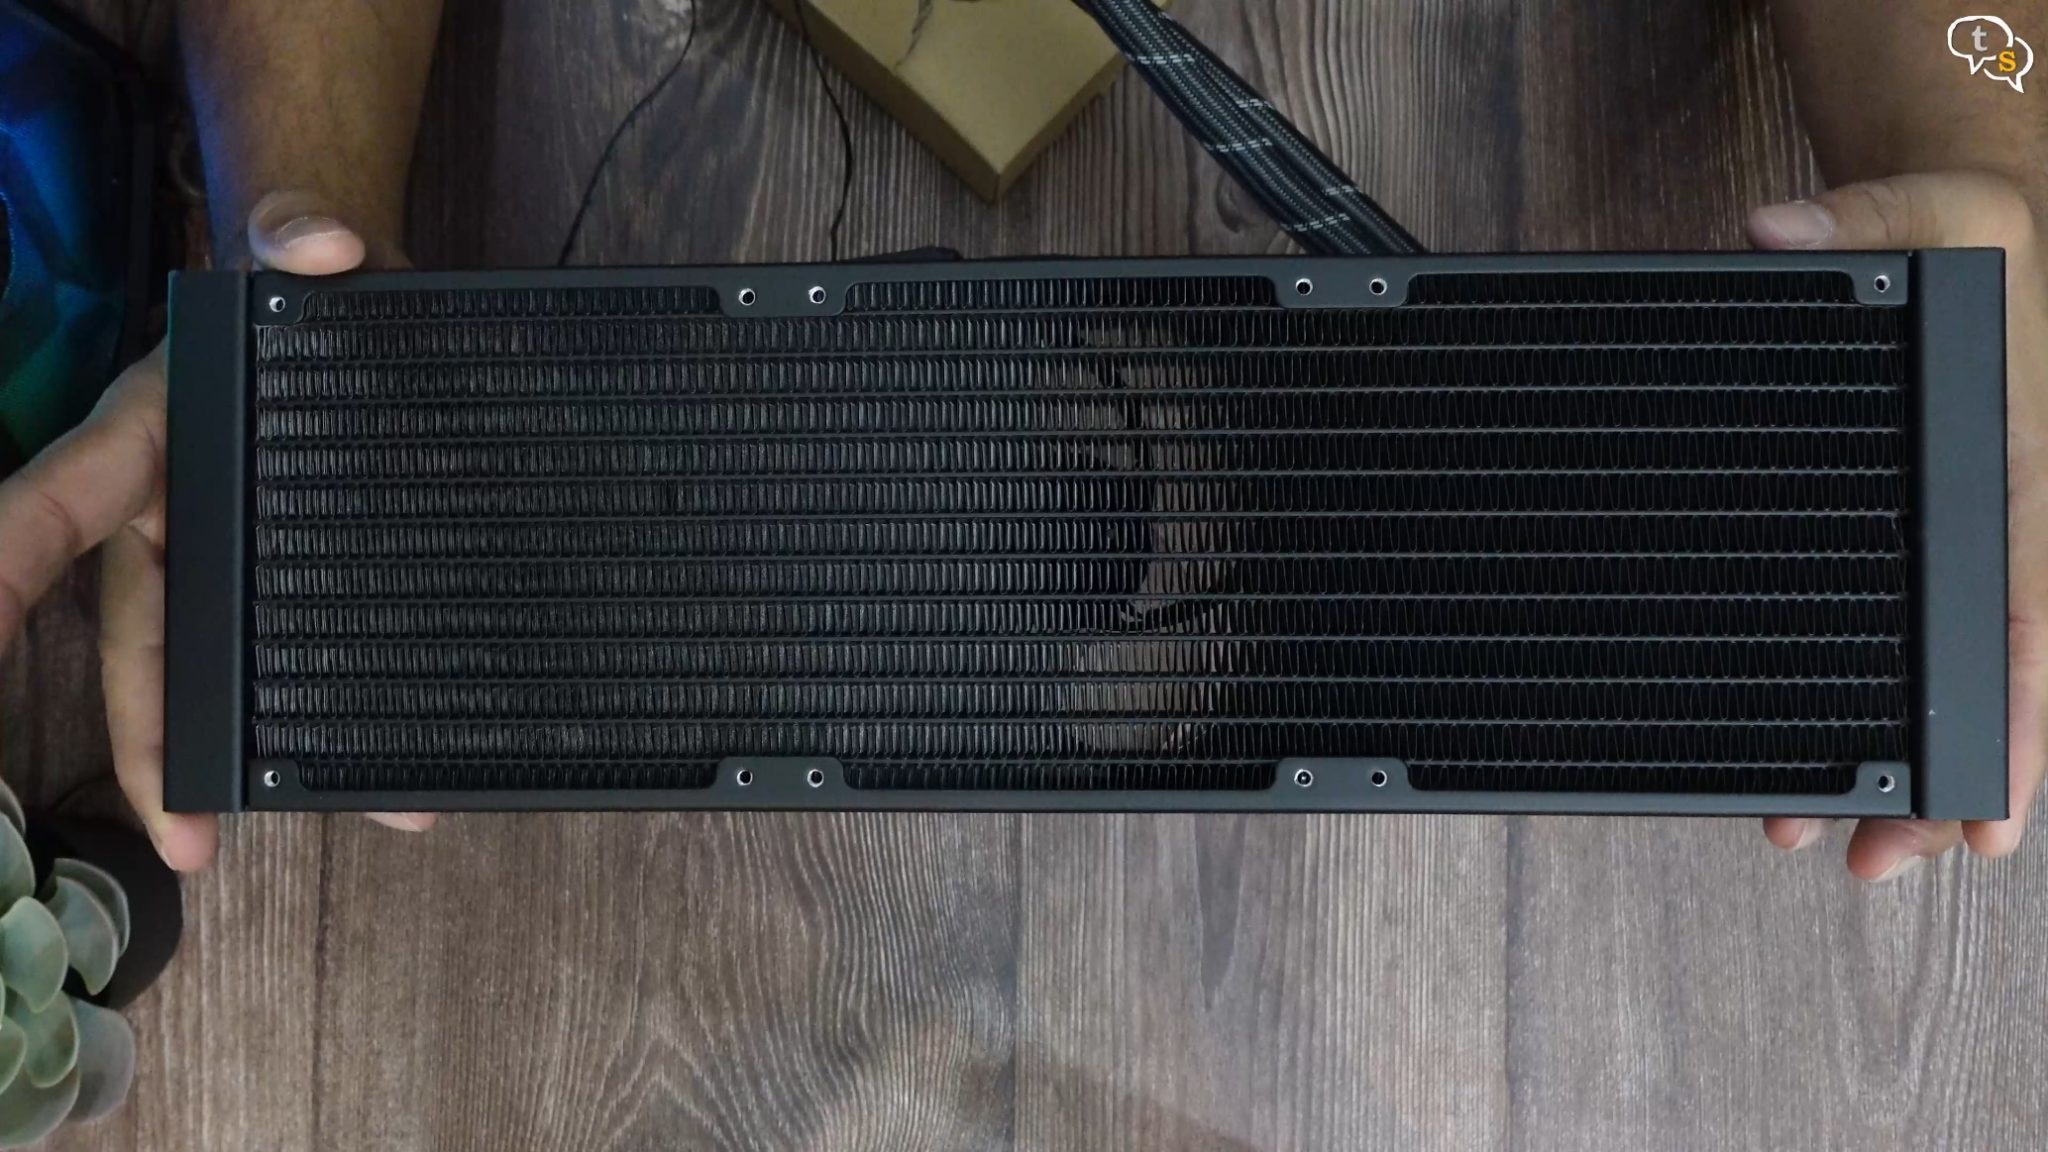
The radiator is aluminium and thicker than usual, I will have to test fit it in the case before Installation.
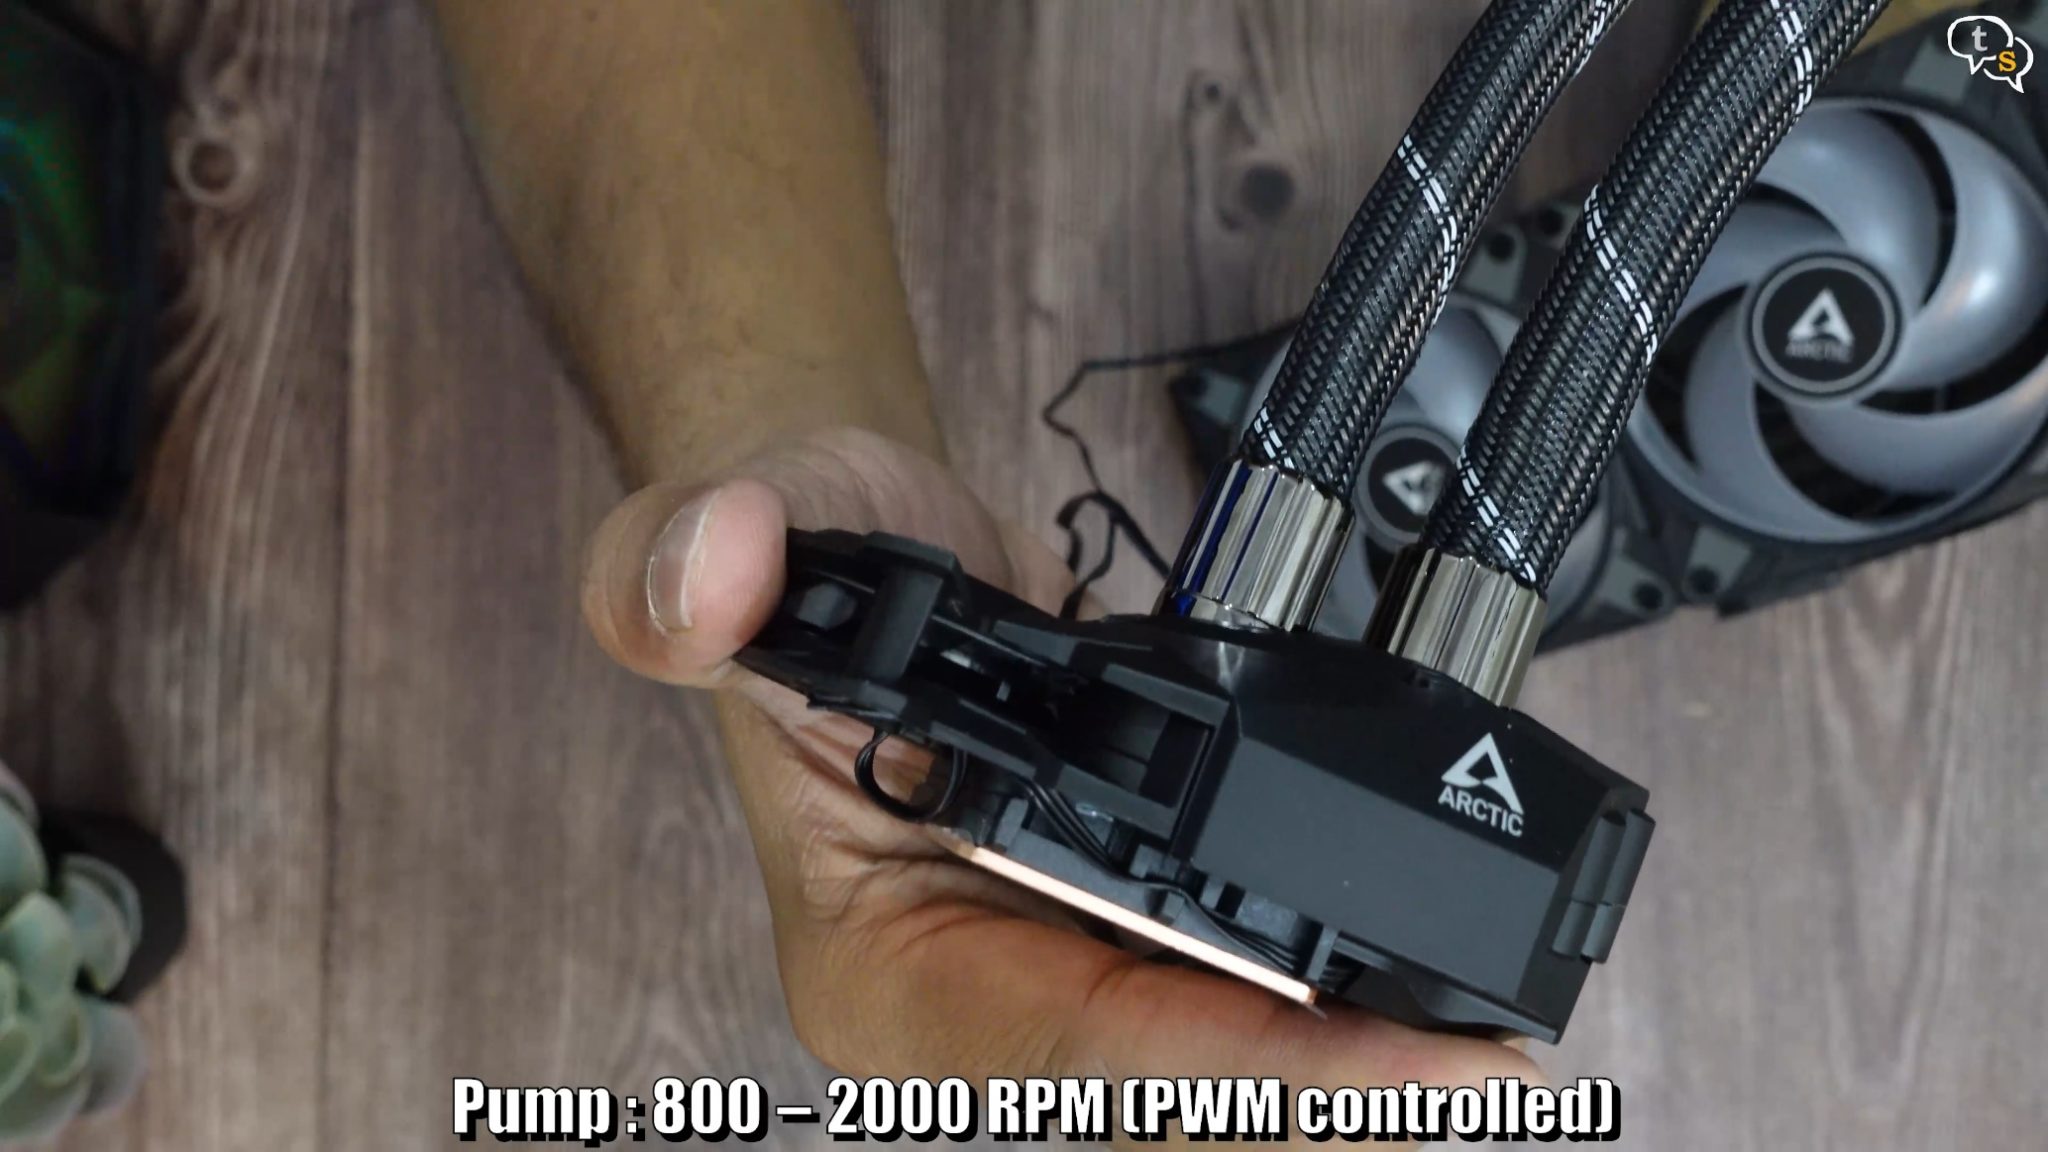
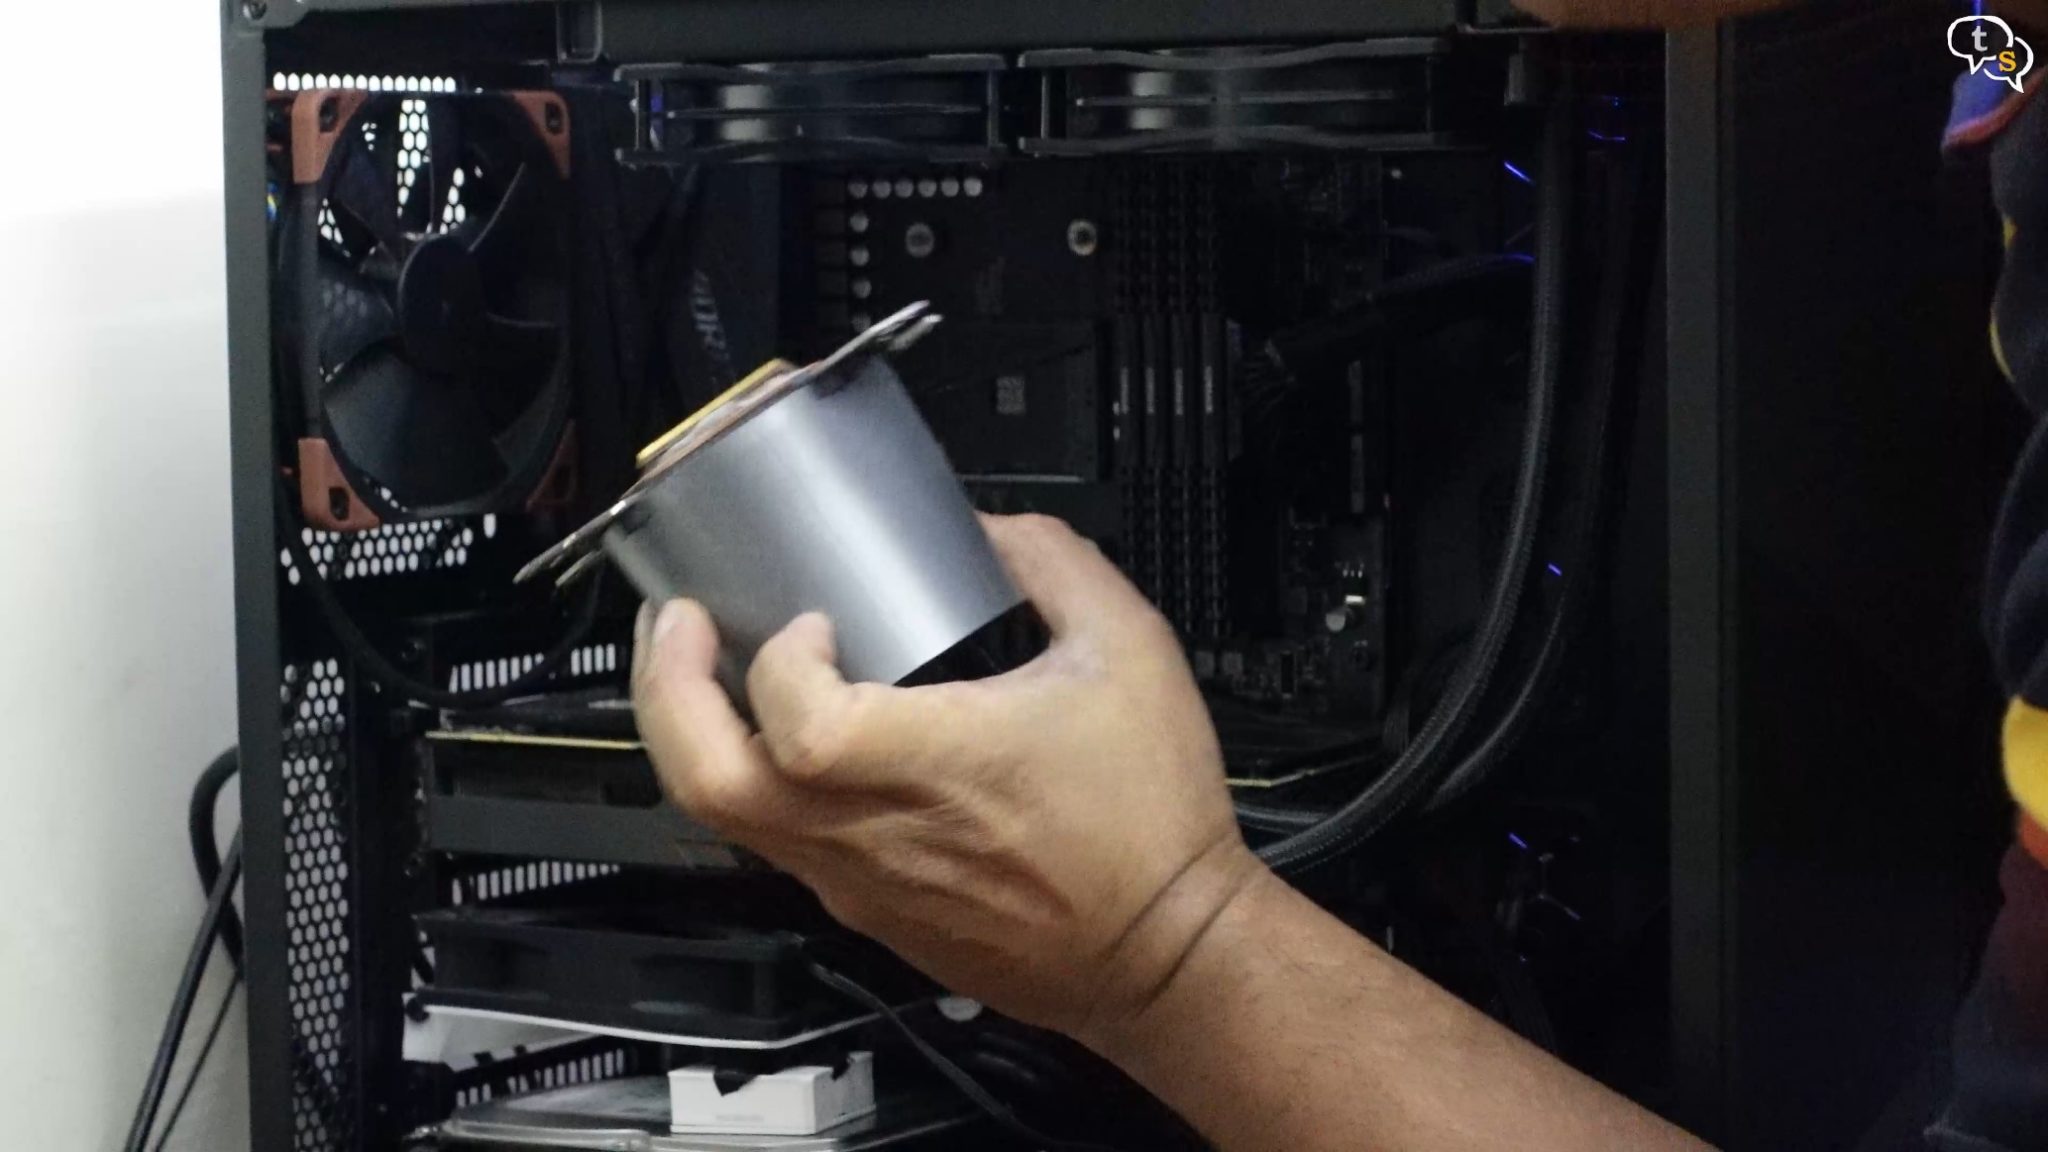
This is Arctic’s in-house designed pump, it is pwm controlled and rated for speeds between 800-2000 RPM. The block is big, looks like a spaceship. The fan housing is translucent, but doesn’t have RGB lighting from within.
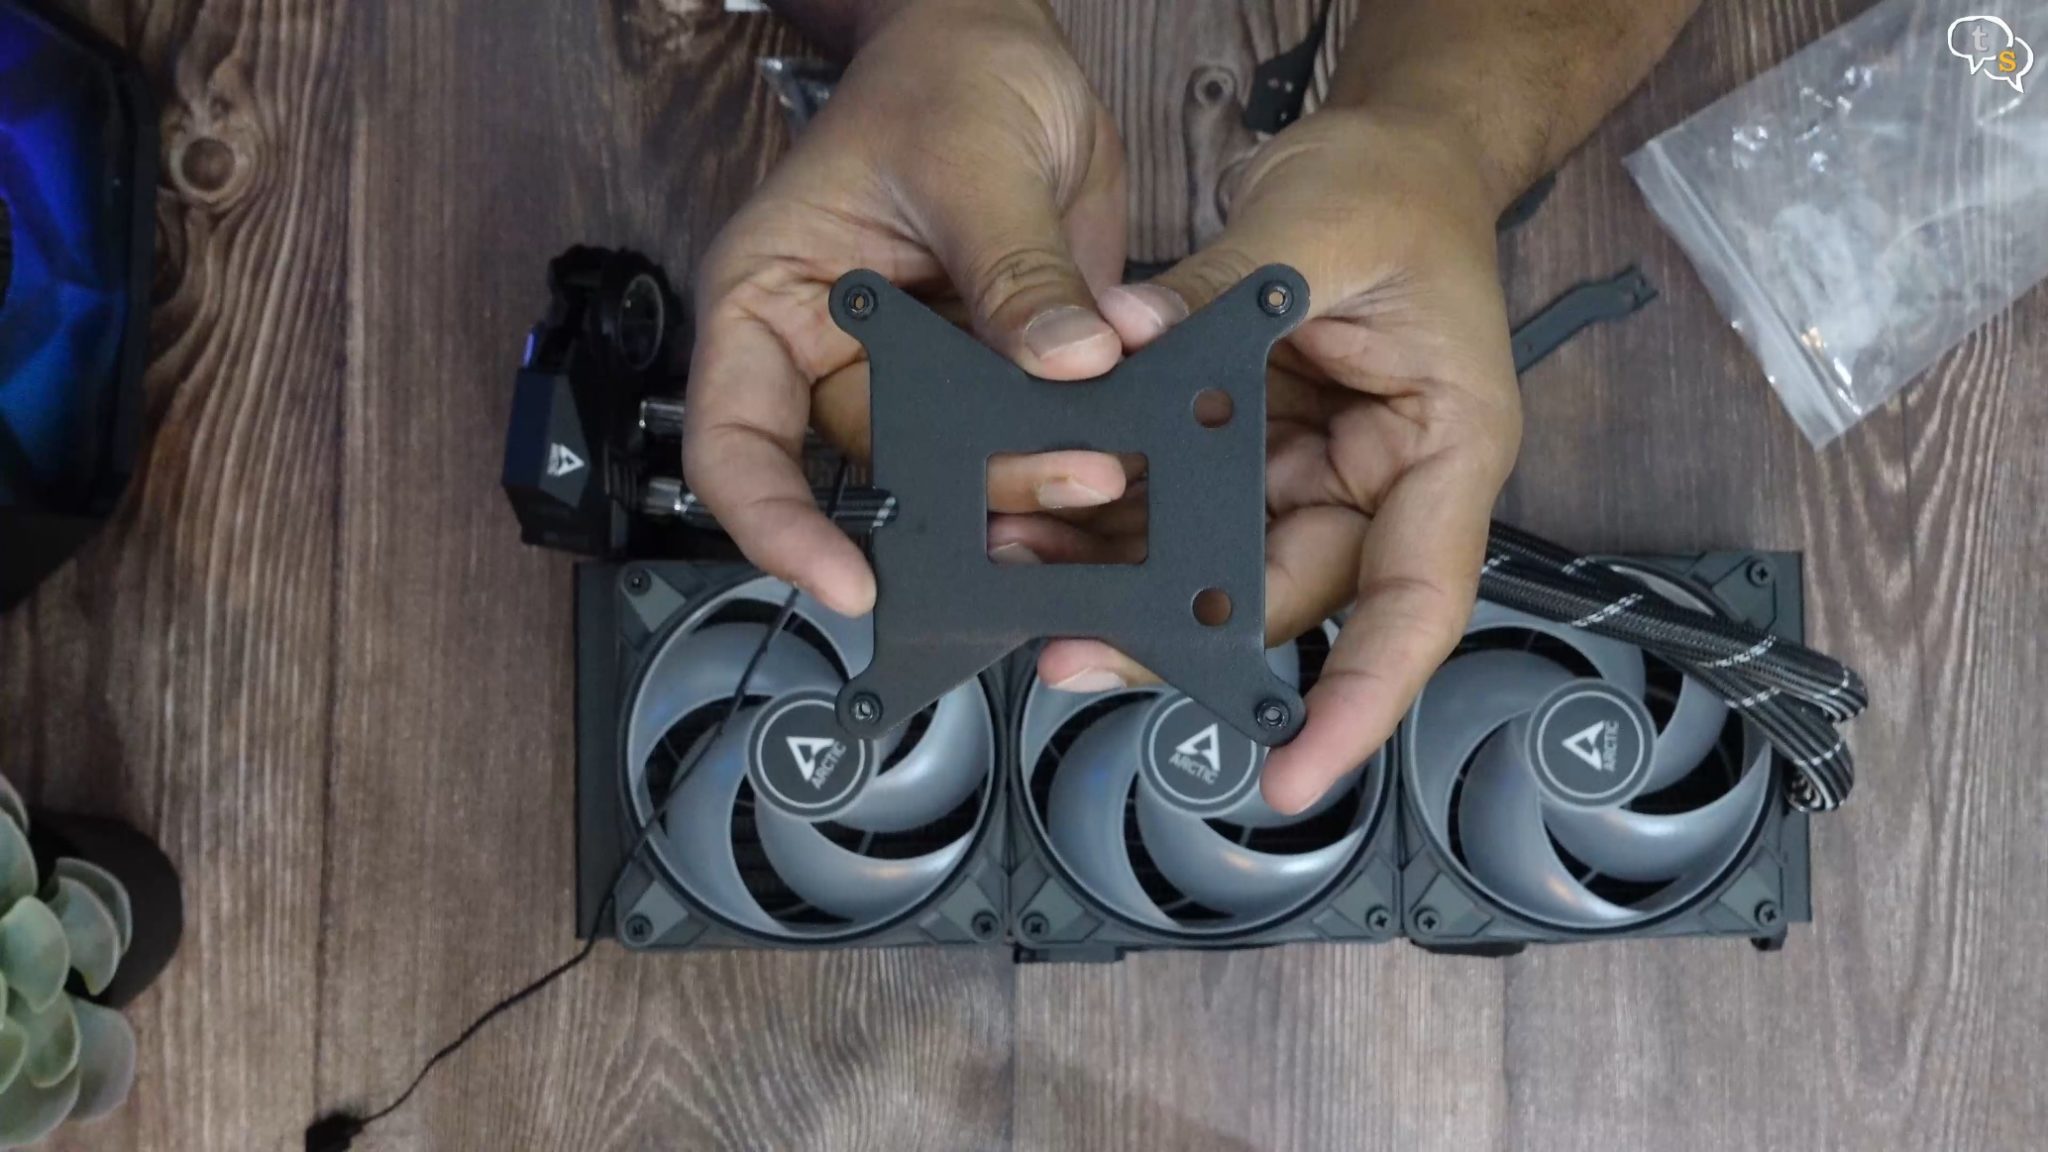
Different mounting plates are provided, such as this one for Intel, but as I have an AMD build, I will need to use the standard backplate provided by the motherboard manufacturers.

But on the top, these retention plates are for AMD. I have heard a lot of horror stories on how complicated it is to install this cooler, so let’s see if they’re true.
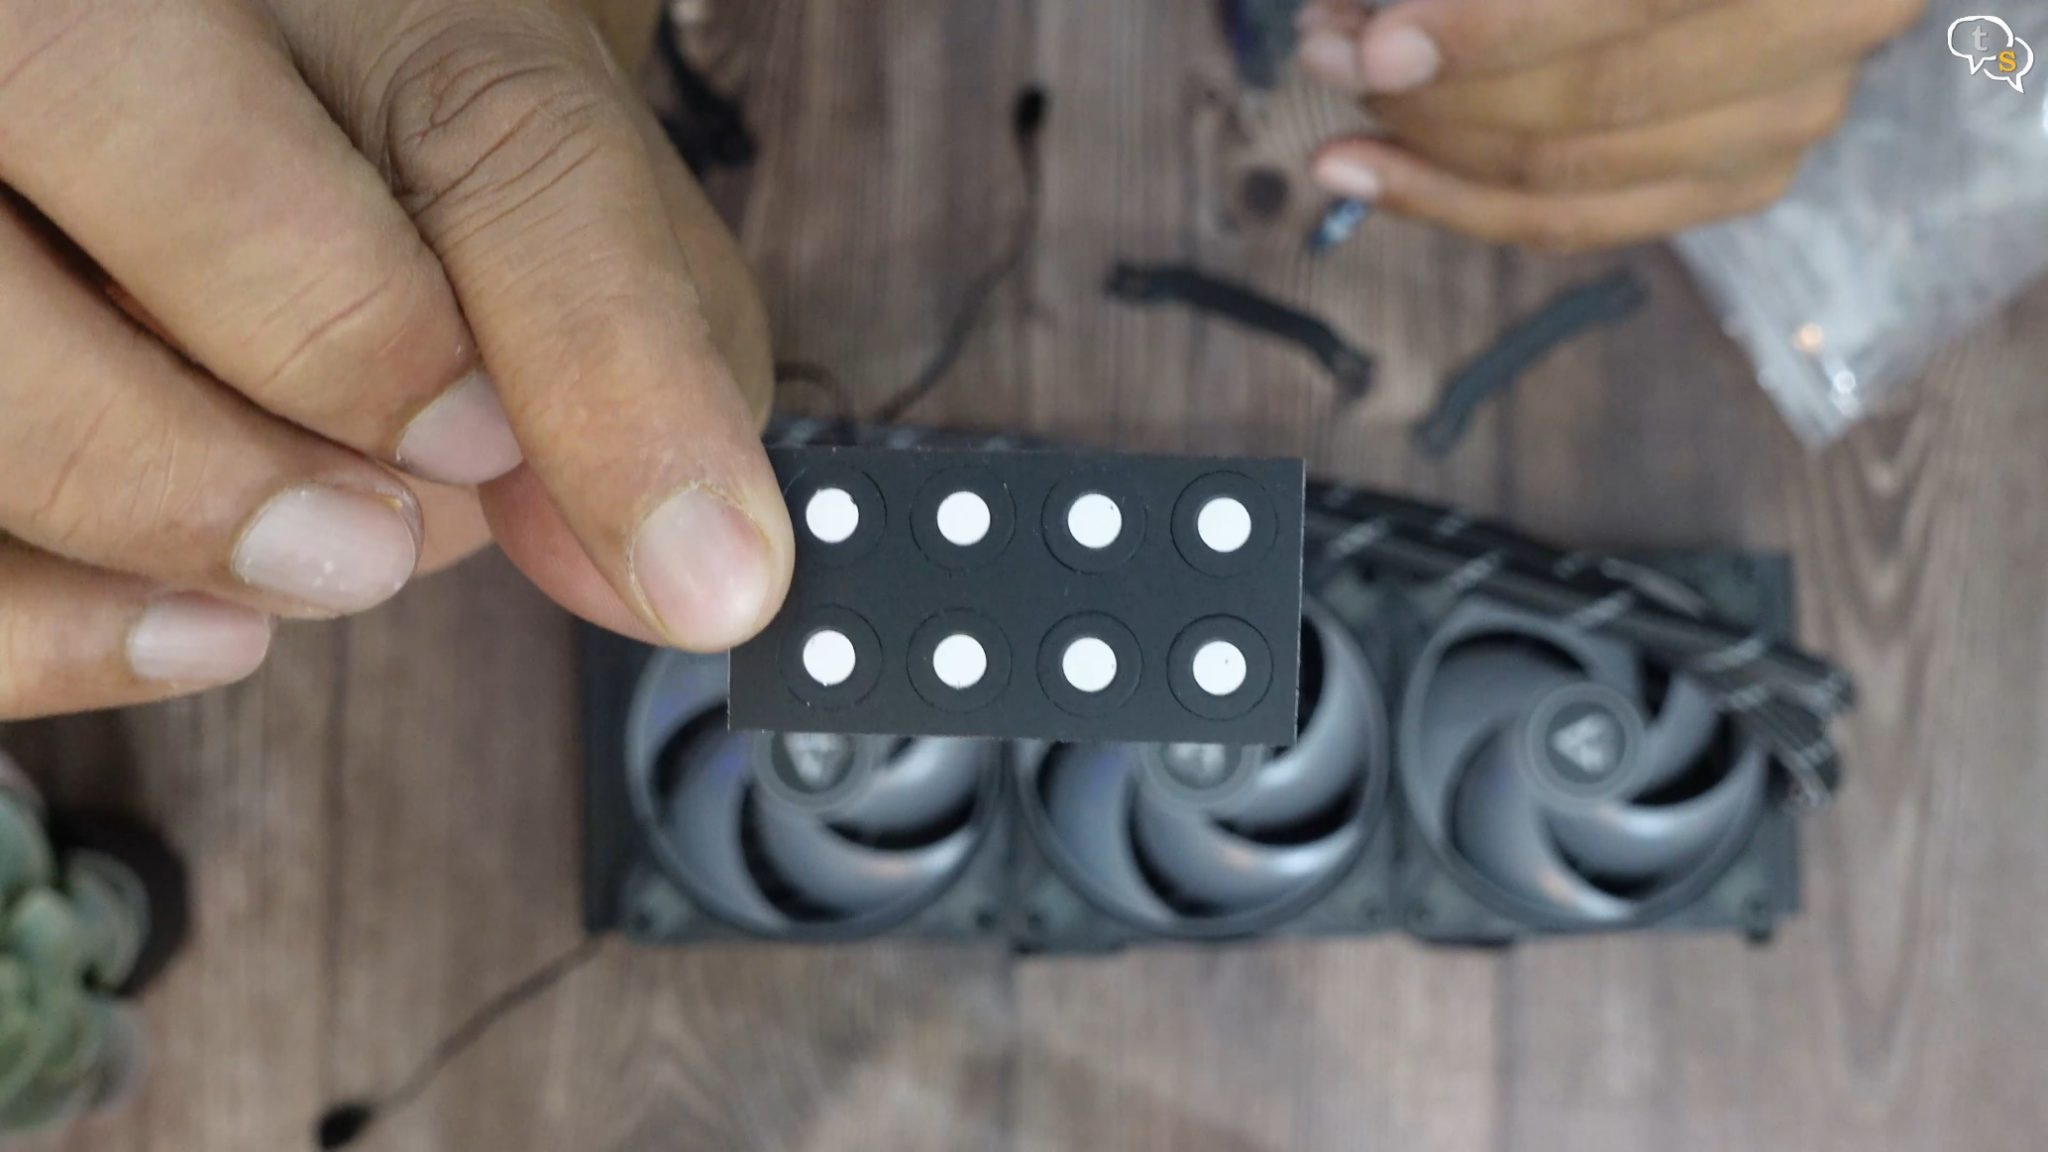
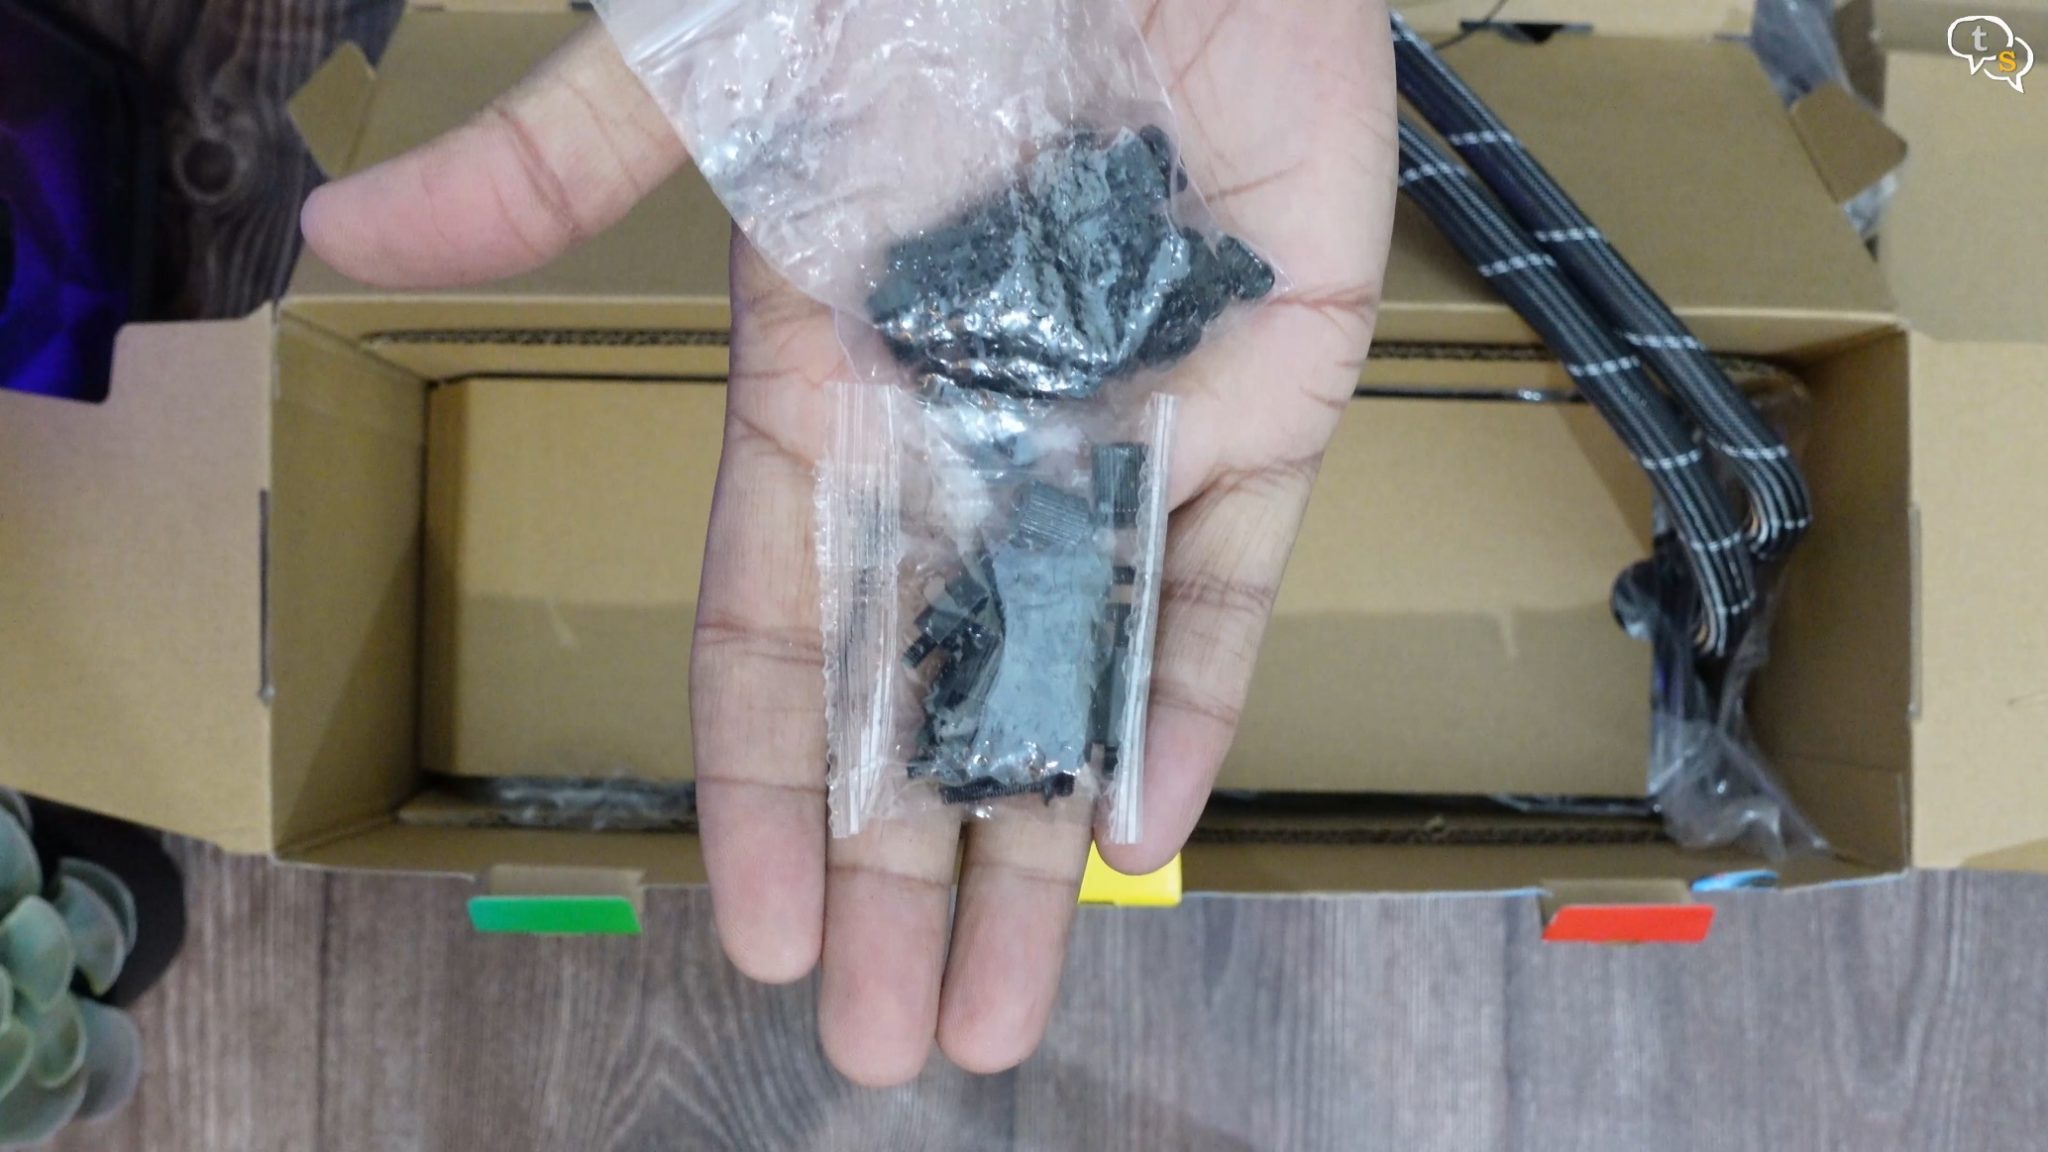
Not sure what these stickers are for? These are the brackets that go onto the pump.
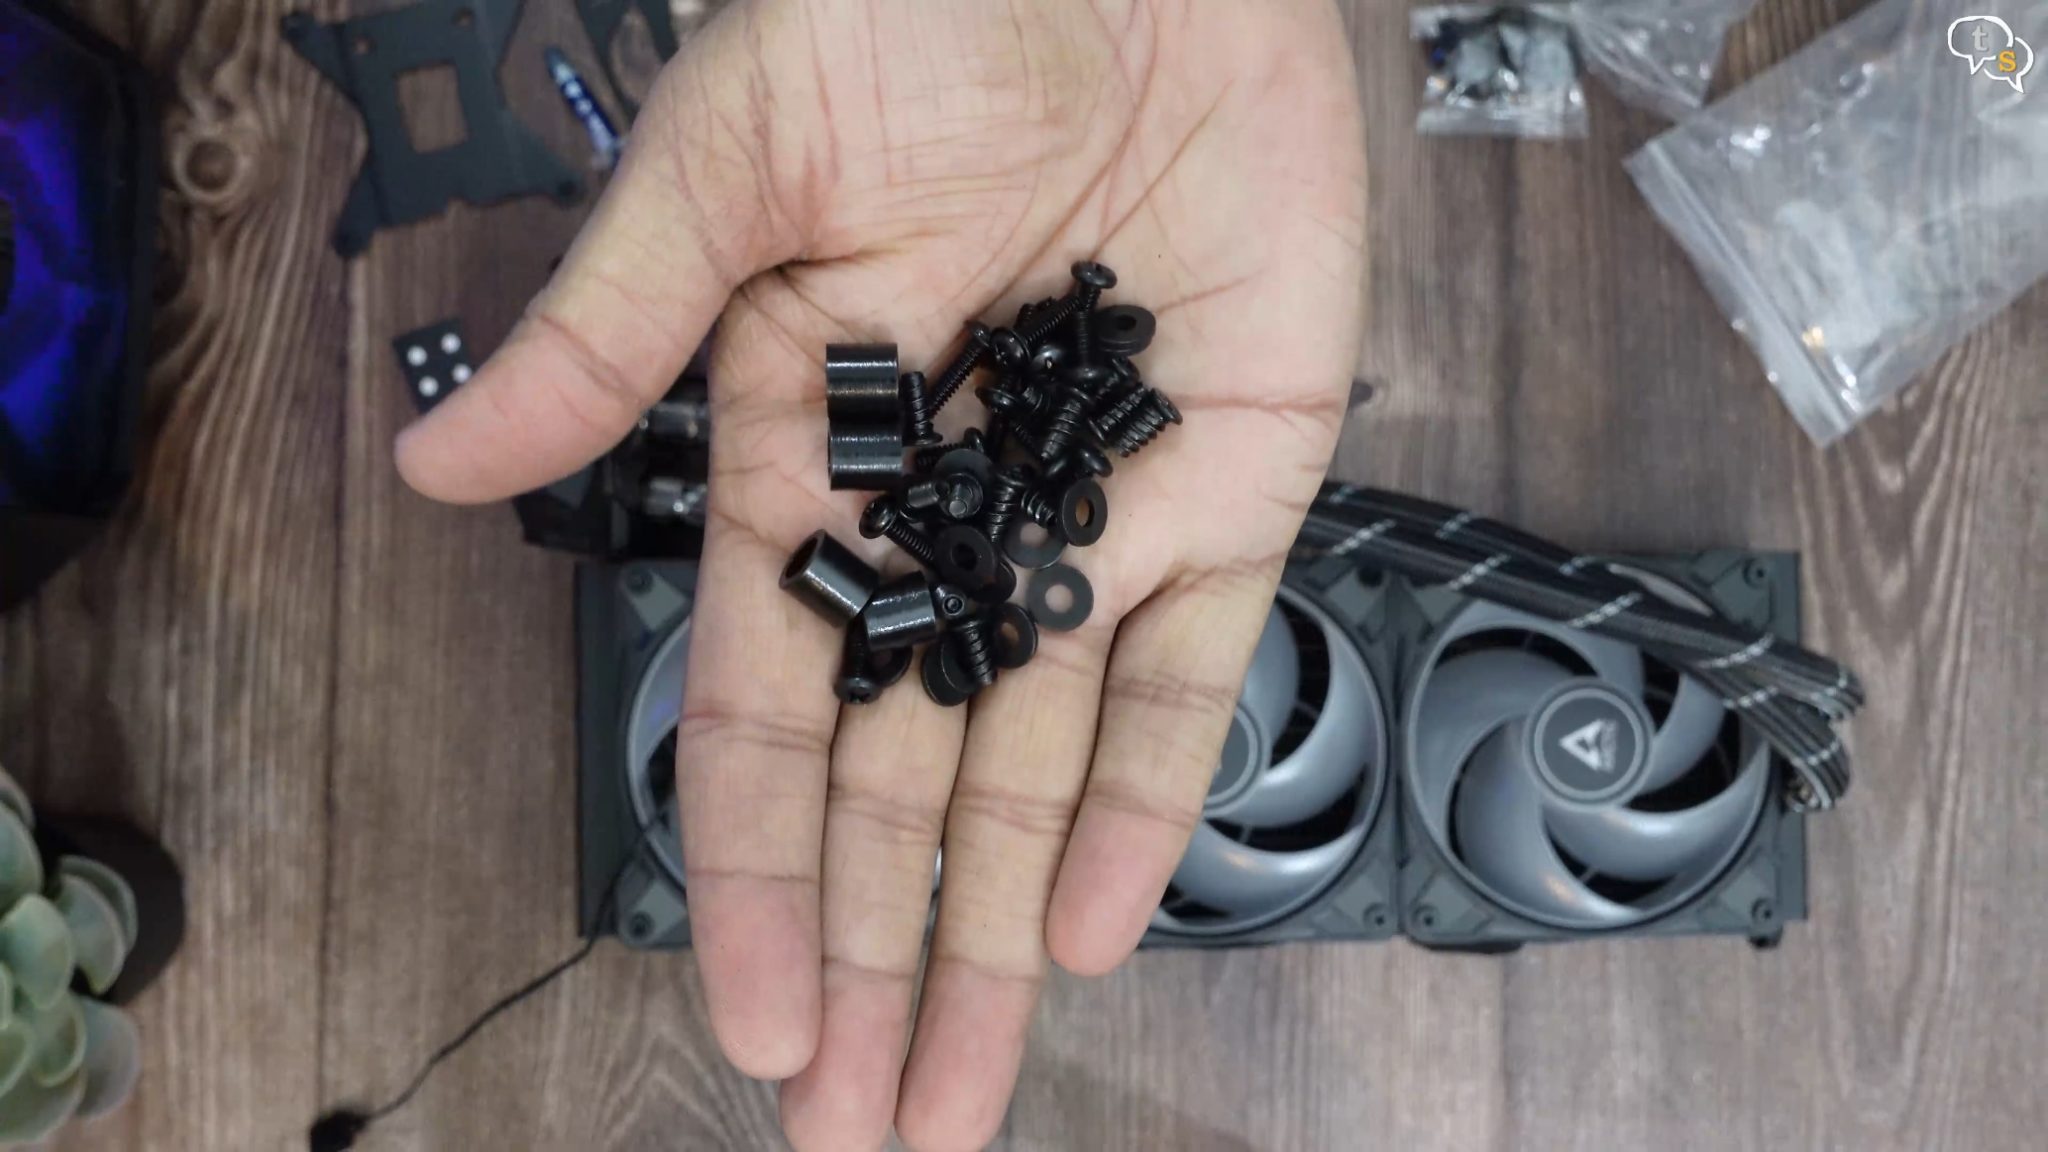
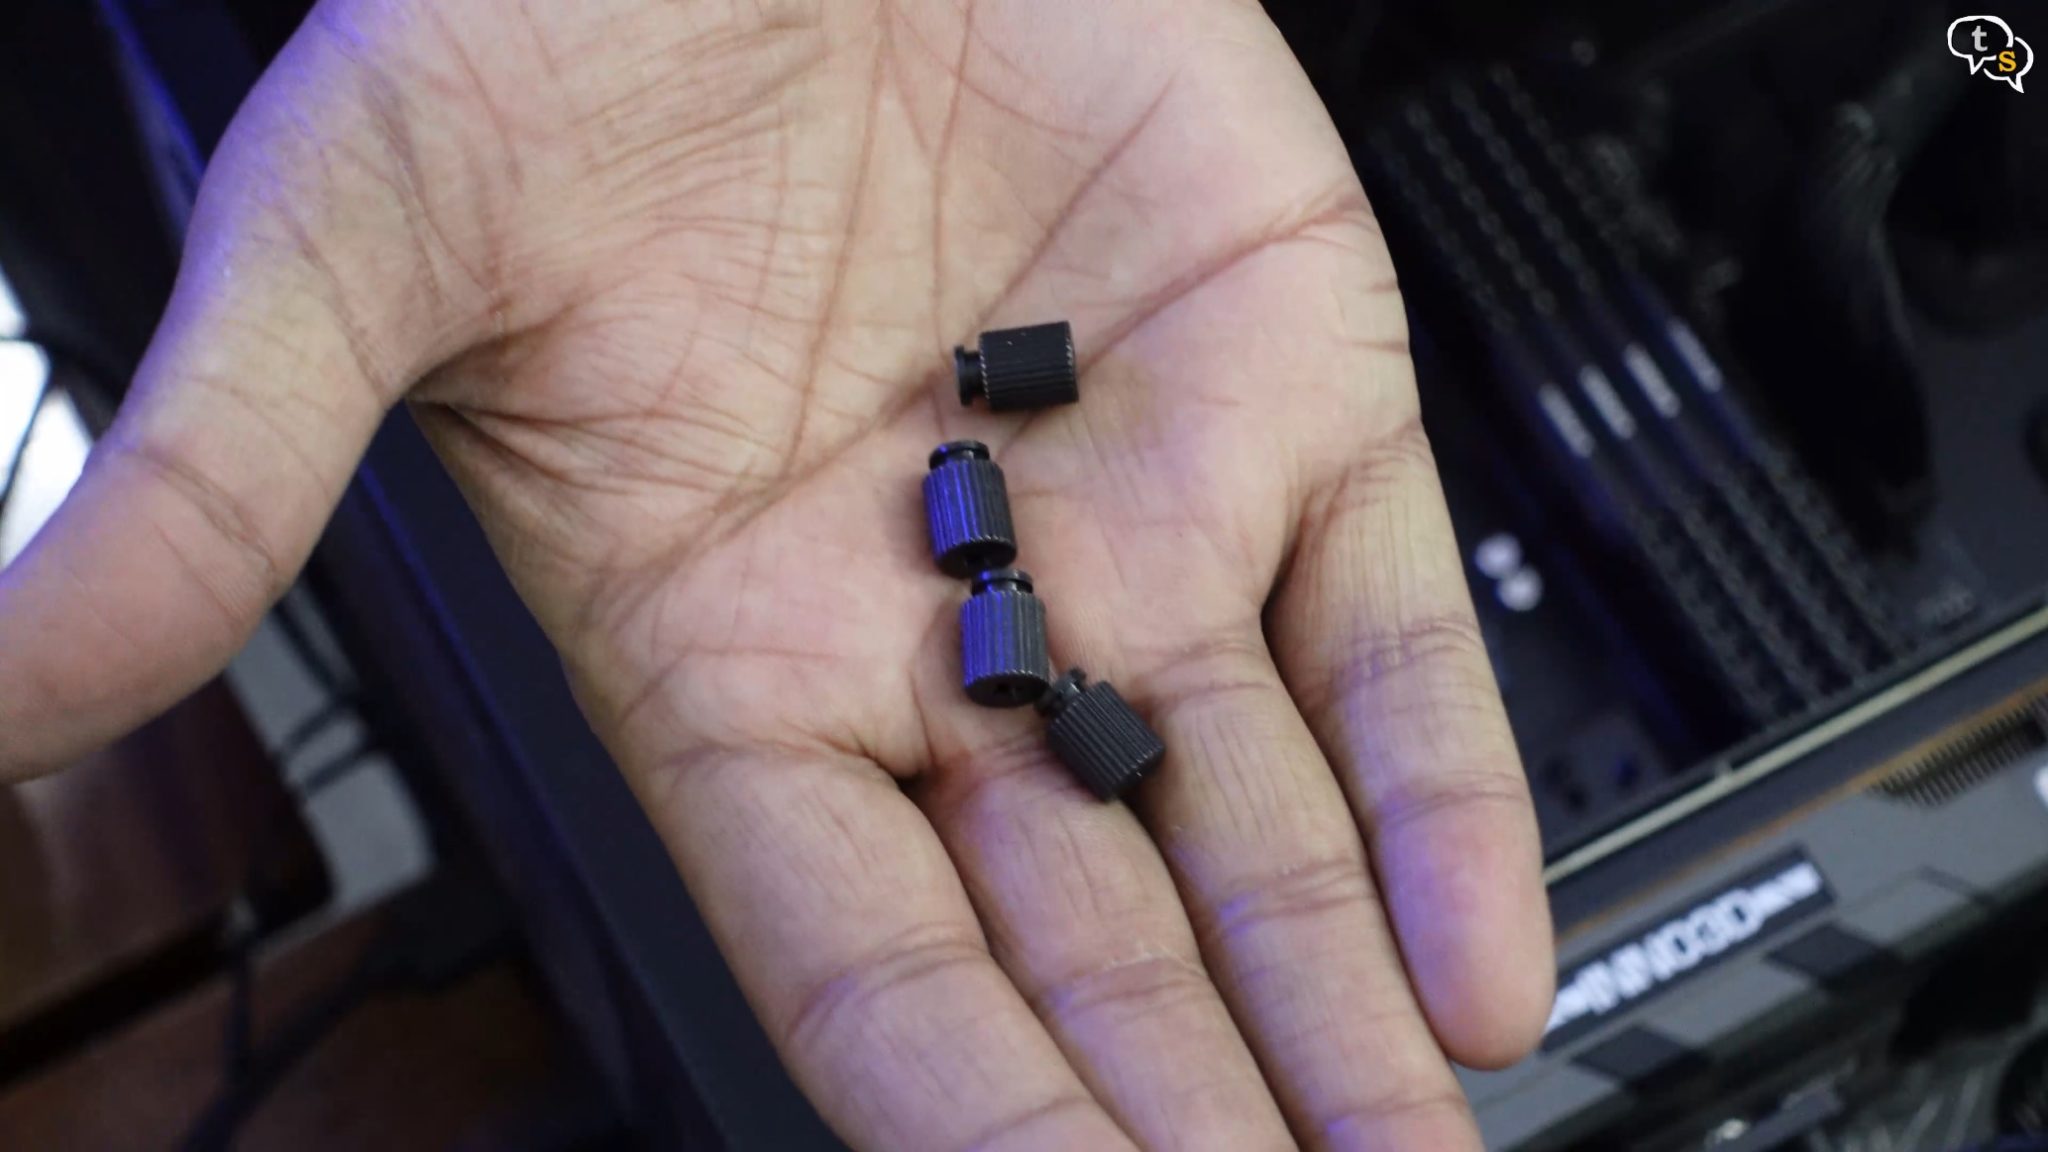
An assortment of screws and spacers. Don’t worry as we need only a few from these.
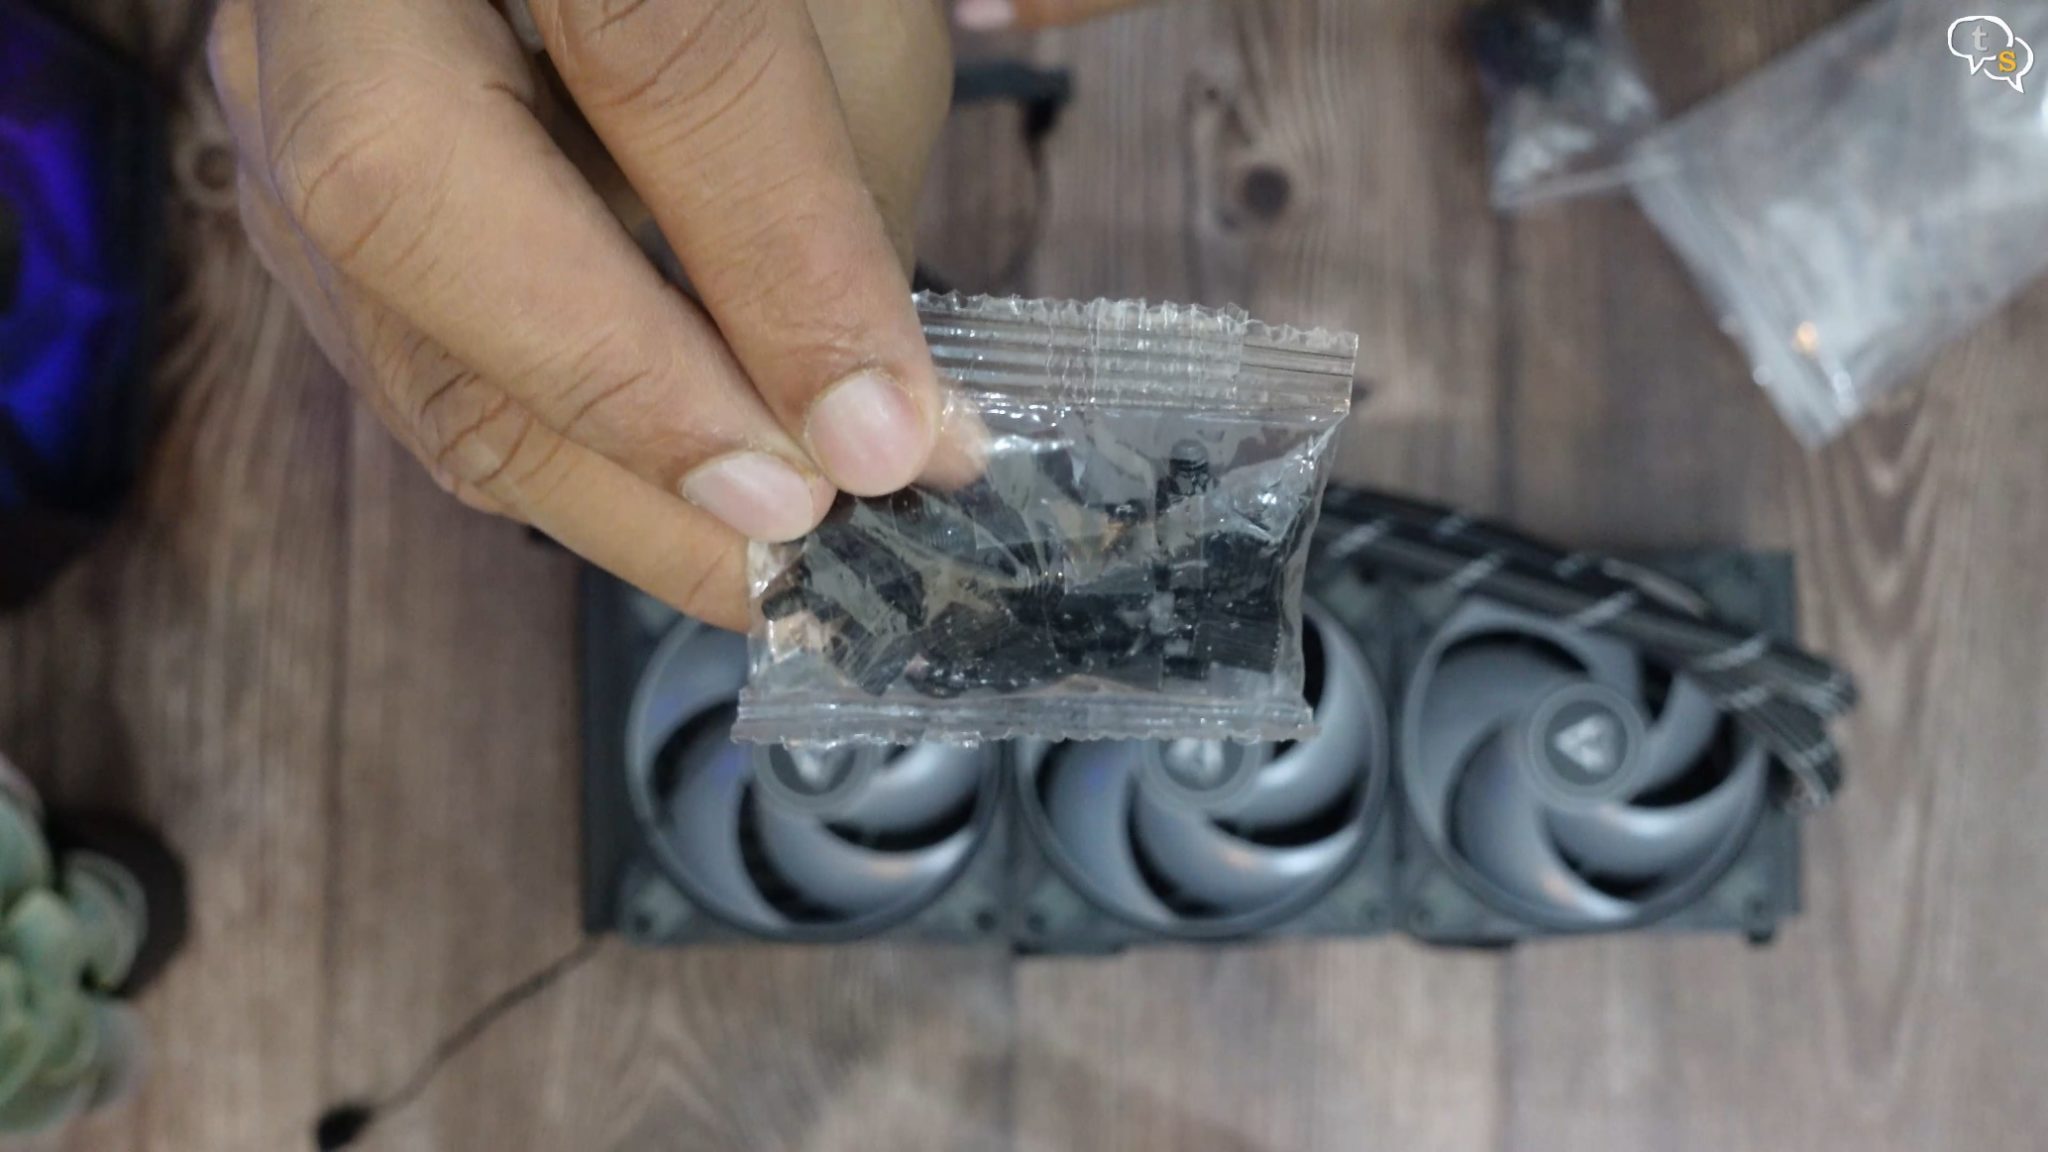
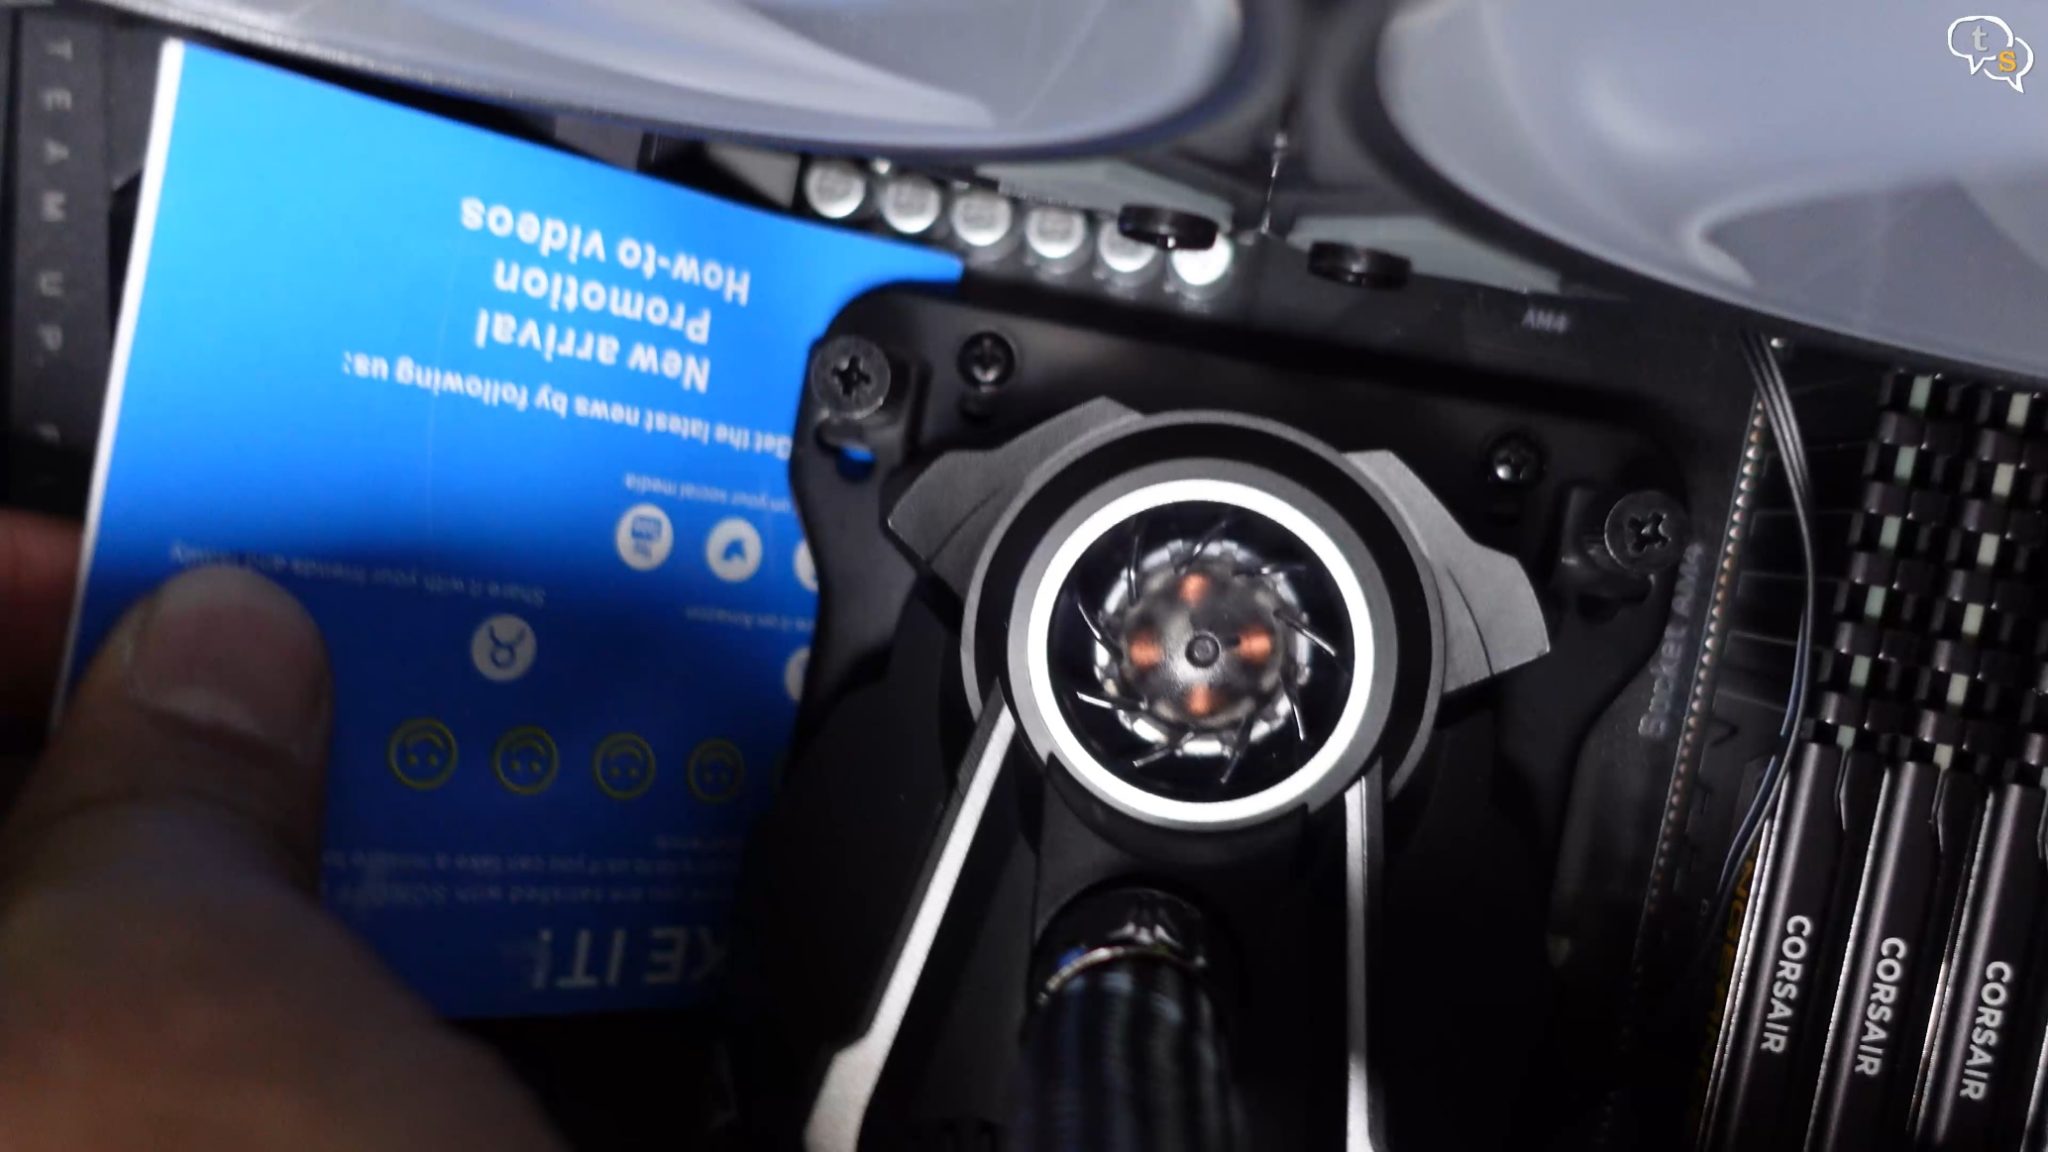
This packet is important as this contains the screws for mounting the brackets on the pump. It took me quite a while to find the right screws, while it was sitting here all along. Also, this has the thumb screws necessary.
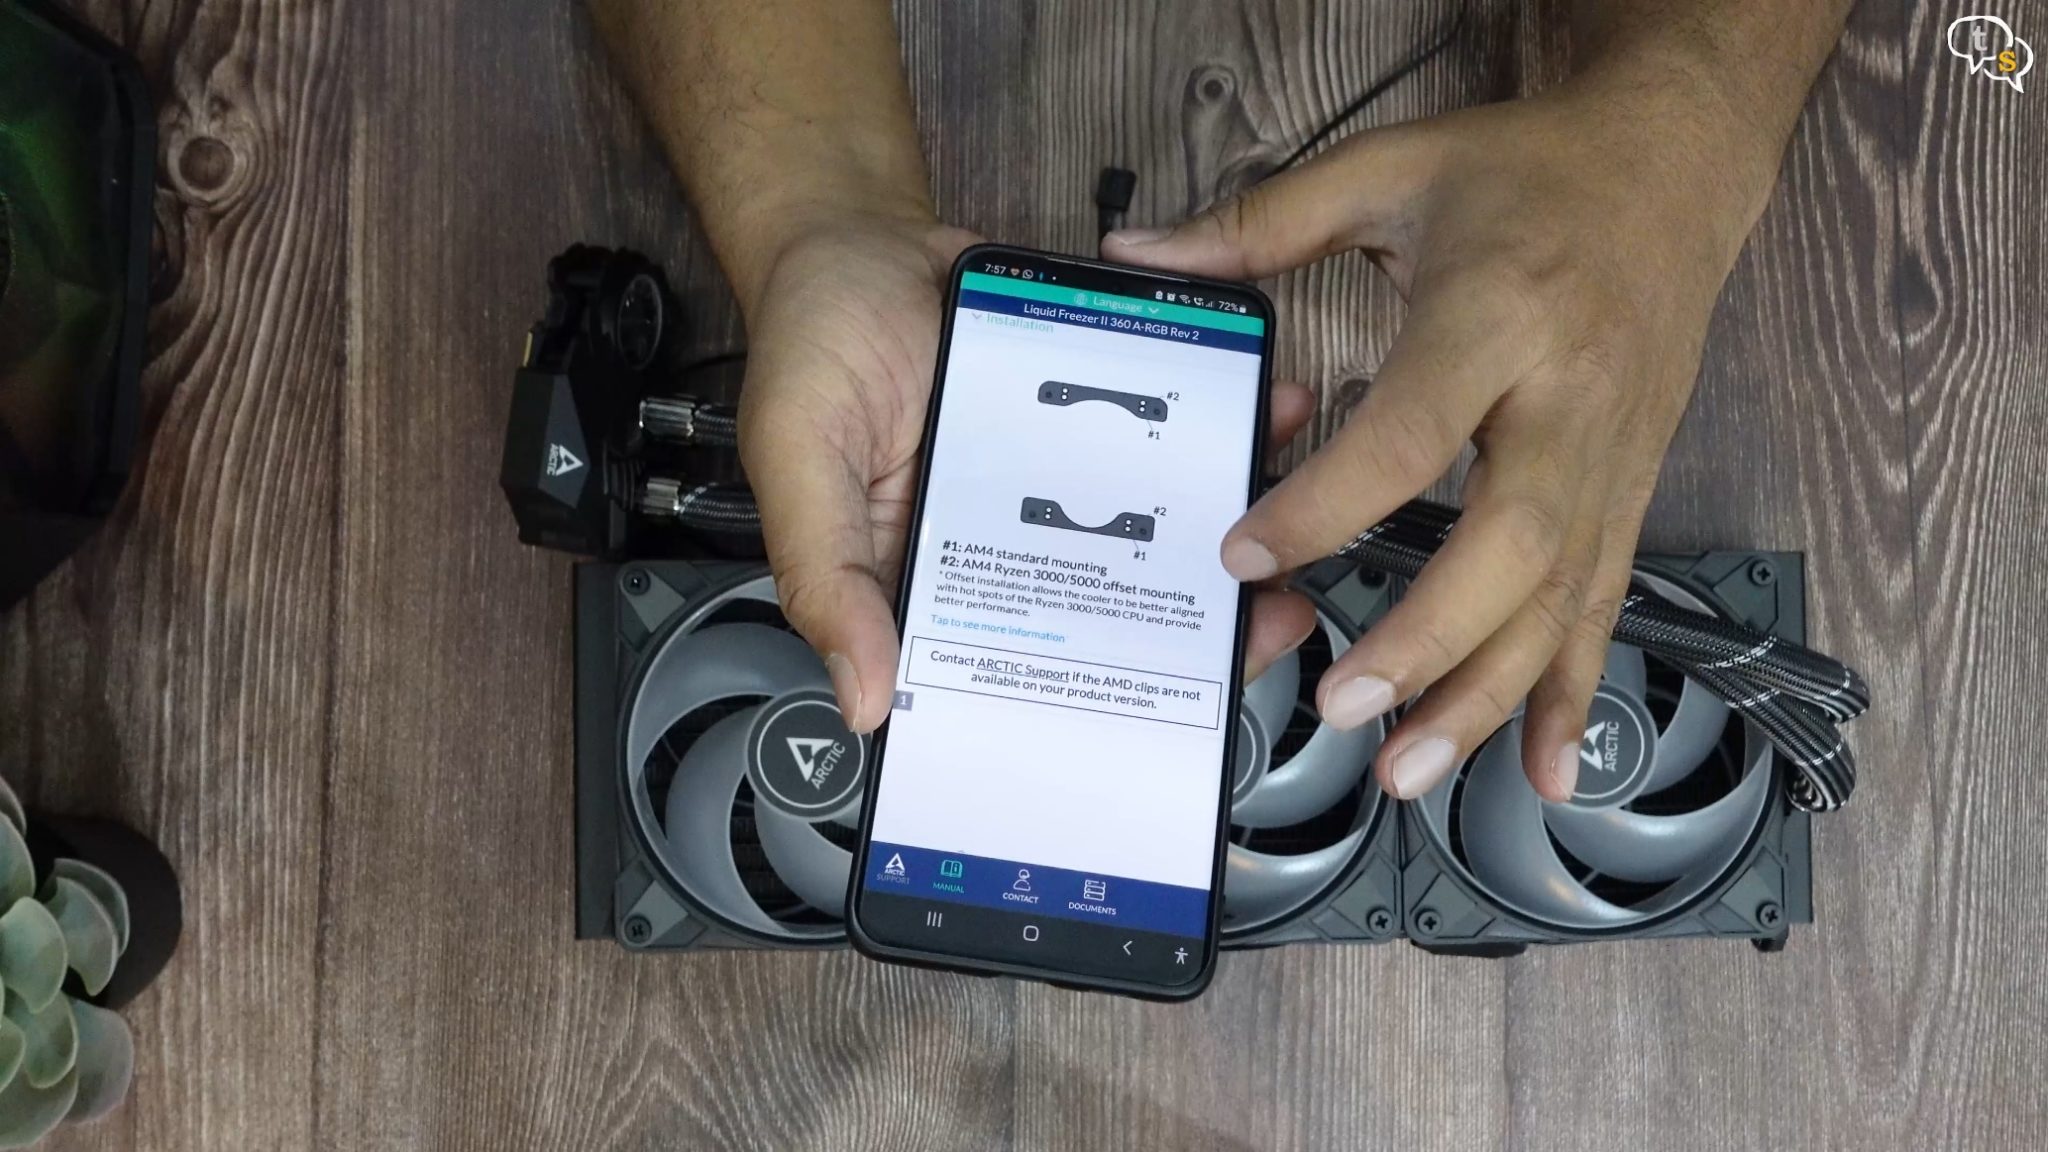
Let’s check the manual out on the phone, it’s laid out quite well, just select your socket type and there you go.
I’m installing for AMD, so it needs these two retention plates to be installed onto the motherboard. Take note of the shape of the curve within the retention plates , as it needs to be installed in this orientation.
The manual has animations detailing the installation process. But they just indicate screws, and not which one’s and where. First time installers would be confused.
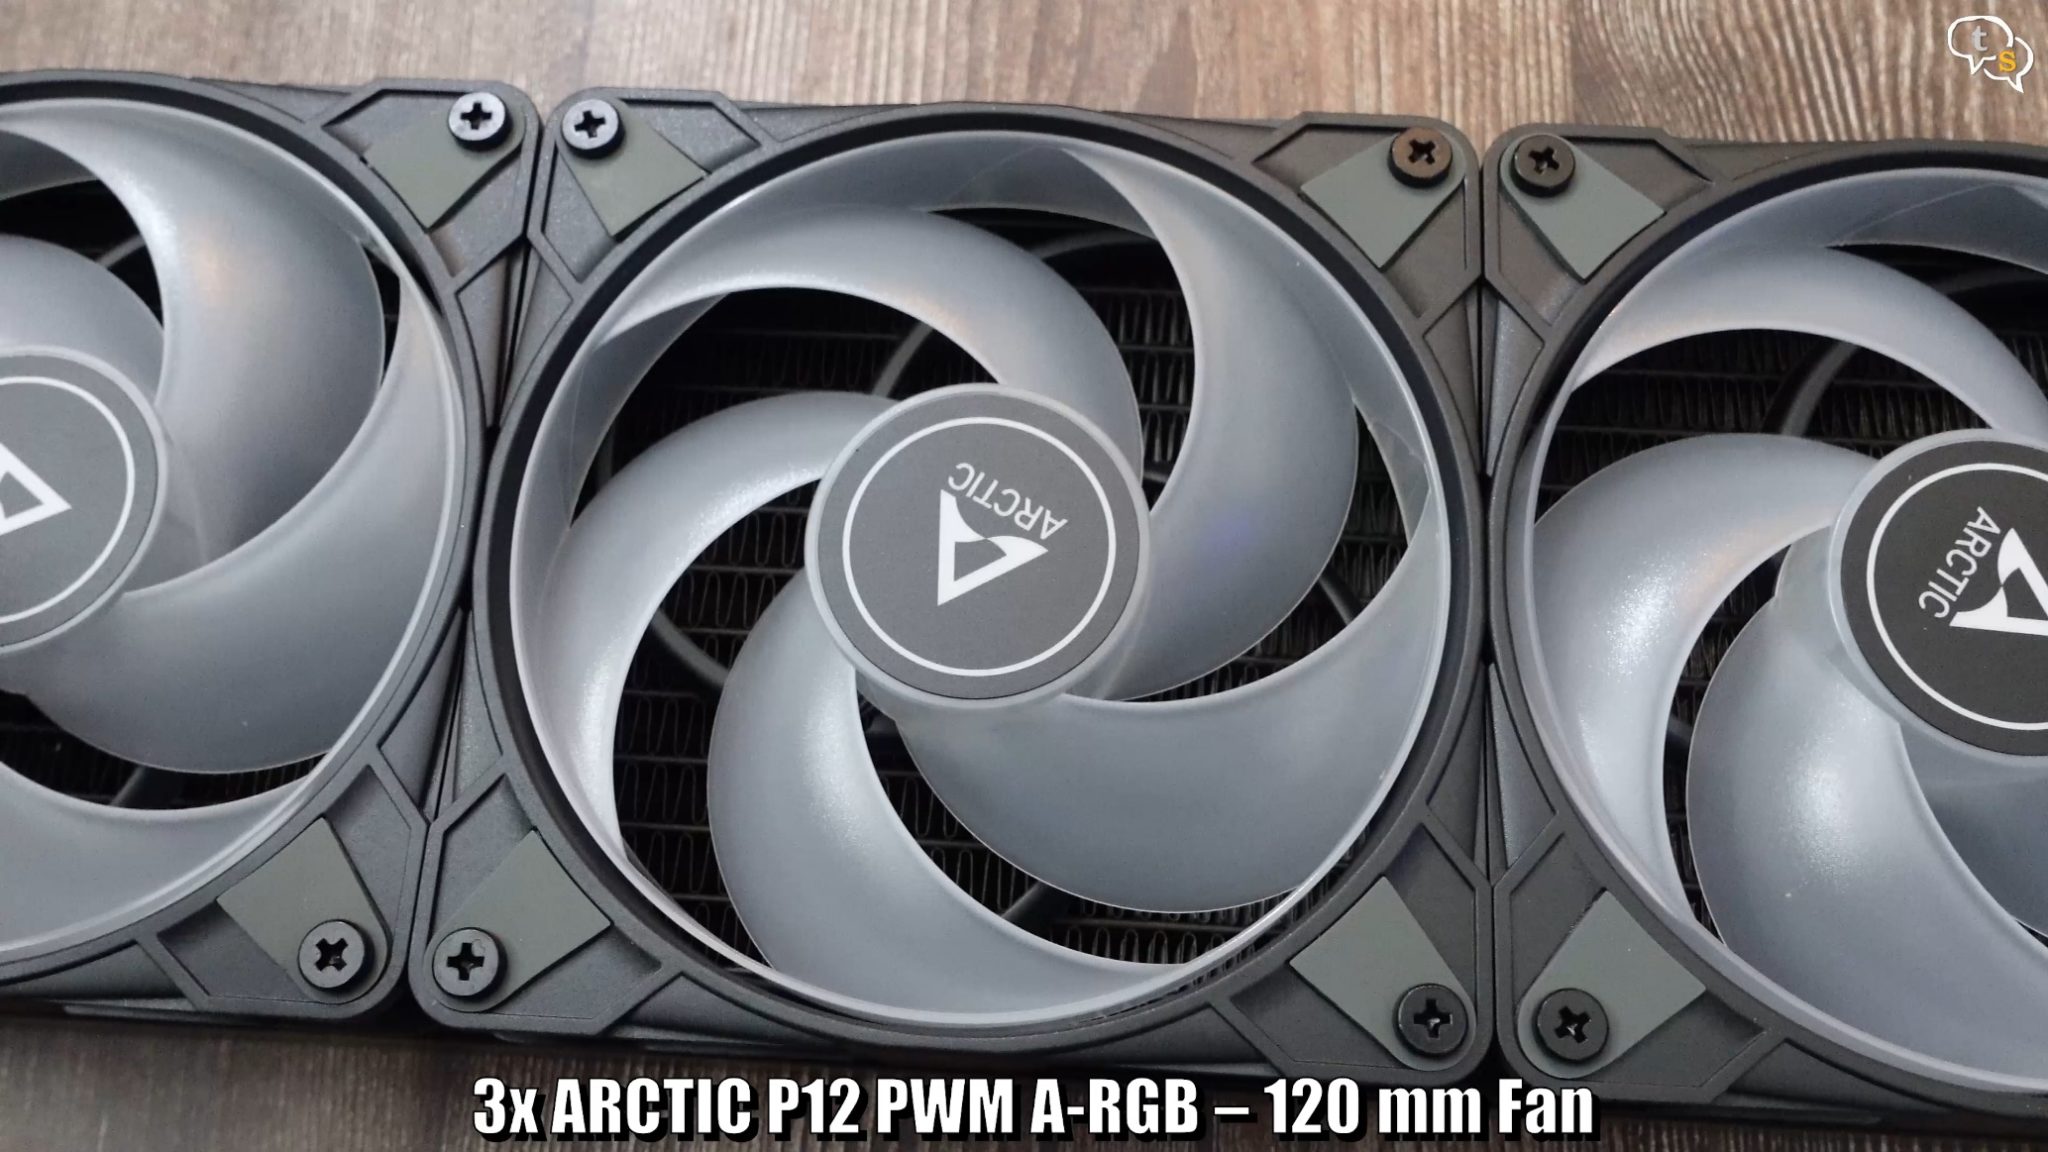
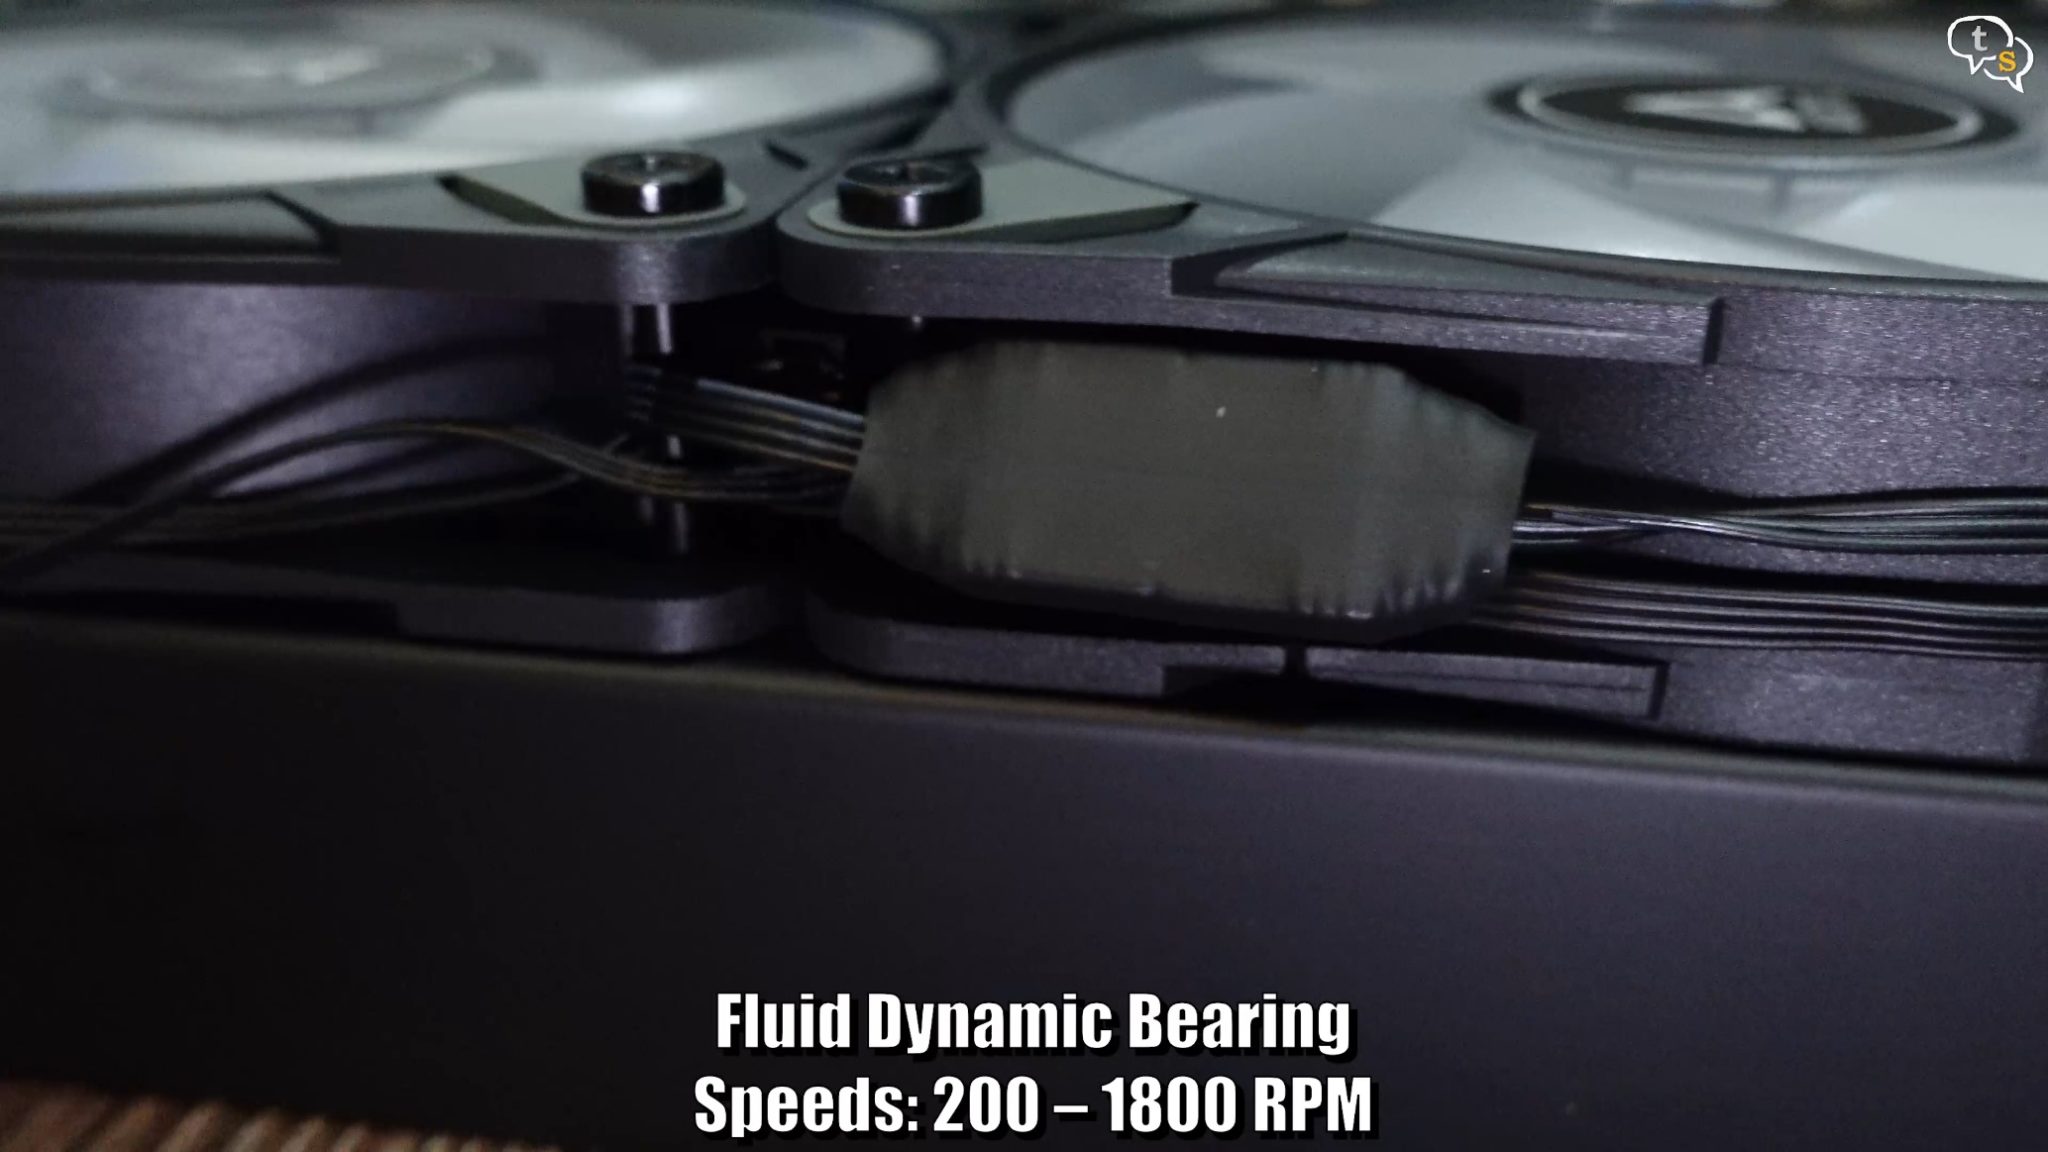
These are the fans preinstalled on the radiator, which are Arctic’s own 120mm P12 PWM fan’s. These are Fluid Dynamic Bearing units and are rated for speeds between 200-1800 RPM.
These are the pre cable managed fans.
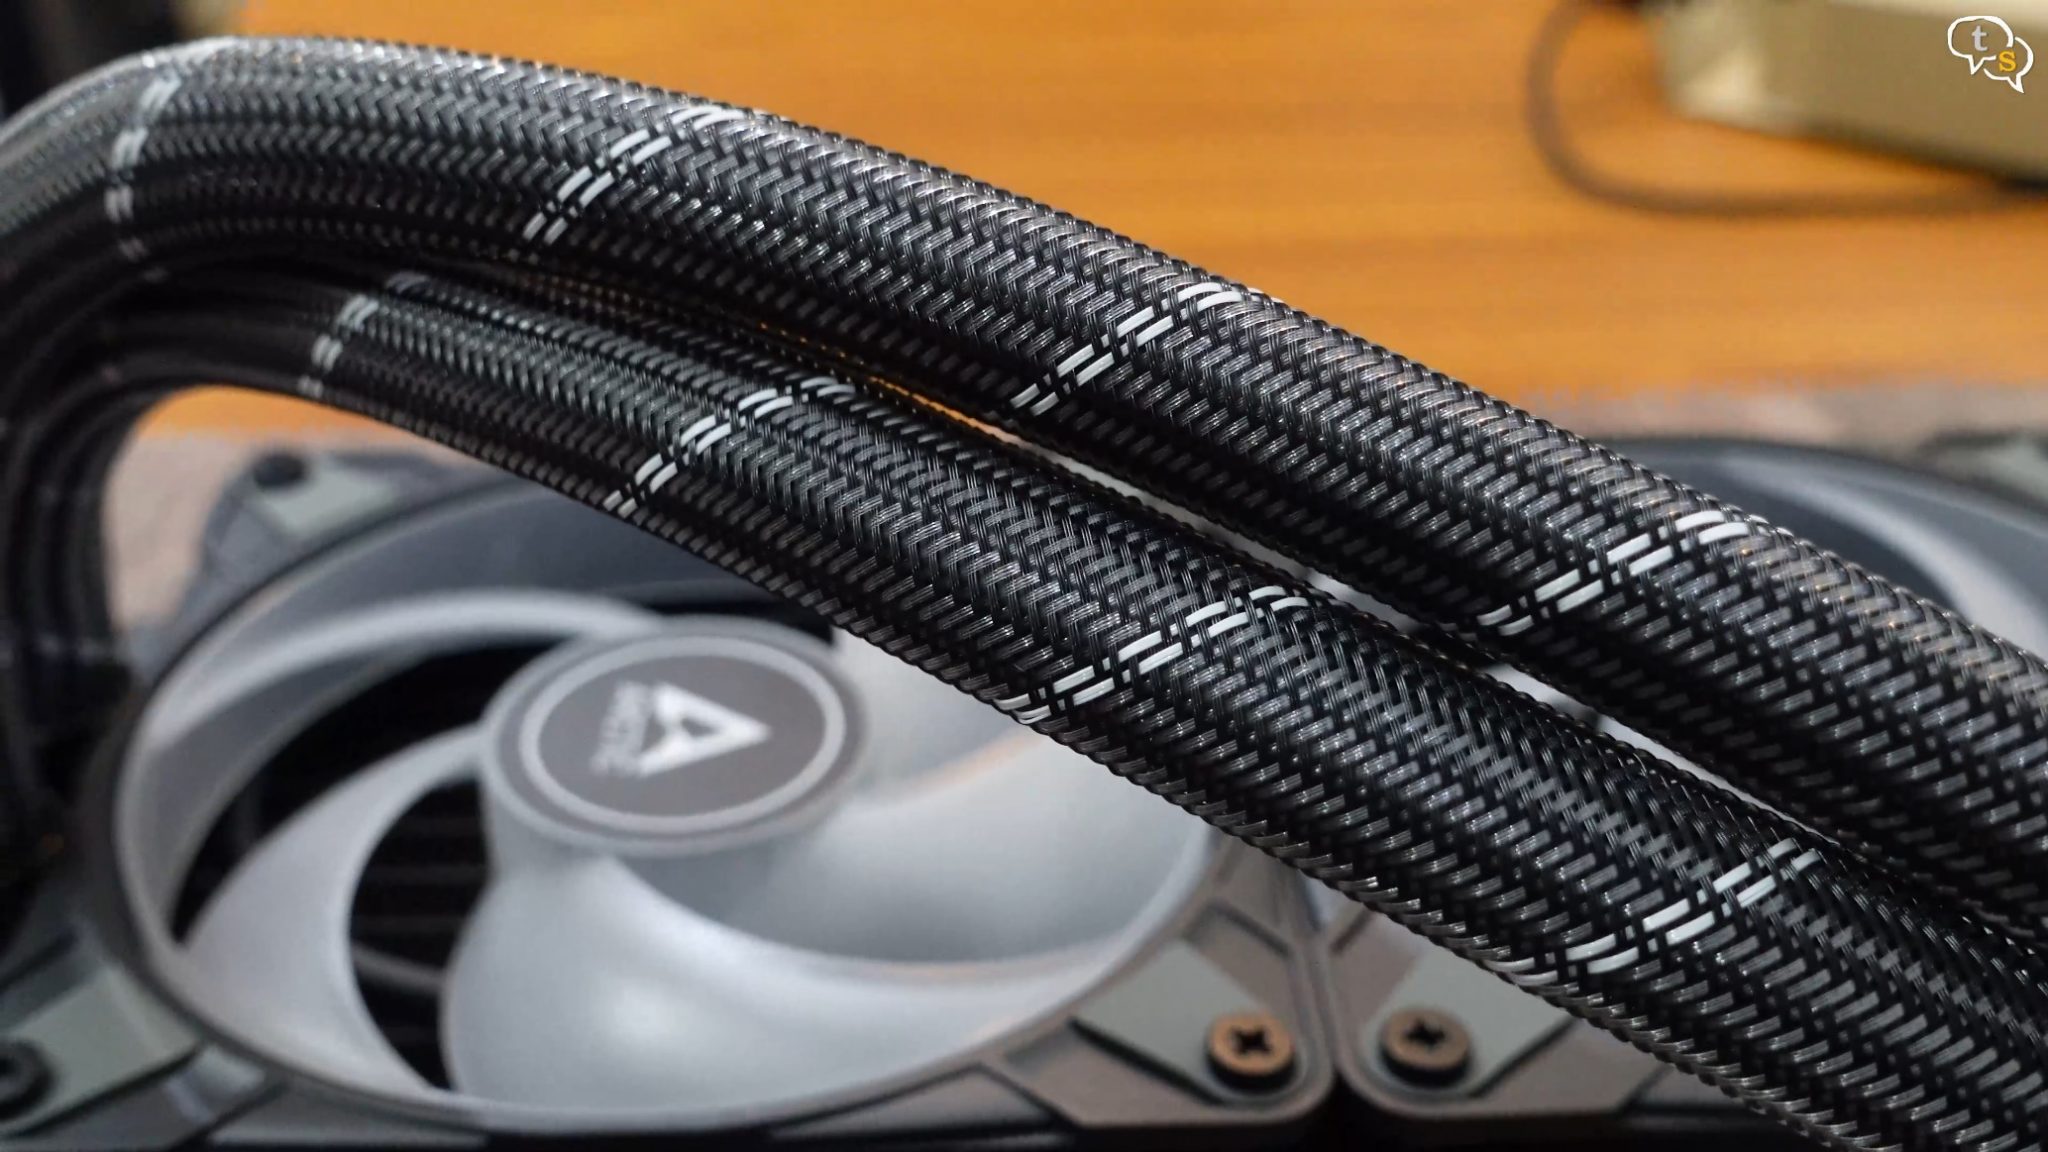
The radiator has two fiber-reinforced EPDM rubber tubes which are 450mm long which
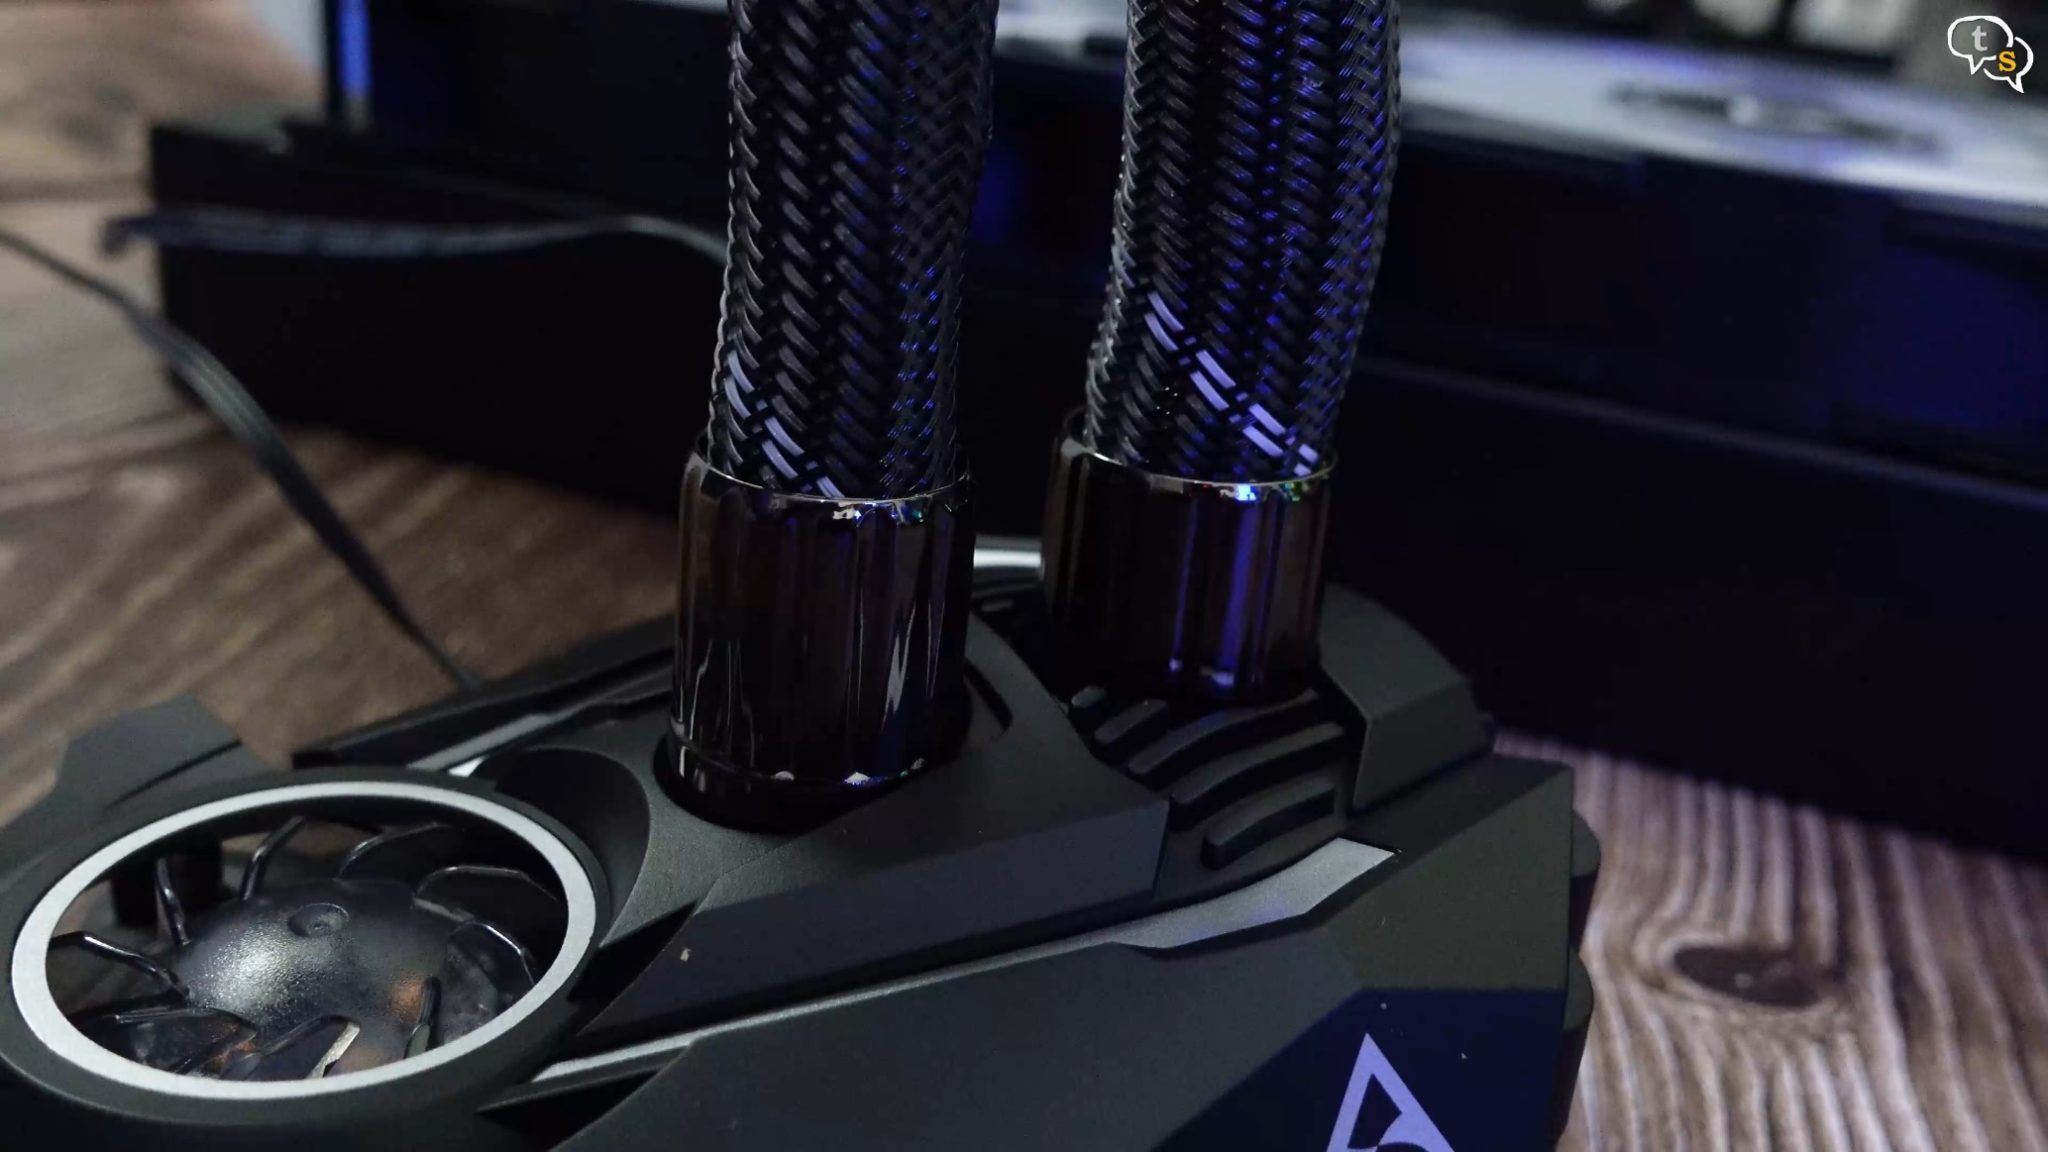
connect to the pump from the top. These tubes cannot be angled, which could hamper the orientation in which the radiator can be fitted.
Now to start the installation. I need to first remove my existing AIO, so I’m running a benchmark to loosen the thermal paste.
My existing radiator is 240mm by Deepcool. This is how thick the radiator is. Here’s the pump, hmm it’s not lighting up for some reason. A cable must have come loose, which is a downside of having multiple cables for RGB and PWM.
Anyway, as I’m uninstalling it, I’m not going to troubleshoot this.
It should be hot enough not, let’s uninstall the pump.
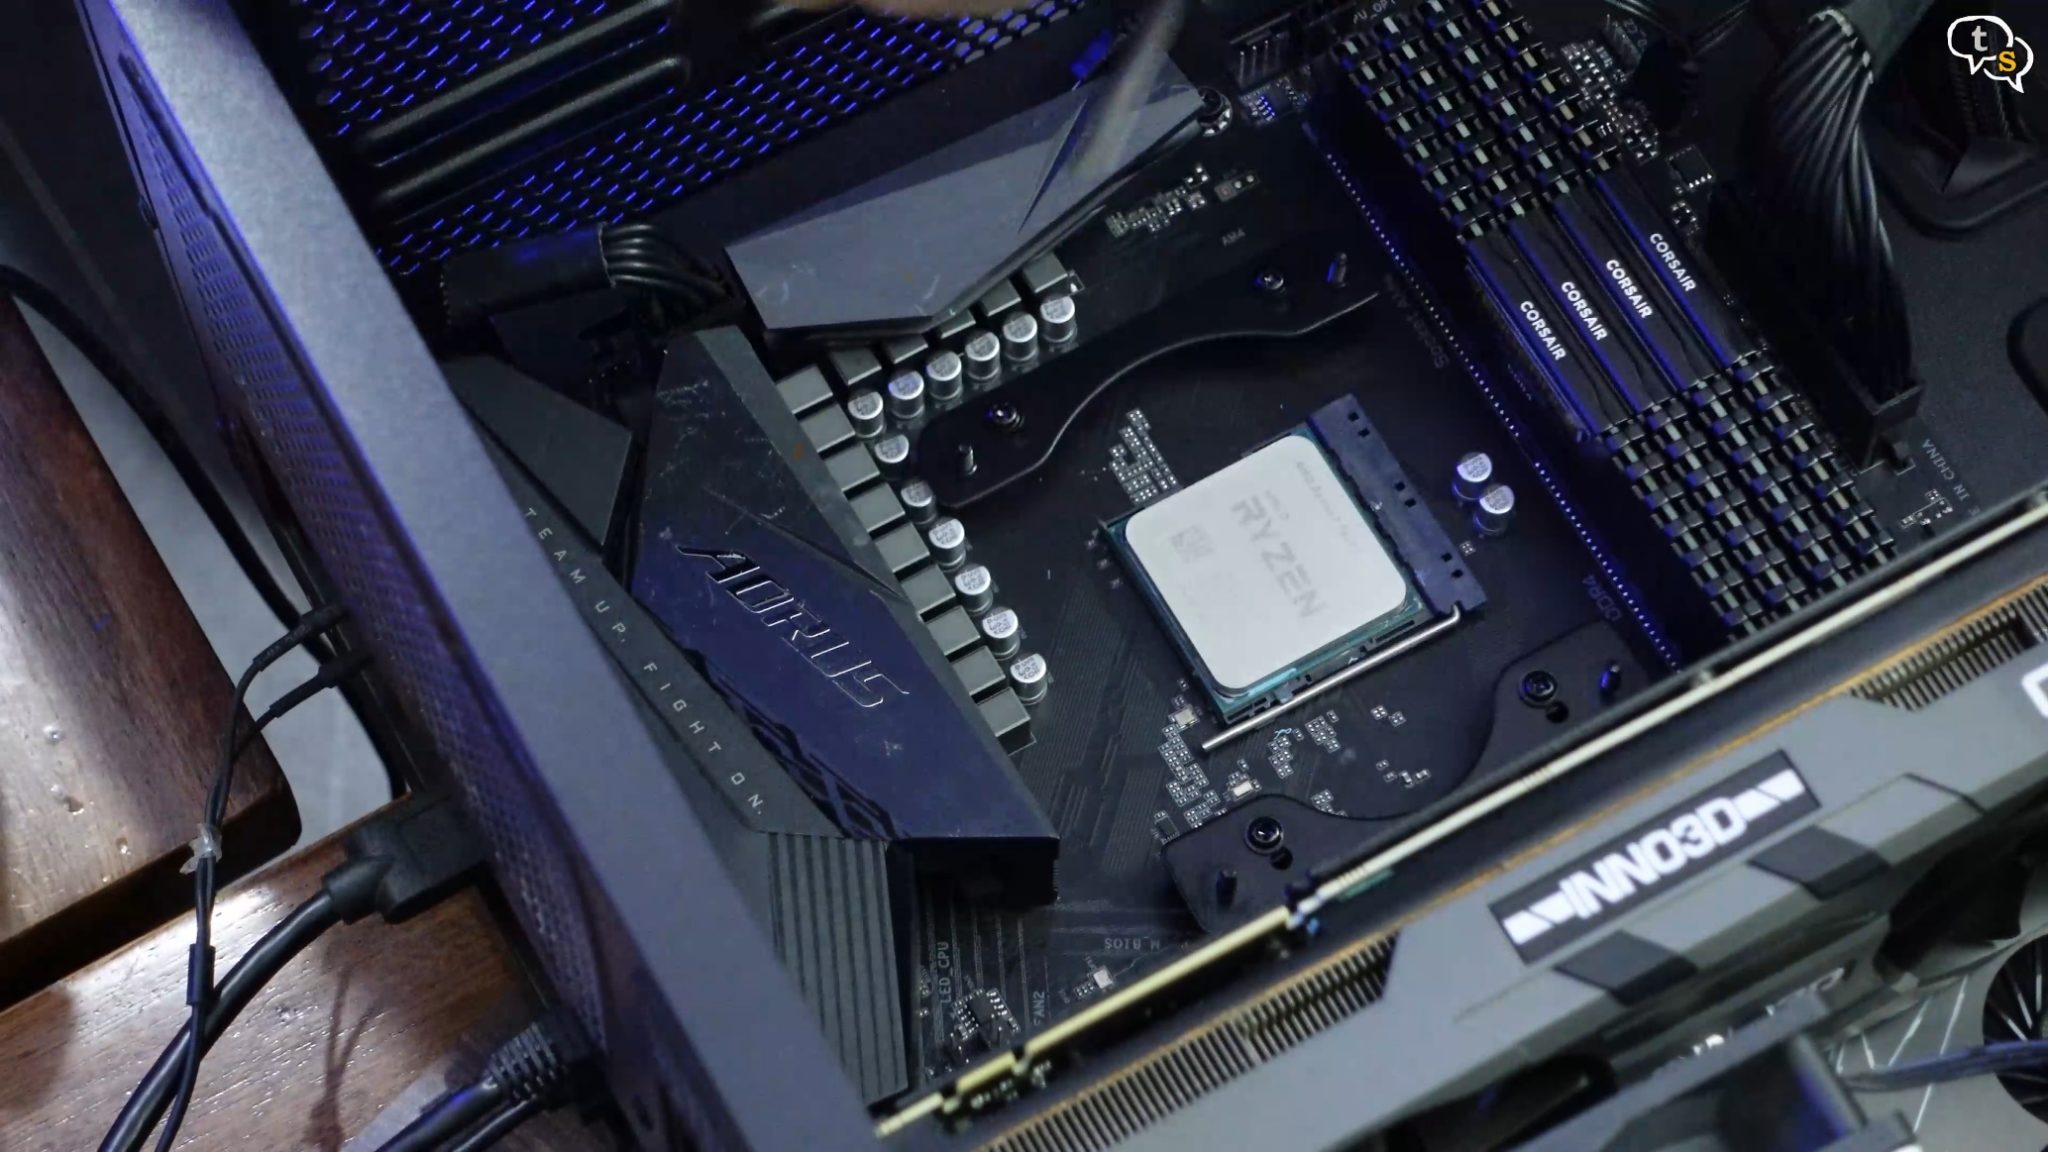
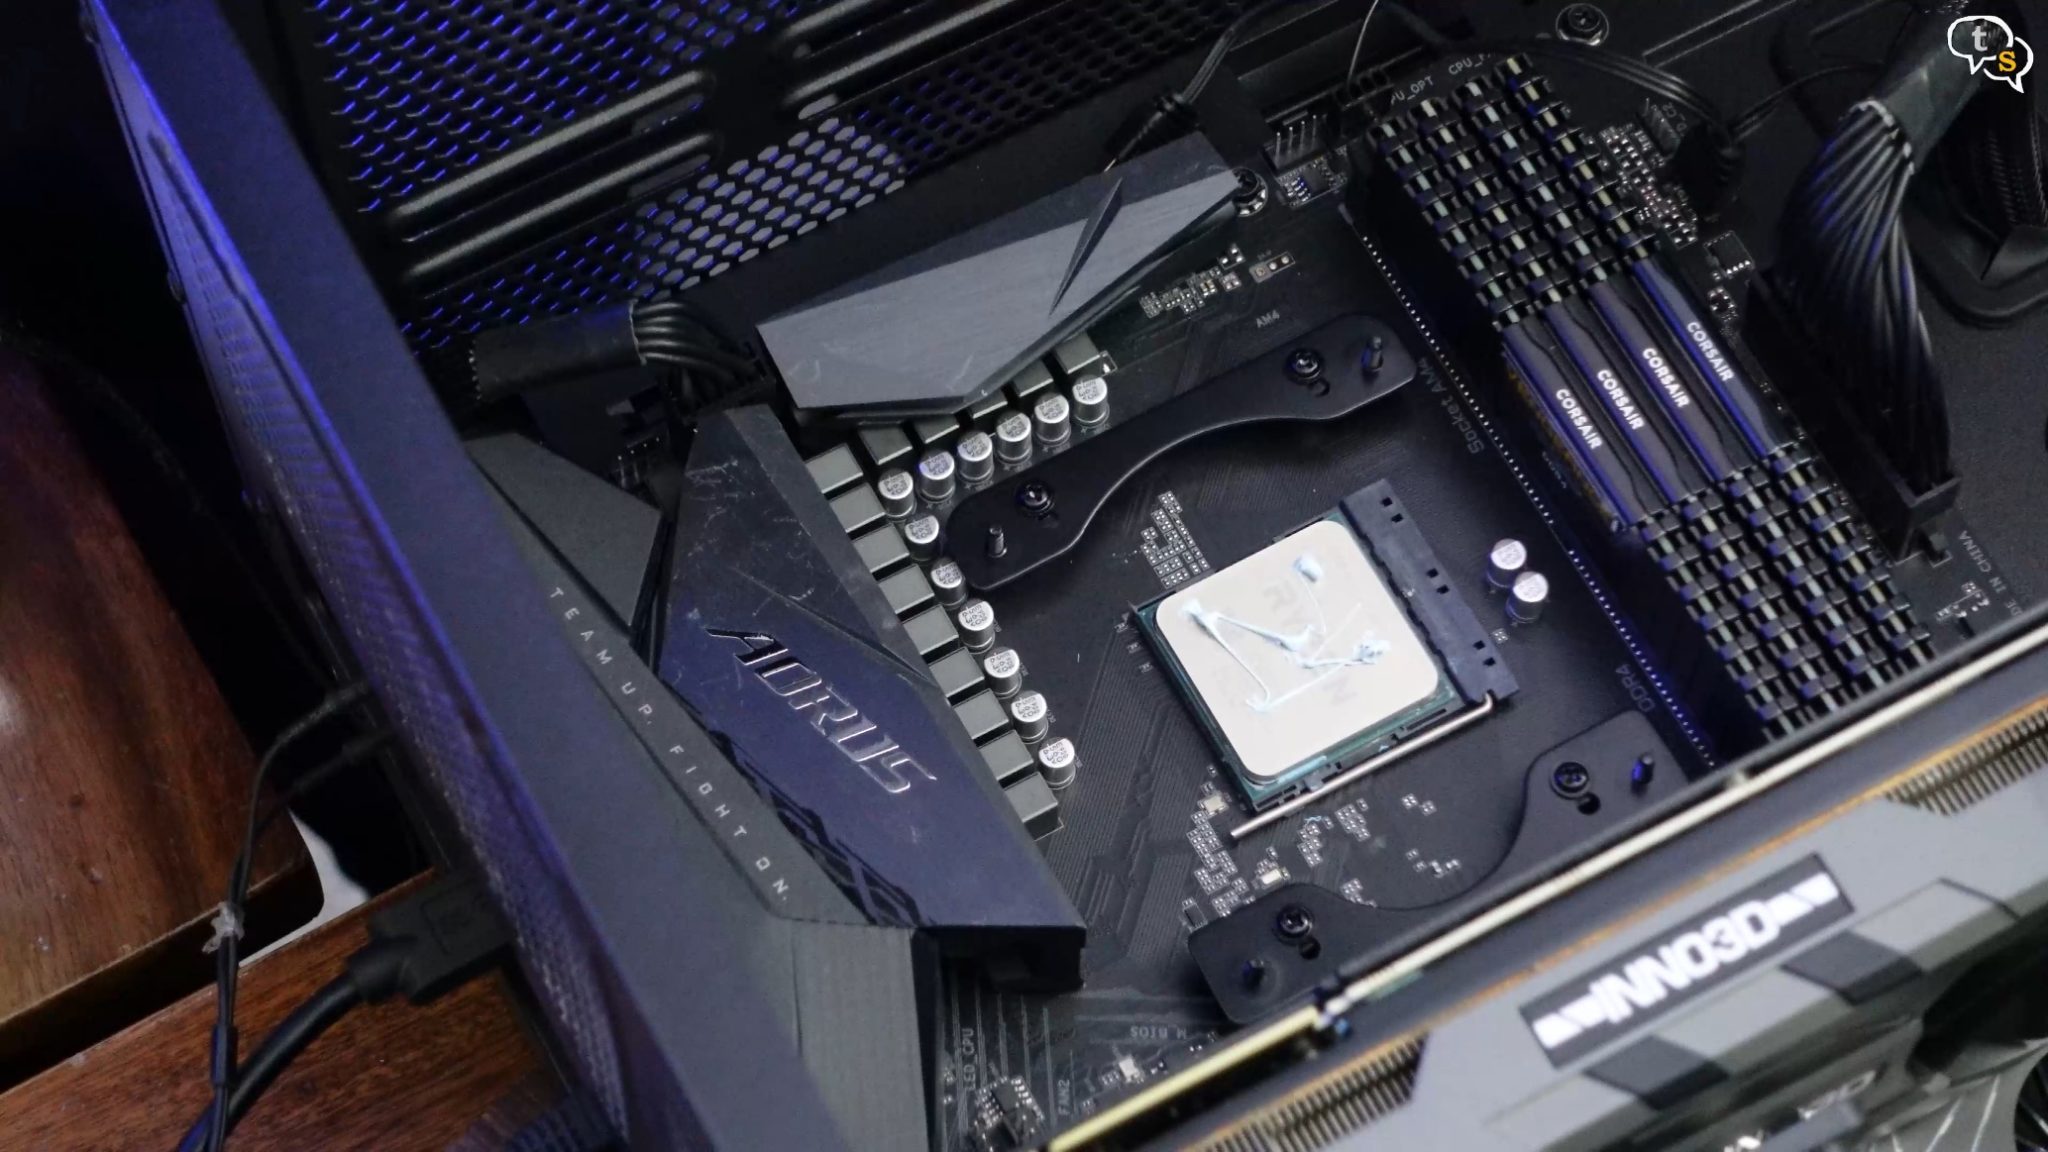
Ahh, the Cpu still came off with the pump. But I got a chance to clean it thoroughly and install it back onto the motherboard.
Now for the radiator, and it’s array of RGB and PWM cables.
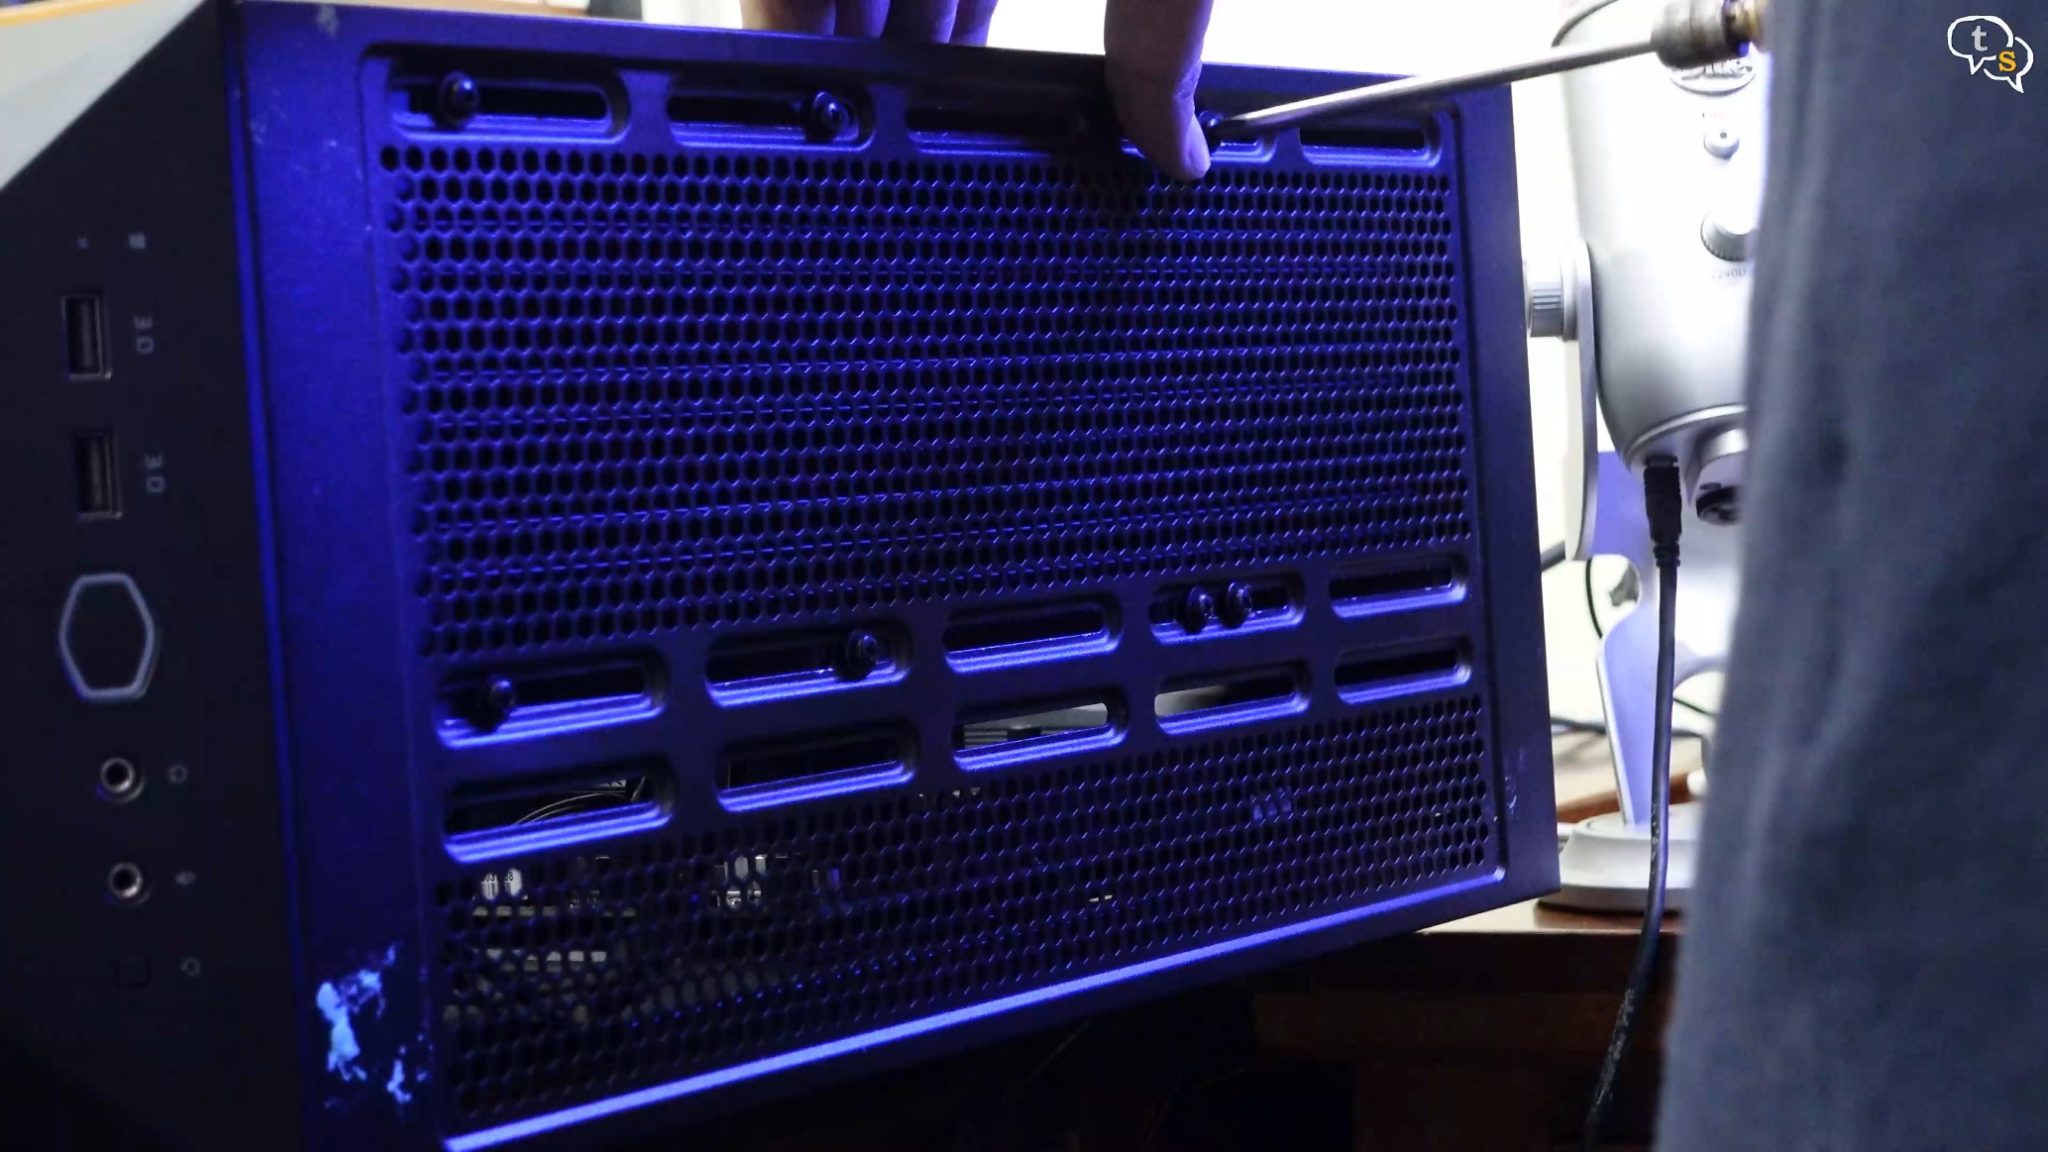
Let’s test fit and see if the pump and radiator would fit. This is the Cooler master TD 500 Mesh cabinet, to give you an idea of the space within.
Ok, I’m having problems with the radiator hitting the rear exhaust fan.
Have to remove it before I can install it.
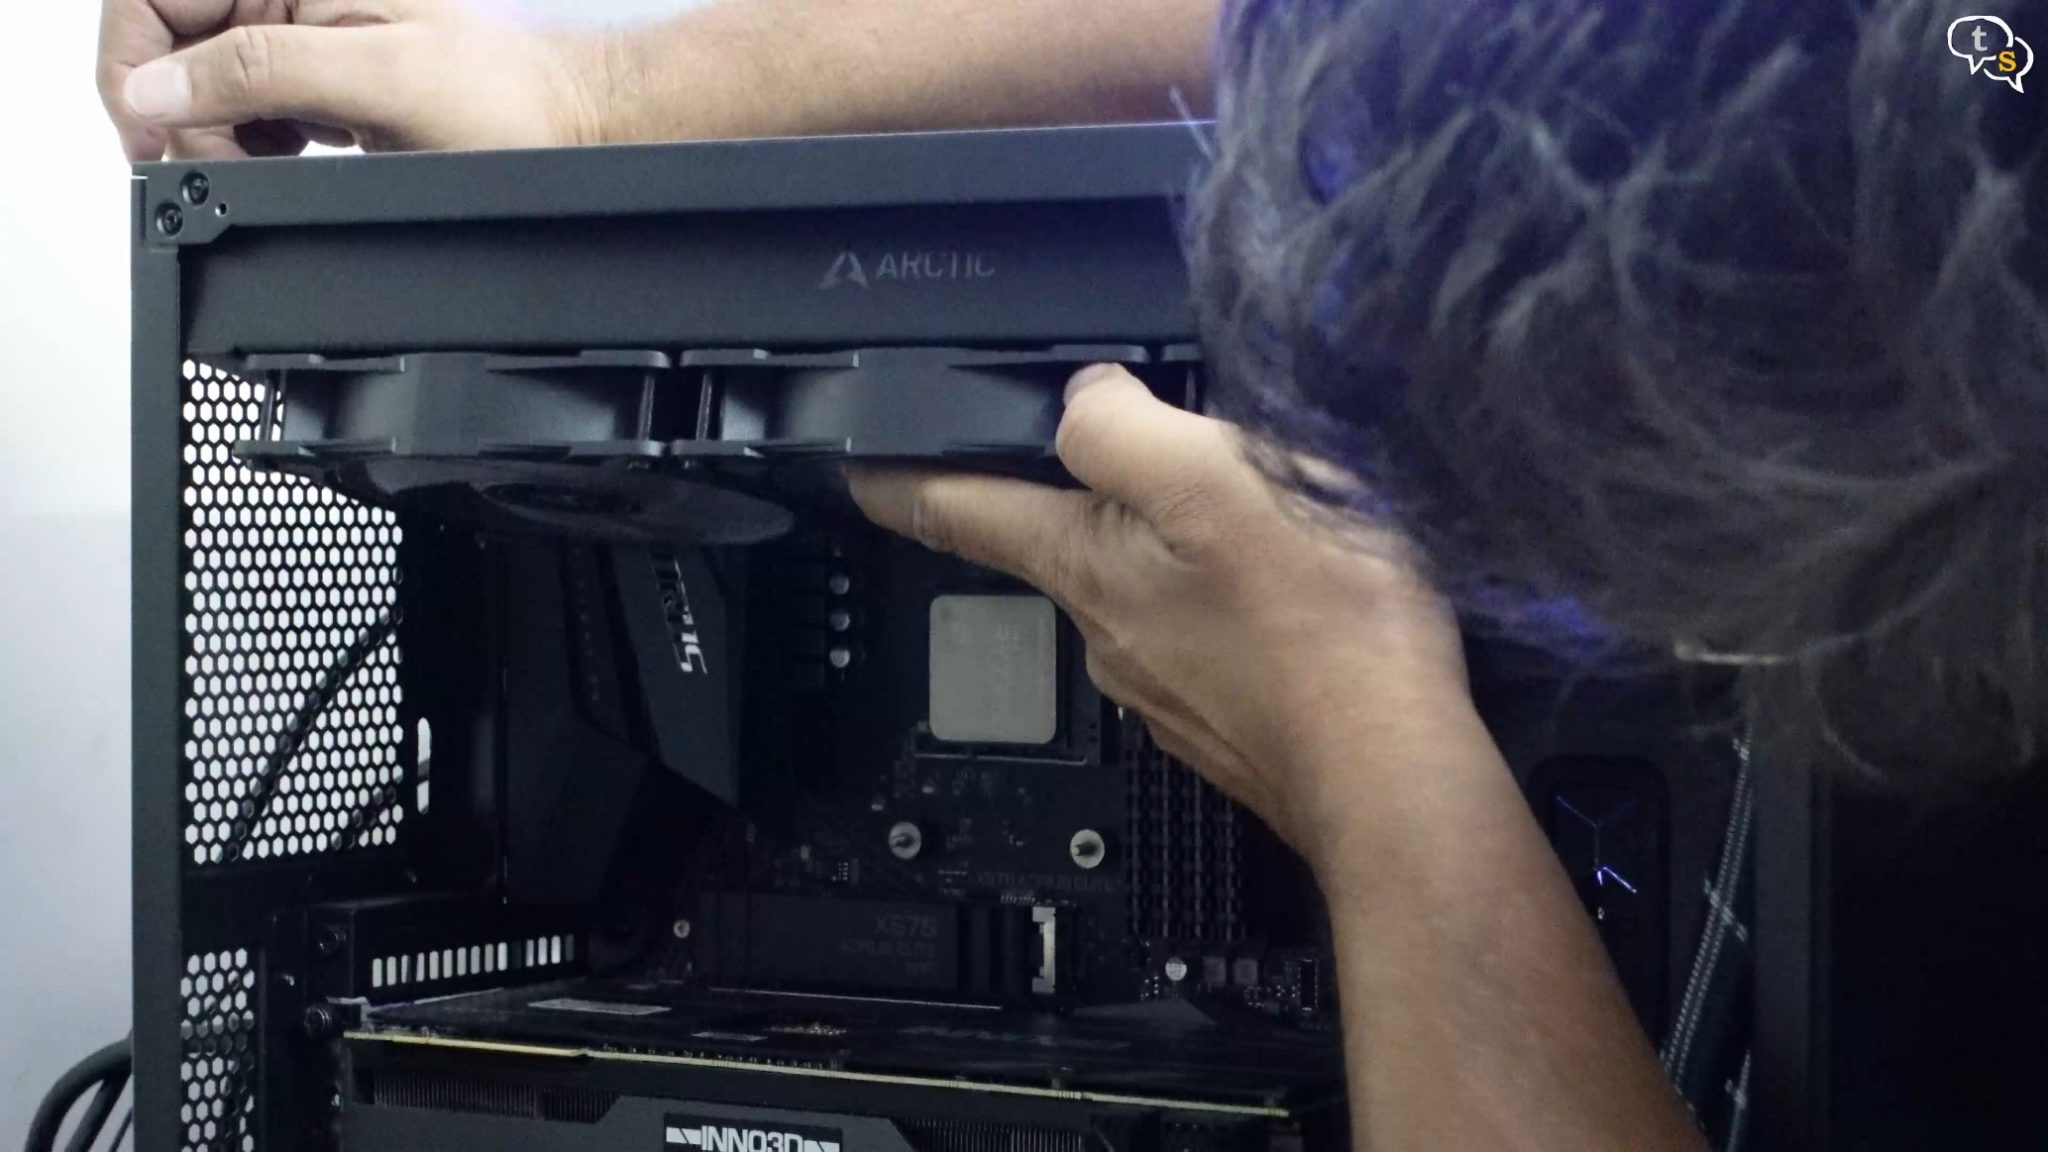
Fits like a glove now. Also make sure to install the pump and connect the RGB and PWM connectors before installing the radiator, as it’s thick and you would lose access to the headers on the motherboard.
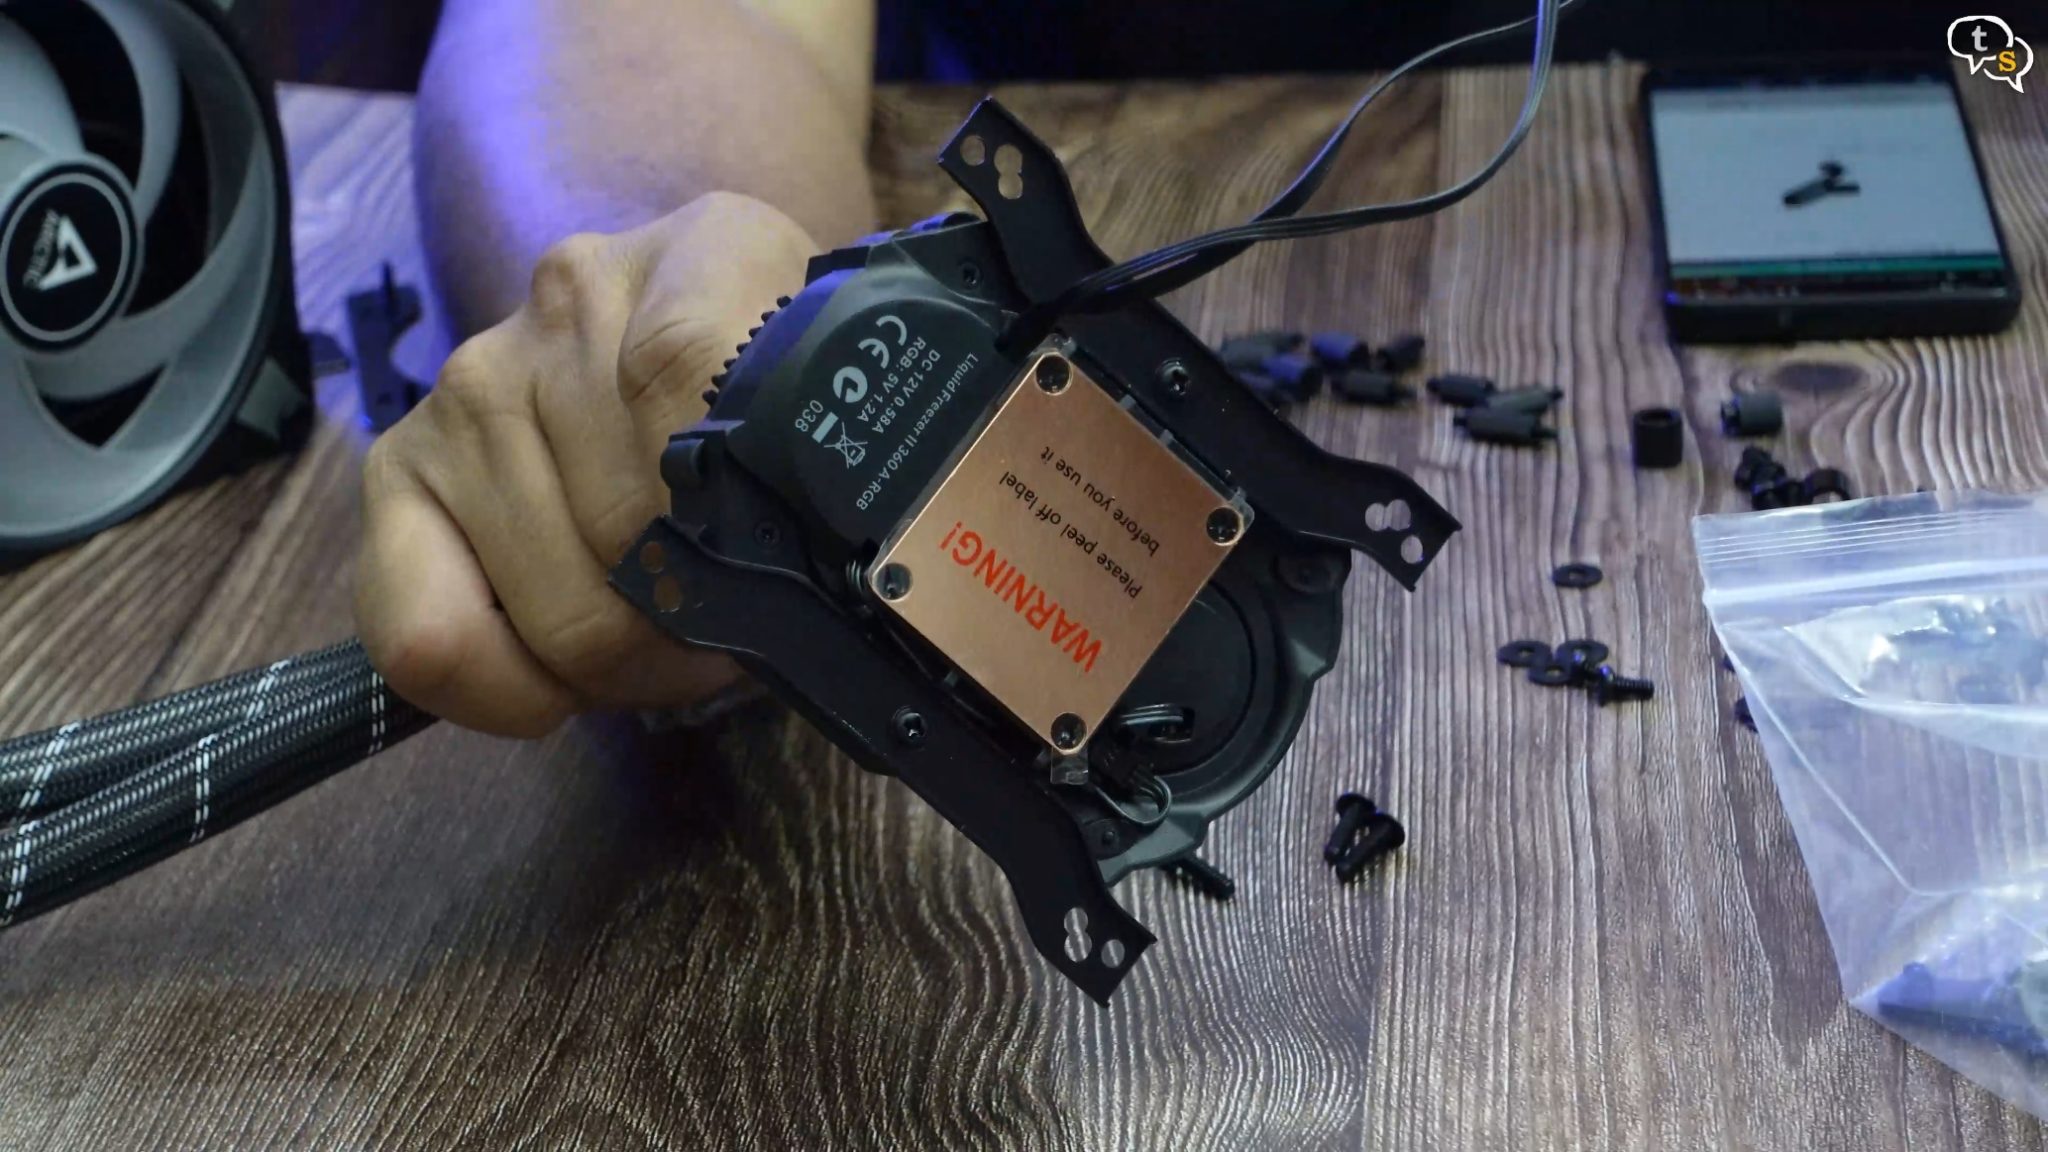
Install the bracket onto the pump, as I said earlier the screws to mount the bracket onto the pump are within this small packet here.
Ready.

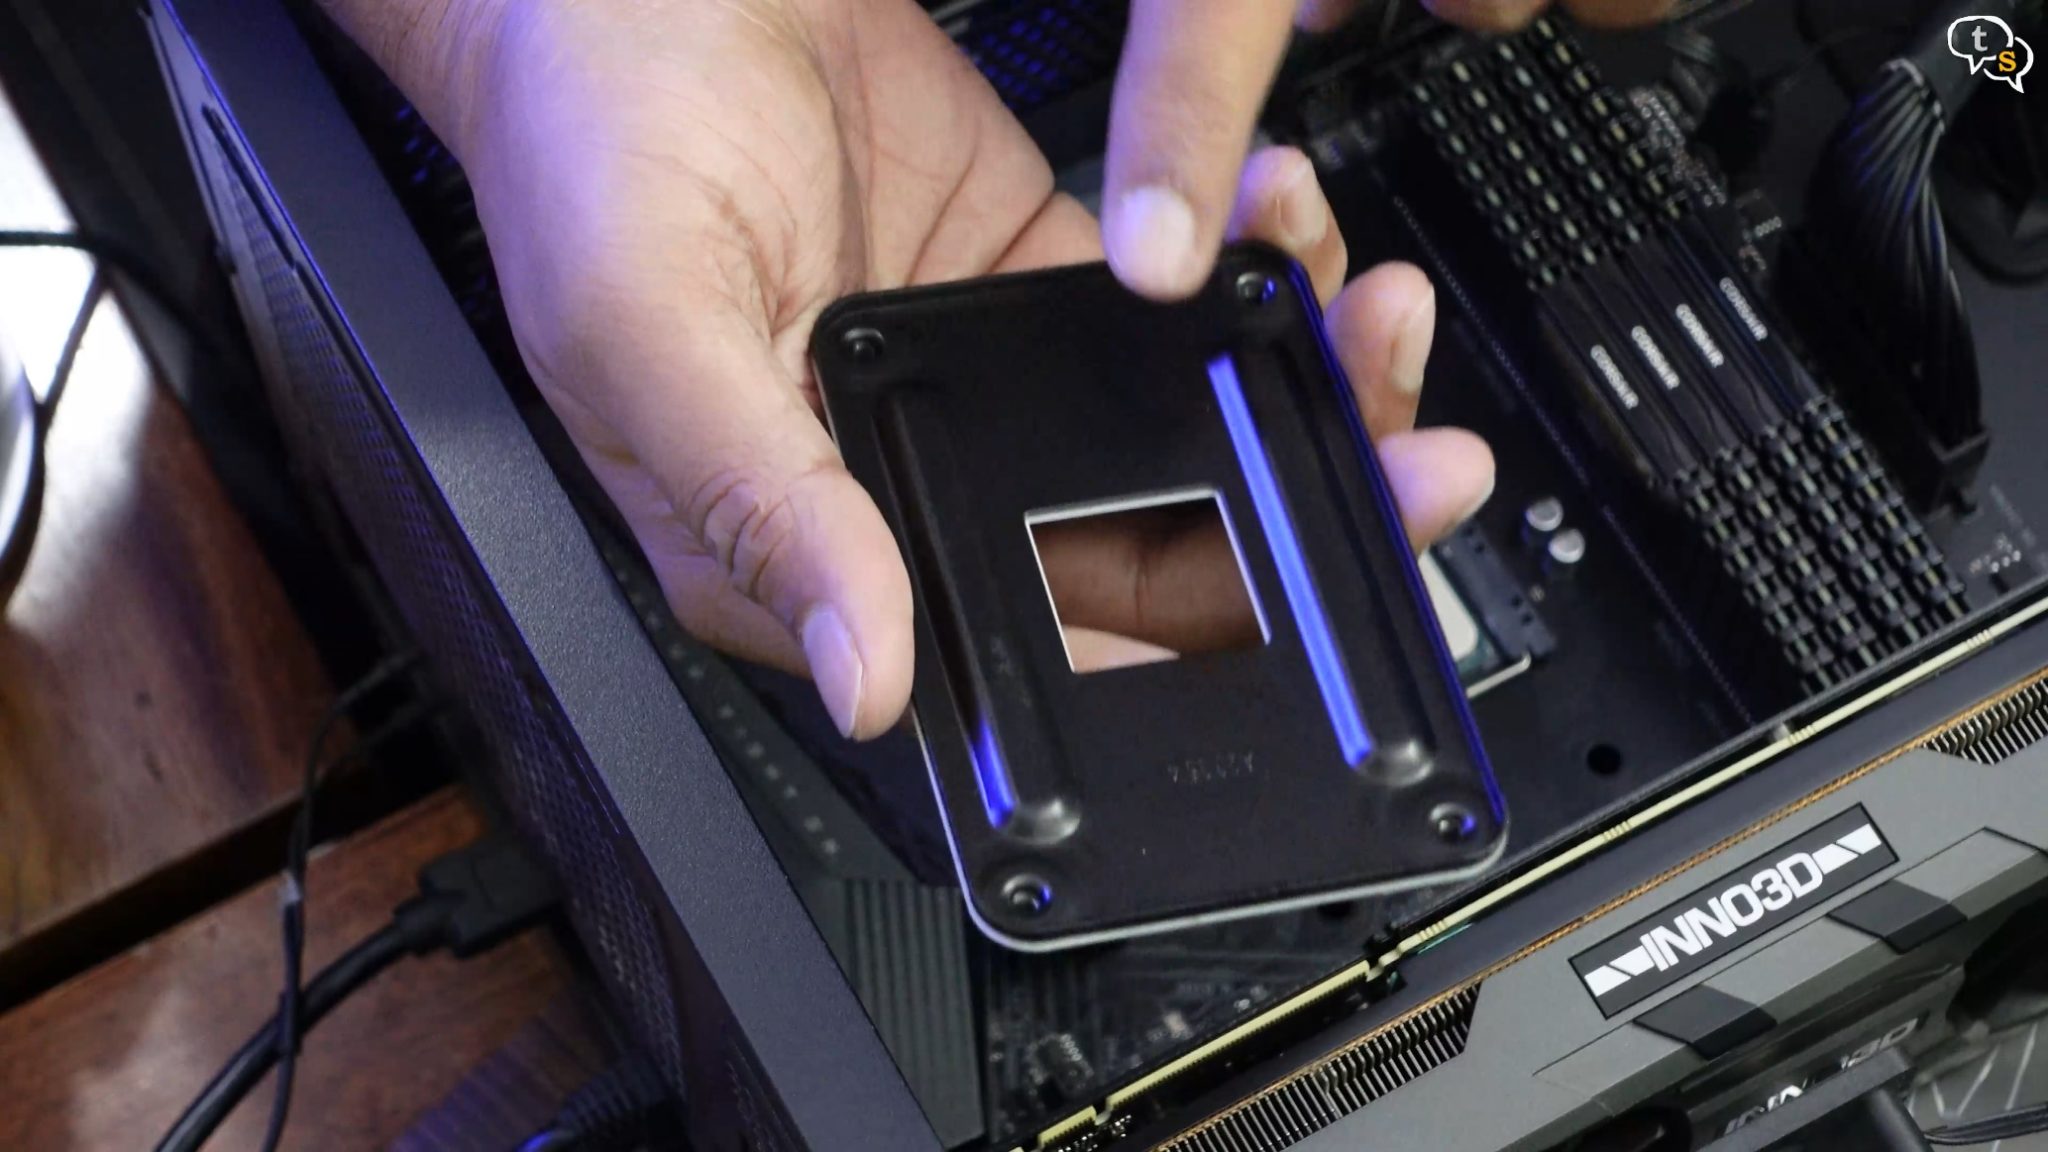
The AMD retention plates have a number of holes, which allow the pump to be installed offset from the center. This is helpful on AMD processors as the center of the cold-plate has the best performance, offsetting it to where the actual hotspots are on the CPU helps keep it cooler.
This is for Ryzen 3000 and 5000 CPU’s, else use holes marked #1 for standard AMD mounting.
Also make sure which retention plate goes where as these are different.
This here is the standard backplate included with the motherboard, we’re going to install the pump retention plates onto it.
It goes in from the back like so, and we have access to these screw holes here.
Add the spacers, and then place the retention plate on top. You need to hold the backplate up as it would fall off. I’m placing the cabinet in a lying down orientation so that it’s easier to install. It can be installed when placed vertically too.
Retention plate one and retention plate 2 done.
Now we use the thumbscrews to mount the pump onto the motherboard.
Before that I have applied thermal paste to the CPU, a drop is generally enough, but i’m using the 5 dot method.
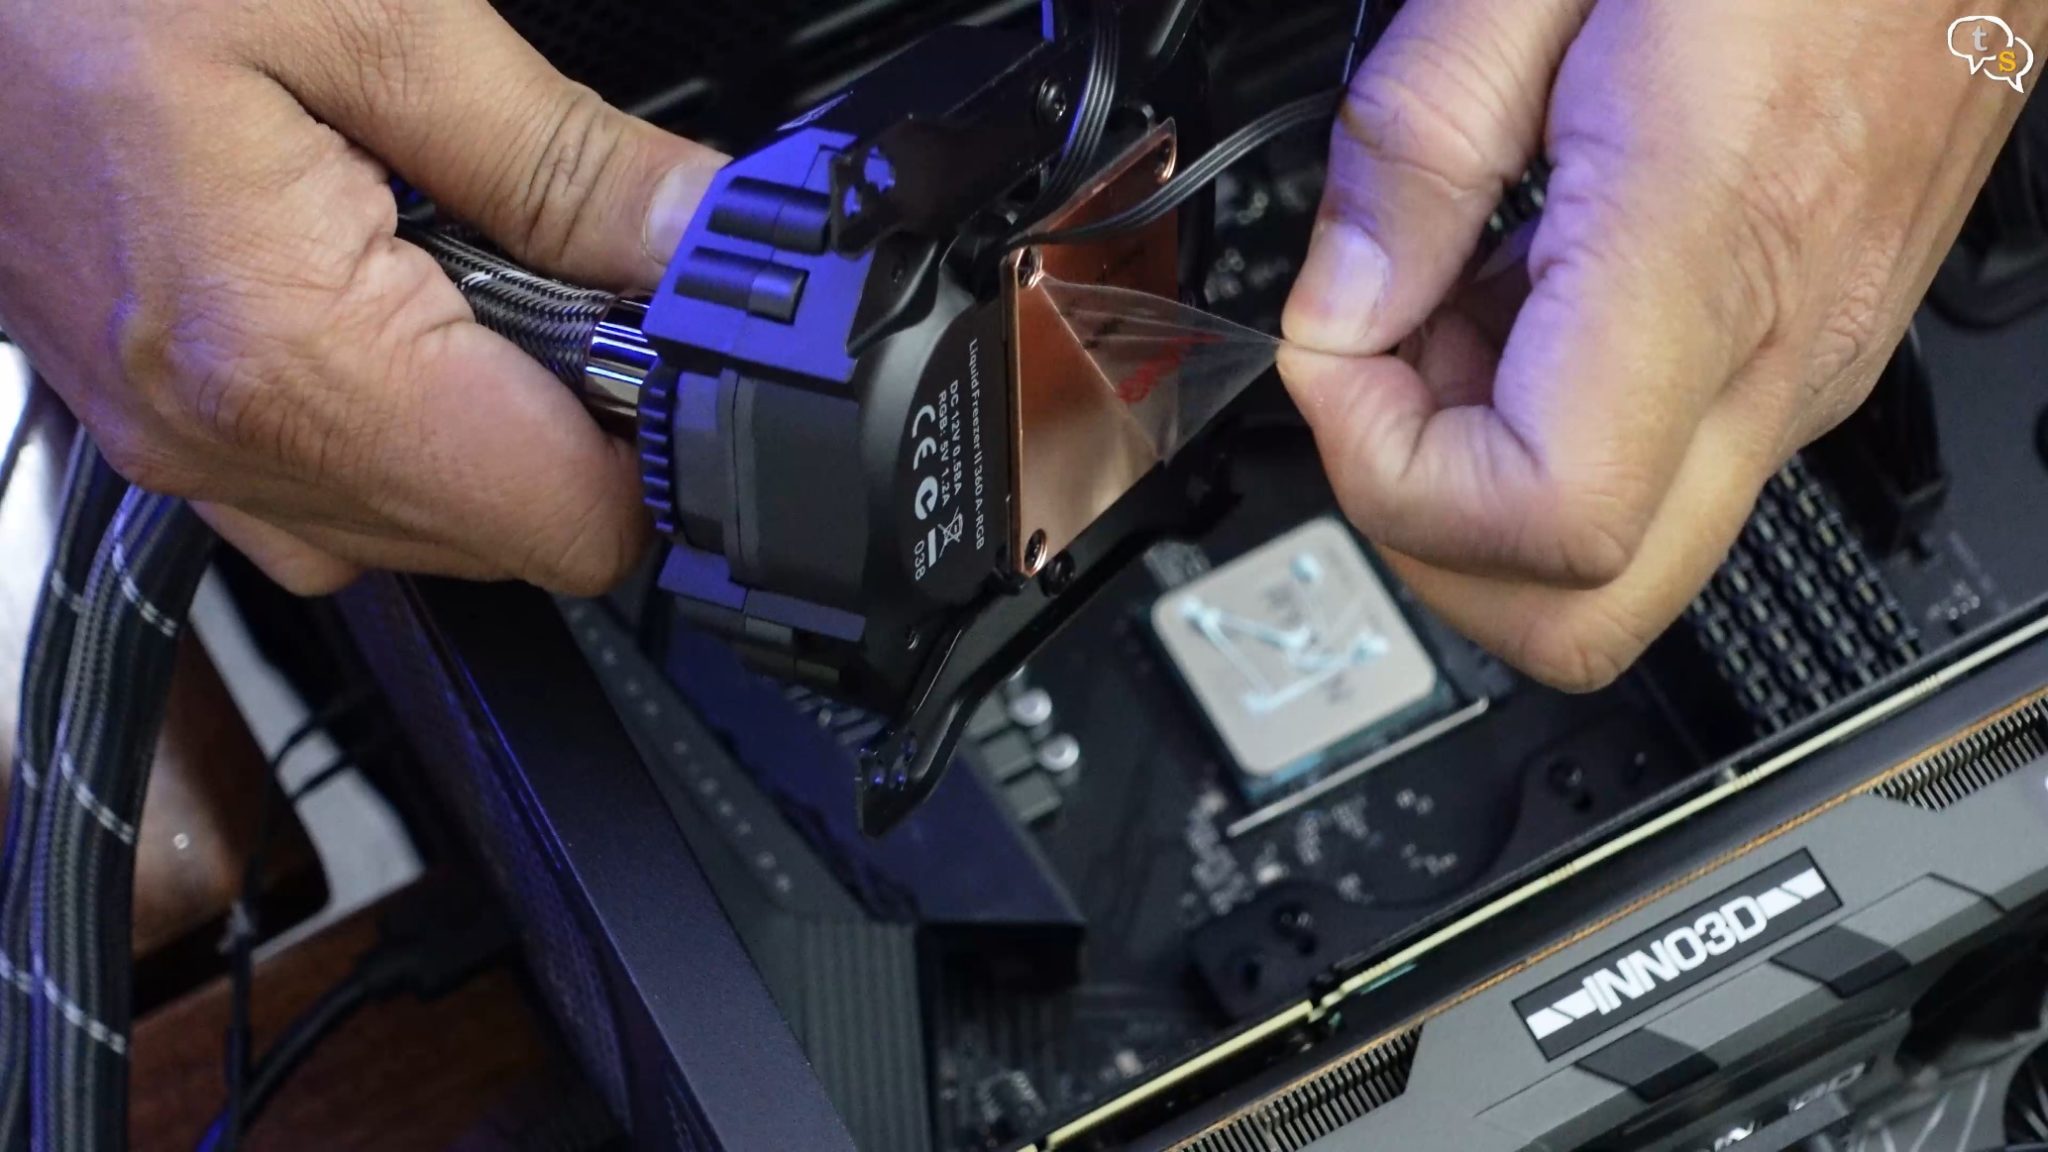
Remove the protective plastic film off the cold plate and install the pump, VRM fans pointing up. This is the orientation recommended in the guide and is understandable as it’s the only way the VRM’s would be cooled by the fan on the pump.
Using the thumb screws to hold the pump down, I tighten the screws across from each other, to get an even pressure and the thermal paste also spreads evenly.
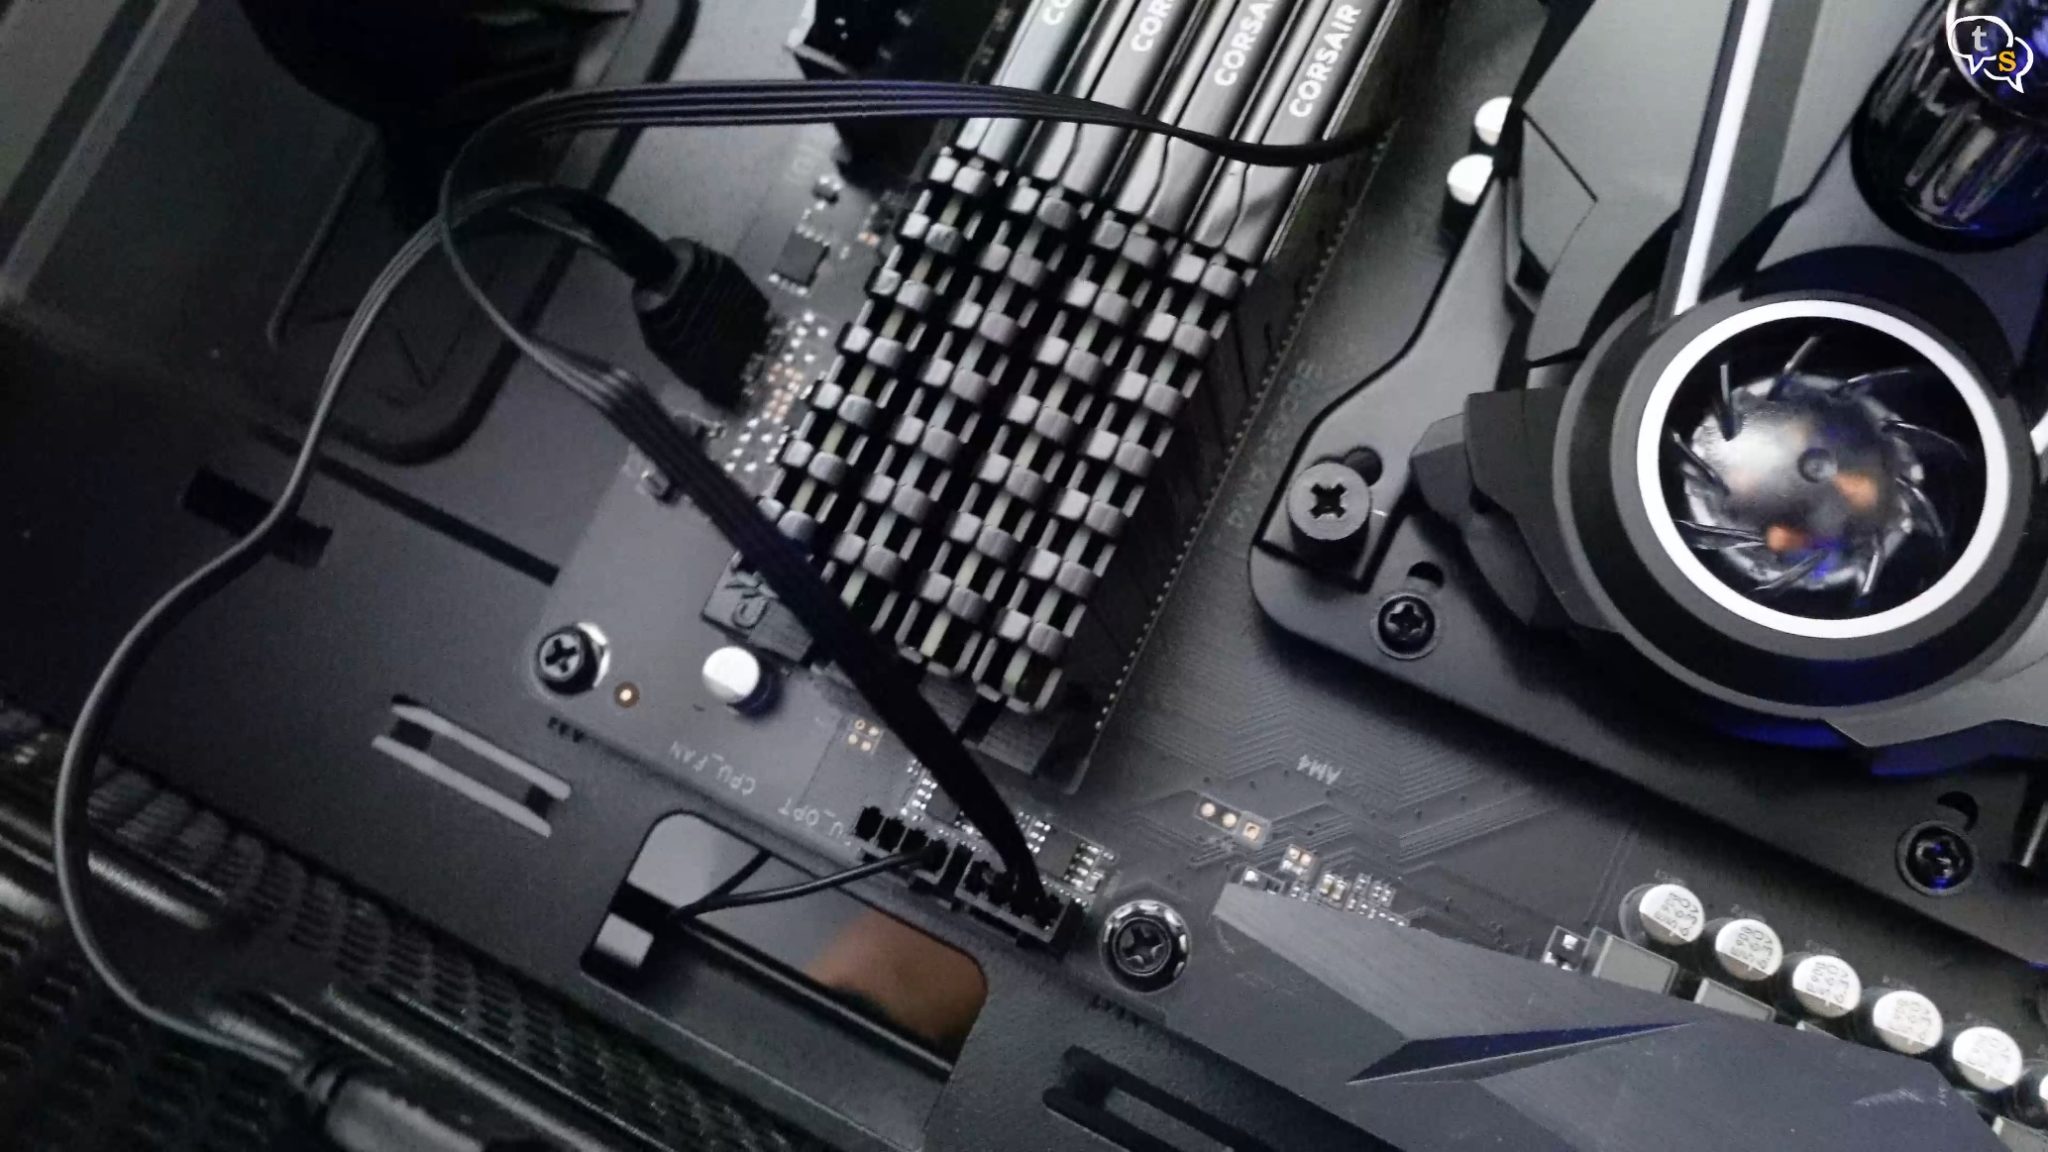
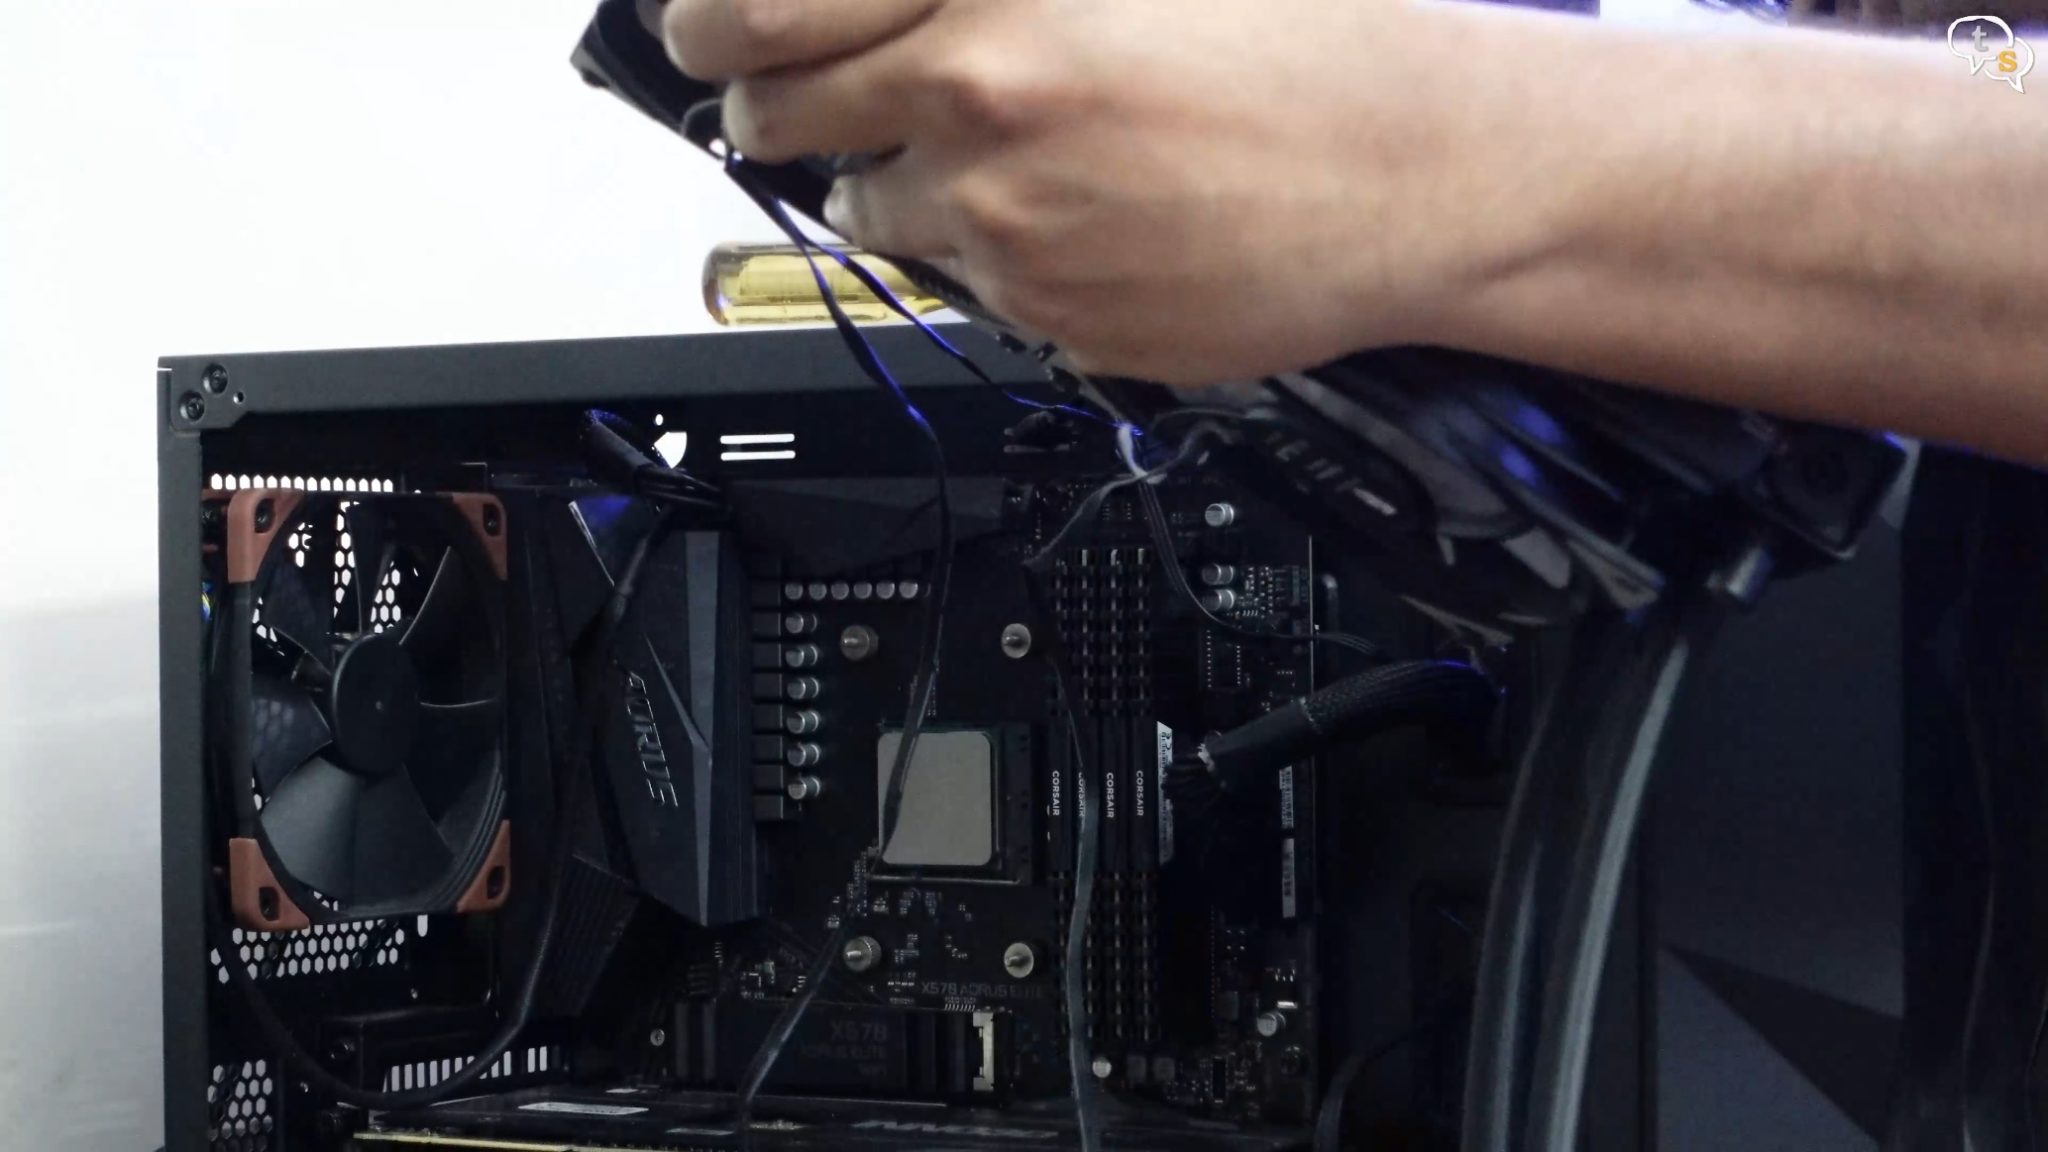
Connect the CPU PWM header onto the motherboard and also the ARGB header.
Now for the radiator, it goes in easily and then using the
provided washers and screws mount it down.
Now for the first boot.
Fingers crossed, fans are spinning, even the VRM fan is spinning.
RGB lighting on the fans are also active, and the system is booting.
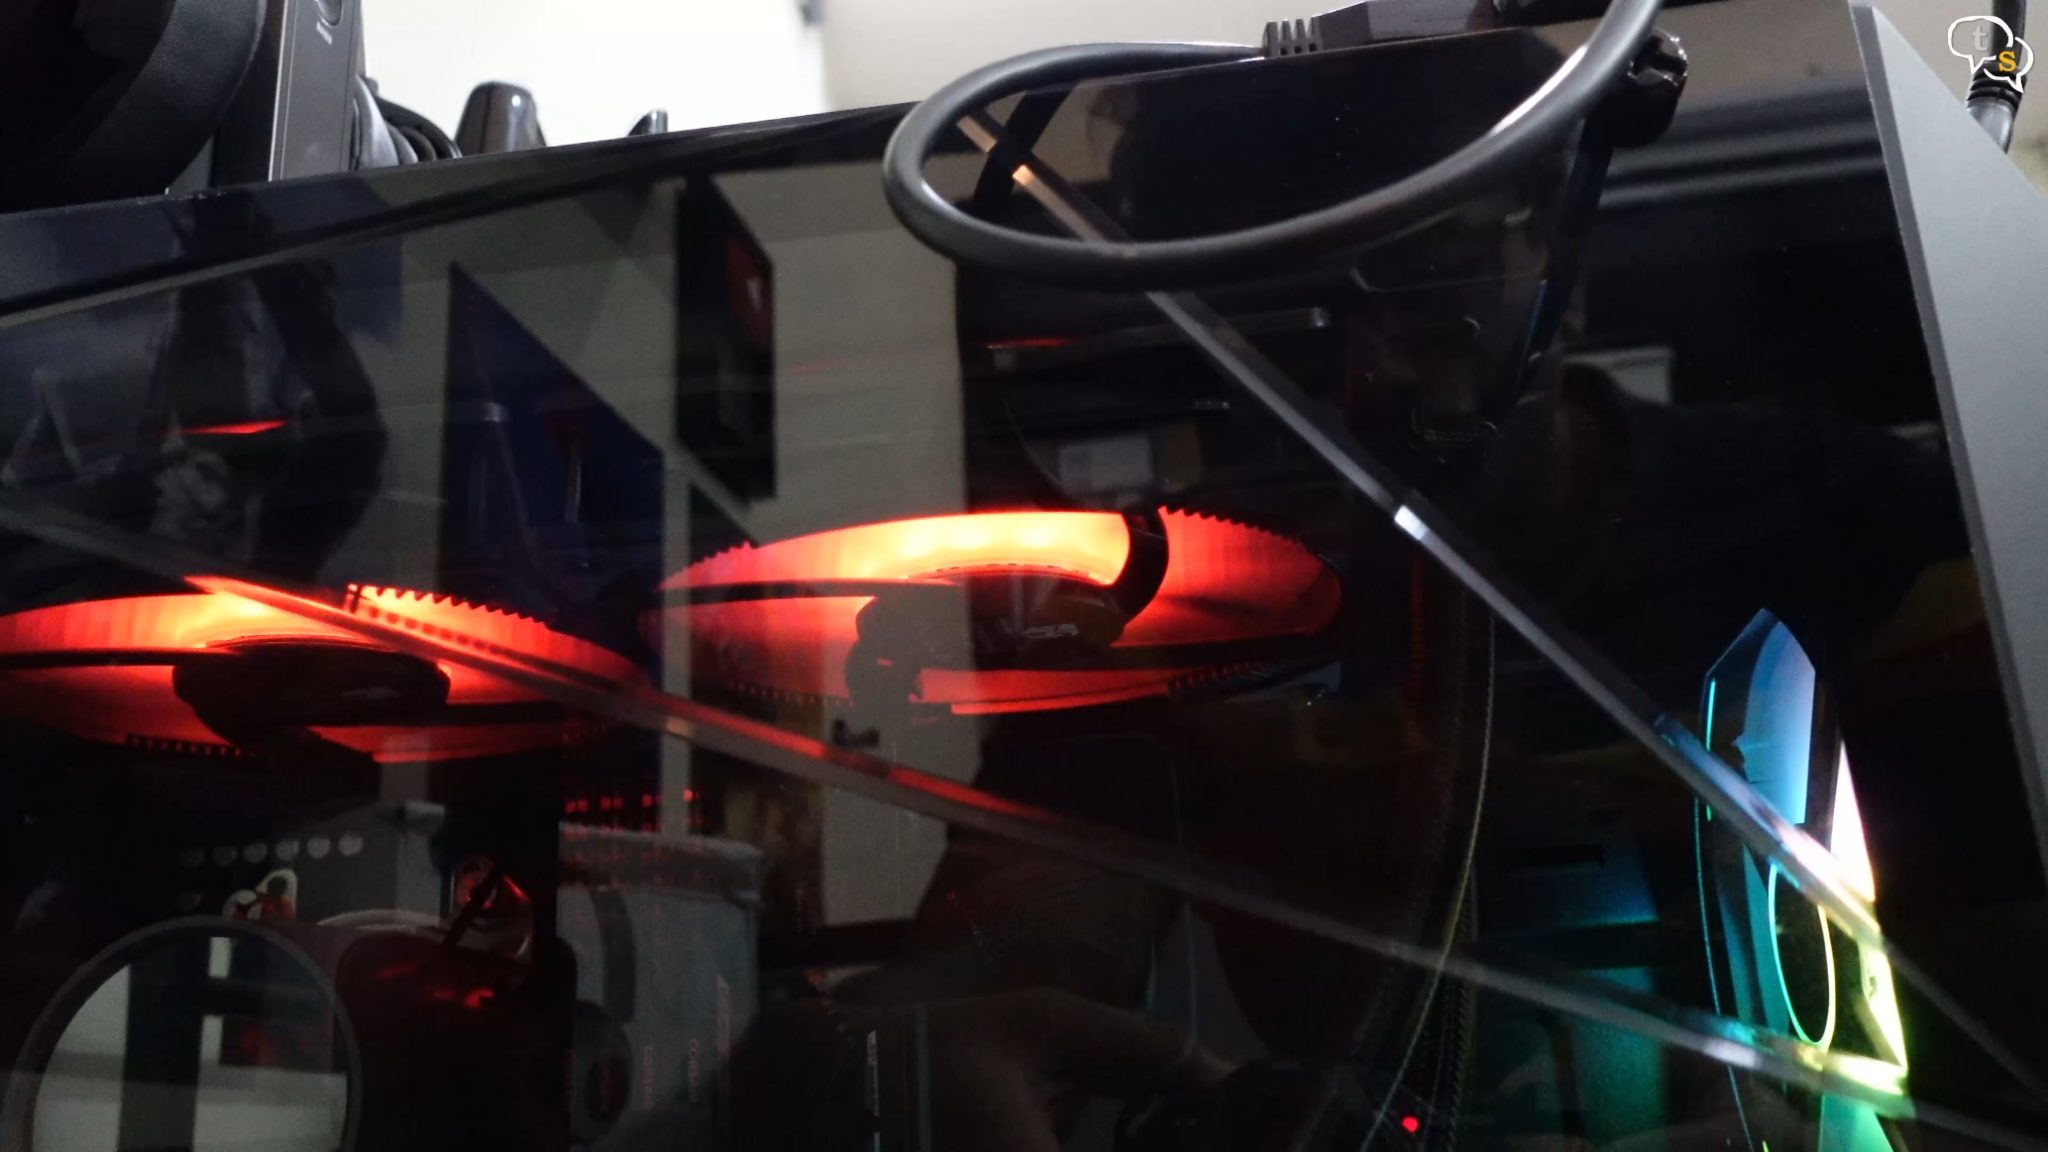
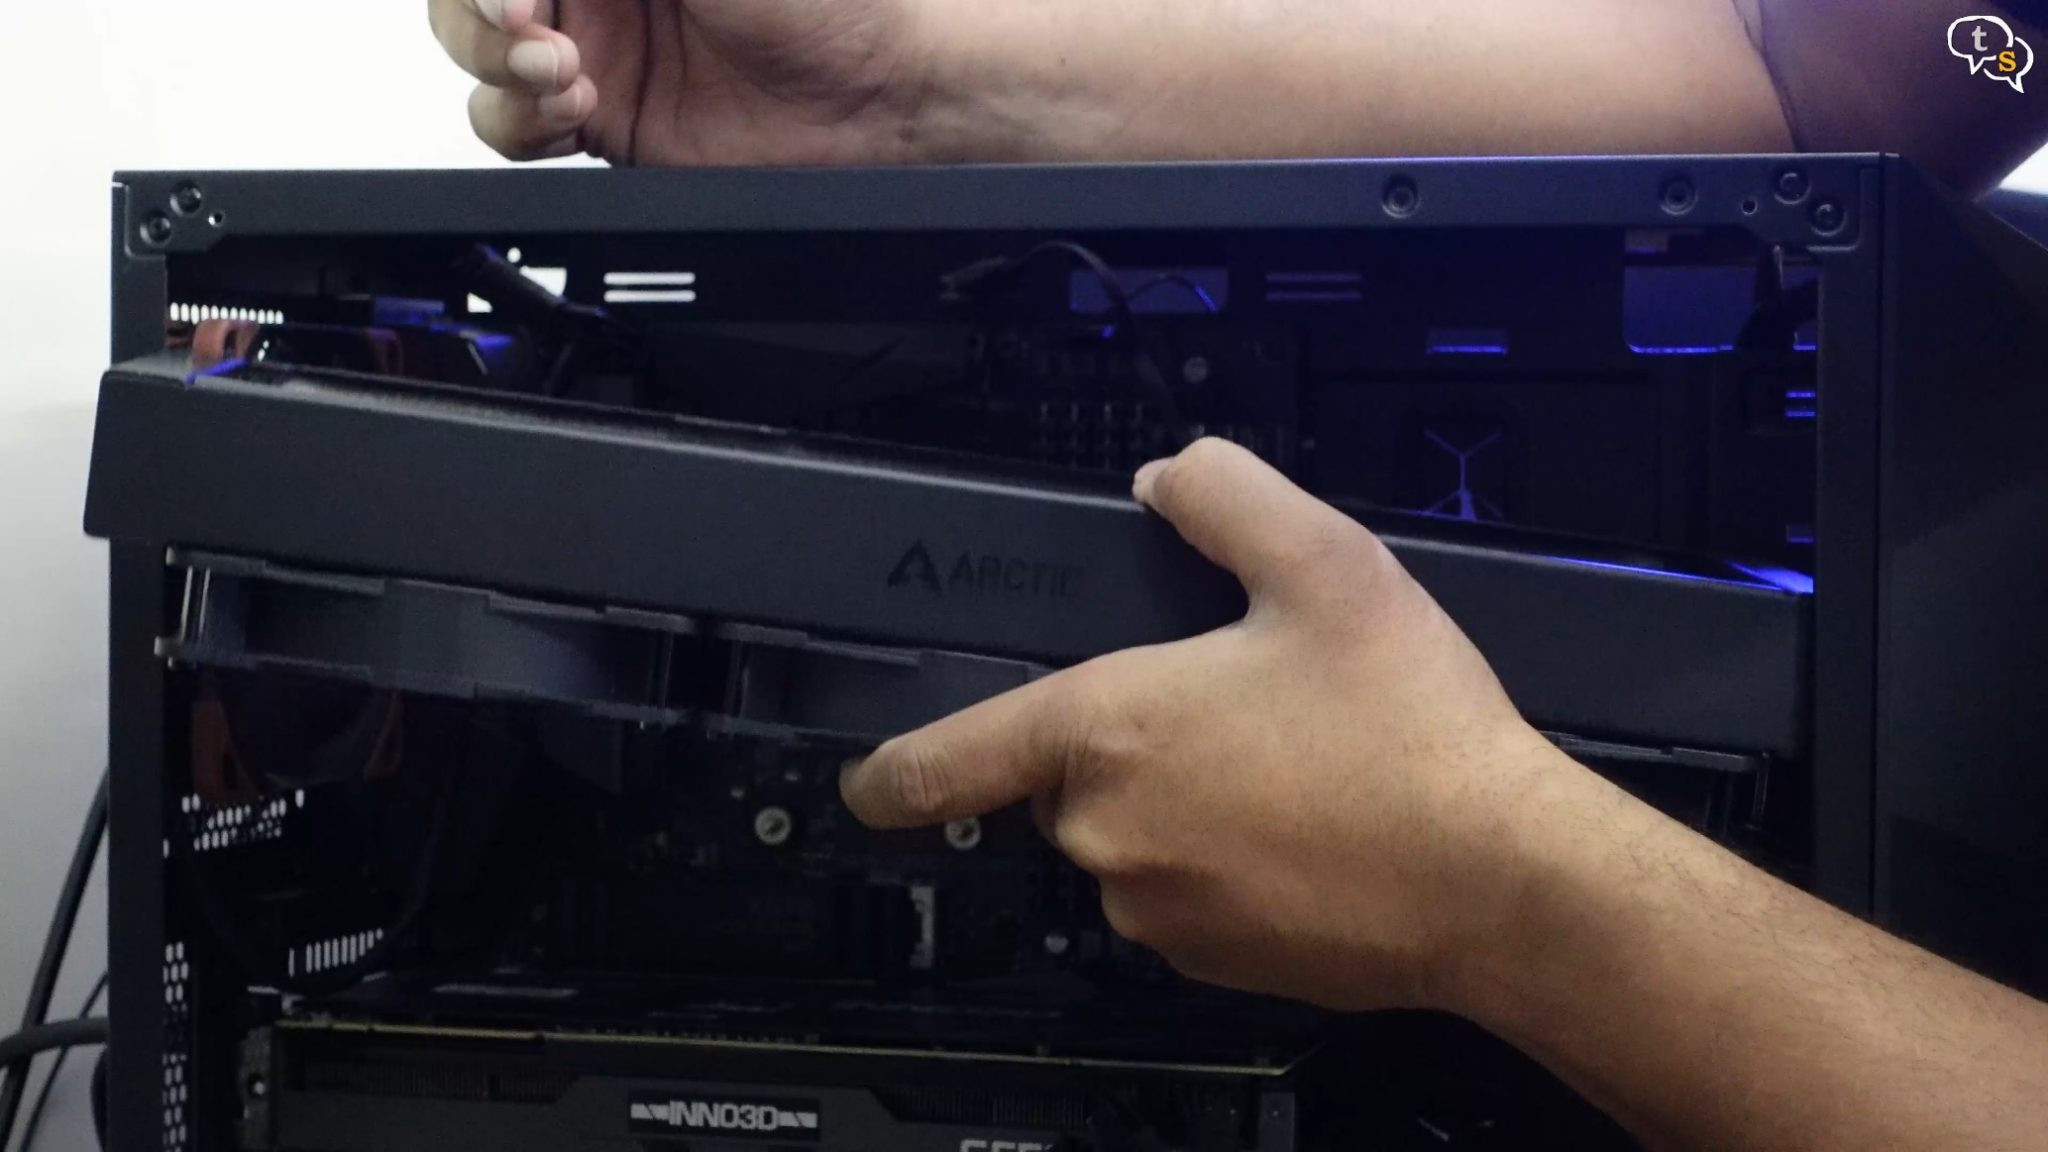
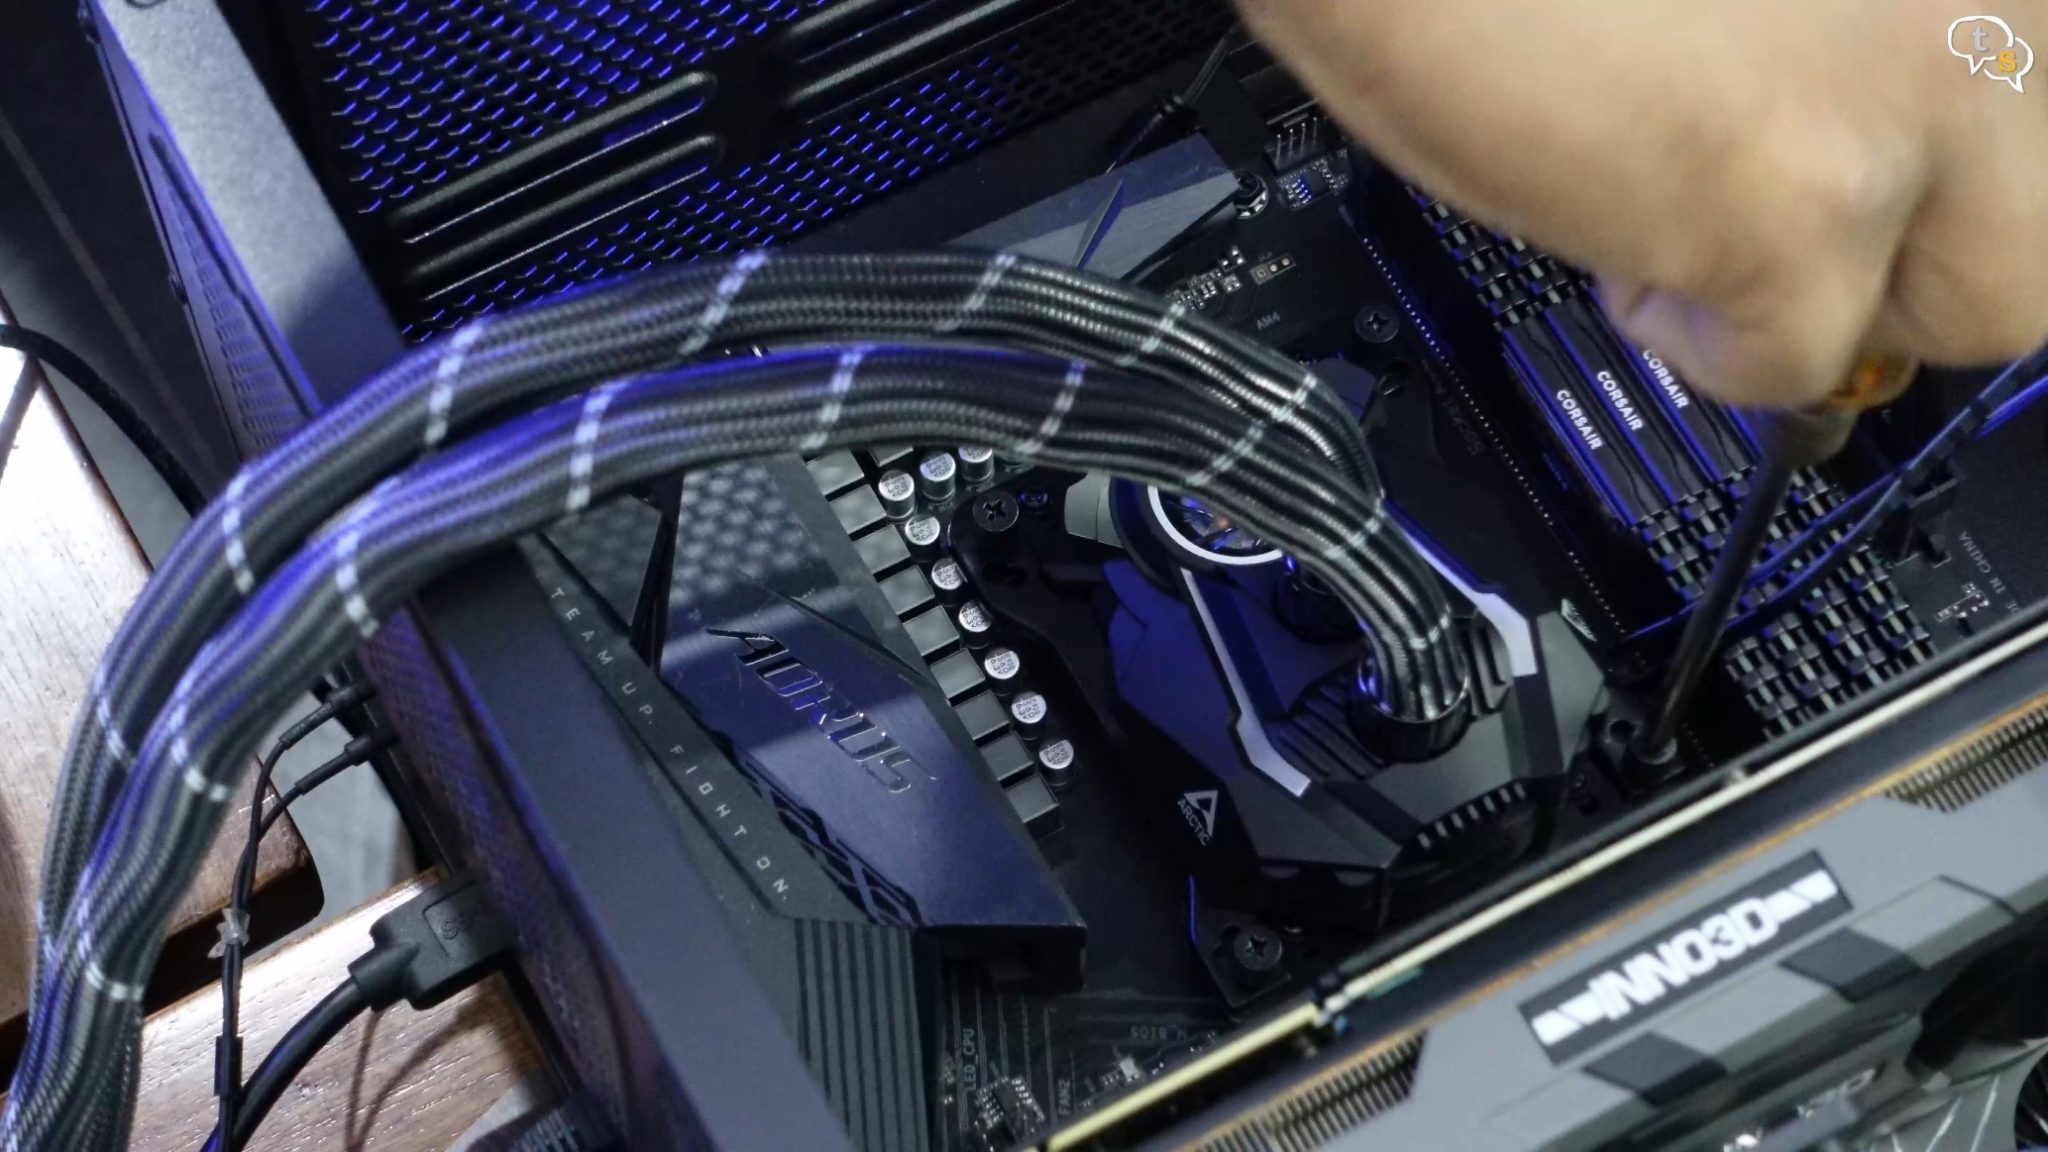
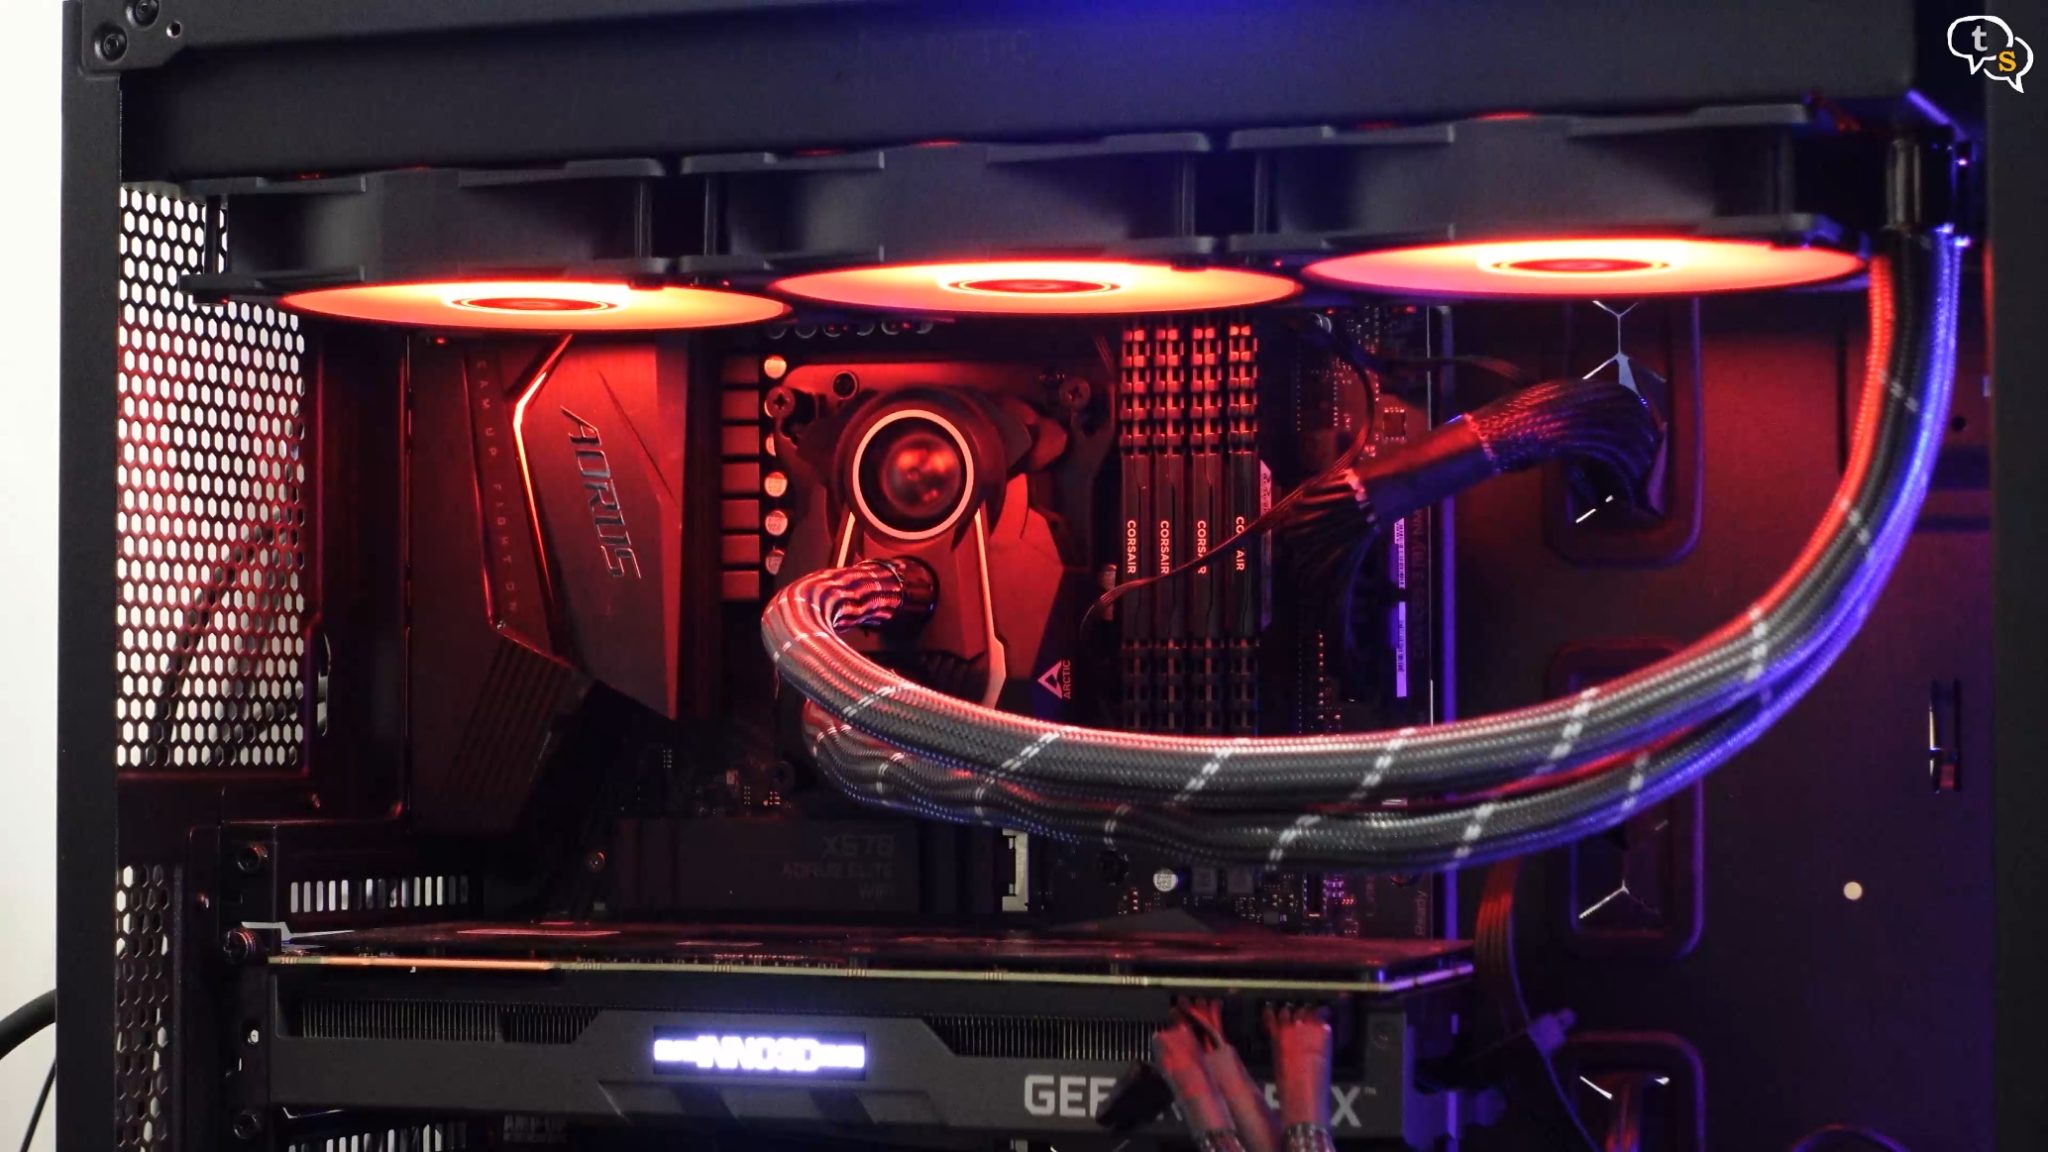
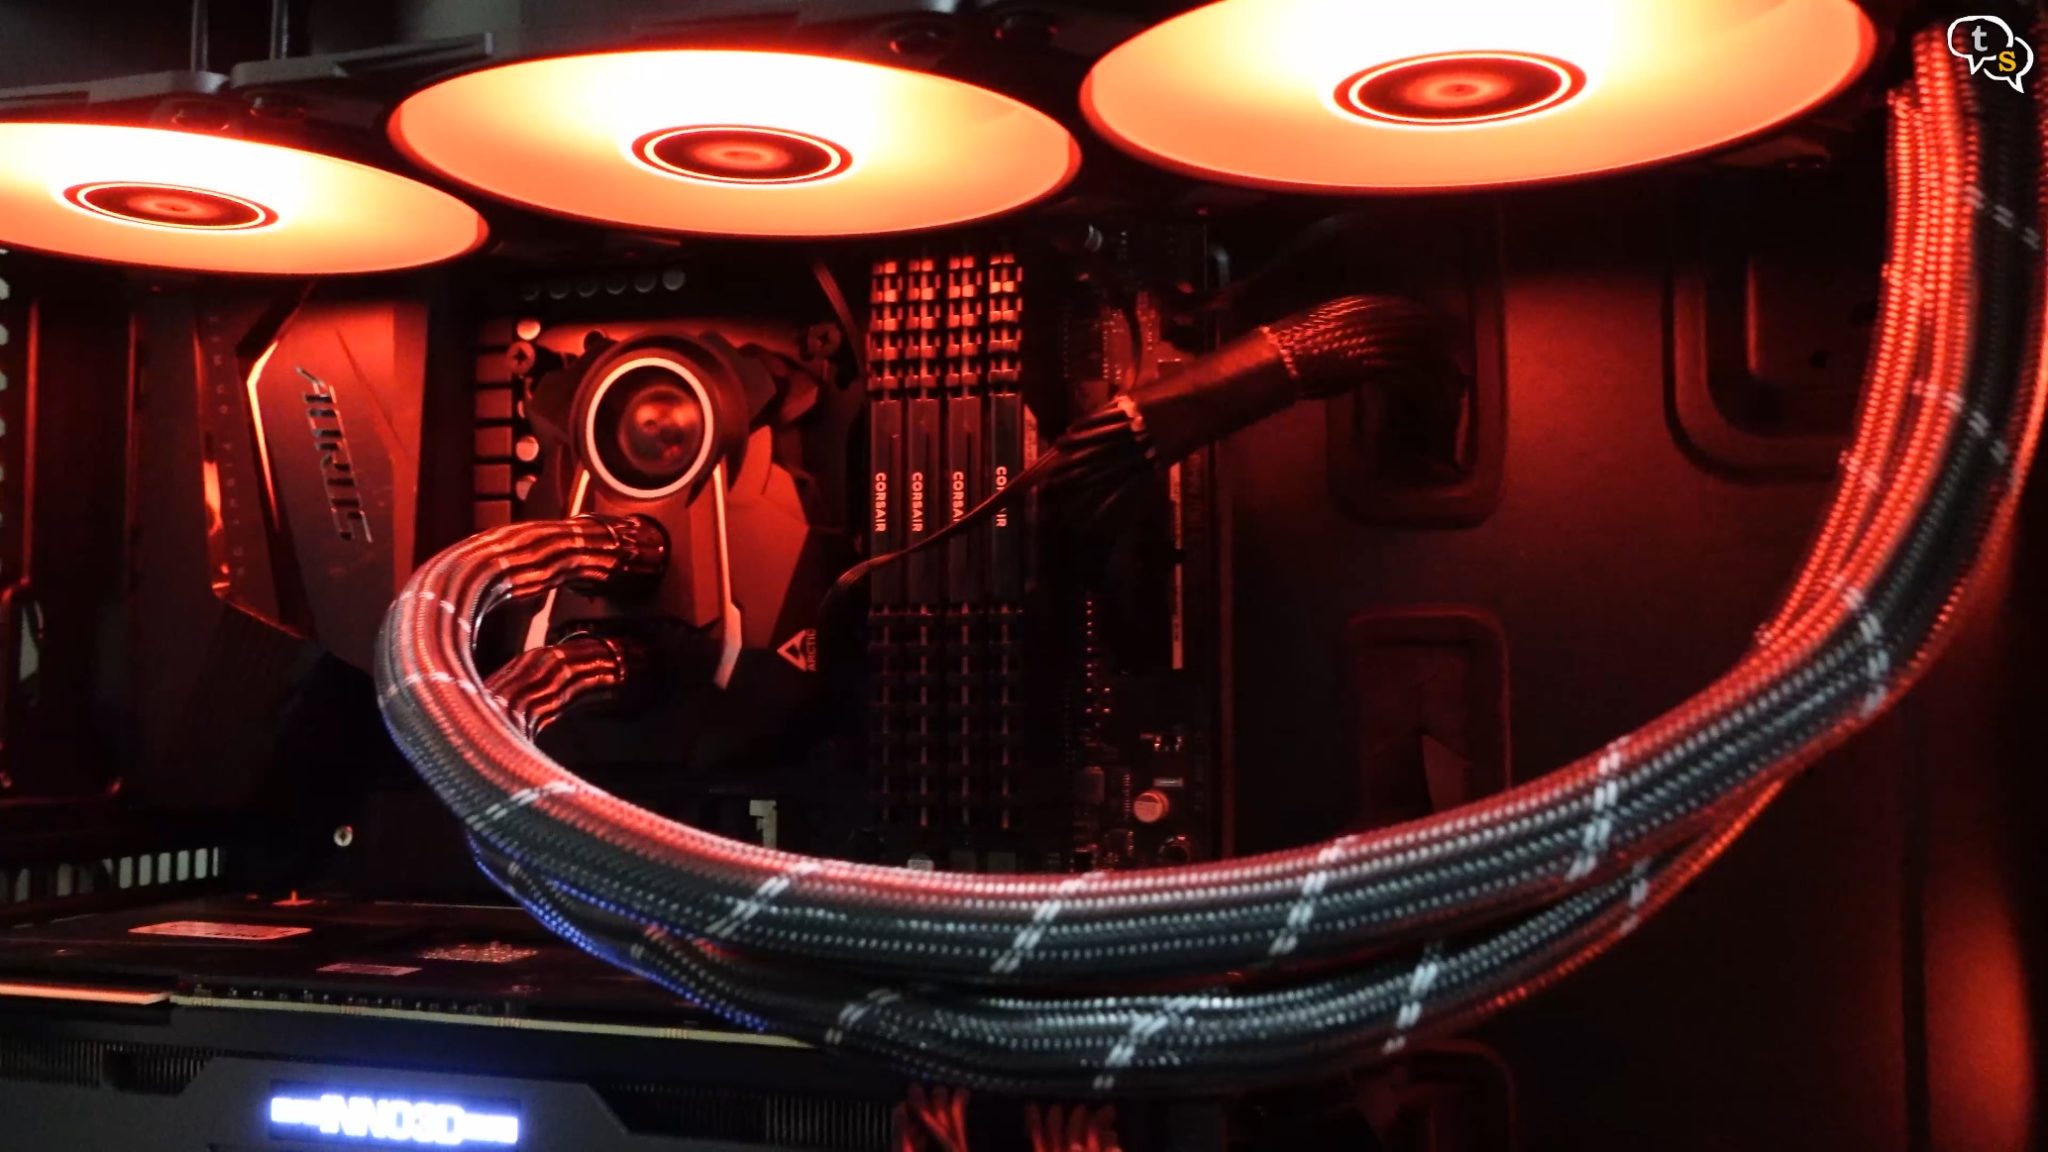
This is how it looks within the system, here are the 3 120mm fans on the radiator and here’s the pump.
The capacitors here are too close for comfort, let me check how much of a clearance we are getting using a piece of paper. Just enough, that’s why we need the spacers.
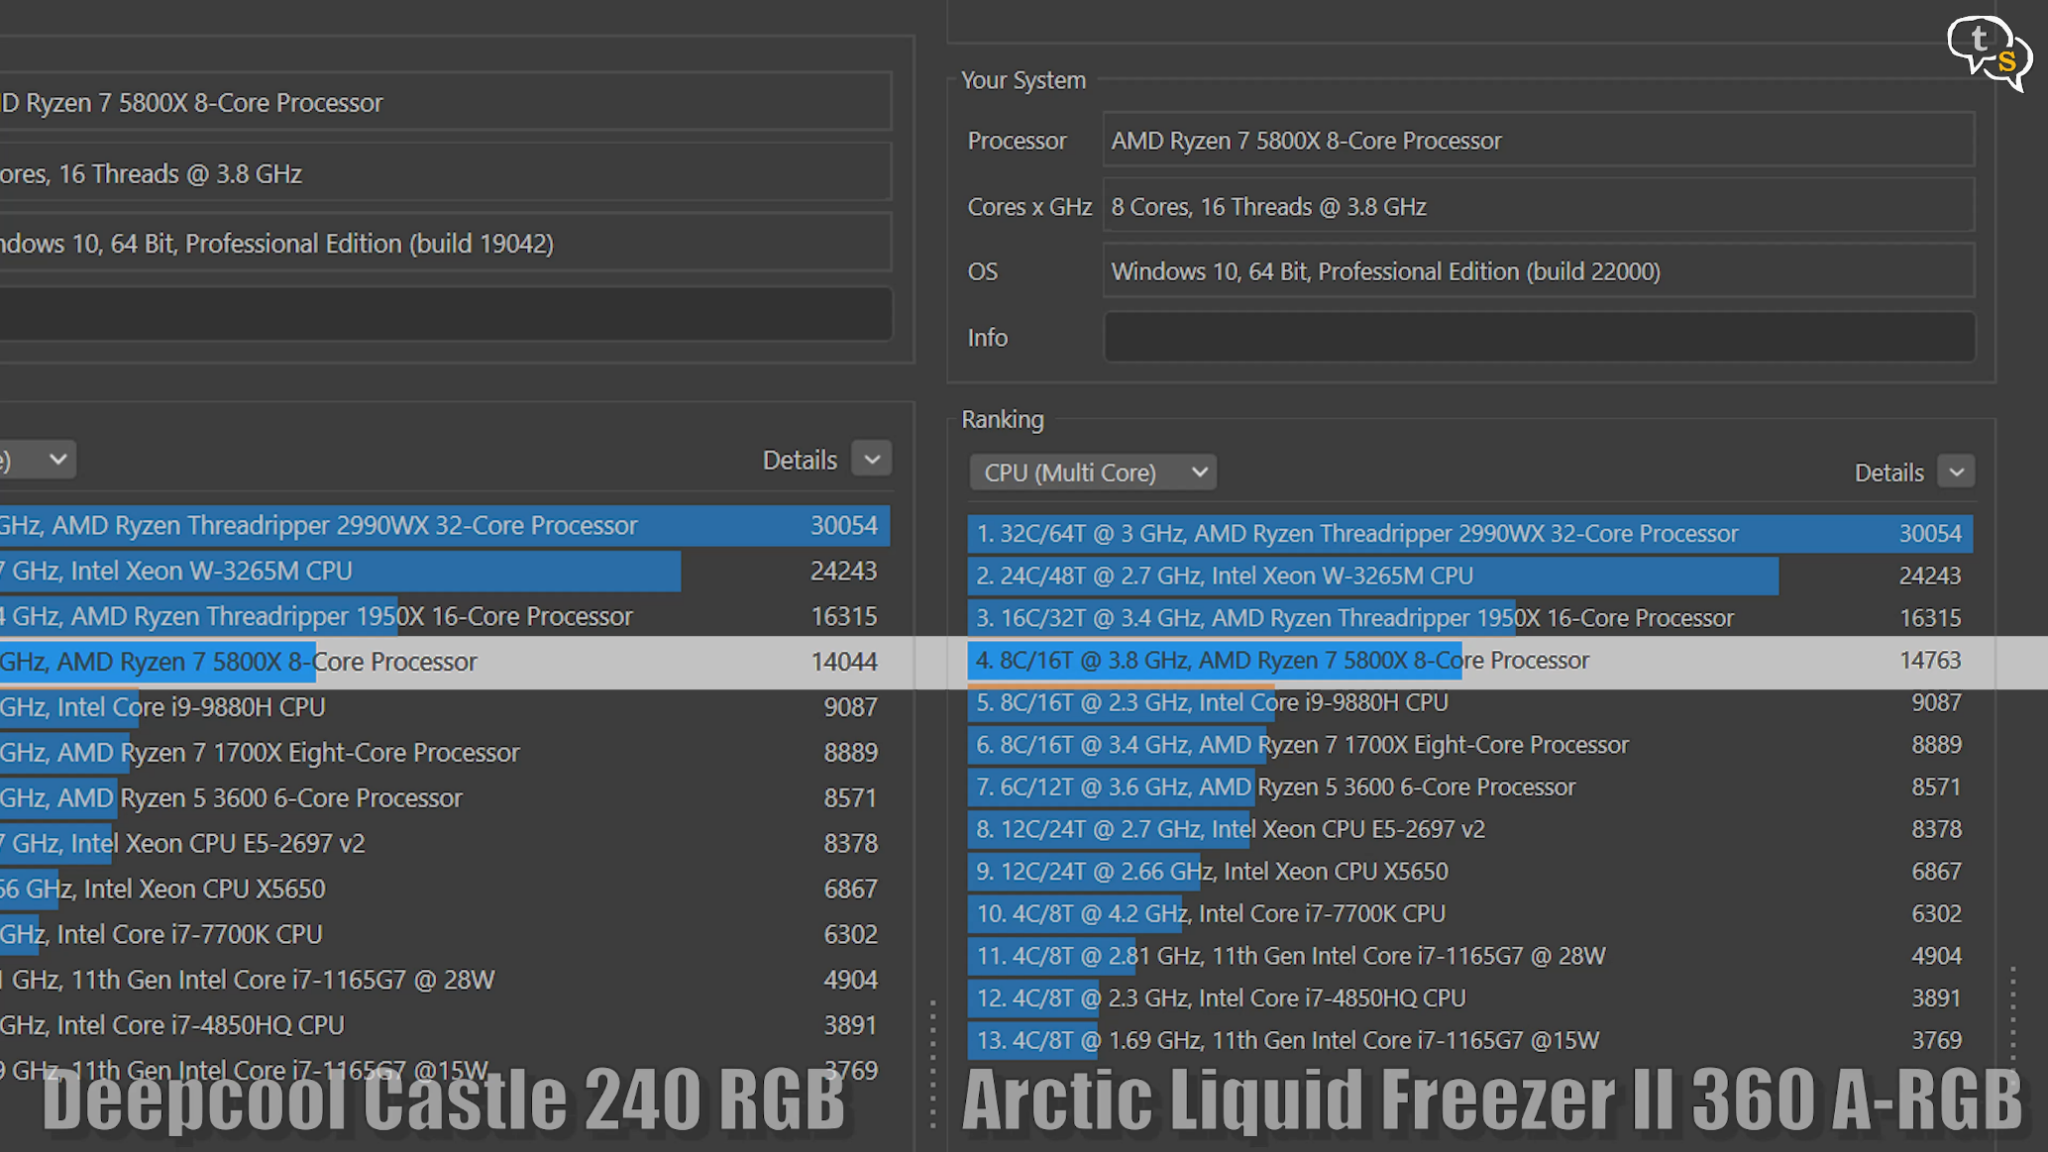
Ok, the system is up and running, so now we need to know just how much better a 360 rad works as compared to a 240 rad.
And here we go.
This is my current configuration,
Ryzen 7 5800x,
Motherboard: Gigabyte X570 Aorus Elite
RAM is 16×4 64 GB at 3600 mhz
And GPU is the Inno3D RTX 2070 Super
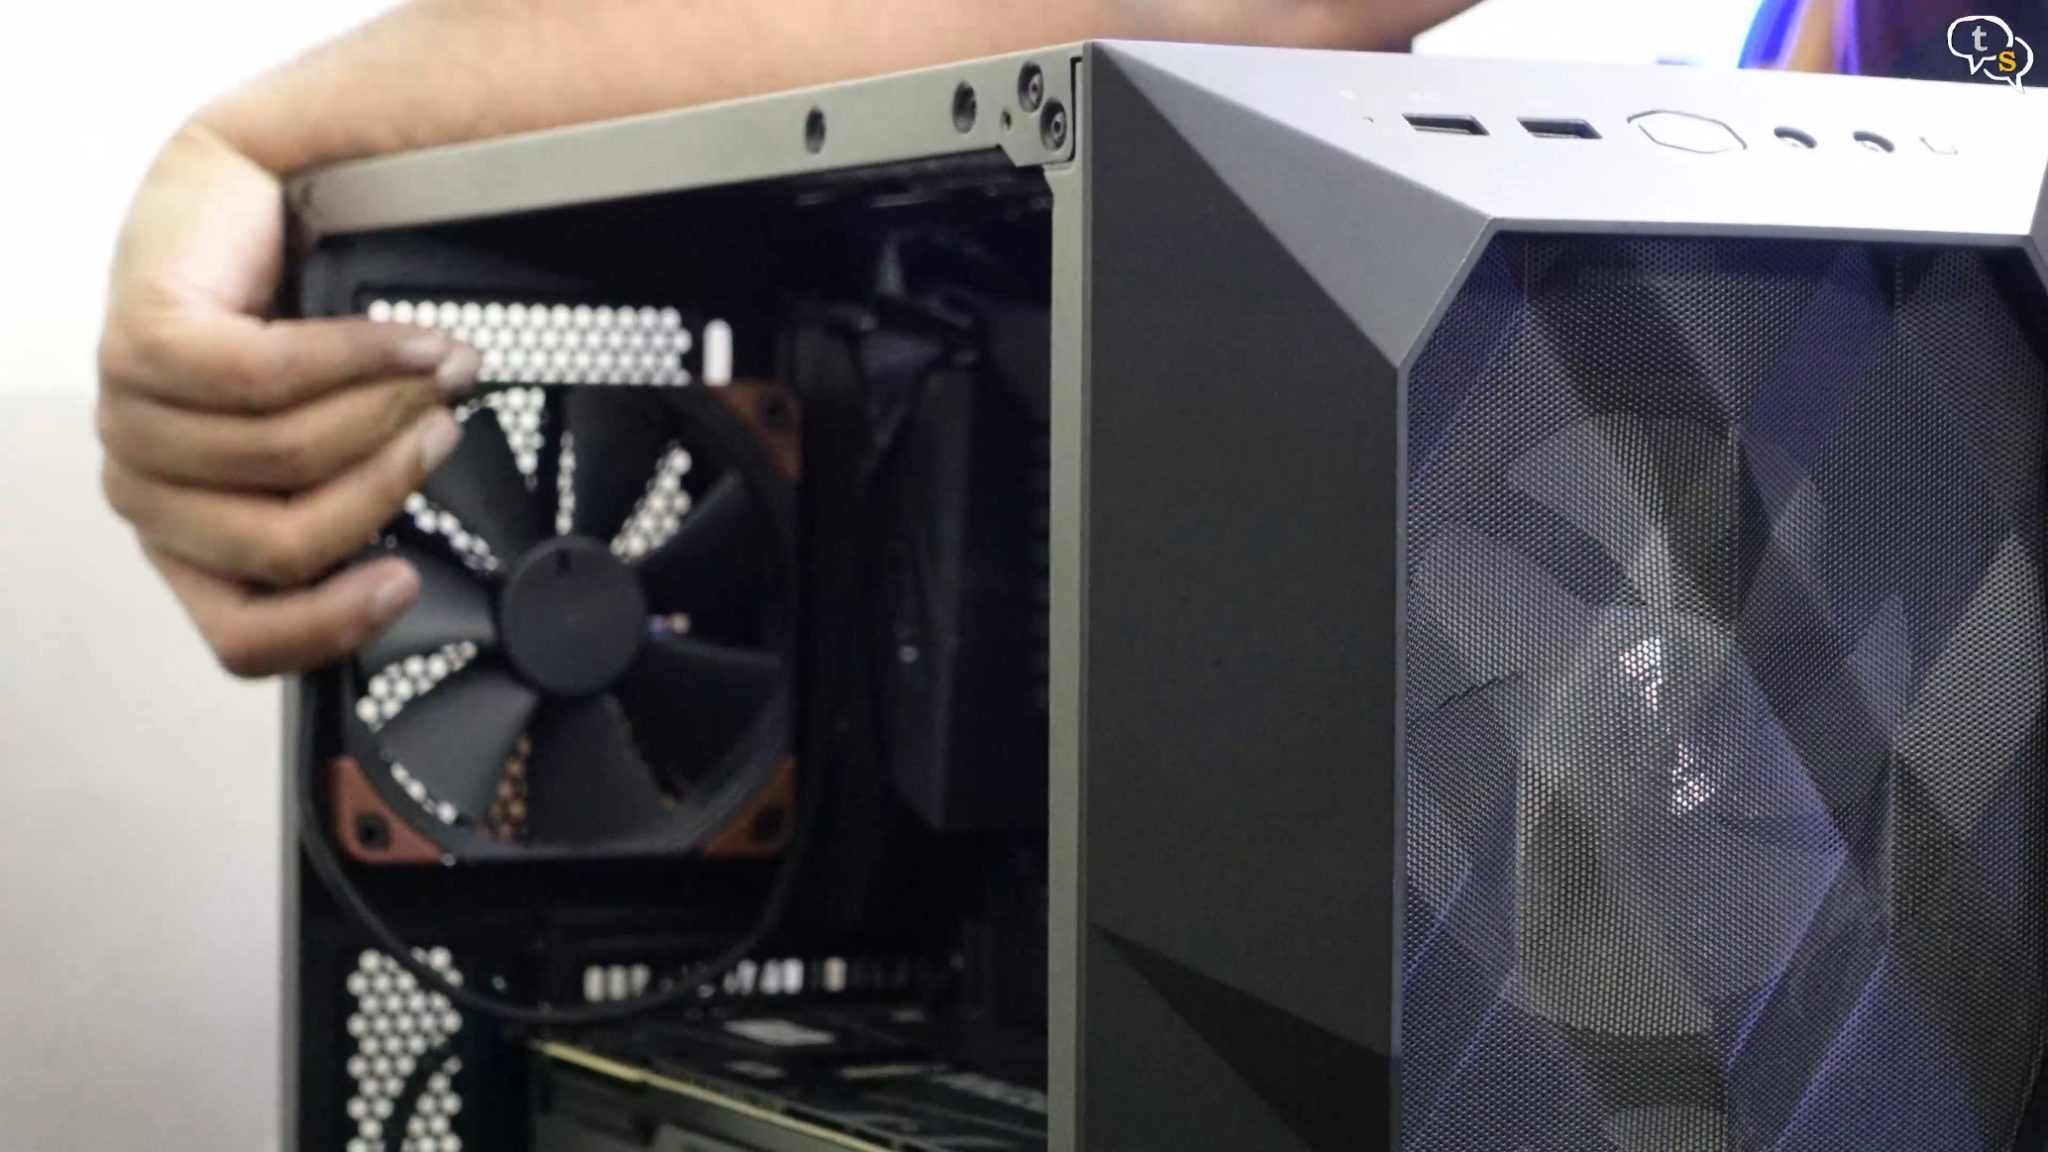
Cabinet is the Cooler Master TD500 Mesh
I have Lian-Li Al120 unifans as front intakes, and I had to remove my Noctua NF-F12 which was my exhaust to be able to fit the bigger Radiator.
PSU is a XPG core reactor 80+ gold 850 watt power supply.
OS is Windows 11 pro
My CPU and GPU are running at stock settings.
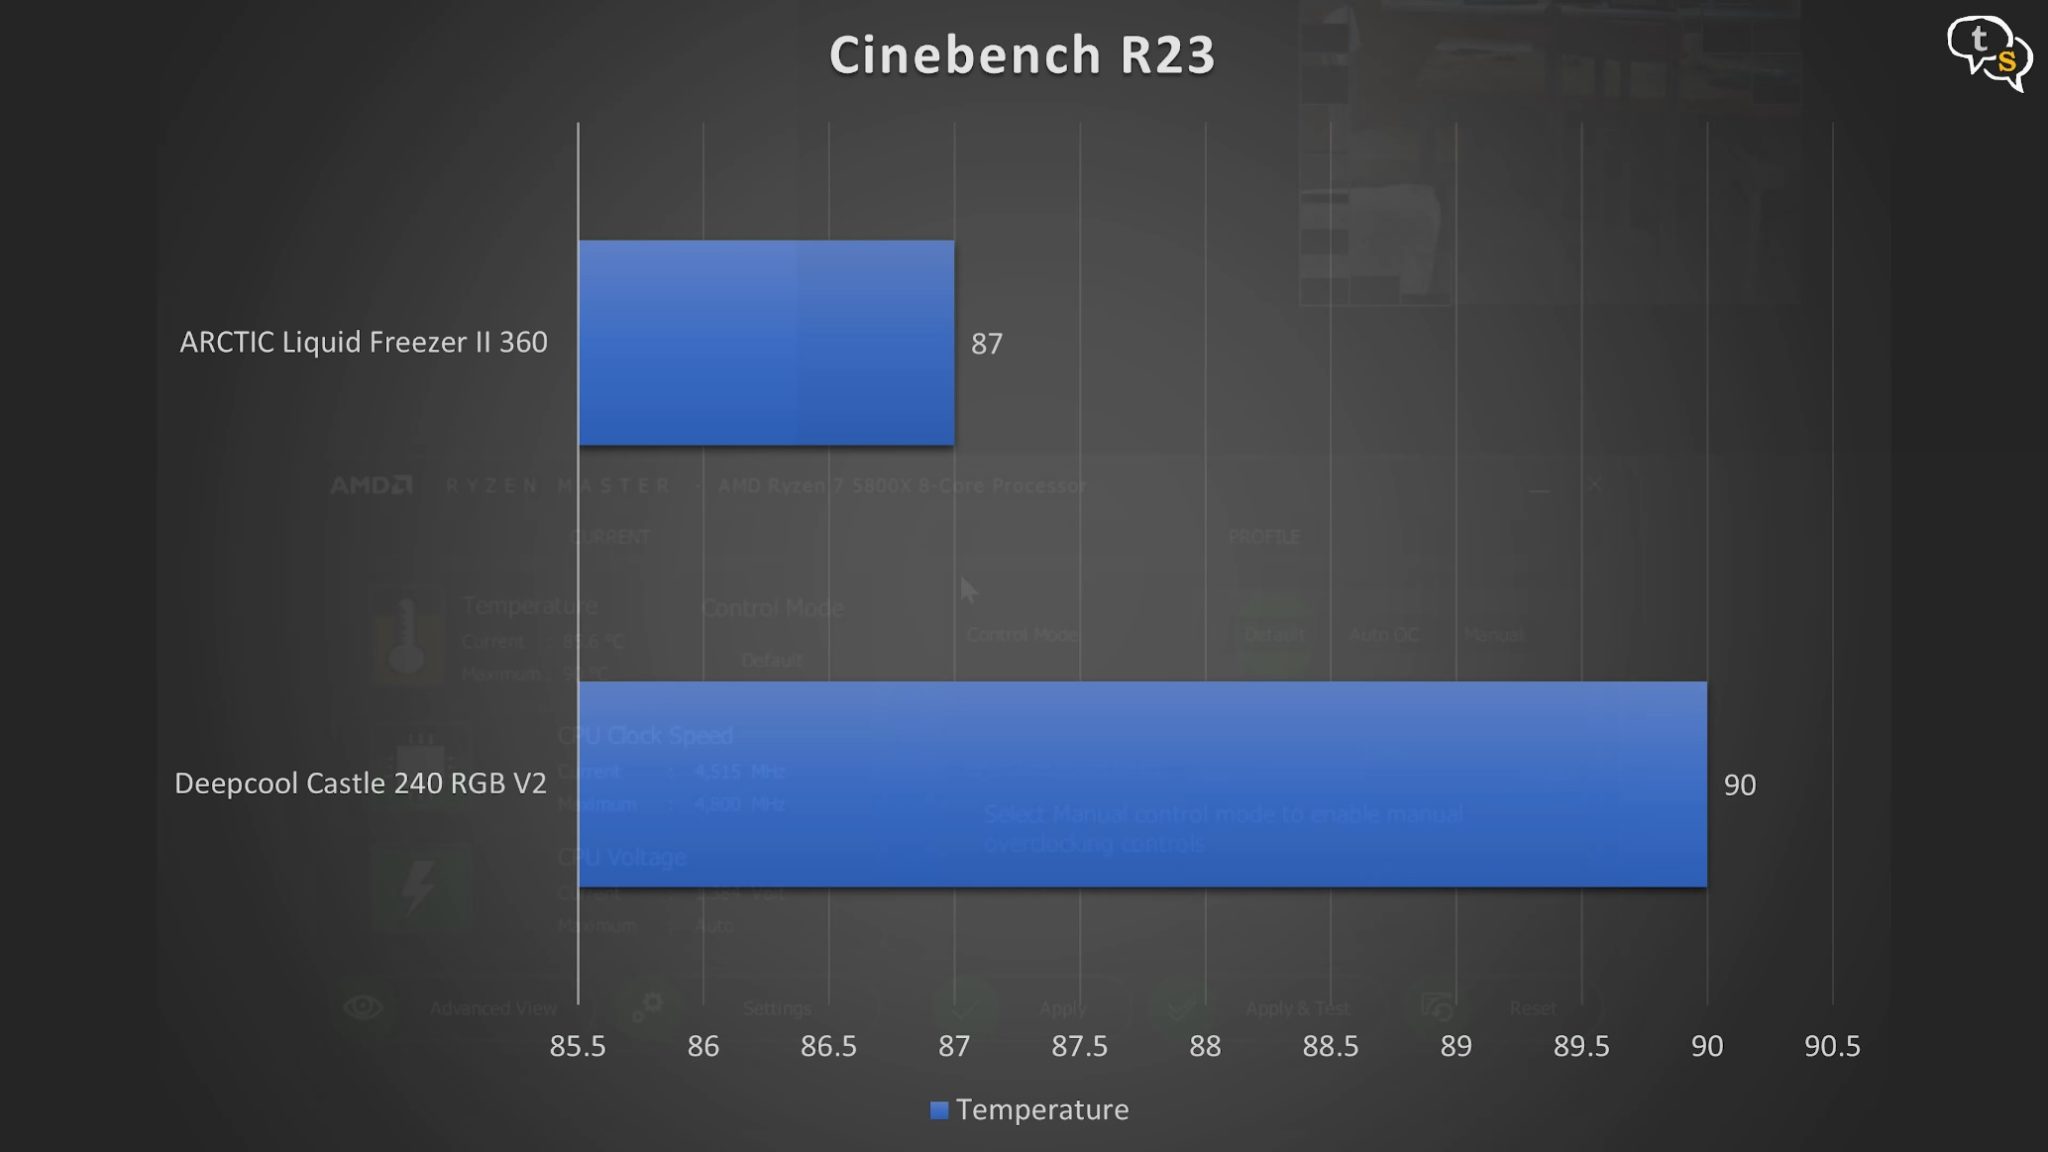
These are the temperature differences when running Cinebench R23, the Arctic liquid cooler is keeping the cpu temps under 90 degrees
and the Cinebench scores have also gone up by around 700 points.
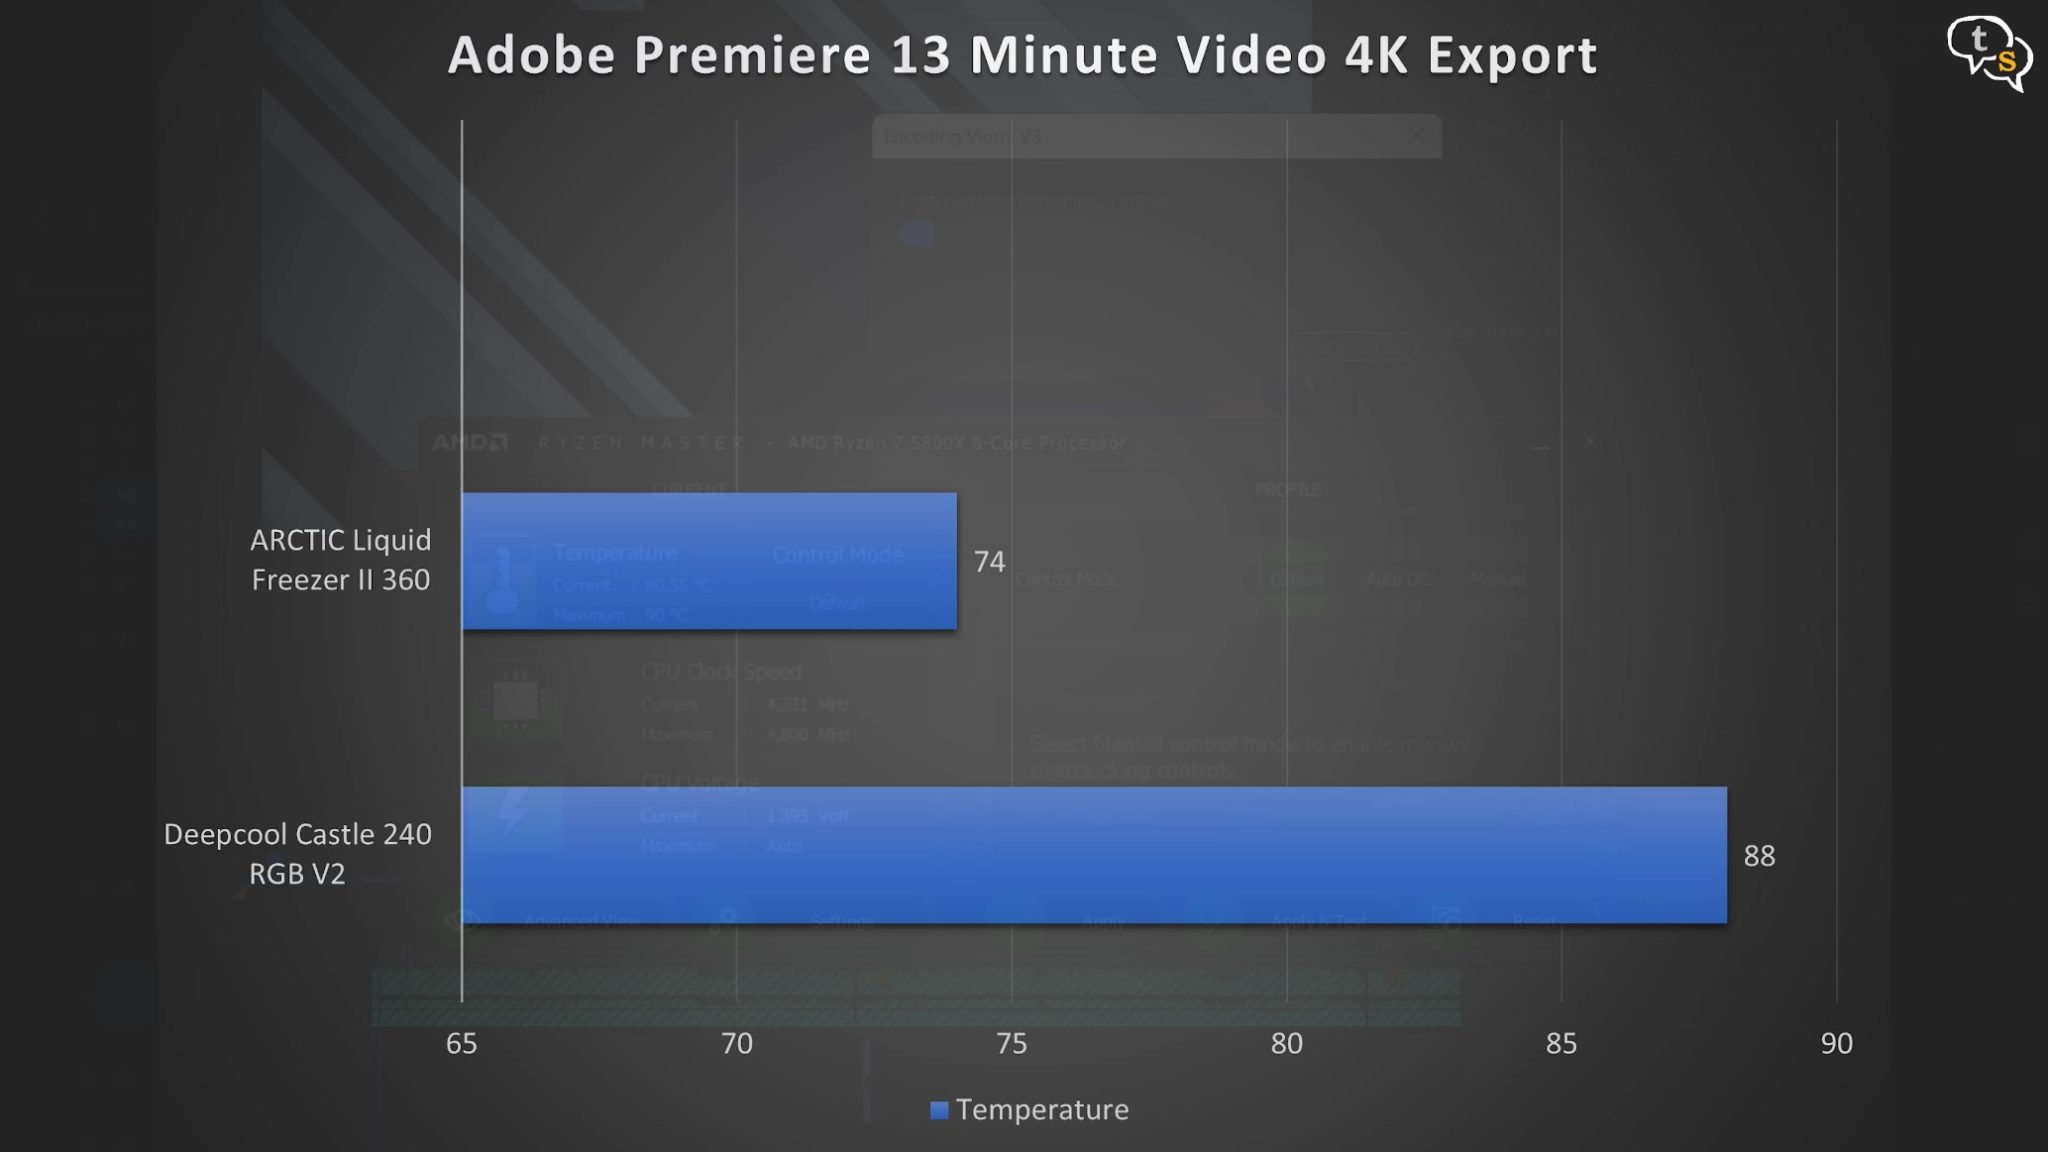
Premiere rendering, the temps are very well controlled and render times shave off a few seconds.
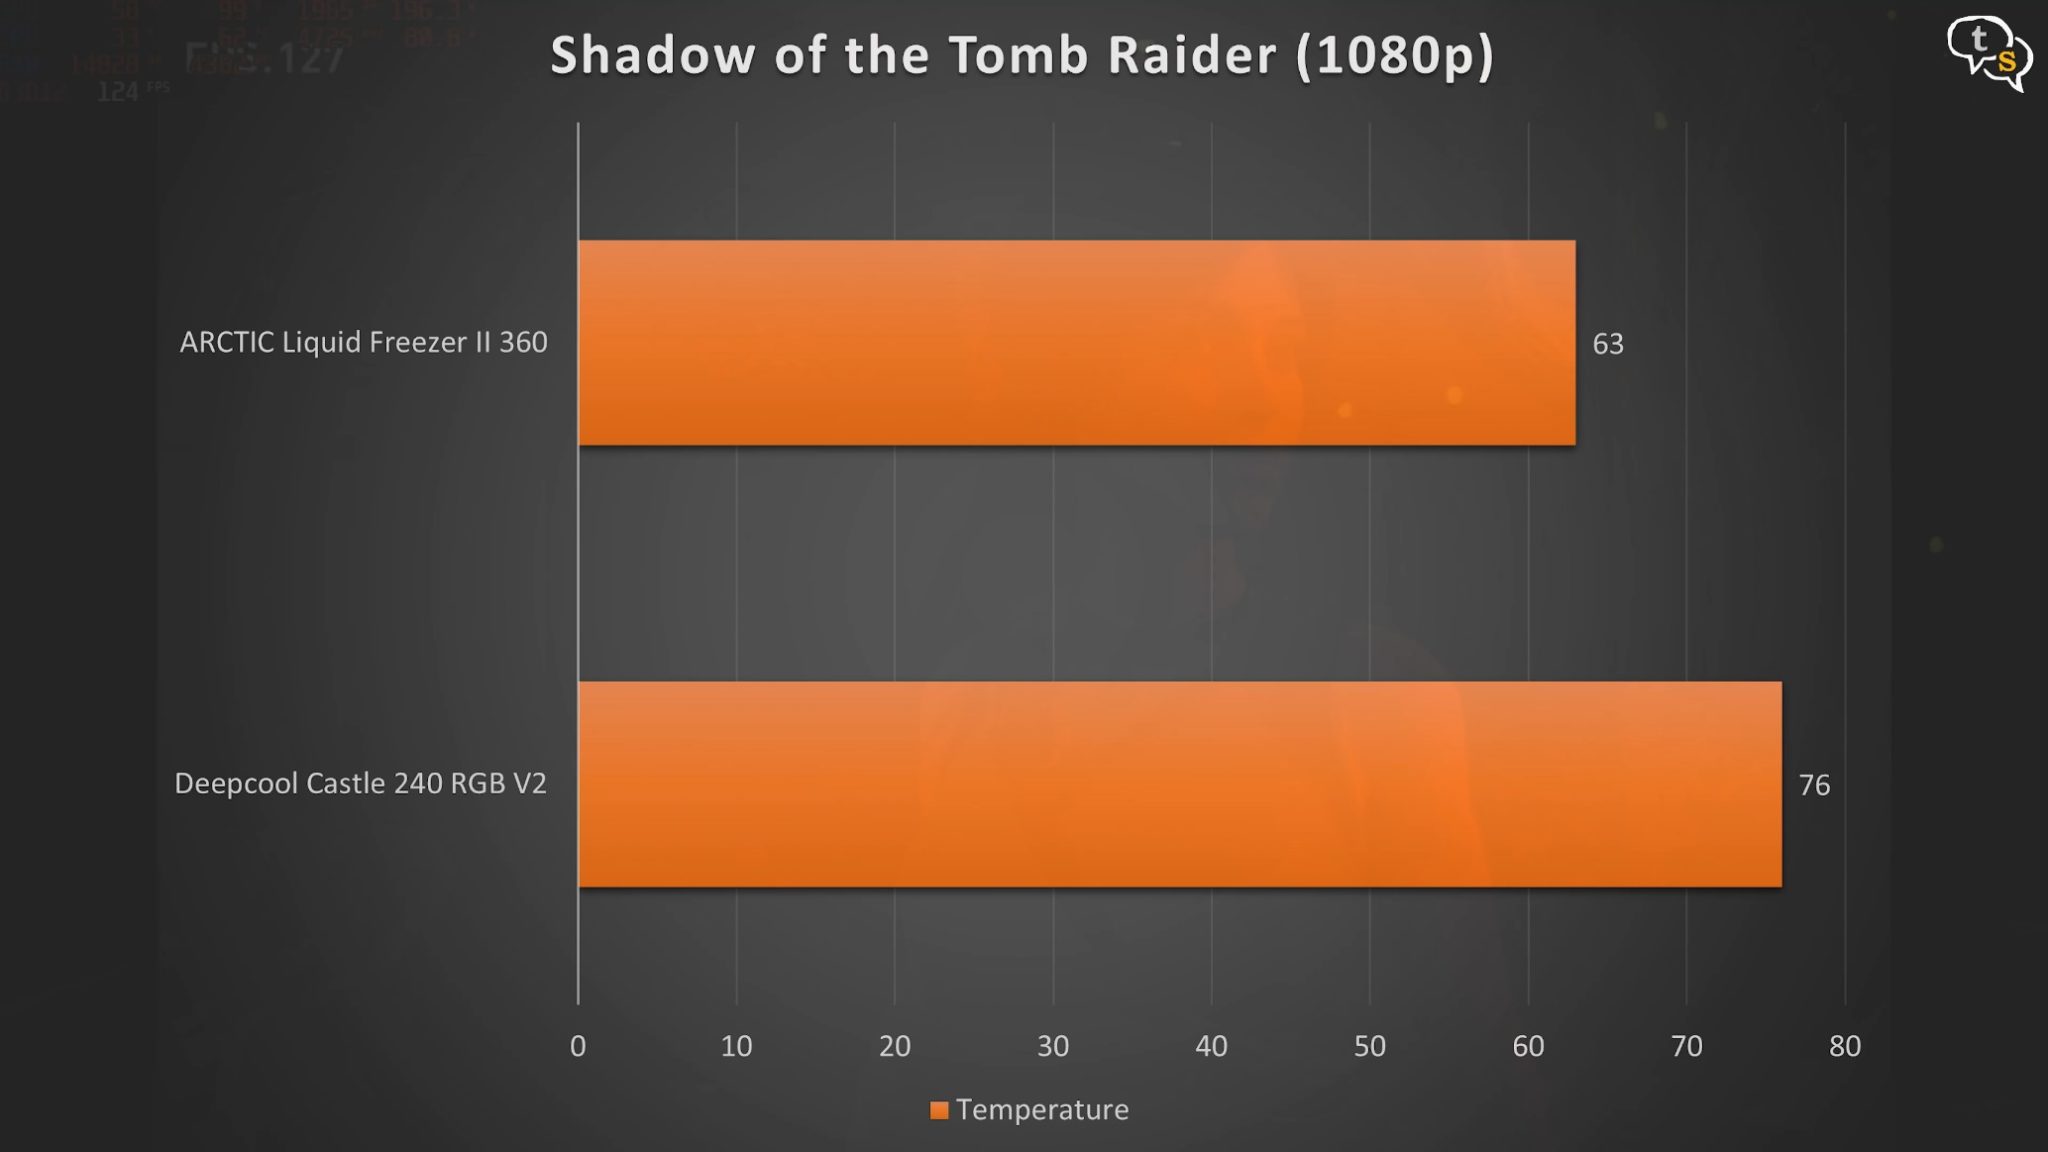
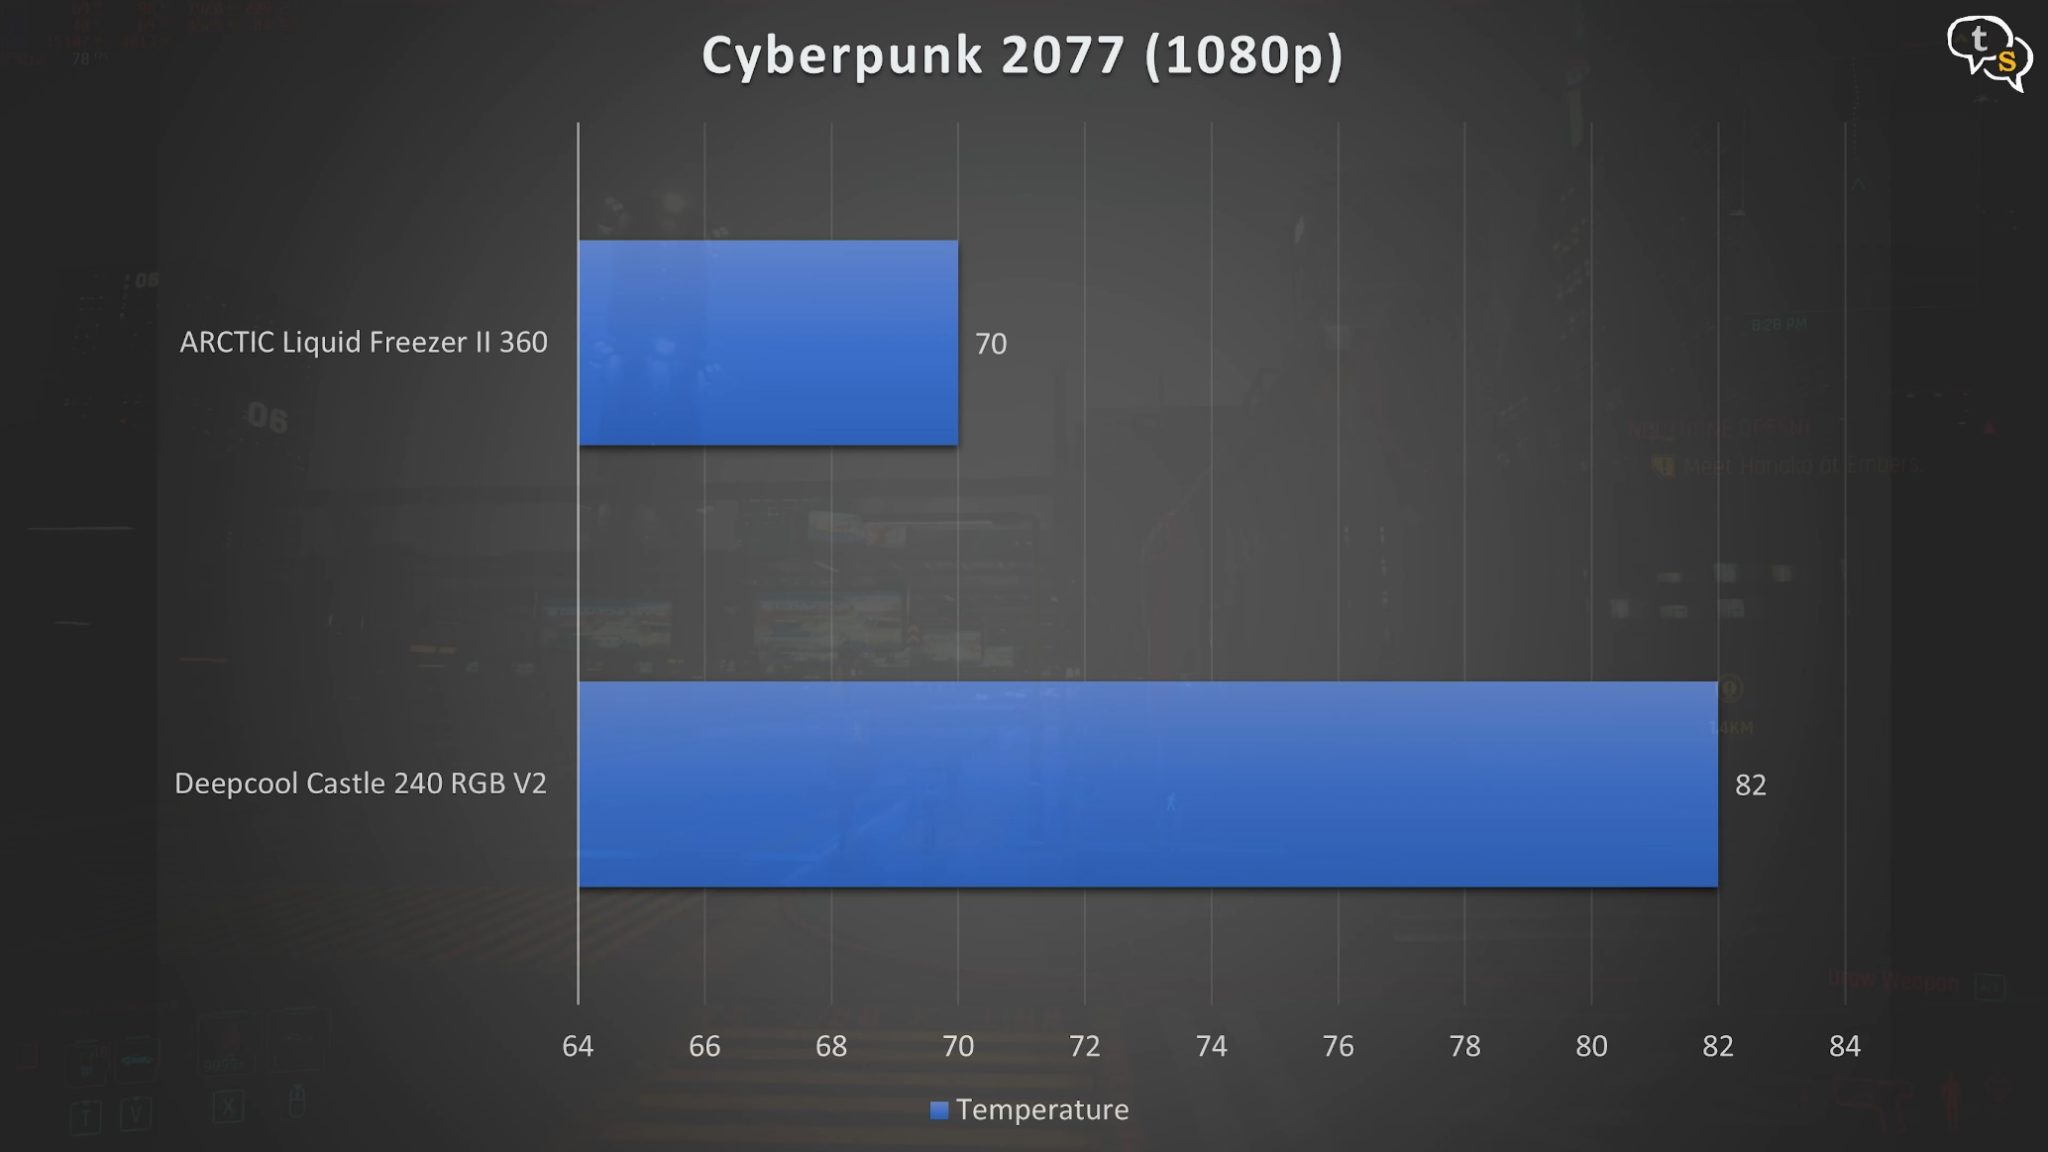
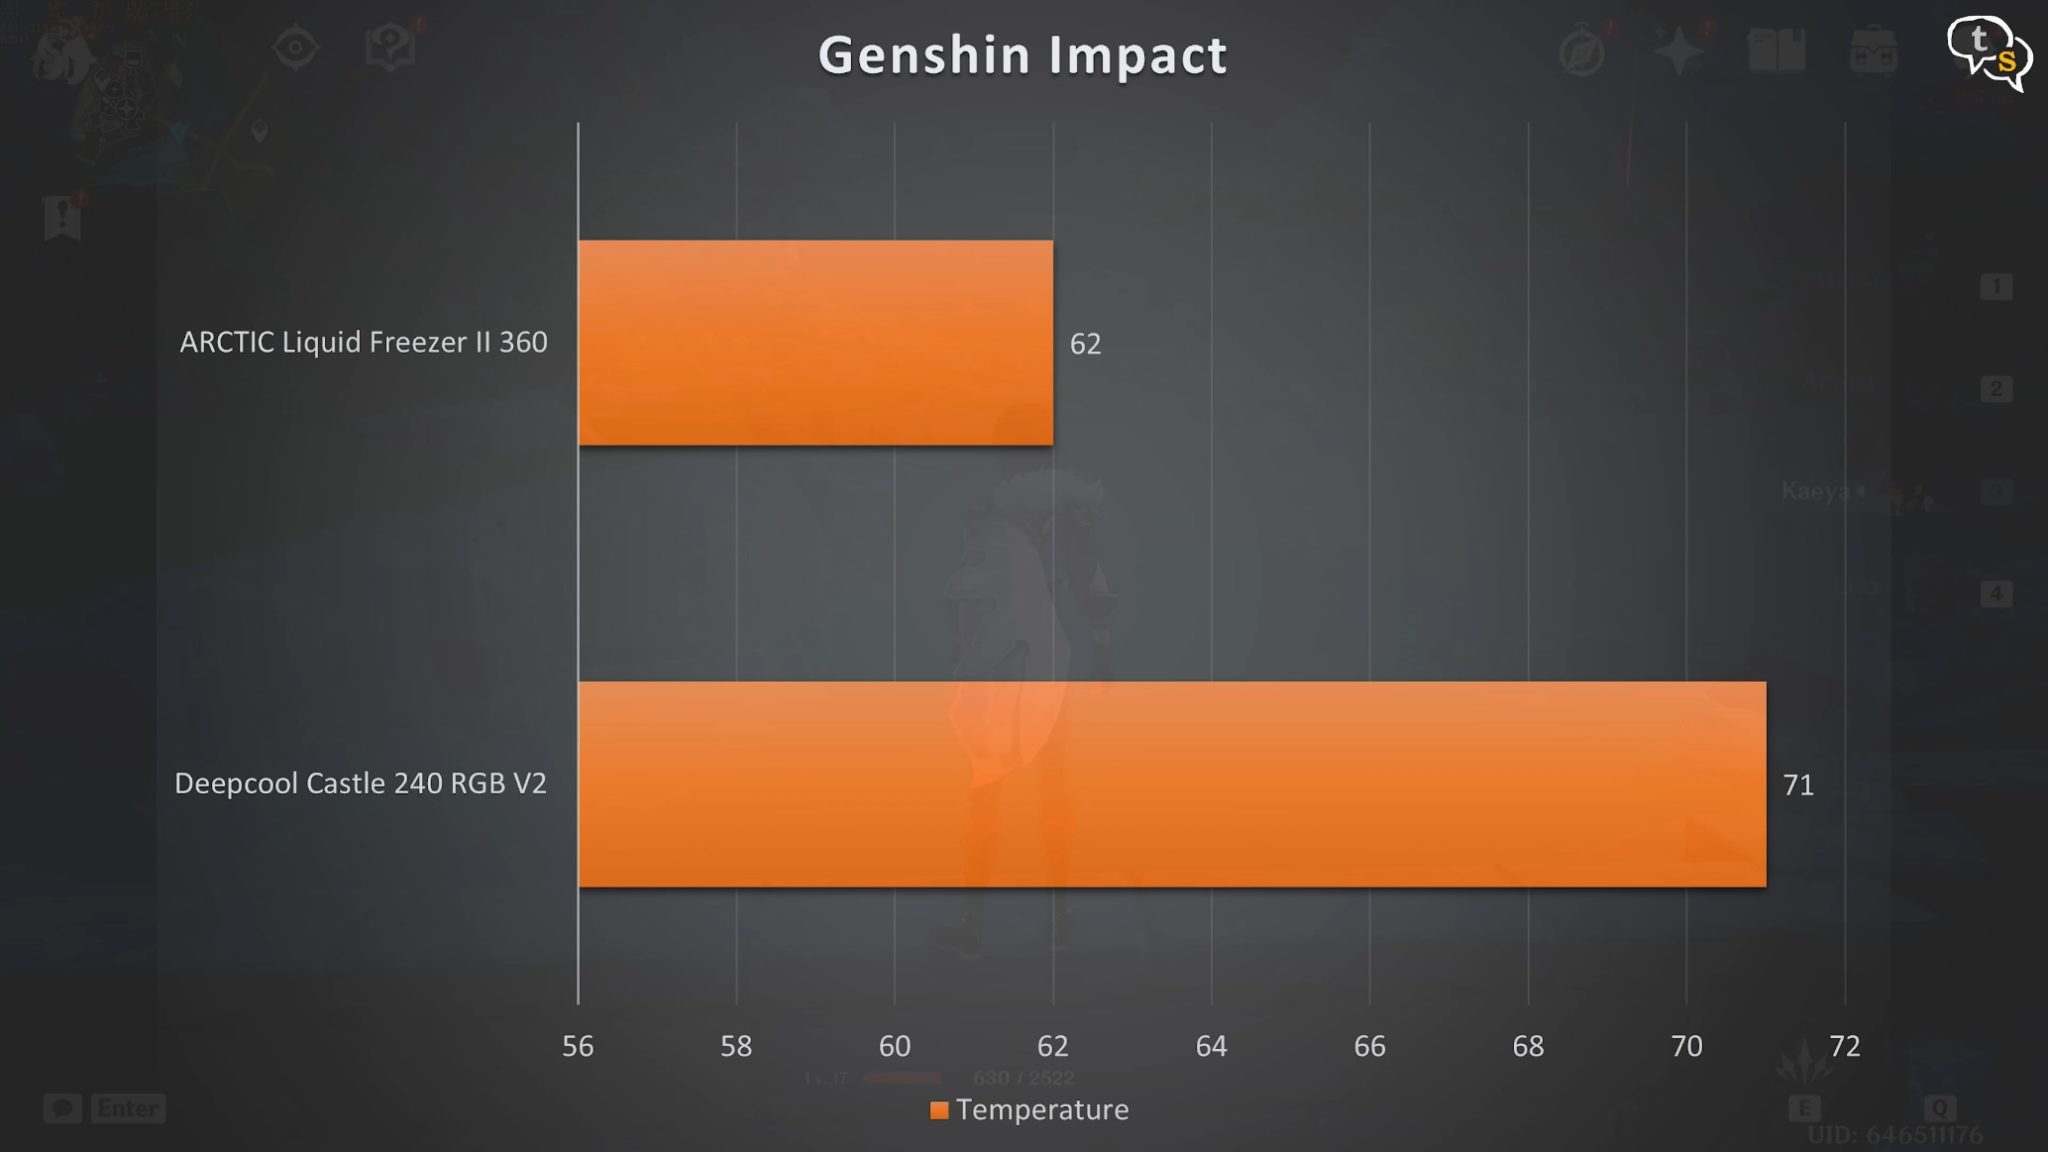
Game Benchmarks:
Game CPU temps are not affected that much, as they are generally GPU bound. But some games do tax the CPU, which is noticeable in


RGB control works via the motherboard software and we can change the colors as we want. No need for any other software or controller hub.
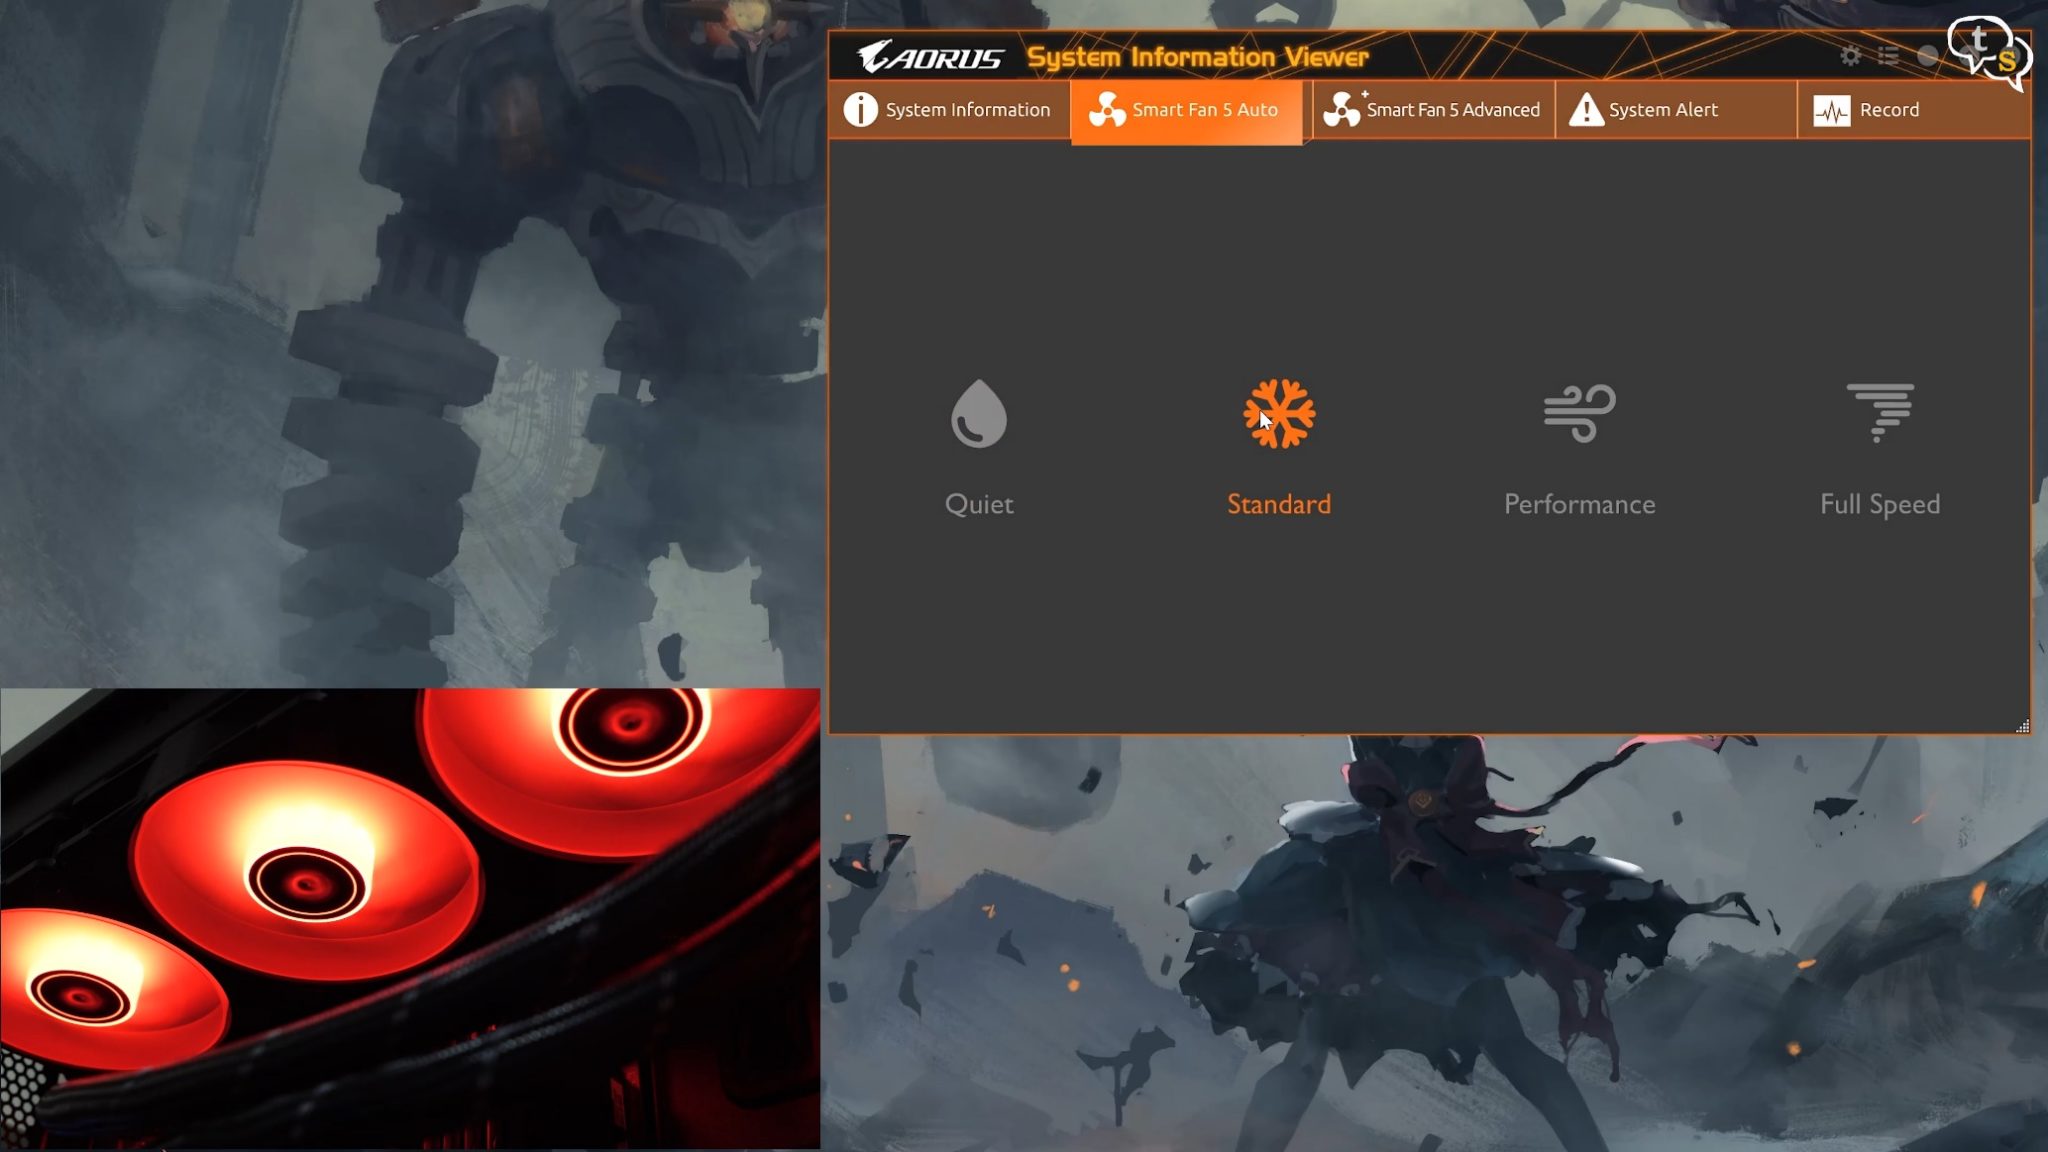
I can also use Gigabytes SmartFan 5 software to control the fans on the AIO.
The fans on the AIO are really quiet too, if I have the ceiling fan in the room on, I almost can’t hear it.
This is how the fan sounds at different speeds.(Watch video to know more)
The Arctic Liquid Cooler helps lower the temps by a few degrees, especially idle temps; my 5800x generally never stays in the 35-36 degree range. This keeps the system more stable and we can also pull a bit more performance out of existing components. The fans are not noticeably audible unless we listen in closely. Cooling performance, this is one of the best rated AIO at its price range. It of course managed to beat my 240mm Deepcool AIO, by a few degrees, which is the difference between a stable system or a system with frequent crashes or black screens. I did have a few black screens on the Deepcool at times which is why I wanted to upgrade the AIO. The 5800X does run hotter than the higher core count 5900X and 5950X. I wanted to pick up the 420 model, but it will not fit my case. 😅
The RGB on the fans look good and are quite bright illuminating the insides of my case quite well. 6 Years limited warranty, must see limited to what? in the manual, but if for manufacturing defects is still a good deal. The pre-installed fans with the cable management is a blessing as we don’t need to wrestle with multiple cables. The MX-5 thermal paste is a good addition. I liked the overall aesthetics of the AIO and at this price is good overall. Installation was not as complicated as I thought it would be, and it was complete within a few minutes, a lot of time went looking for the screws more than the actual installation.