I always wanted a touch screen interface to control my smart home devices, and I purchased the Amazon echo show for that very reason. Sonoff has released a Smart Scene wall switch, and I’m excited to see how well it works. So, let’s unbox it.
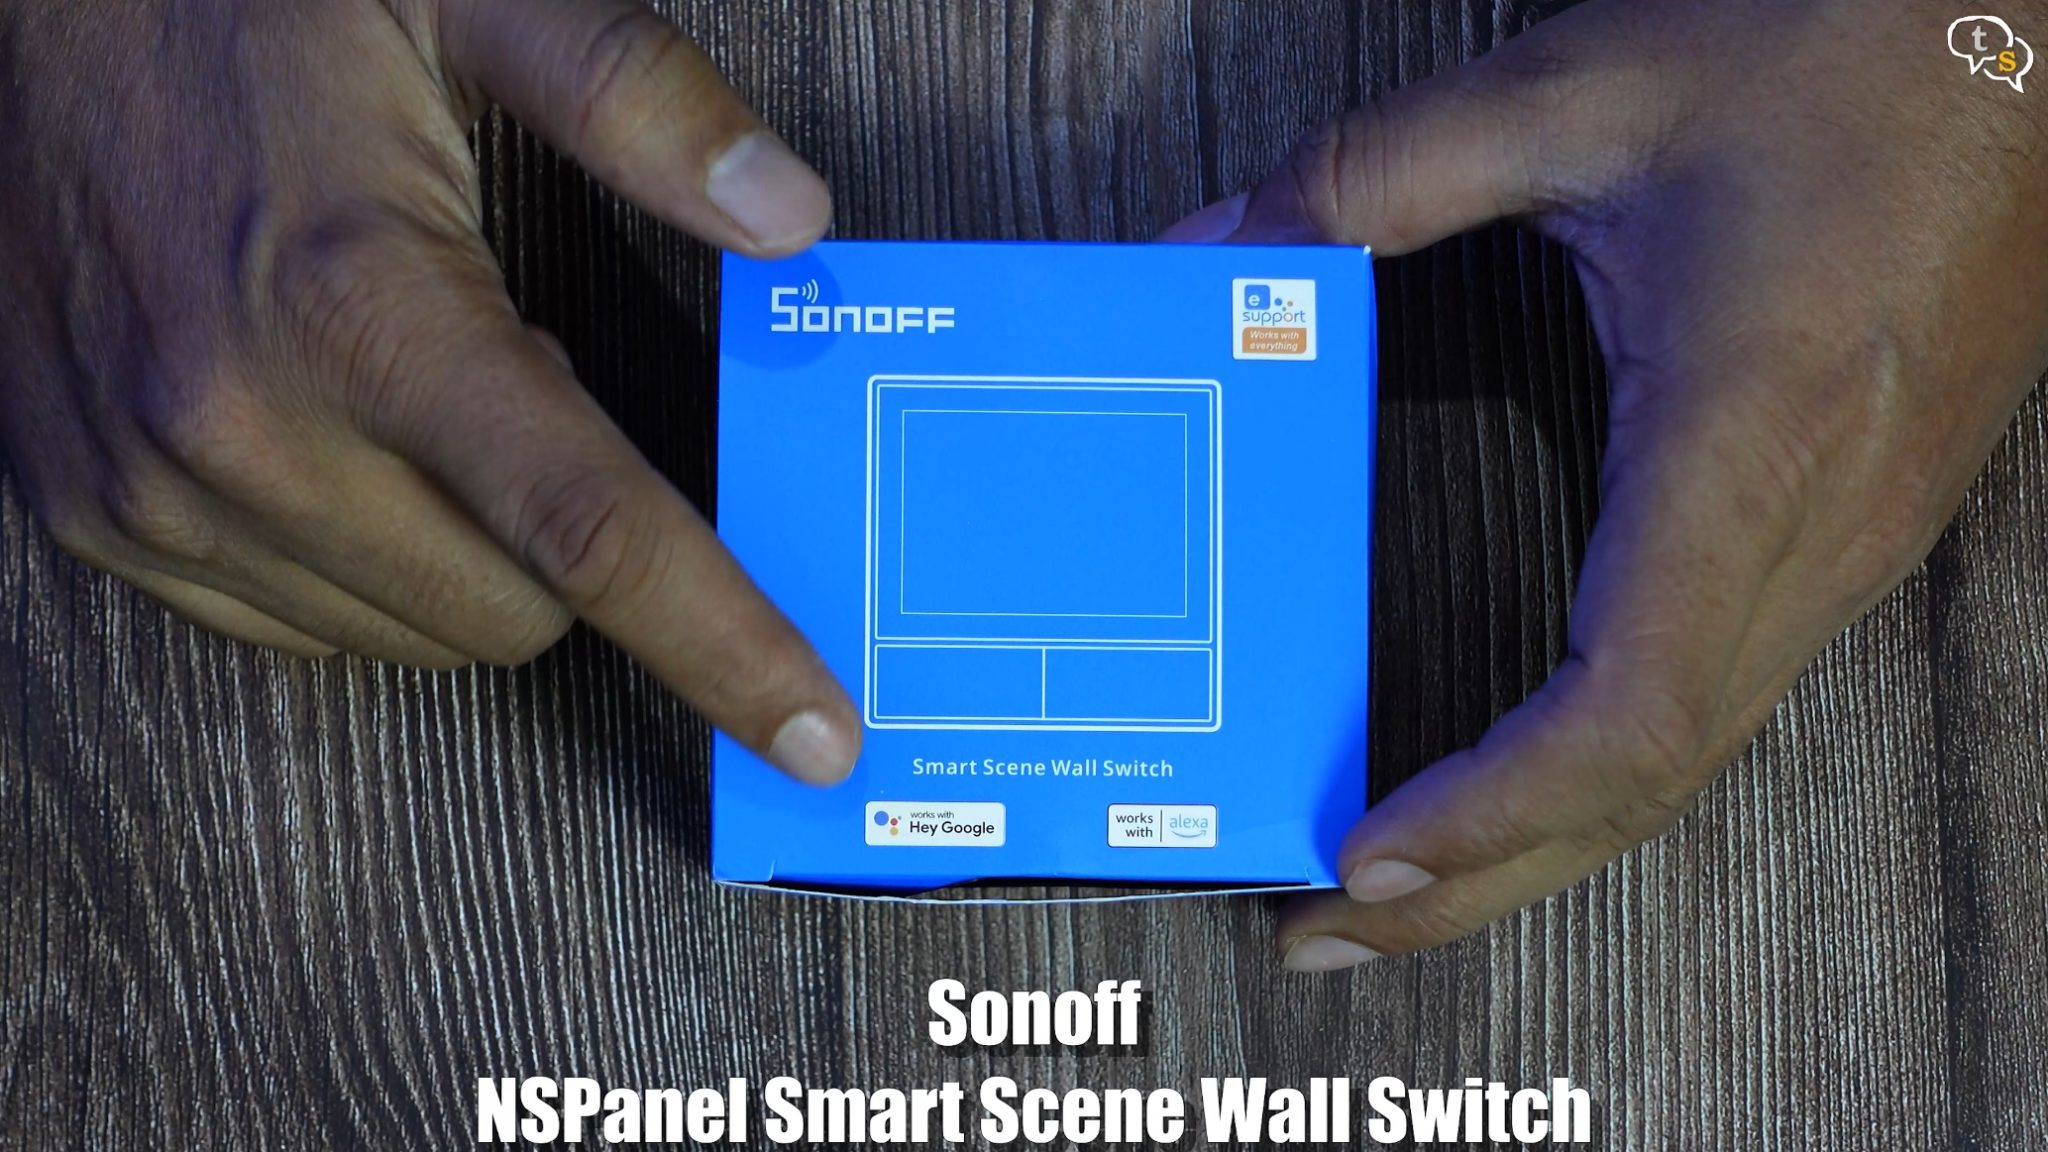
This is the new Sonoff NSPanel Smart Scene Wall Switch. It works with google assistant and Amazon Alexa, and is set up using the eWelink app.
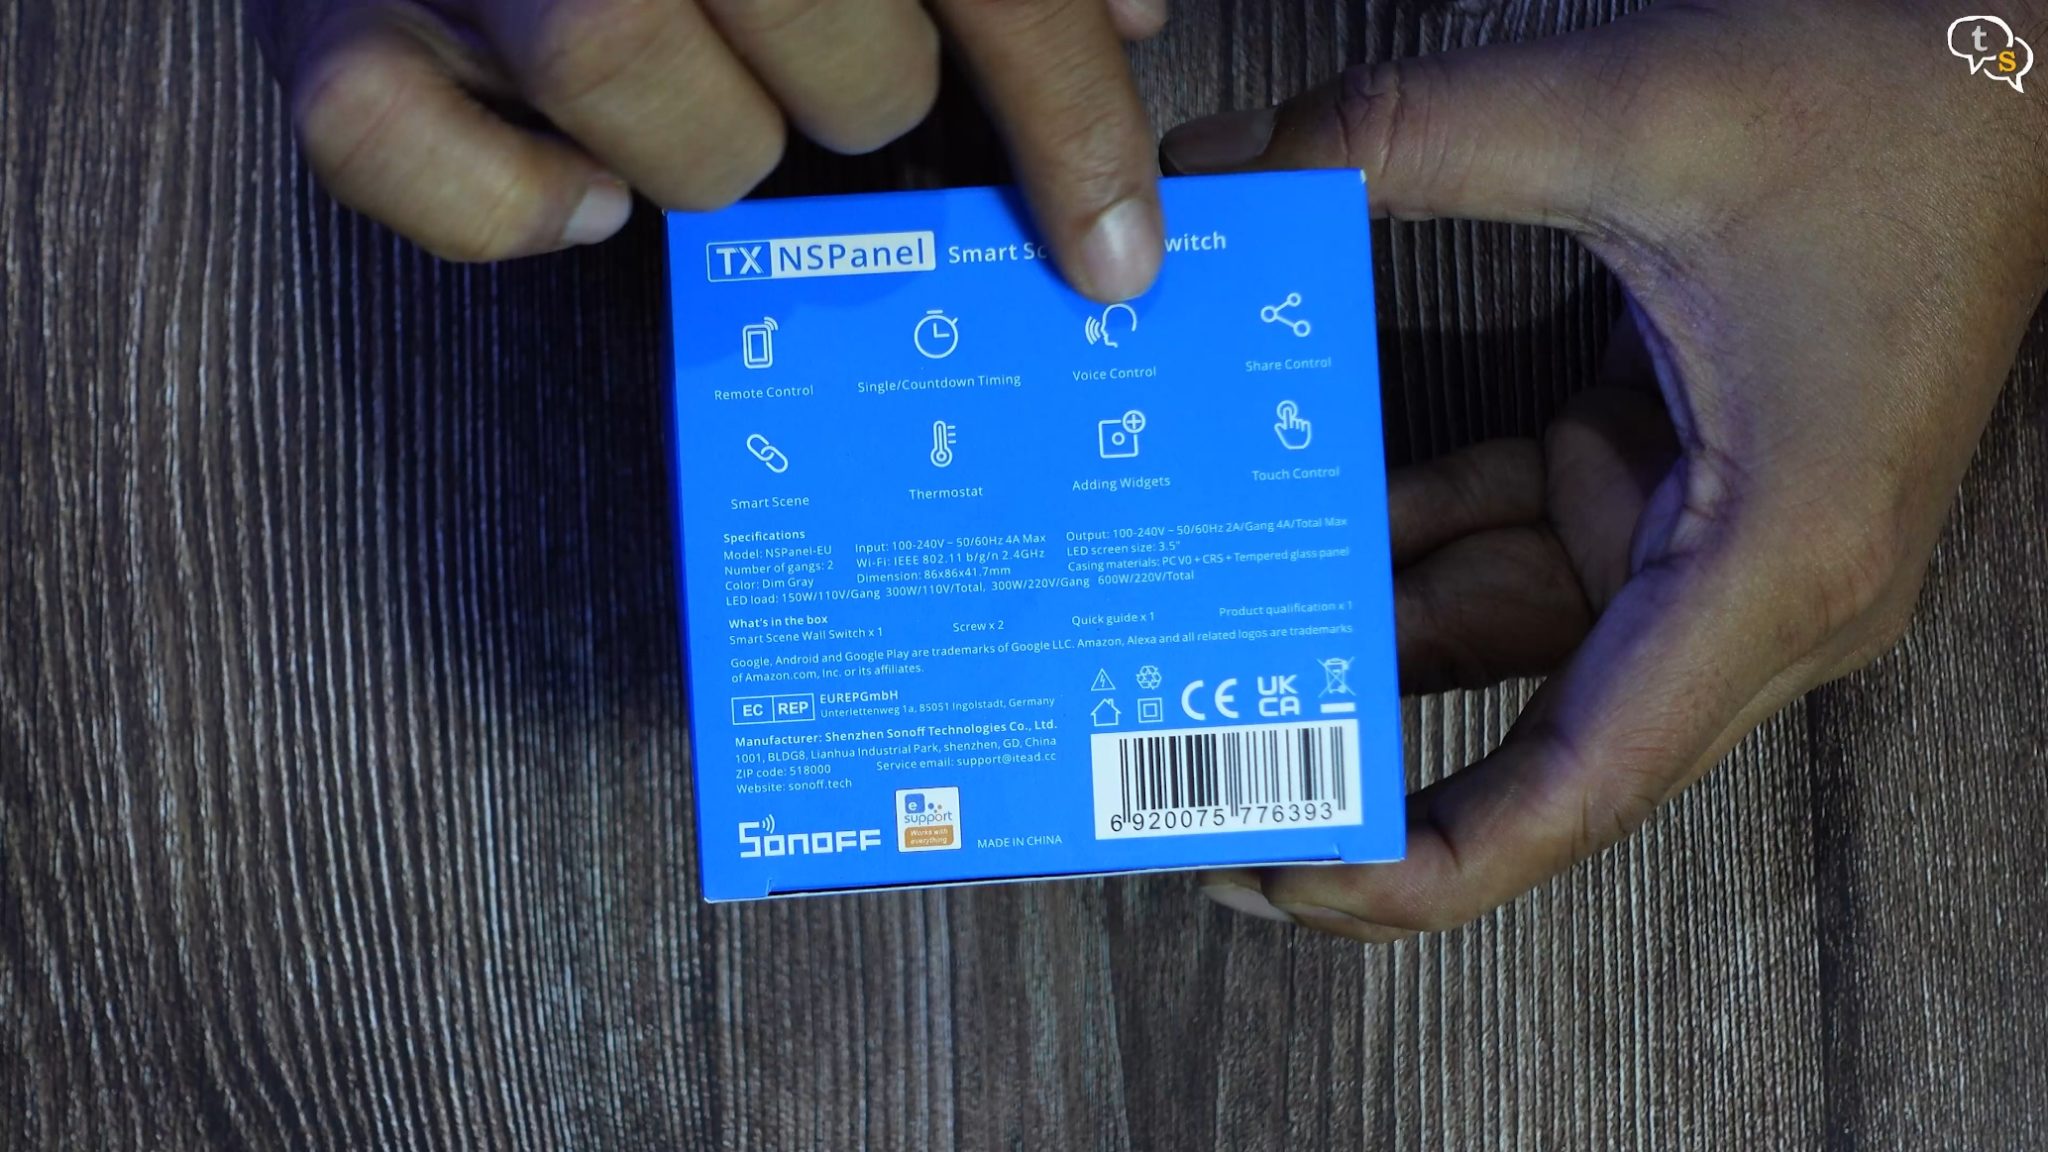
The features are Remote control, set timers, voice control, device sharing, smart scenes, thermostat support, widgets, and touch control.
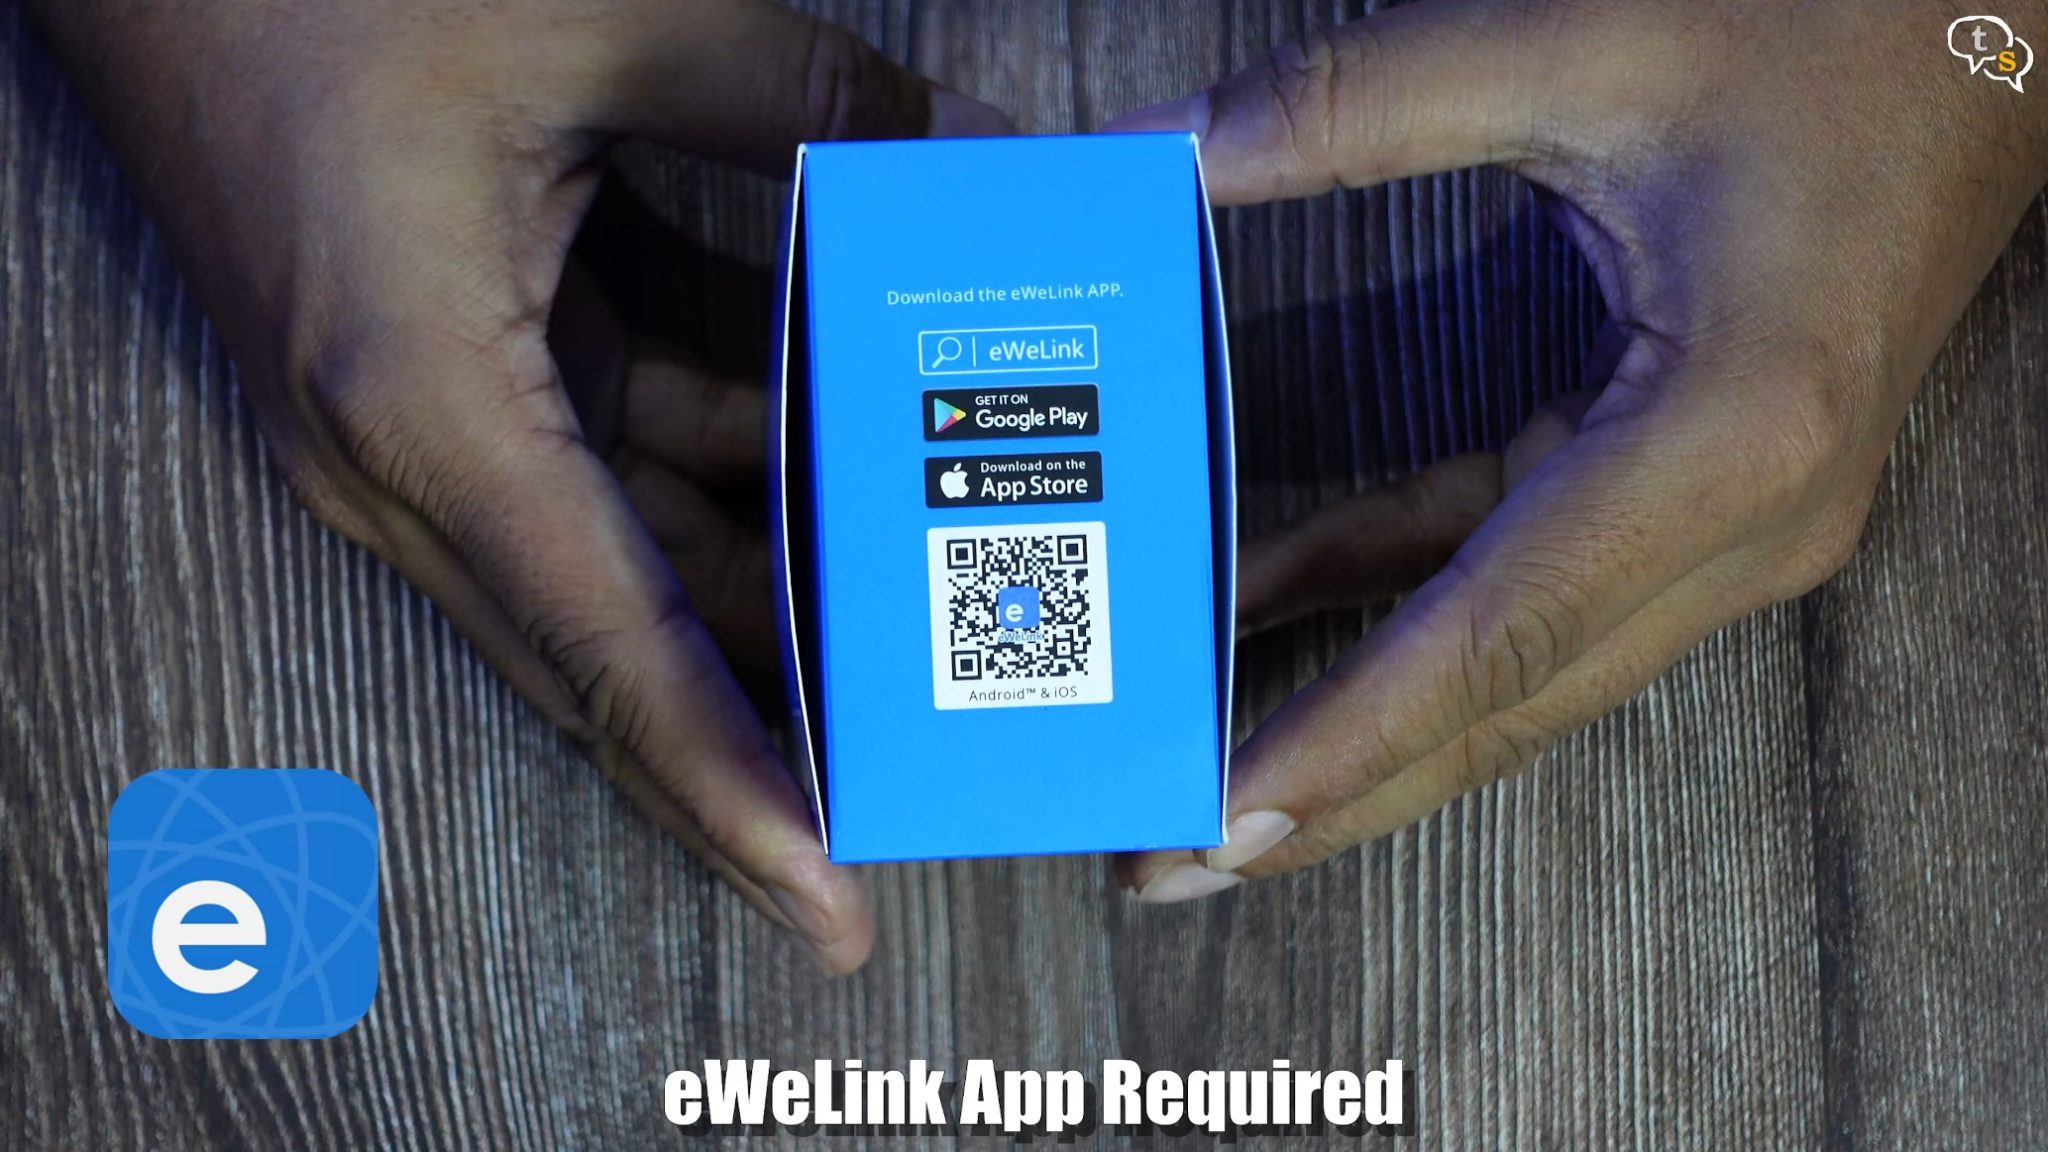
We have a QR code for the eWelink app, which is required to set this device up, the support for google assistant and amazon Alexa is routed through this app.
It supports smart switches, smart plugs, smart lights and more. But do note the devices you’re installing need to work with the eWelink app.
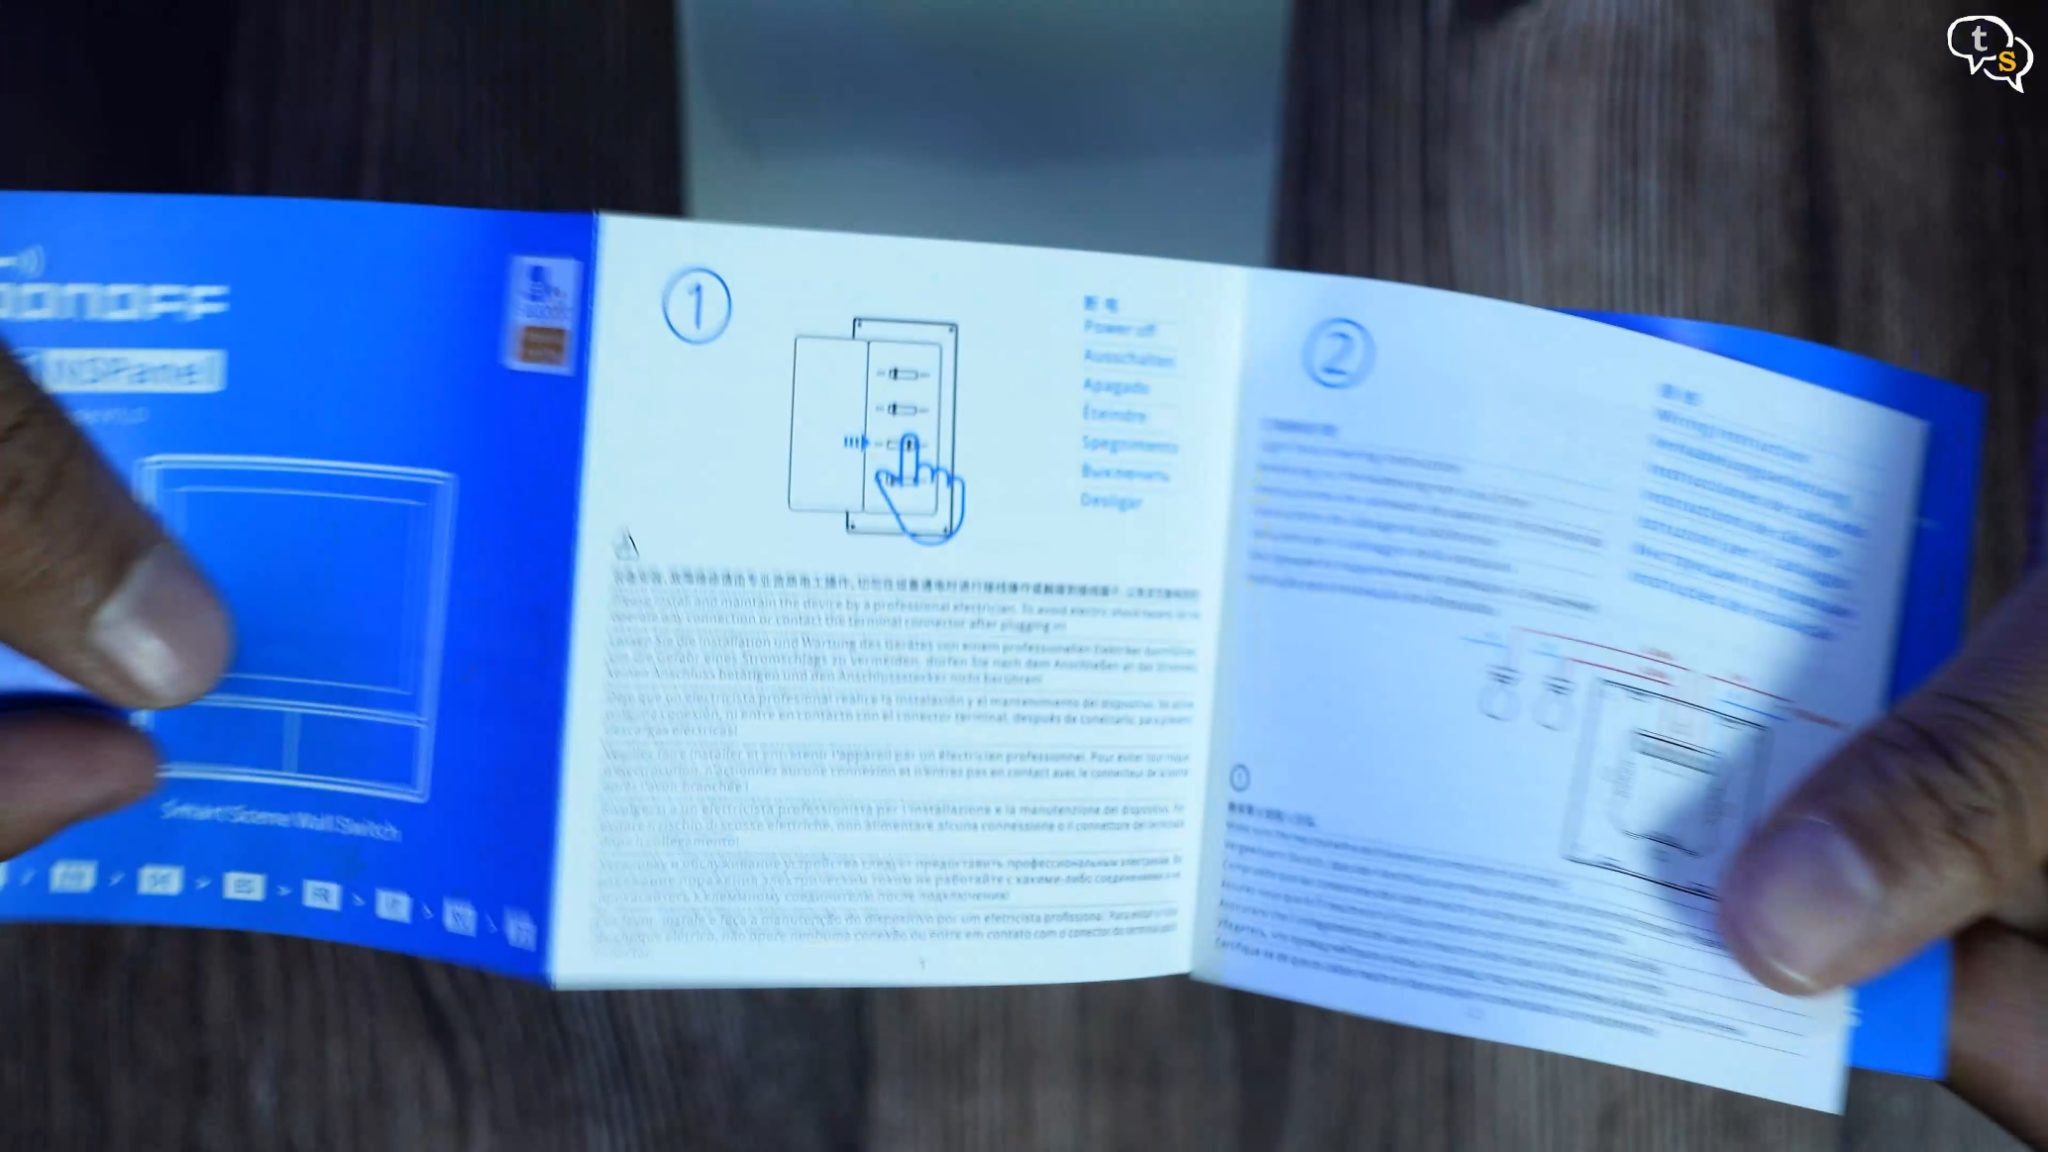
Now let’s open the box and see what we get within. First, we have a manual, typical Sonoff style small print with instructions in multiple languages.
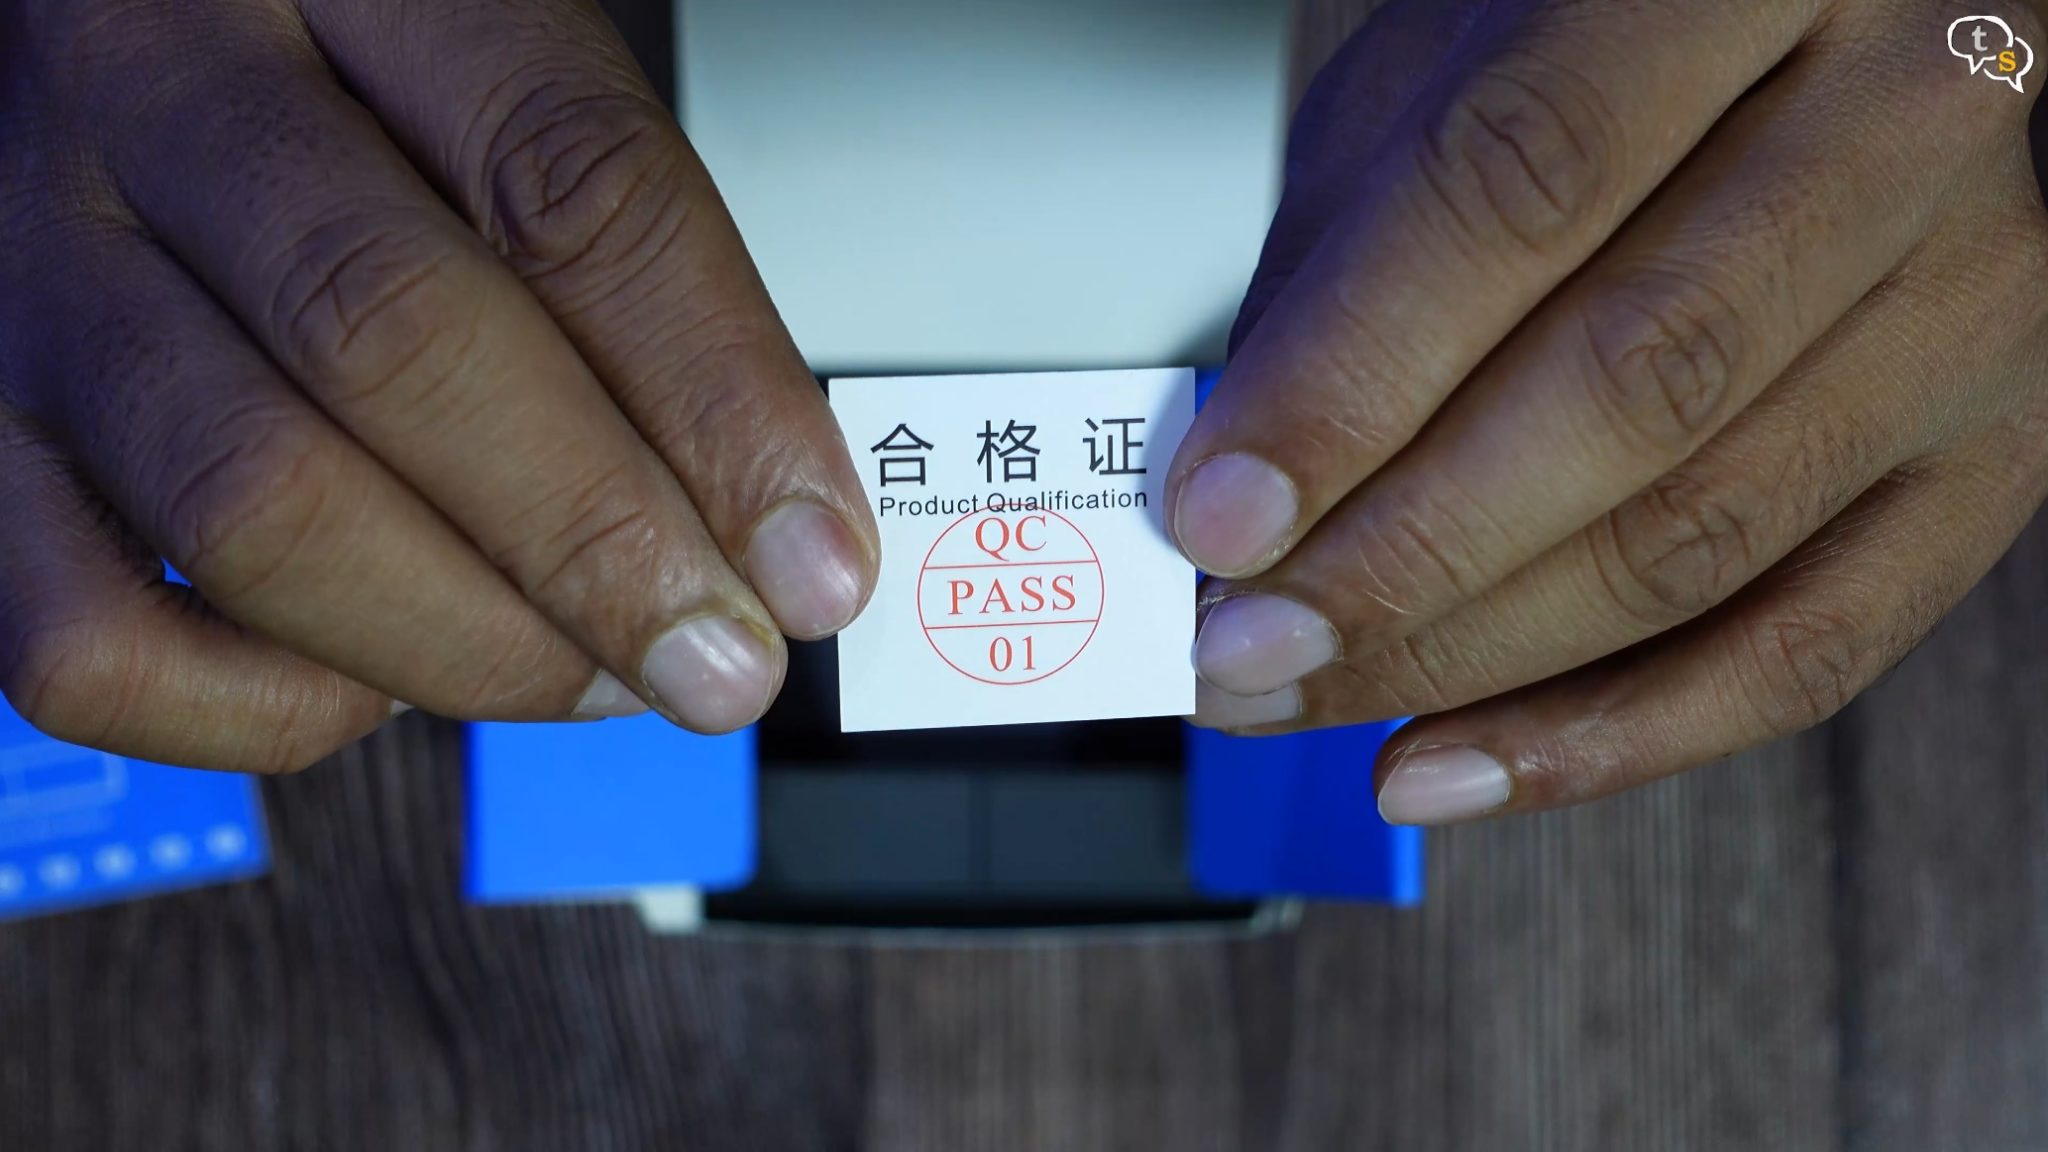
A QC pass sticker.
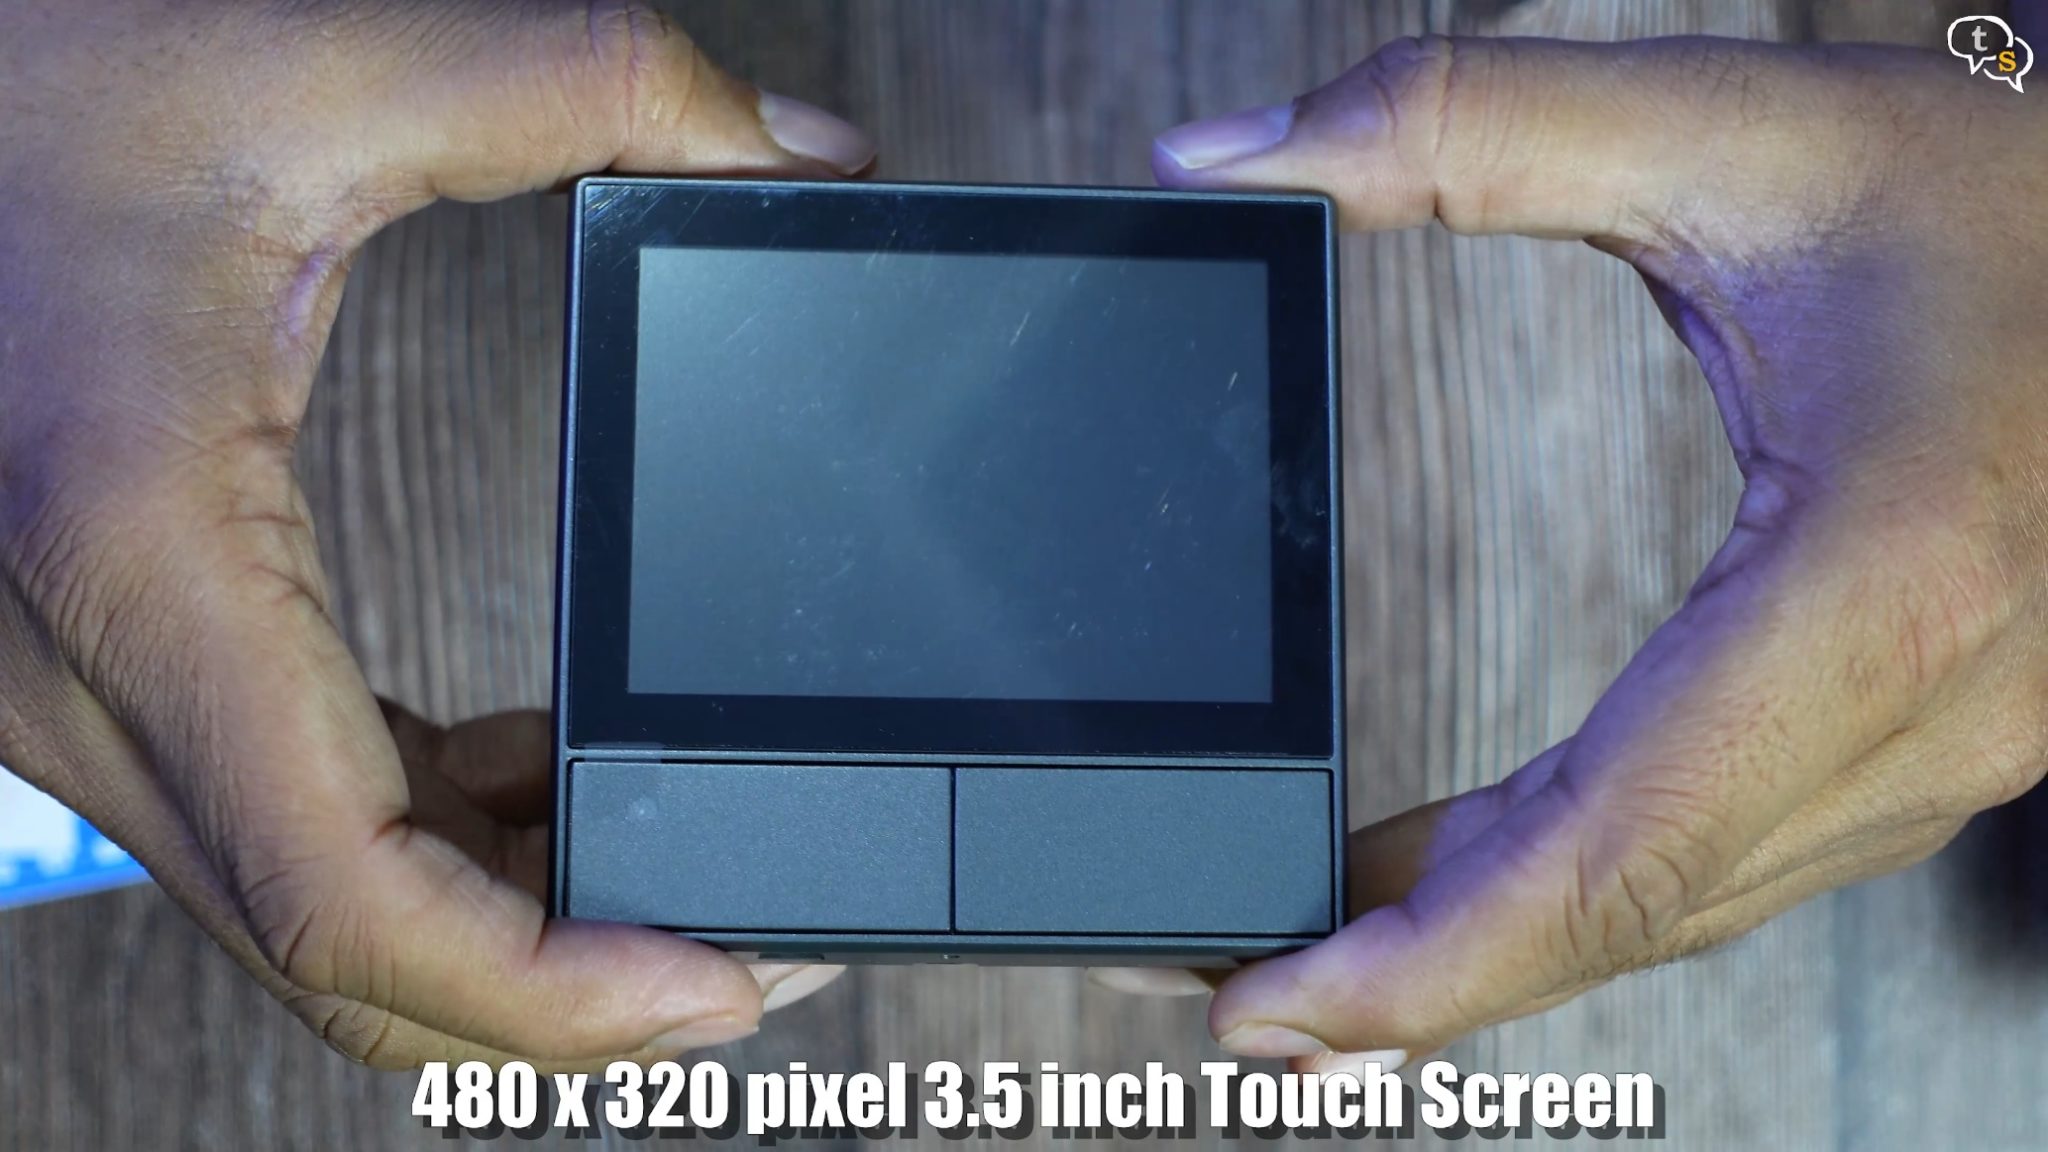
And here is the panel. Looking at pictures earlier I expected it to be much bigger. It has a 480×320 pixel 3.5-inch touch screen with toughened glass.
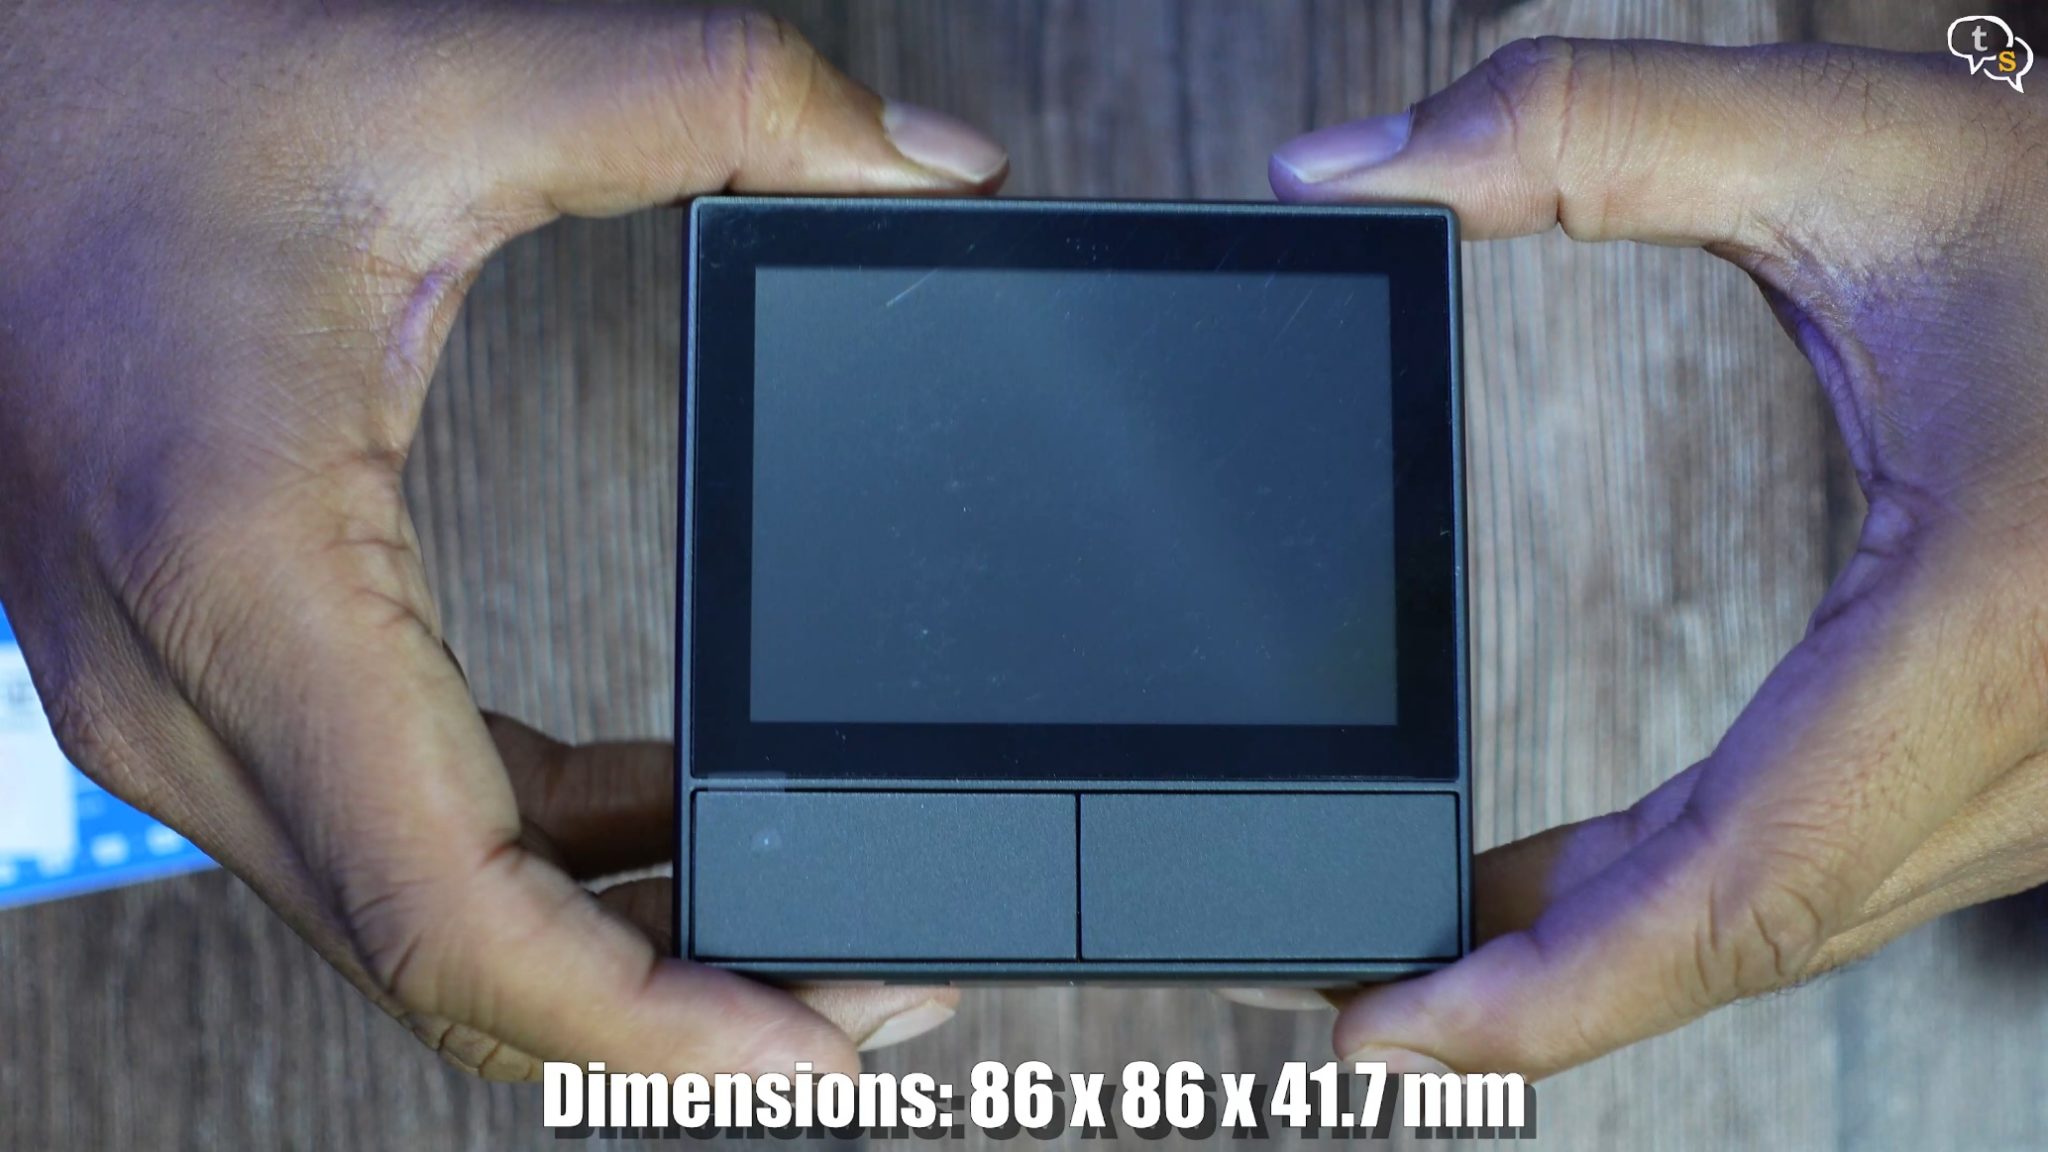
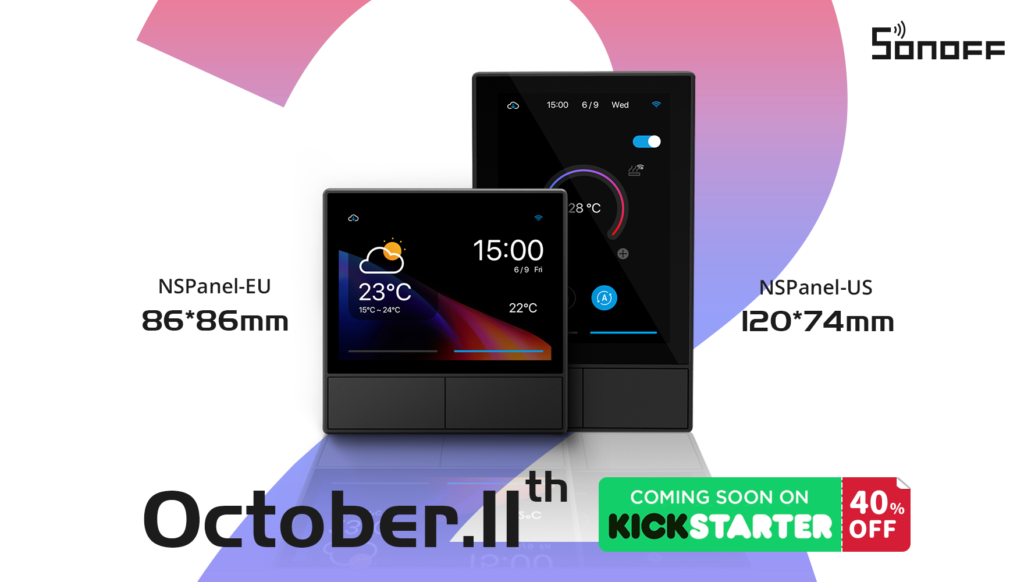
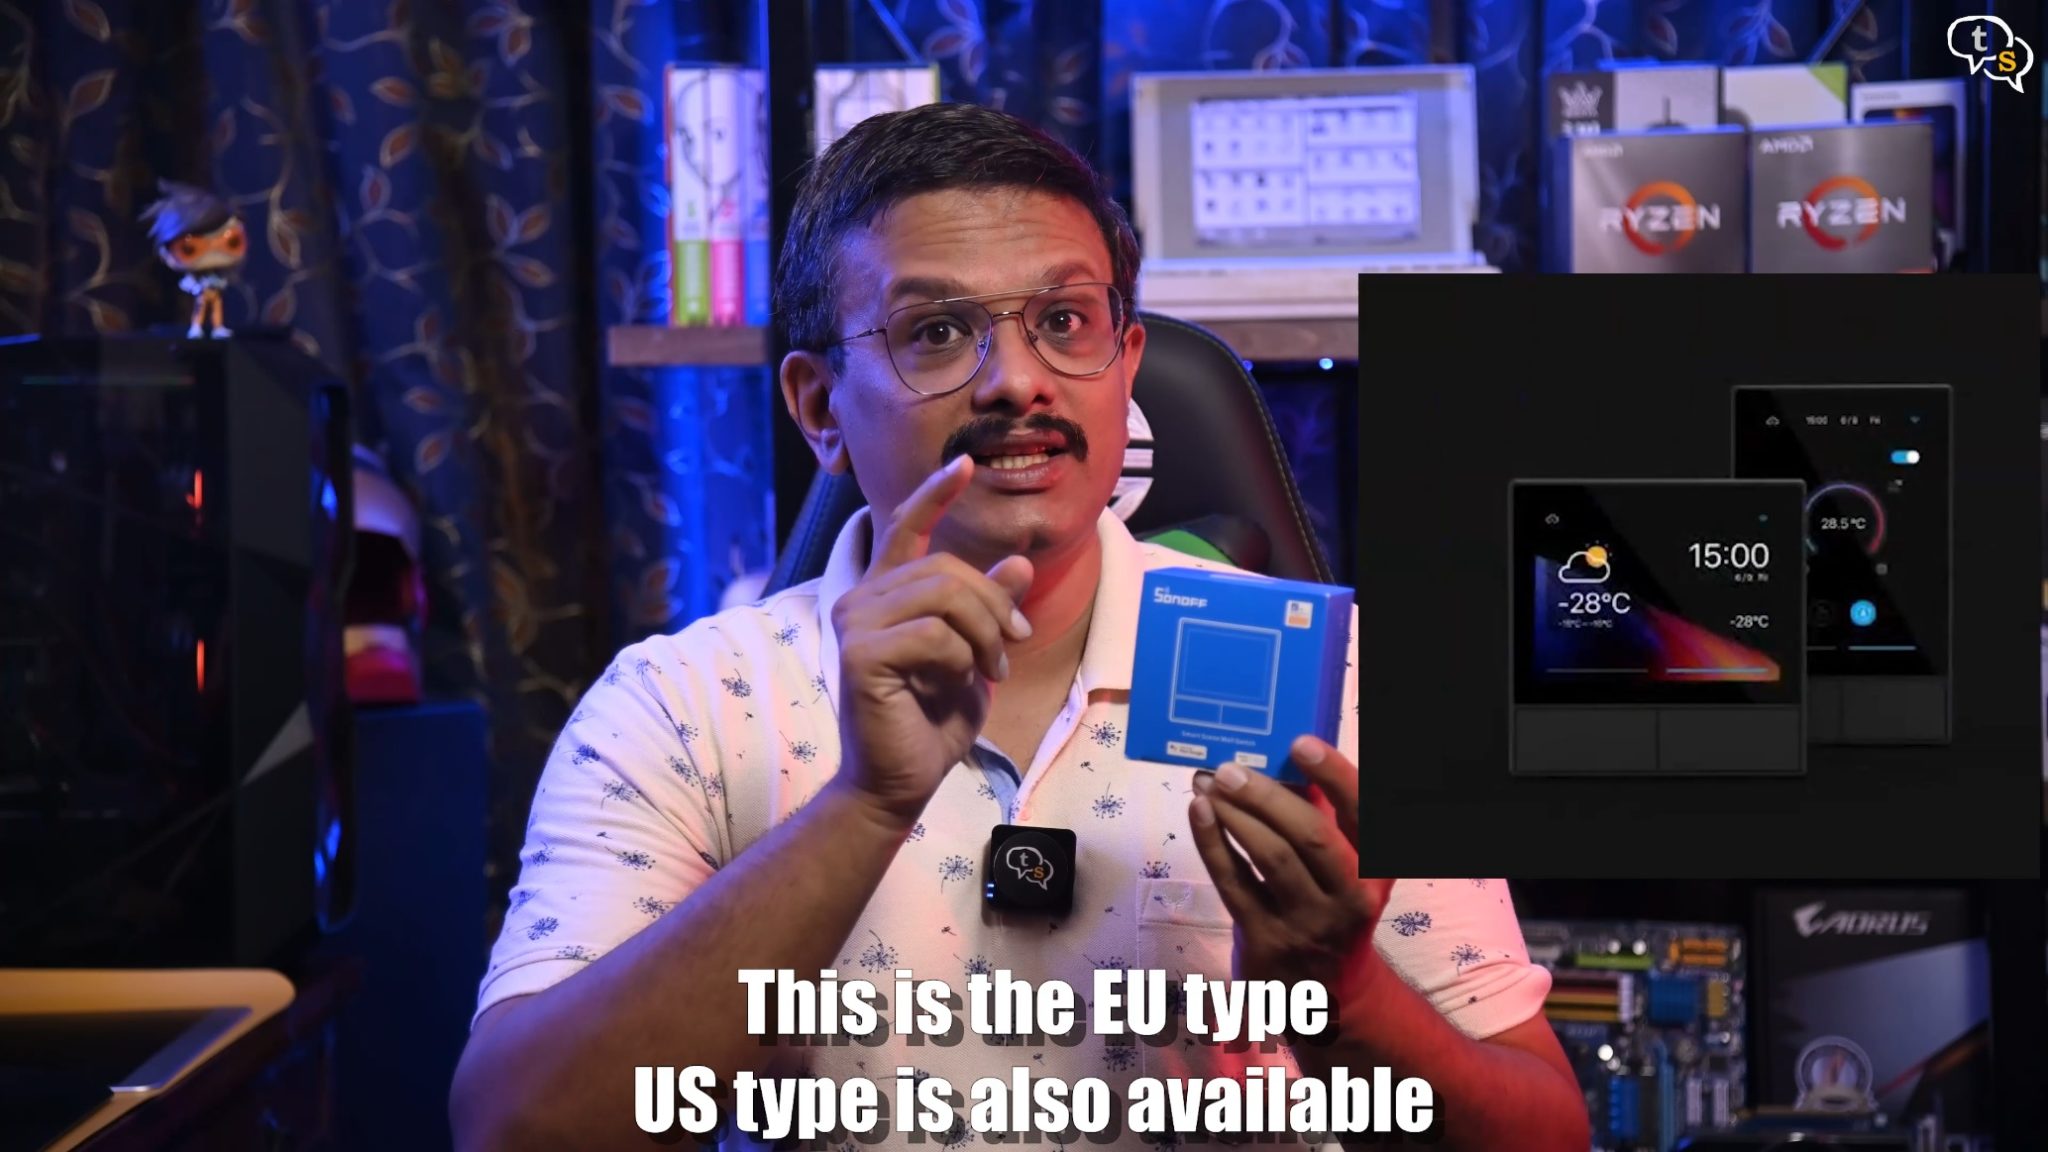
Dimensions are 86x86x41.7 mm and uses a polycarbonate and CRS shell. This is nice, small and can fit within a standard Indian switch box. Do note this is the EU version. There is an American version too, which is taller. So, when purchasing make sure to select the correct model.
We have two physical switches in front, which can be hardwired to outlets or bulbs, making them smart.
![]()
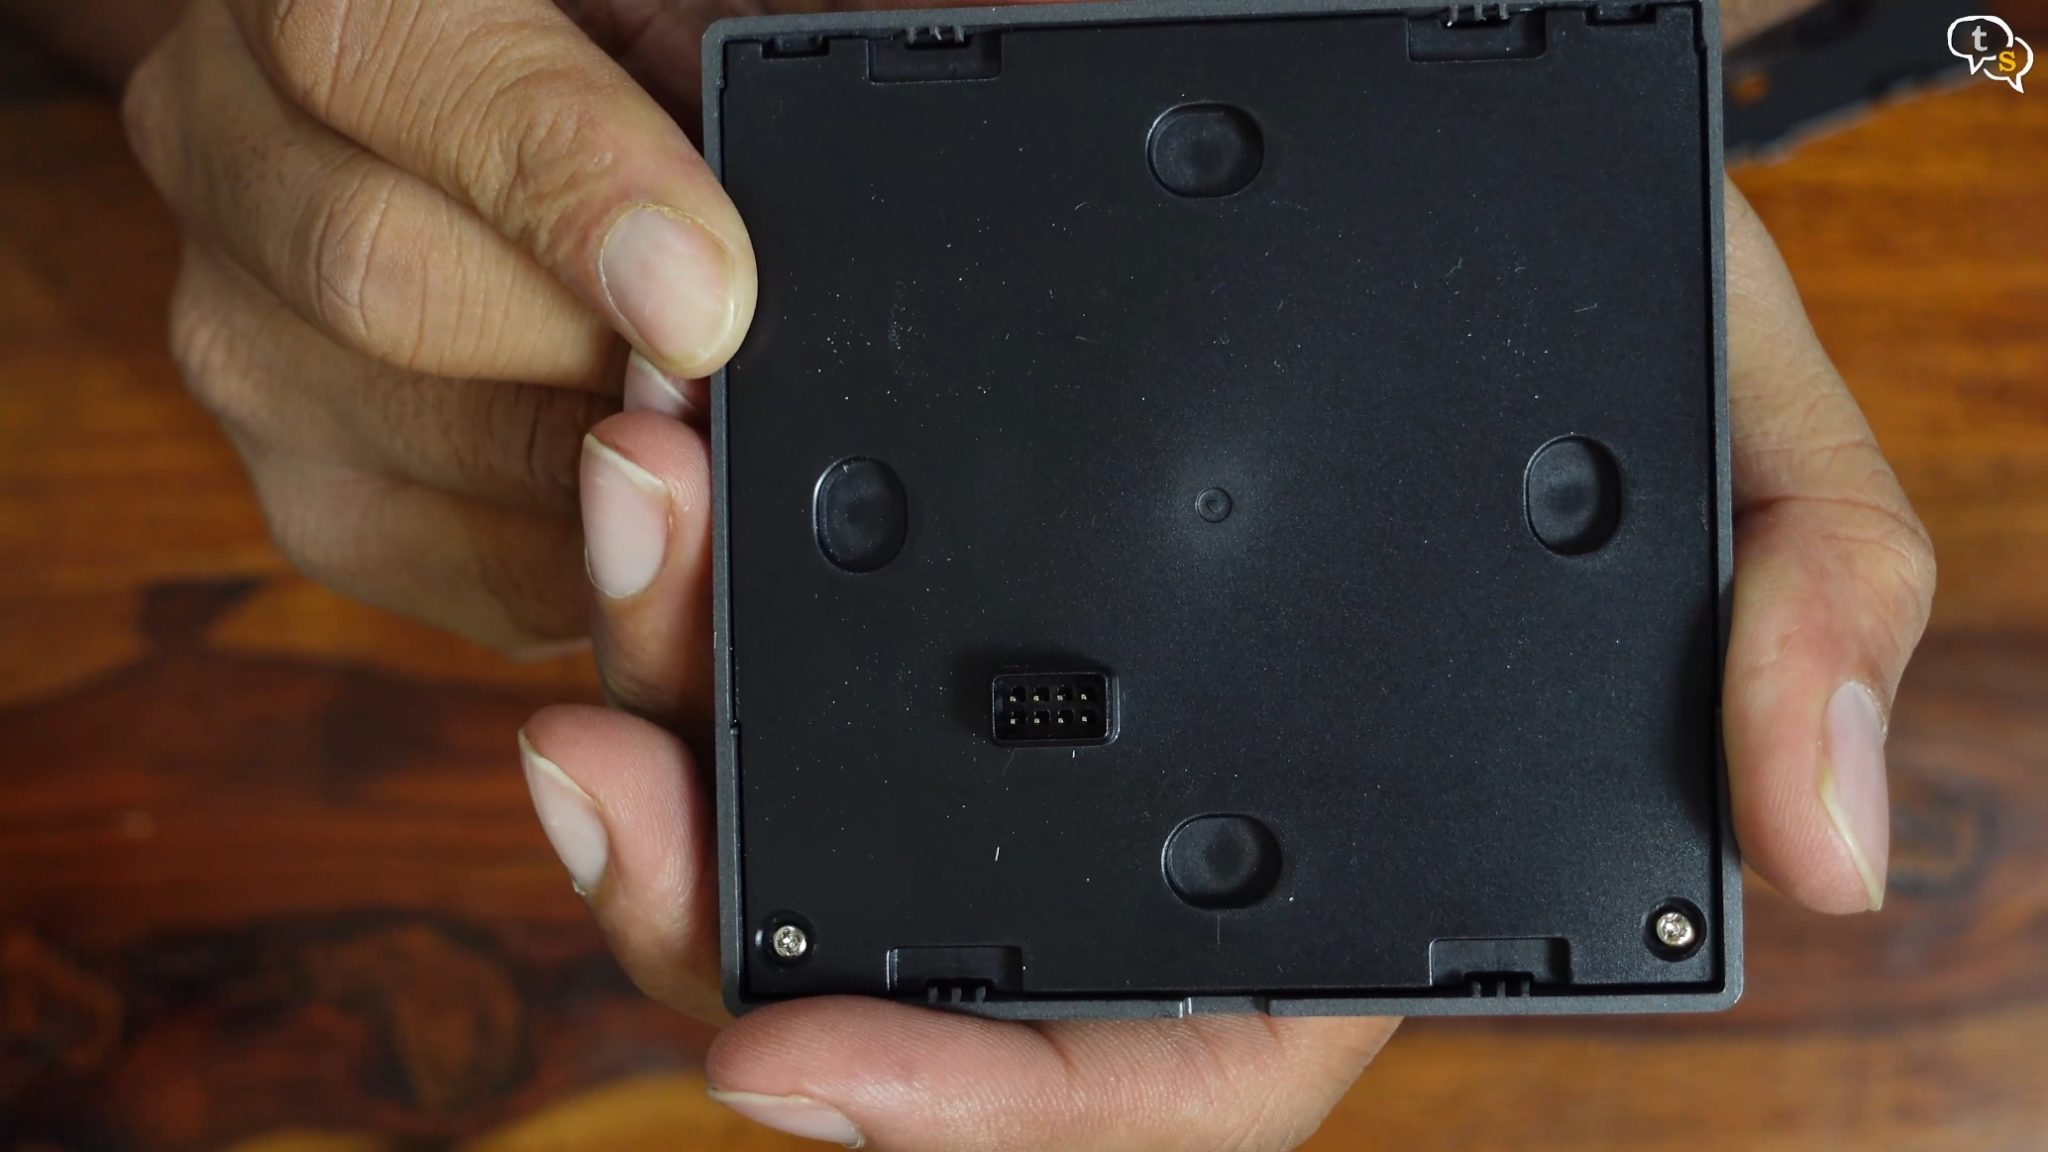
We have the Sonoff logo on the side, below is a led?
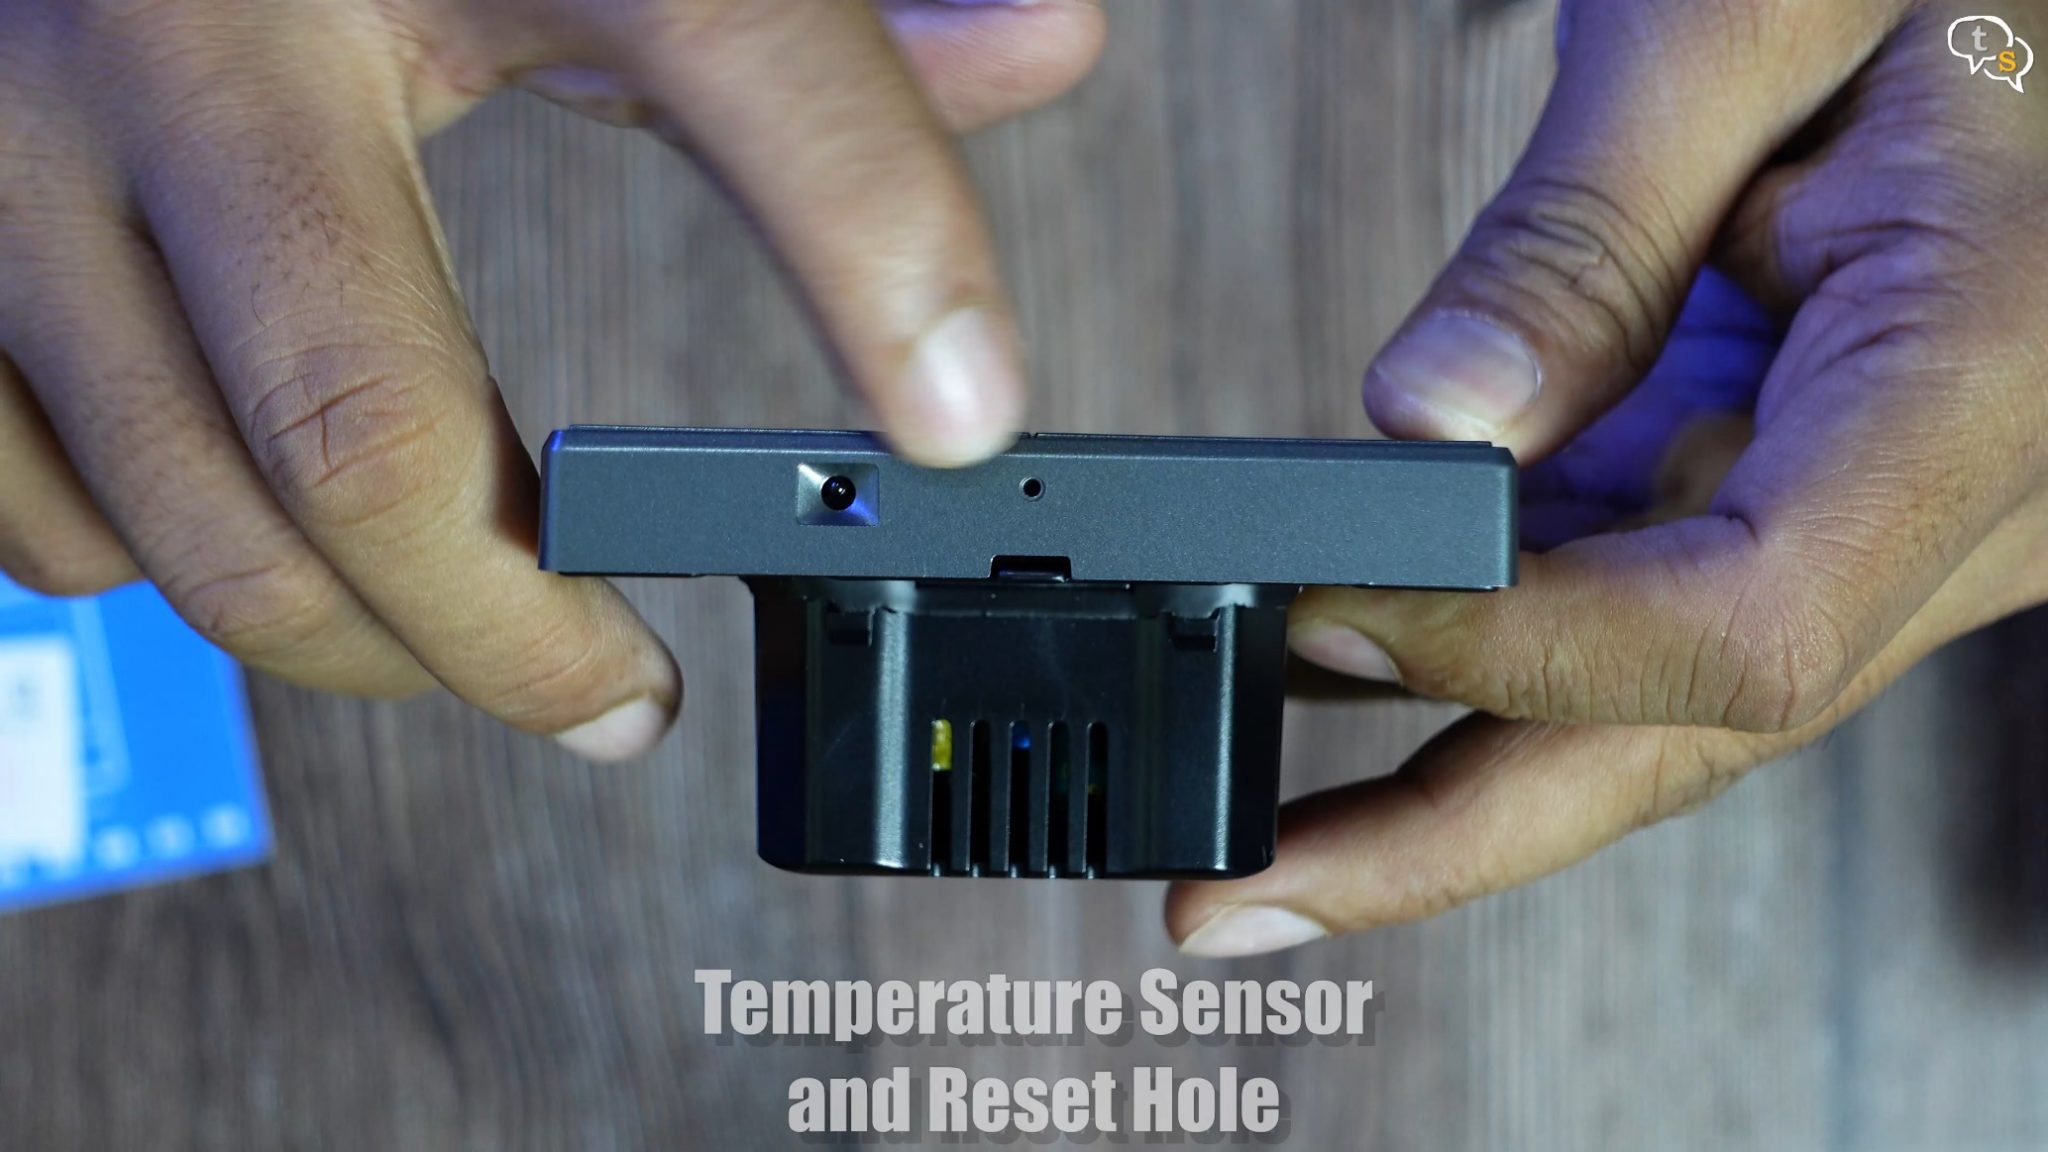
Temperature sensor and the small hole next to it is a device reset hole on the bottom.
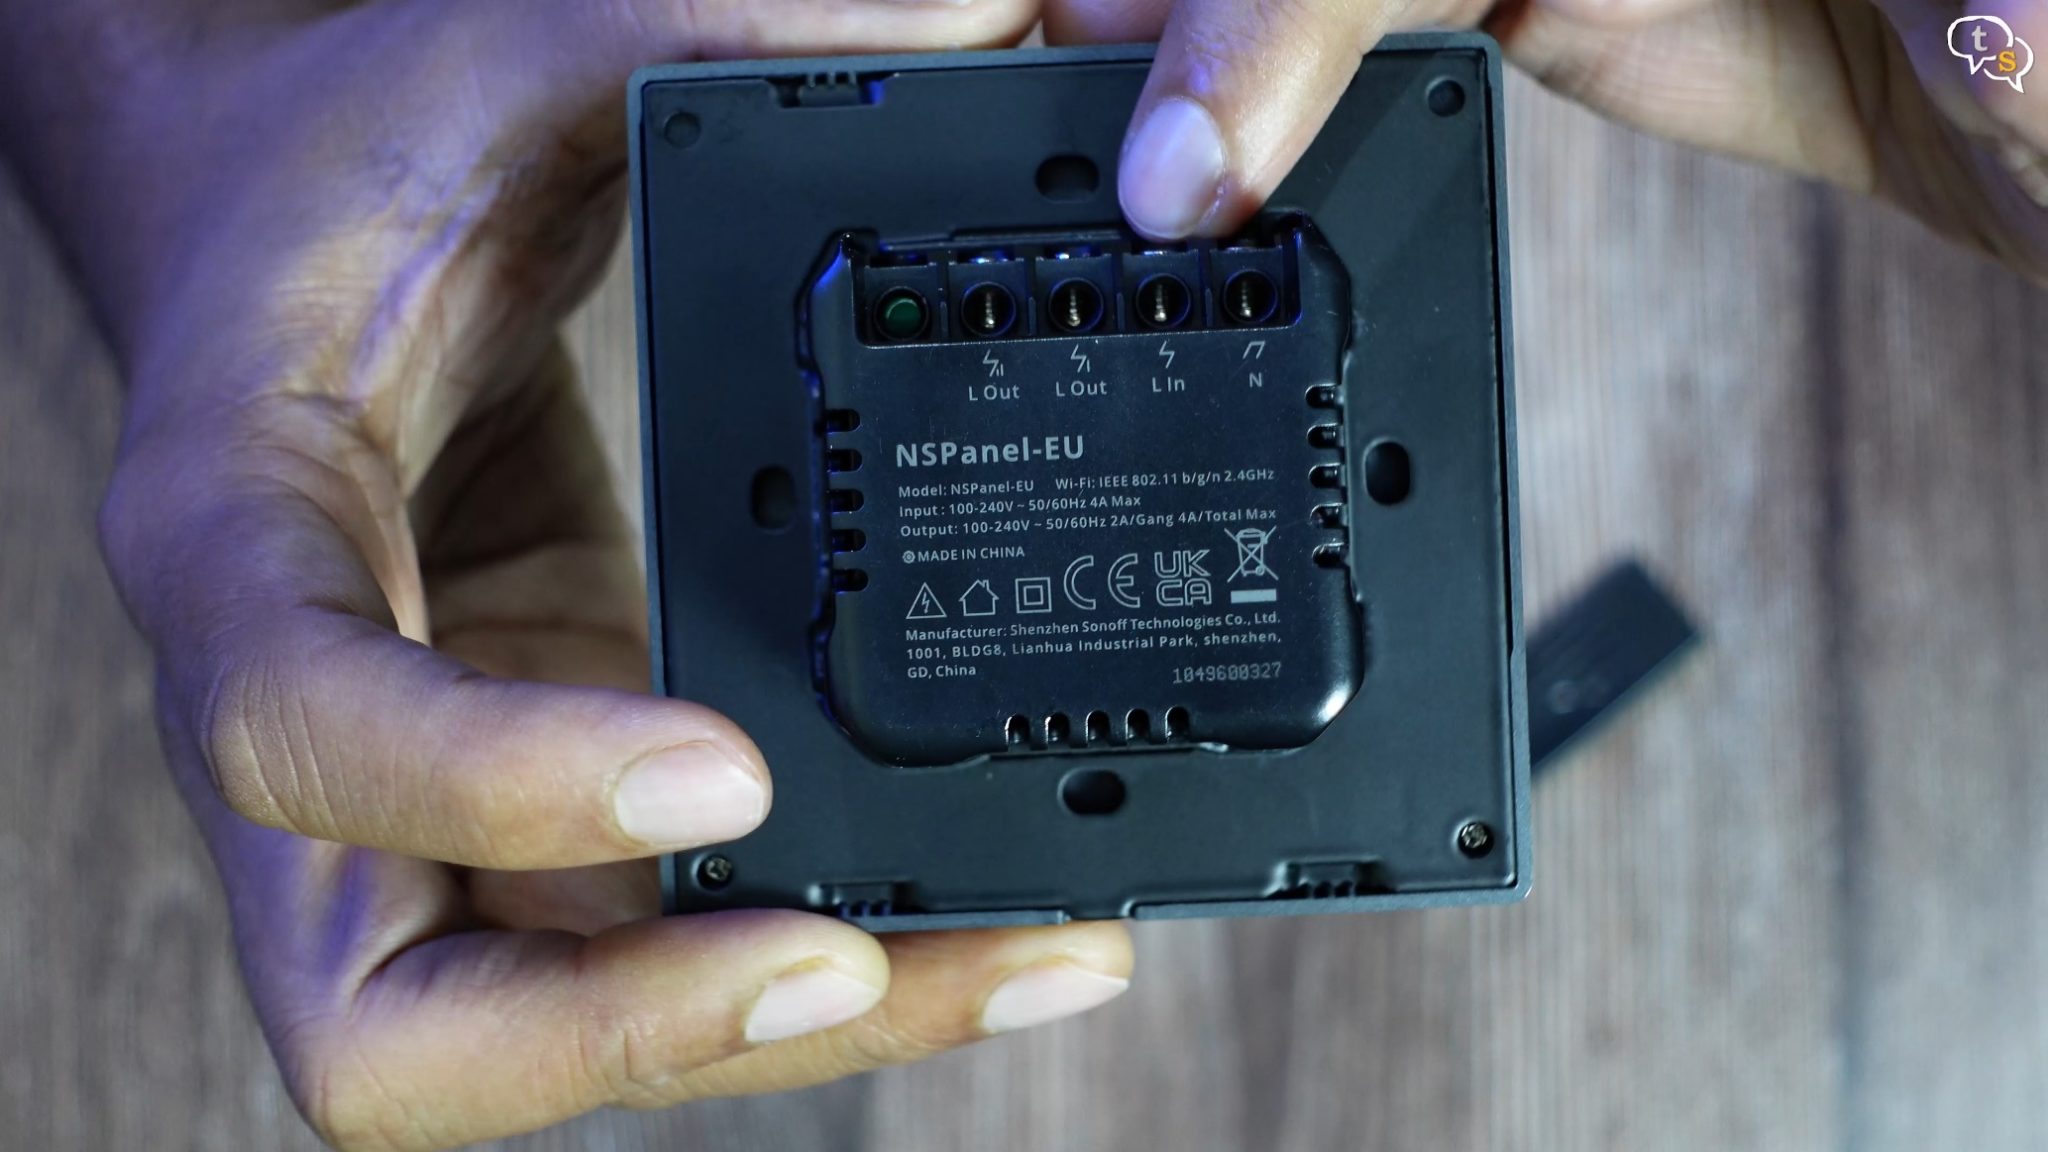
All the connectors are at the back, at the end are line in and neutral, and the others are line out 1 and line out 2, which are toggled by the switches. We need to remove this plastic cover, to access the screws.
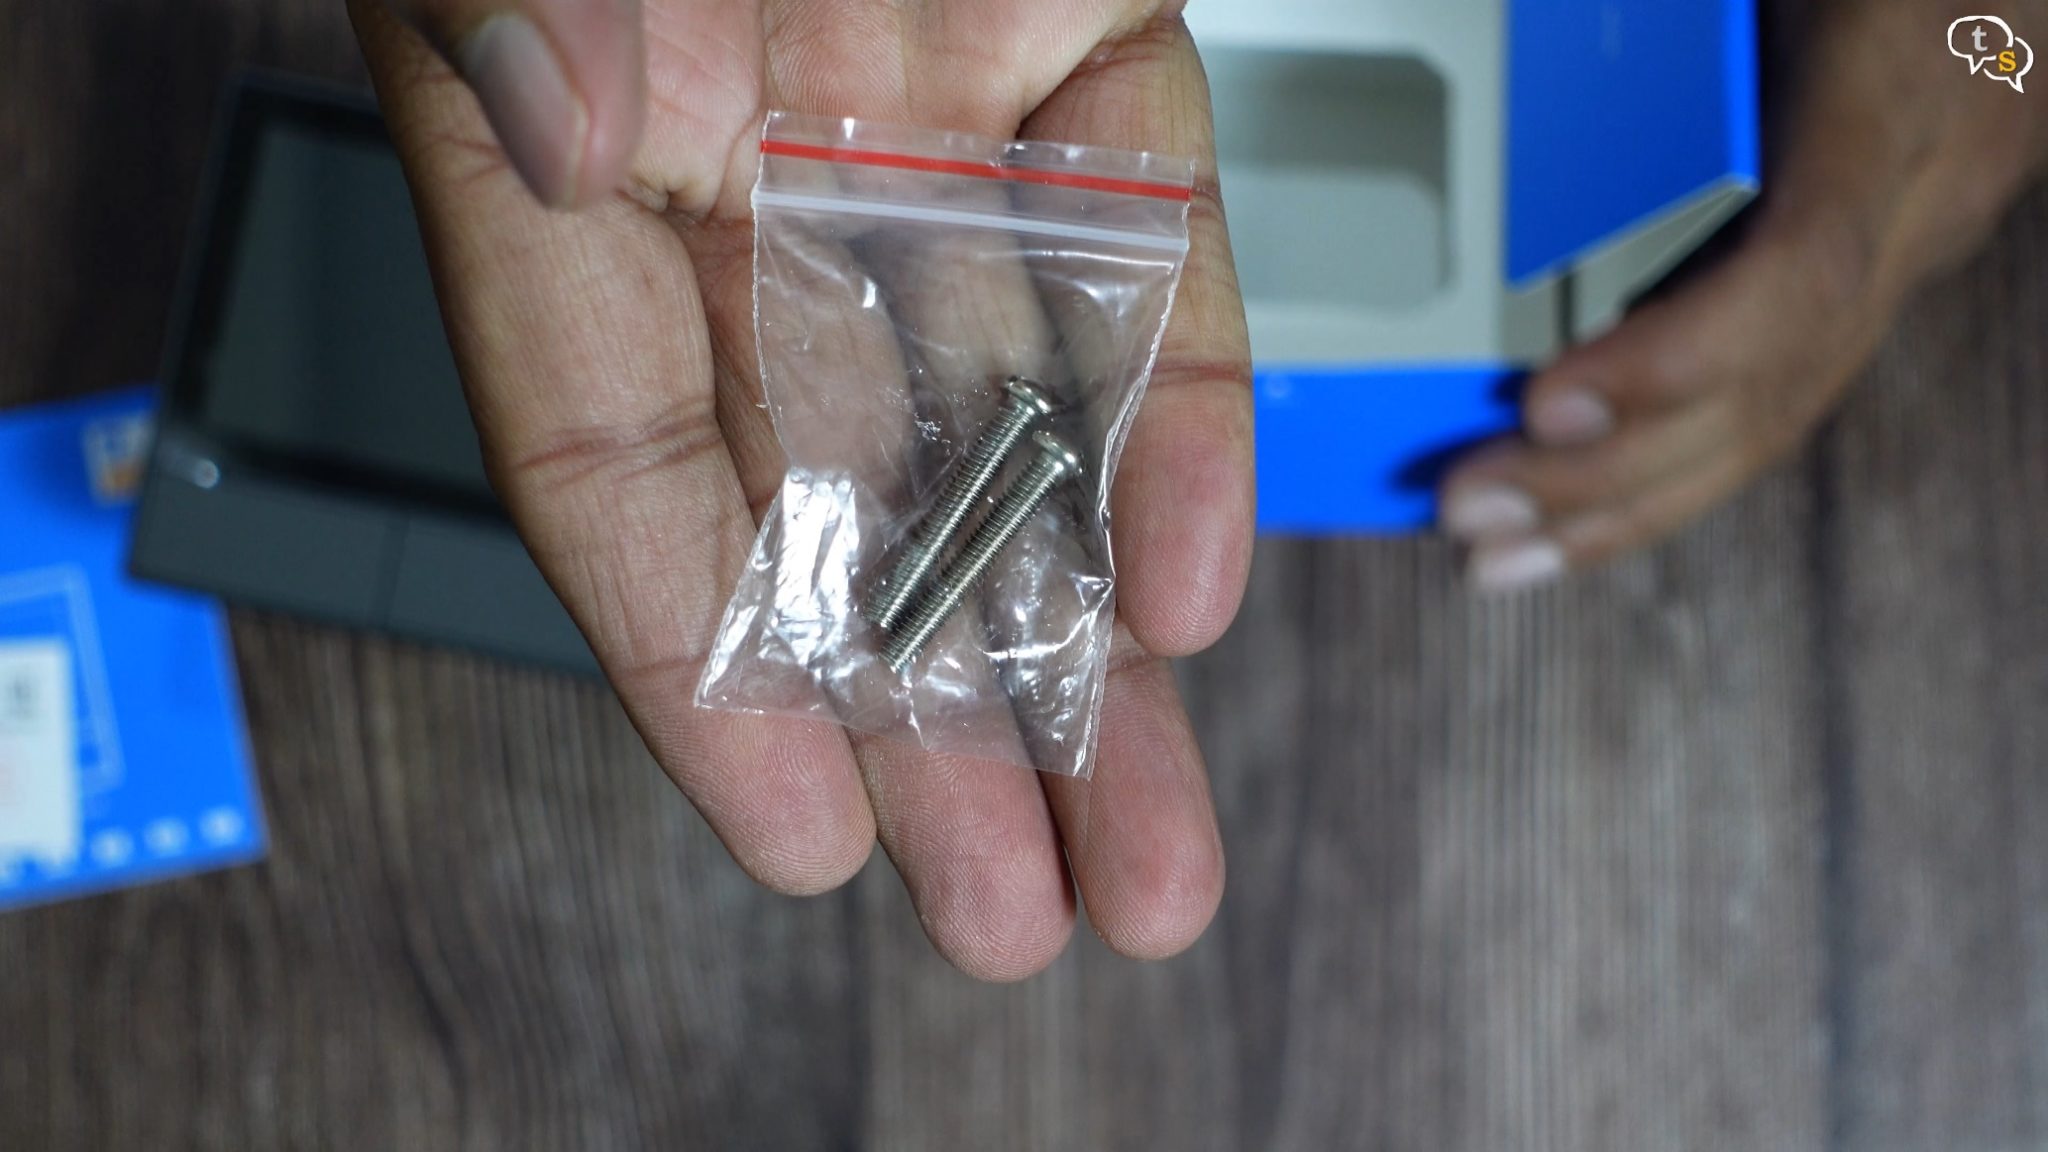
A pair of screws are also provided, to mount the device.
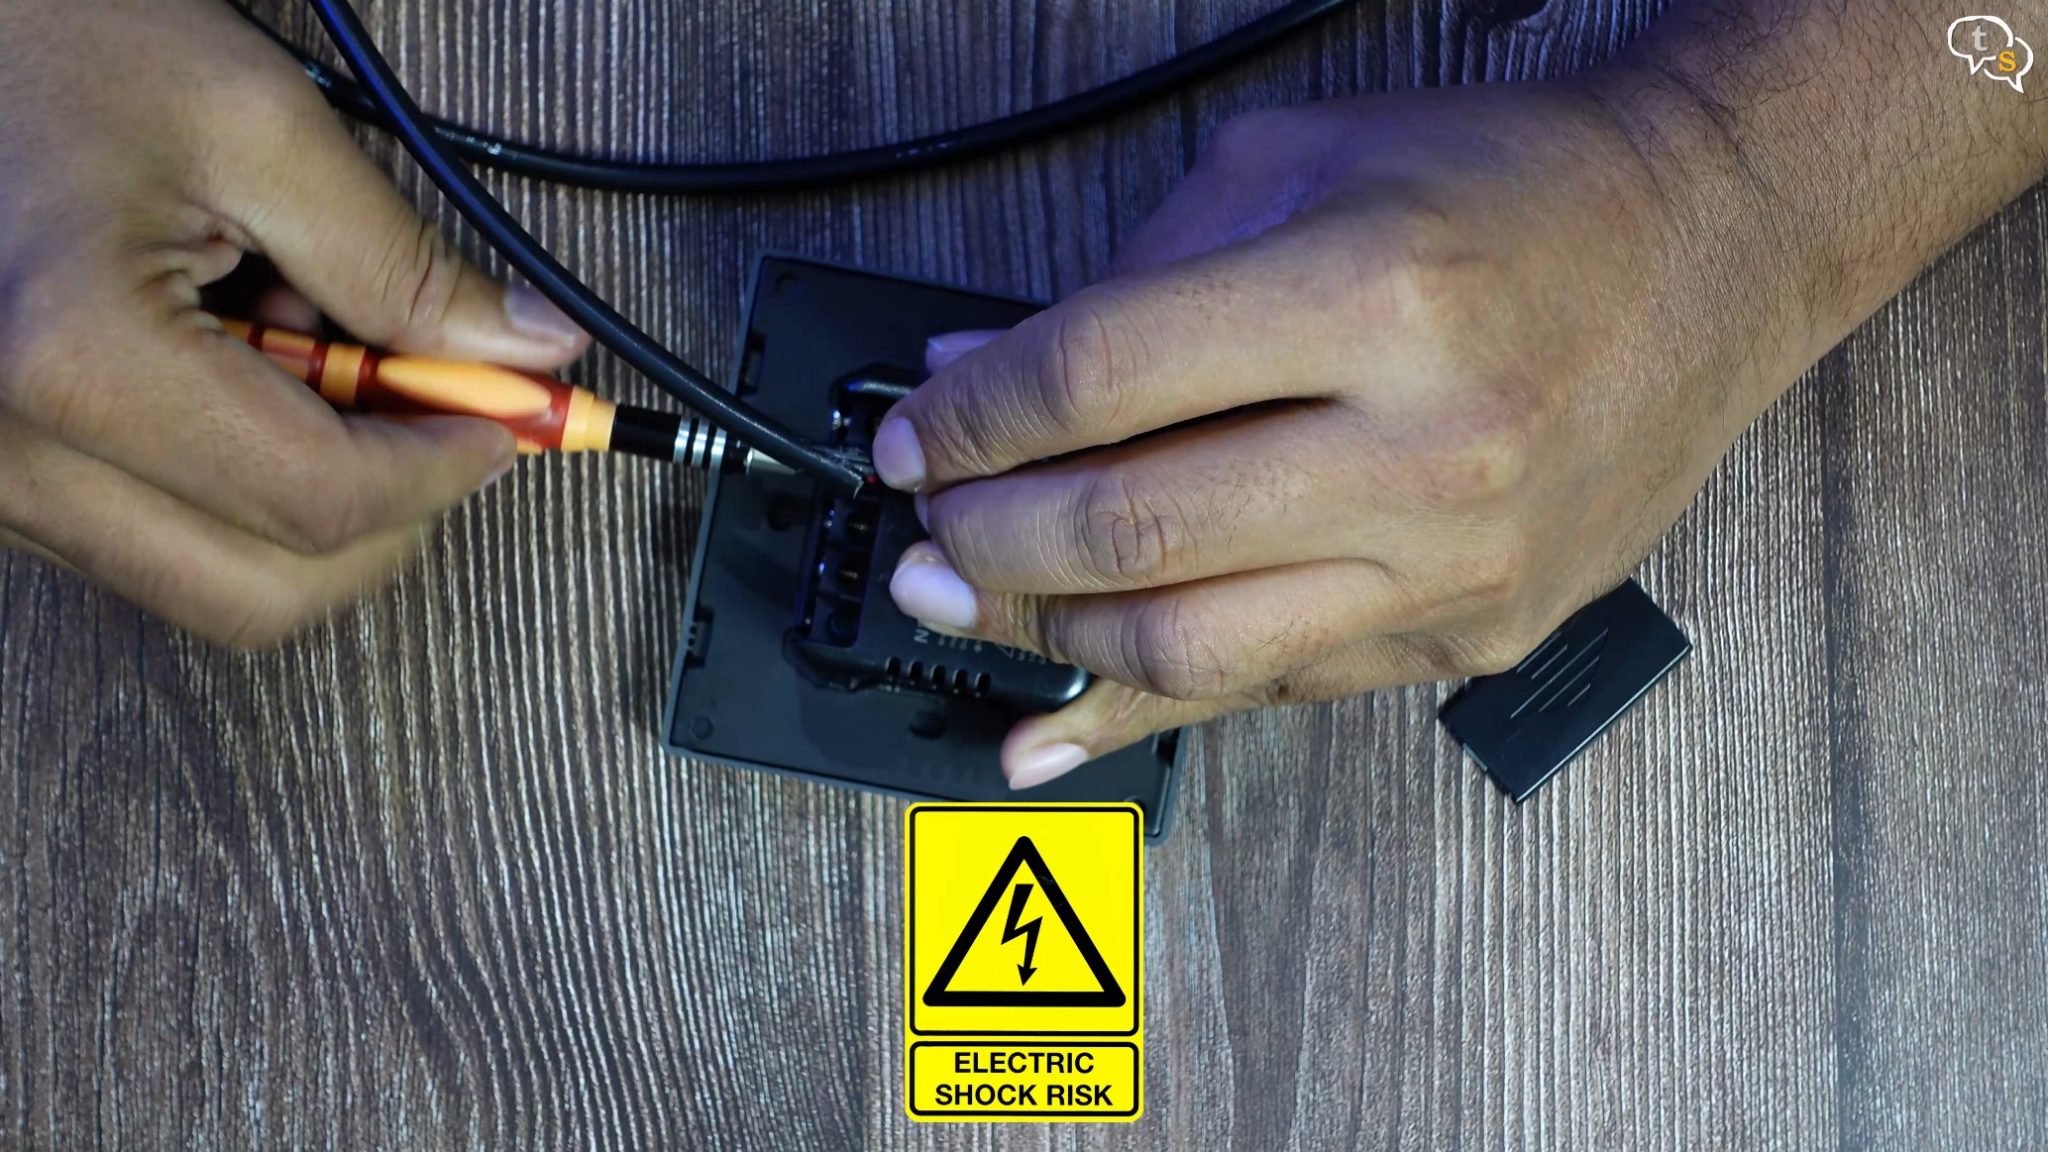
That’s a quick look at the main device, now let’s set the device up. I’m using this wire with a plug on the end as the power input, this would connect to the main line. We are working with electricity here, so be careful. If you don’t know what you’re doing, maybe get an electrician to install it for you.
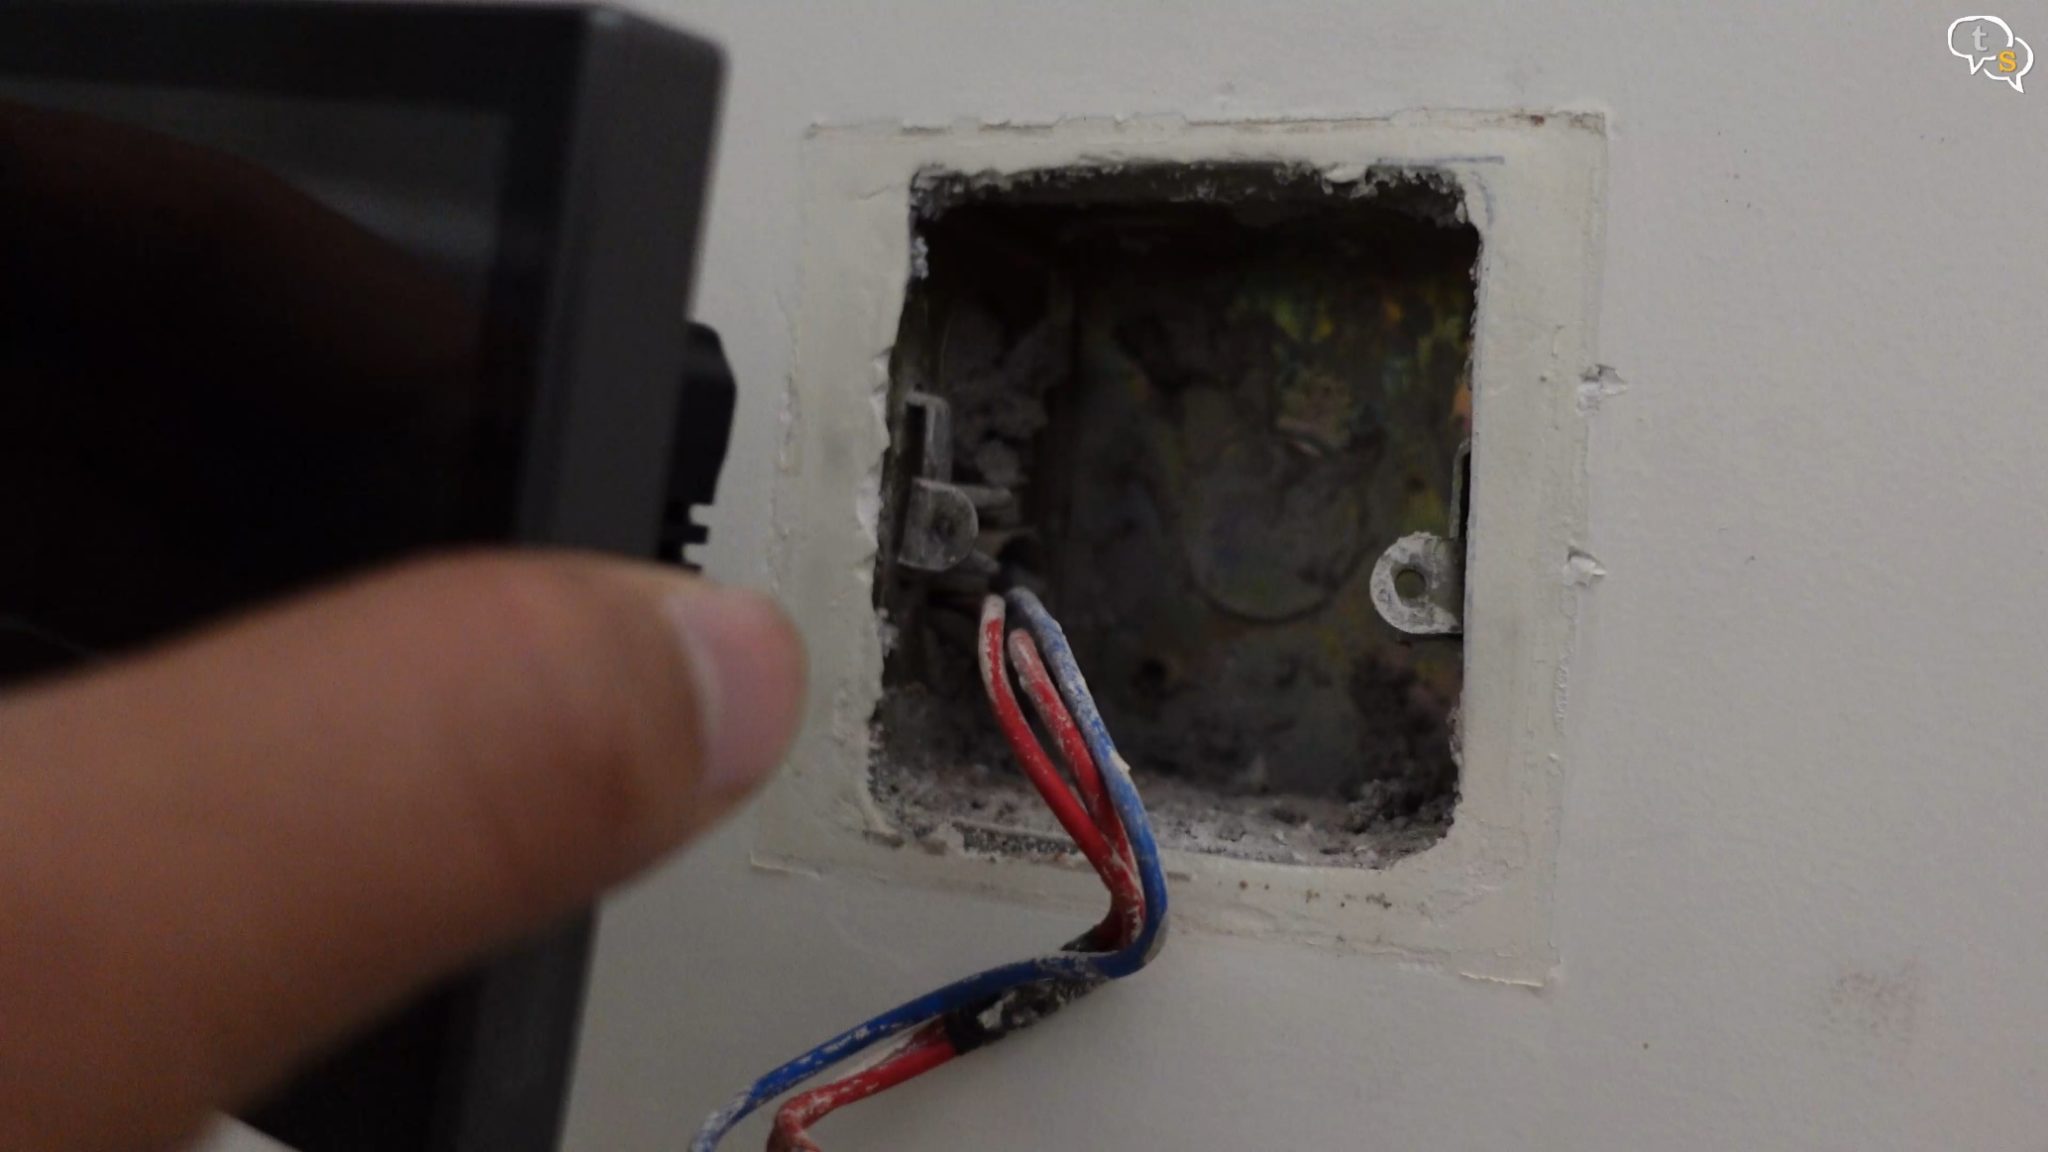
Ok that out of the way, we have two wires one is black which is neutral and red is line, or power.
So Line goes here and neutral here.
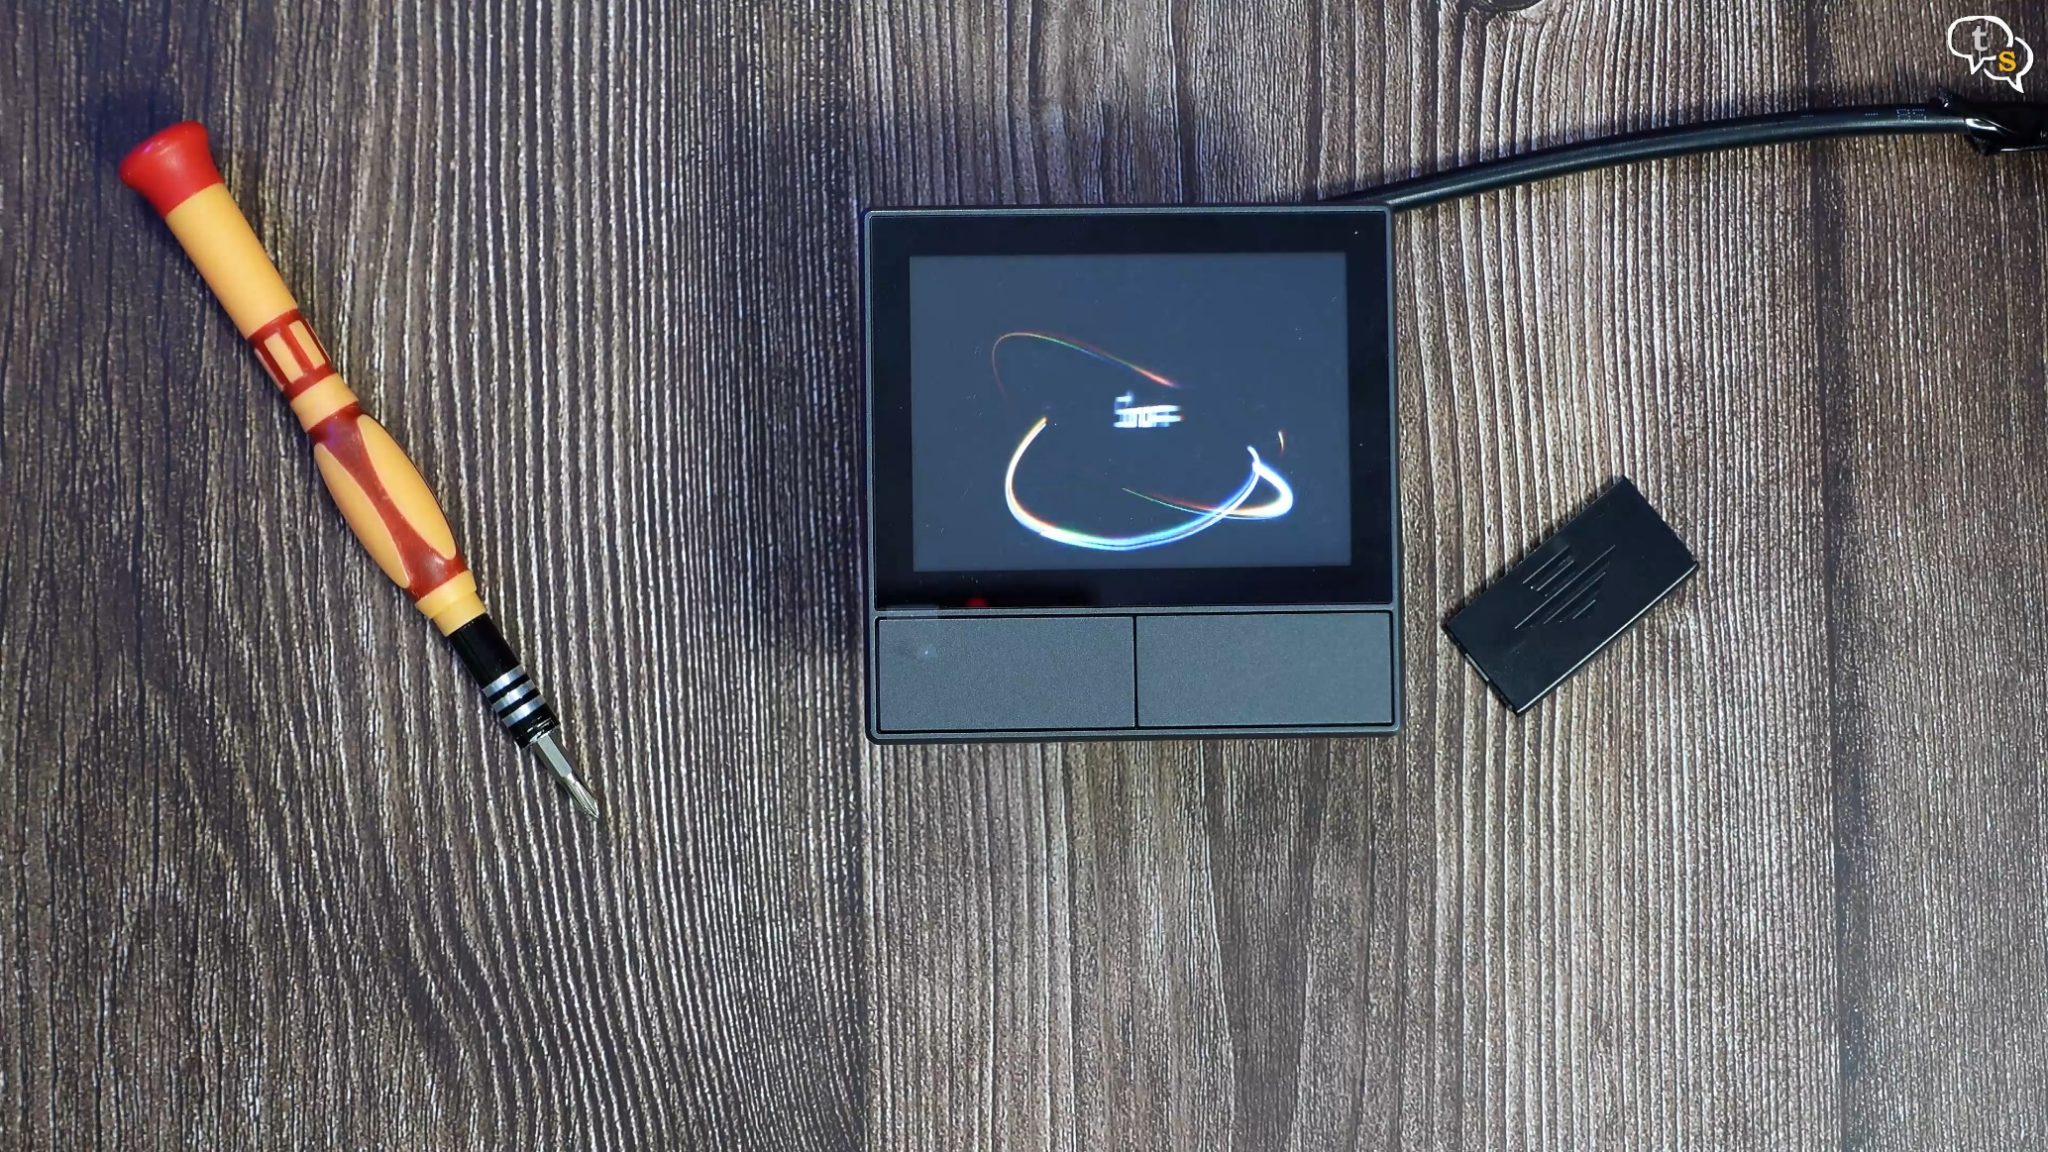
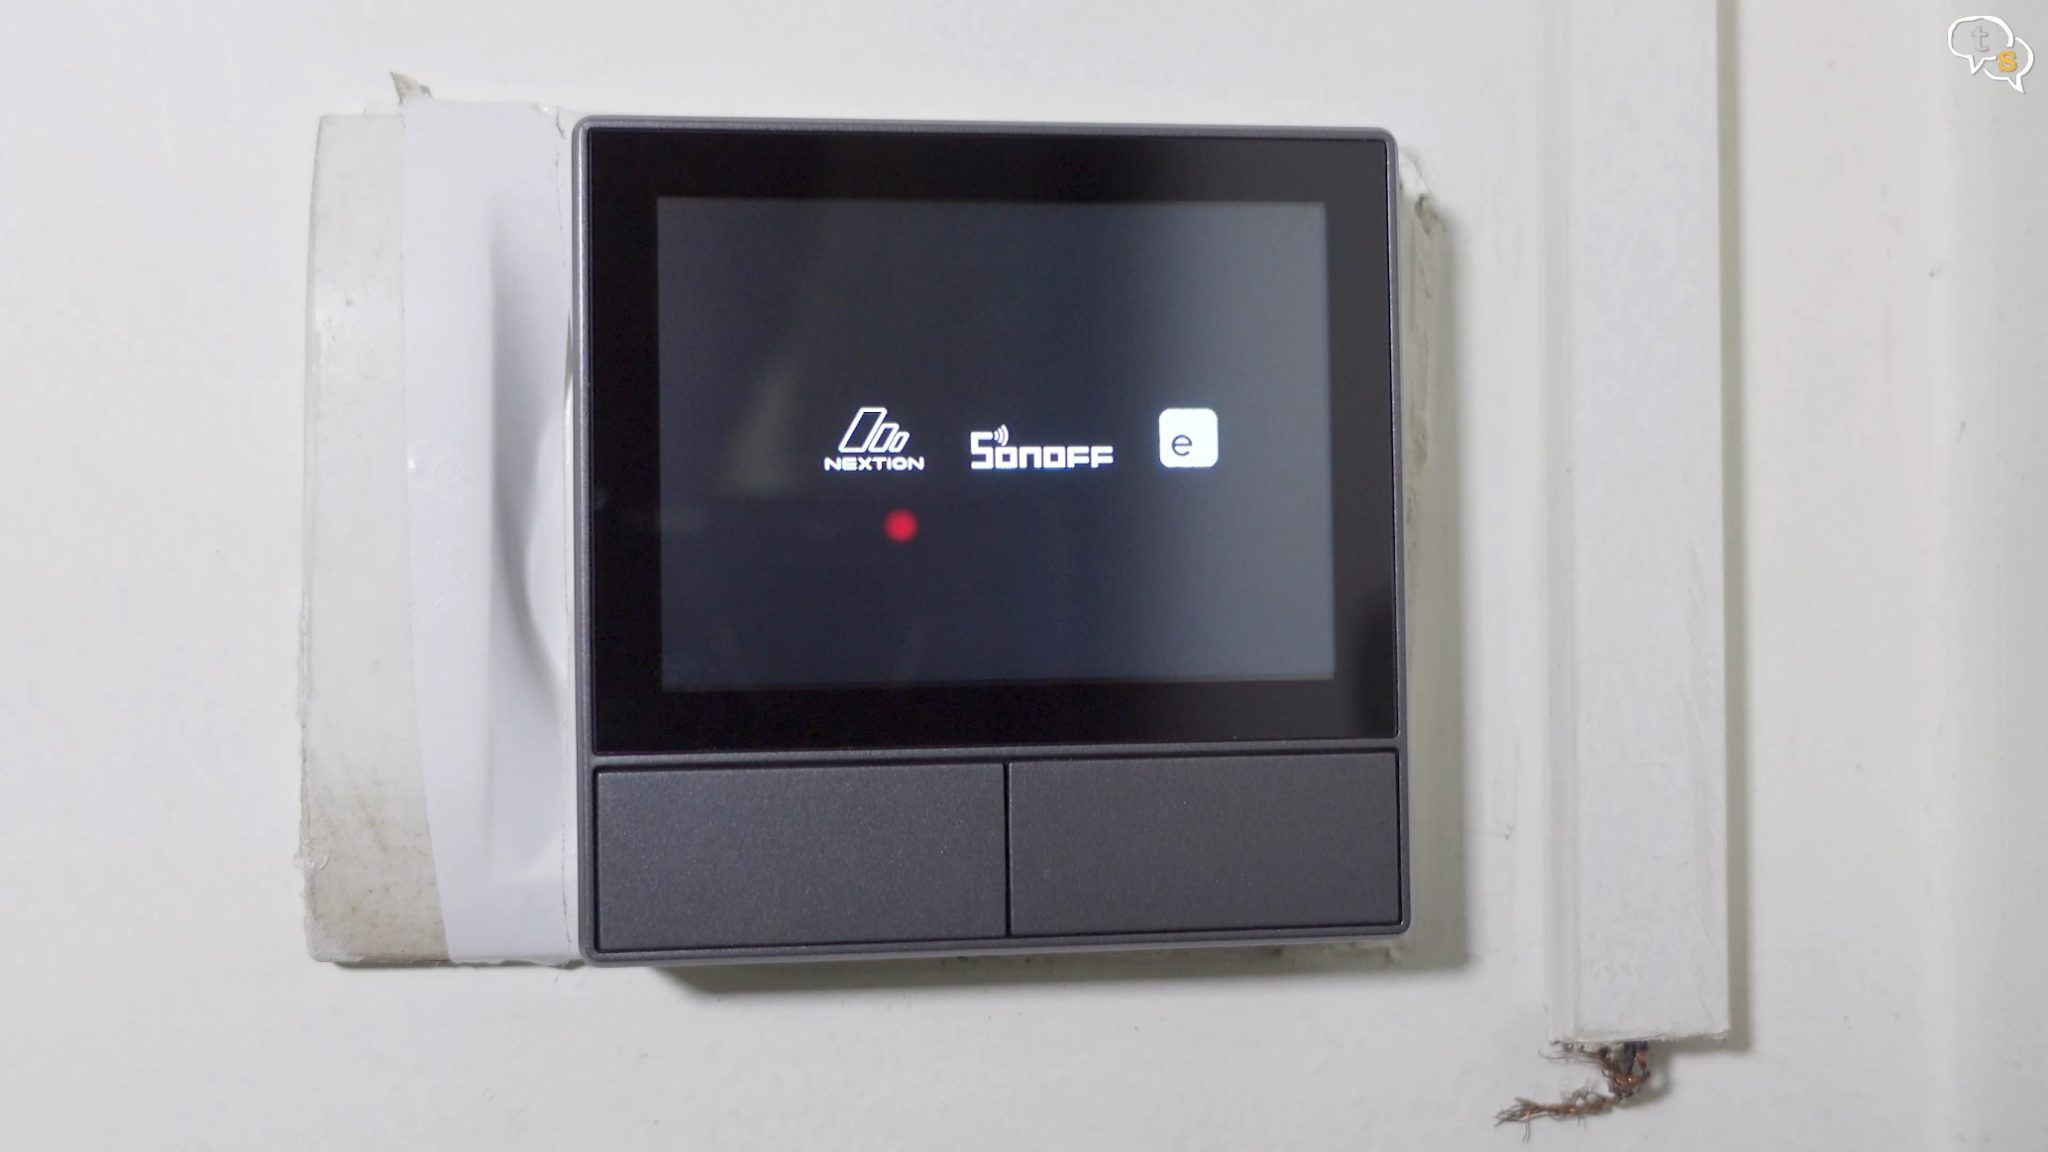
Now that it’s connected, we can set it up. Power on and we see the Sonoff animation on boot up.
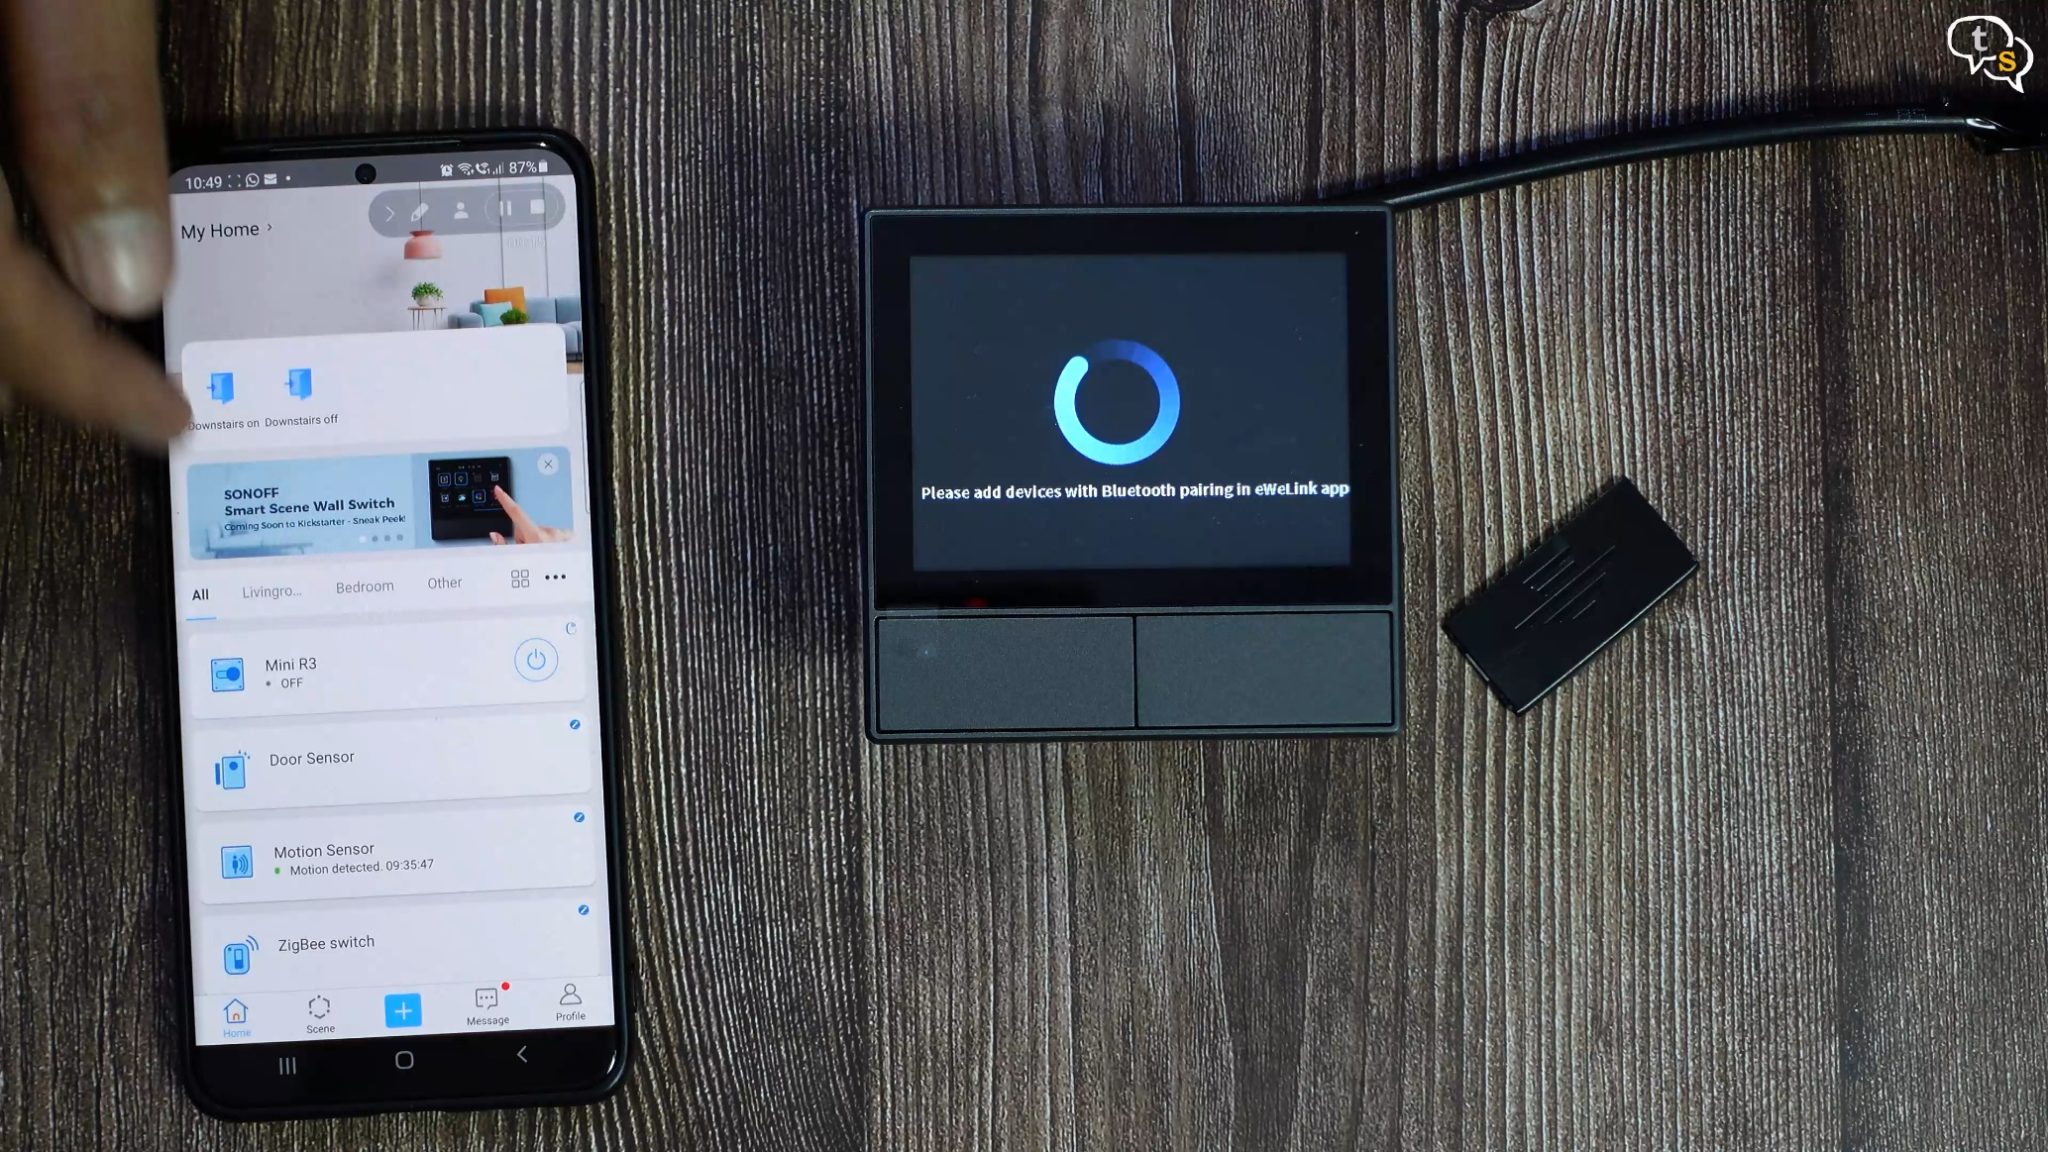
The device is ready in Bluetooth pairing mode, so using the eWelink app on the phone we set it up.
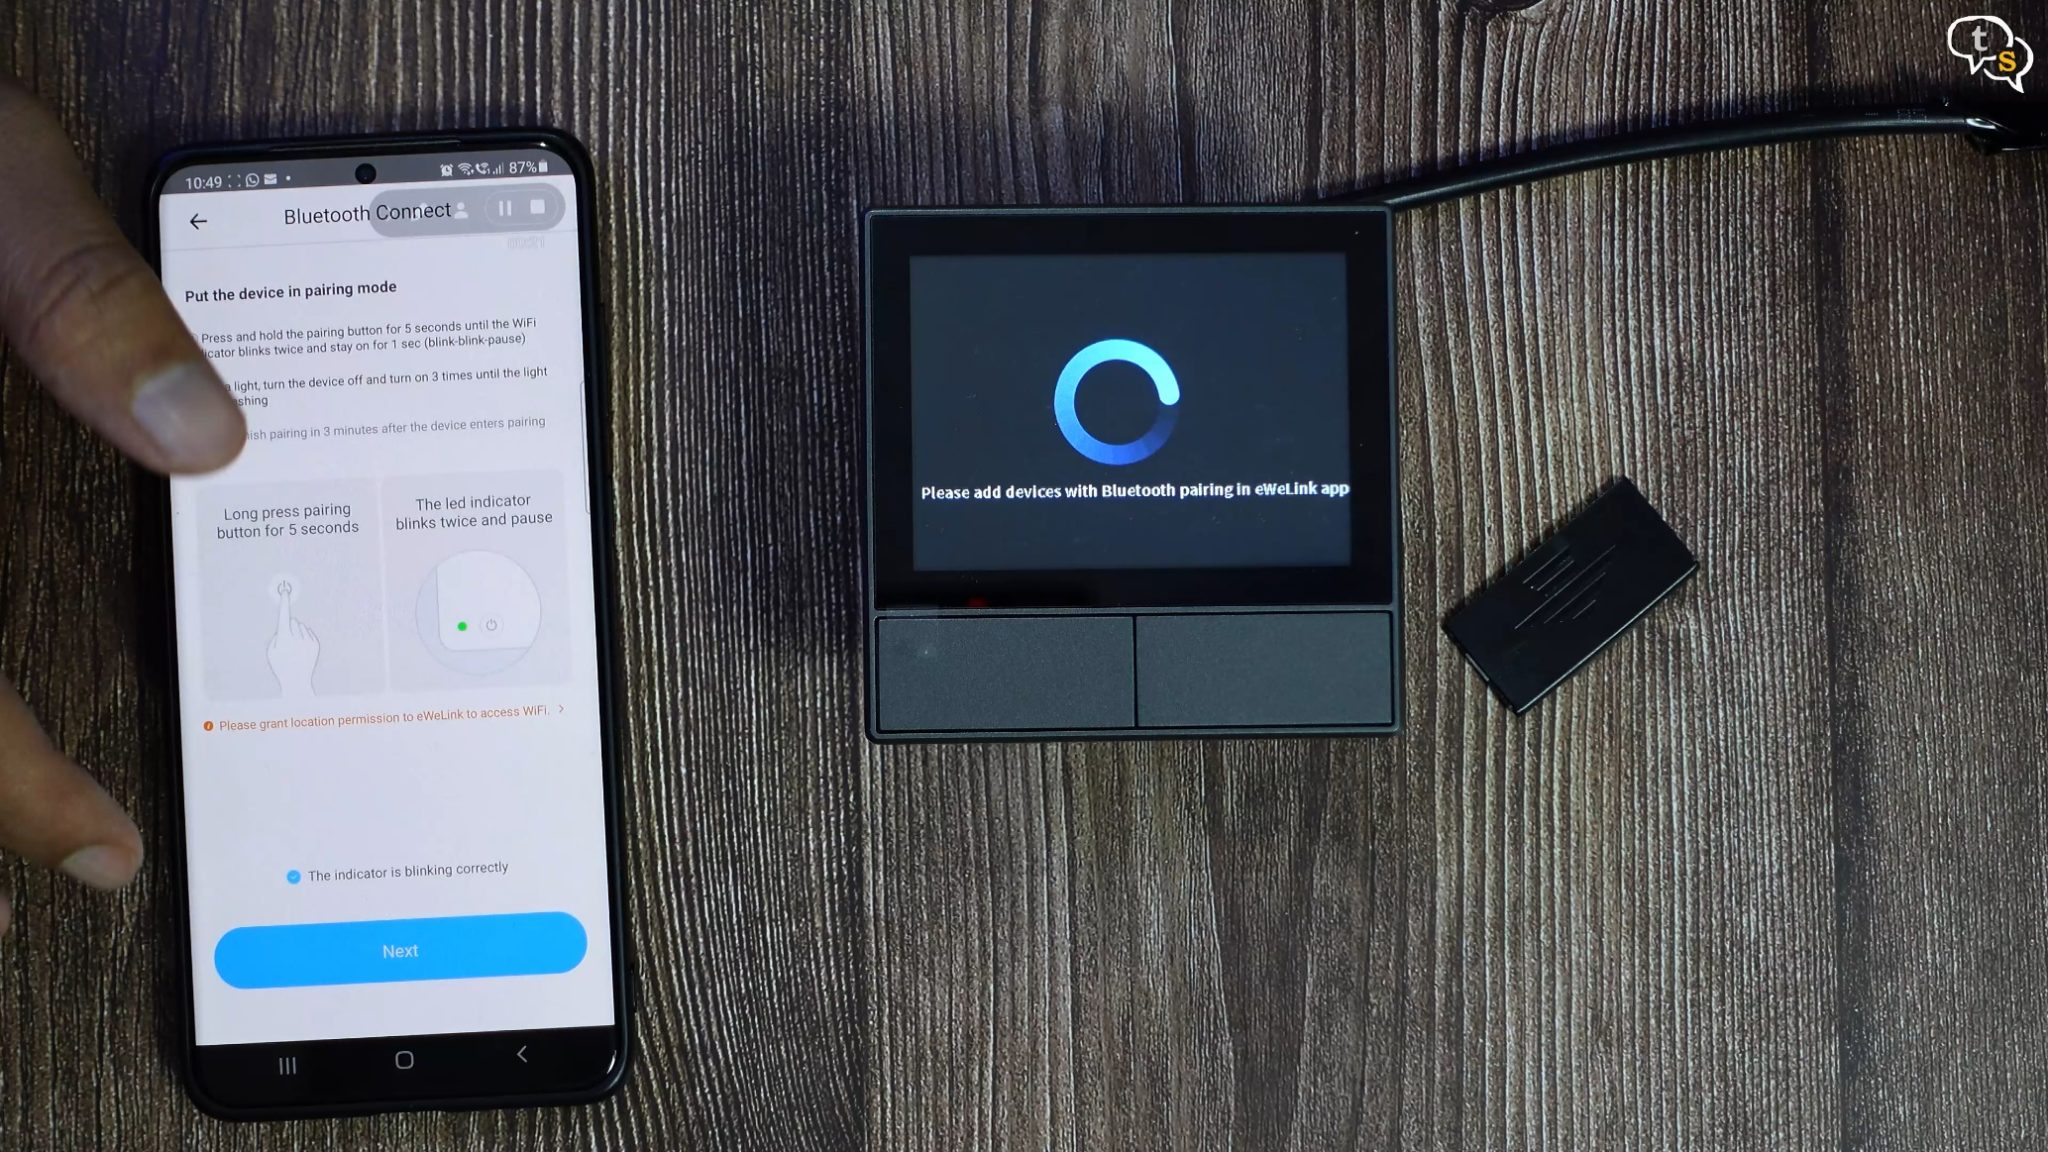
So, add device, Bluetooth connect, we don’t have any lights but as the device is already in pairing mode as visible on screen just tap on The indicator is blinking, next button, it finds the device, tap on connect, select your Wi-Fi, enter password and its connected.
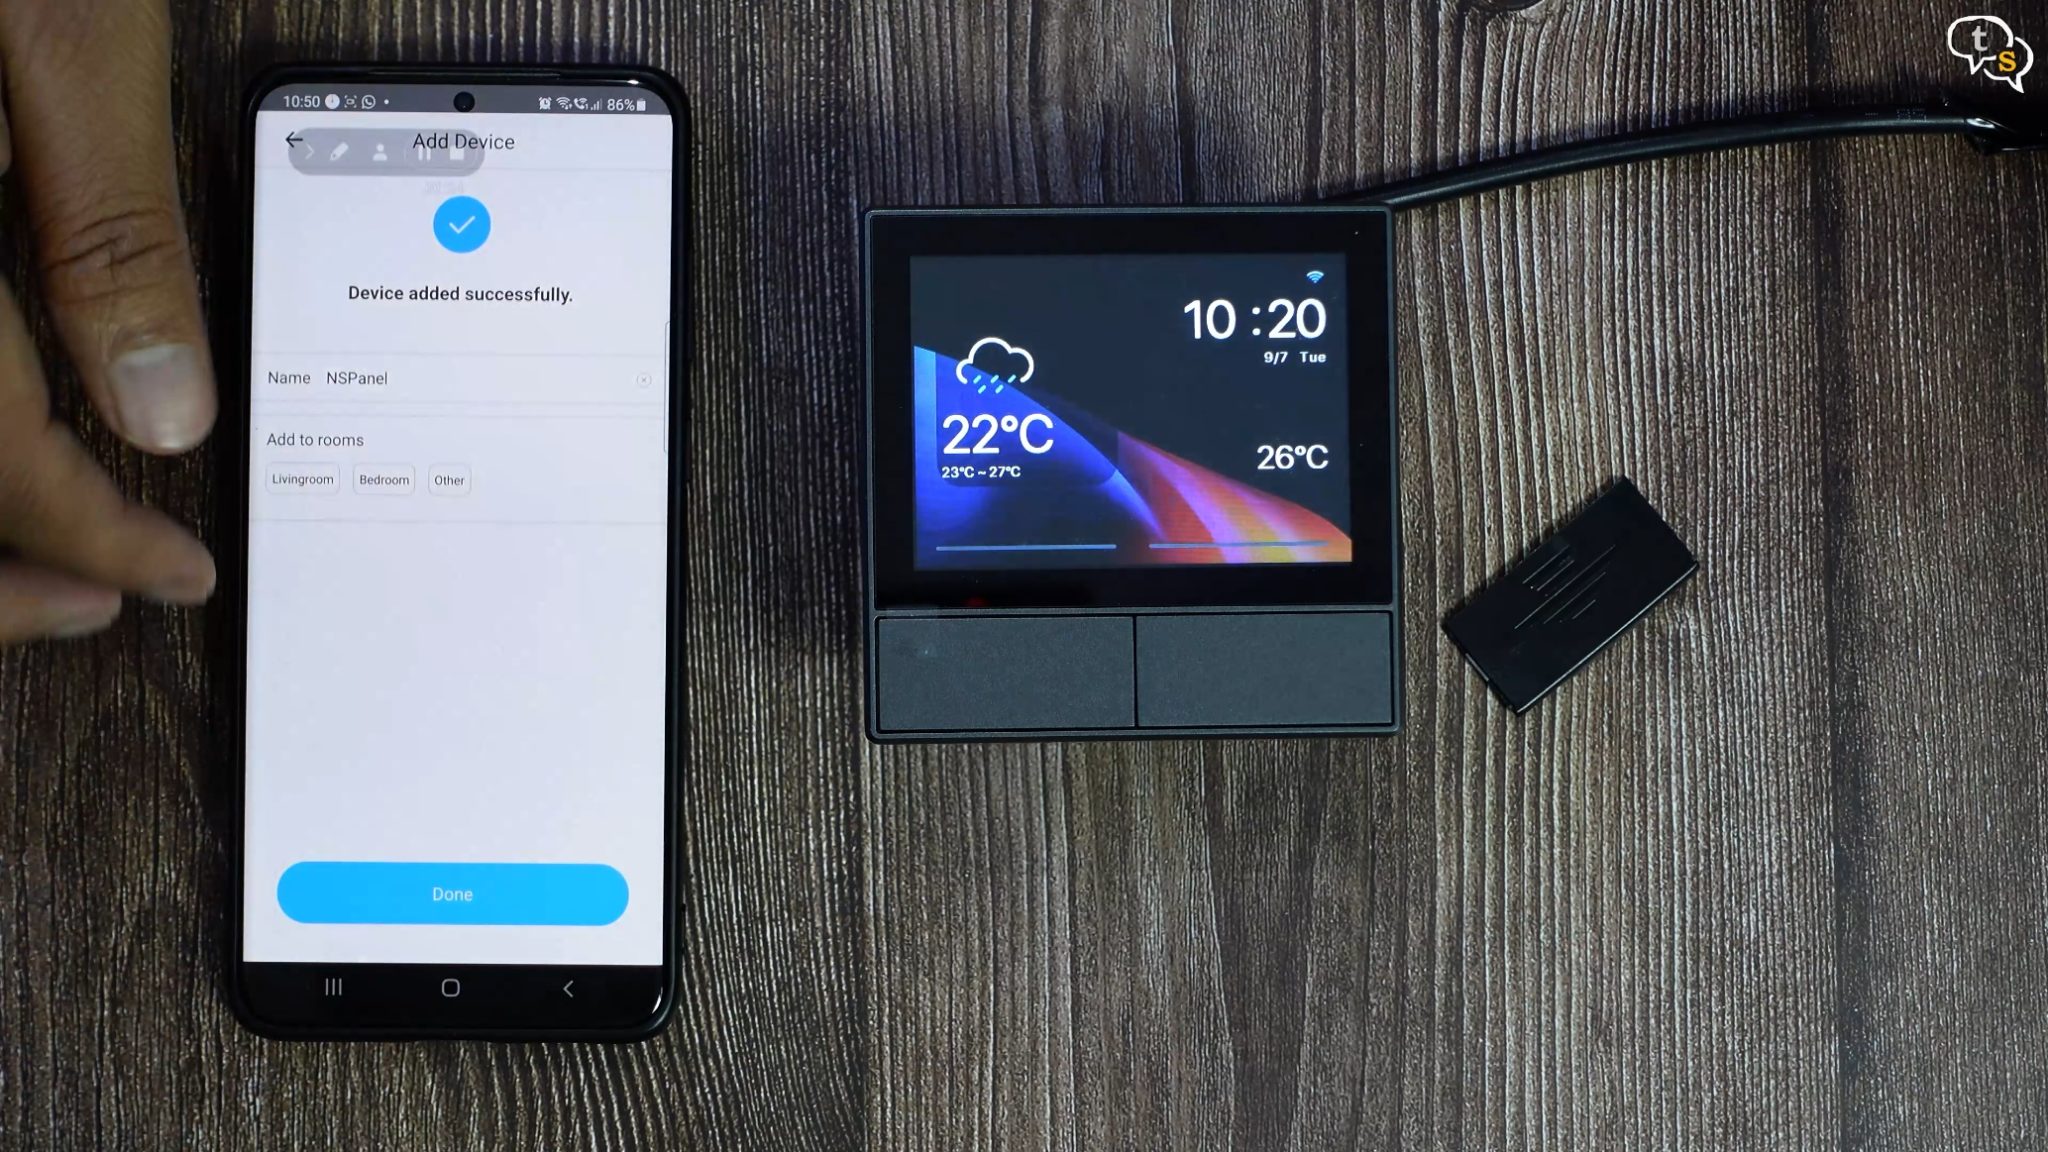
Cool, I’m renaming this device to NSPanel, and we can select a location where this device is being installed.
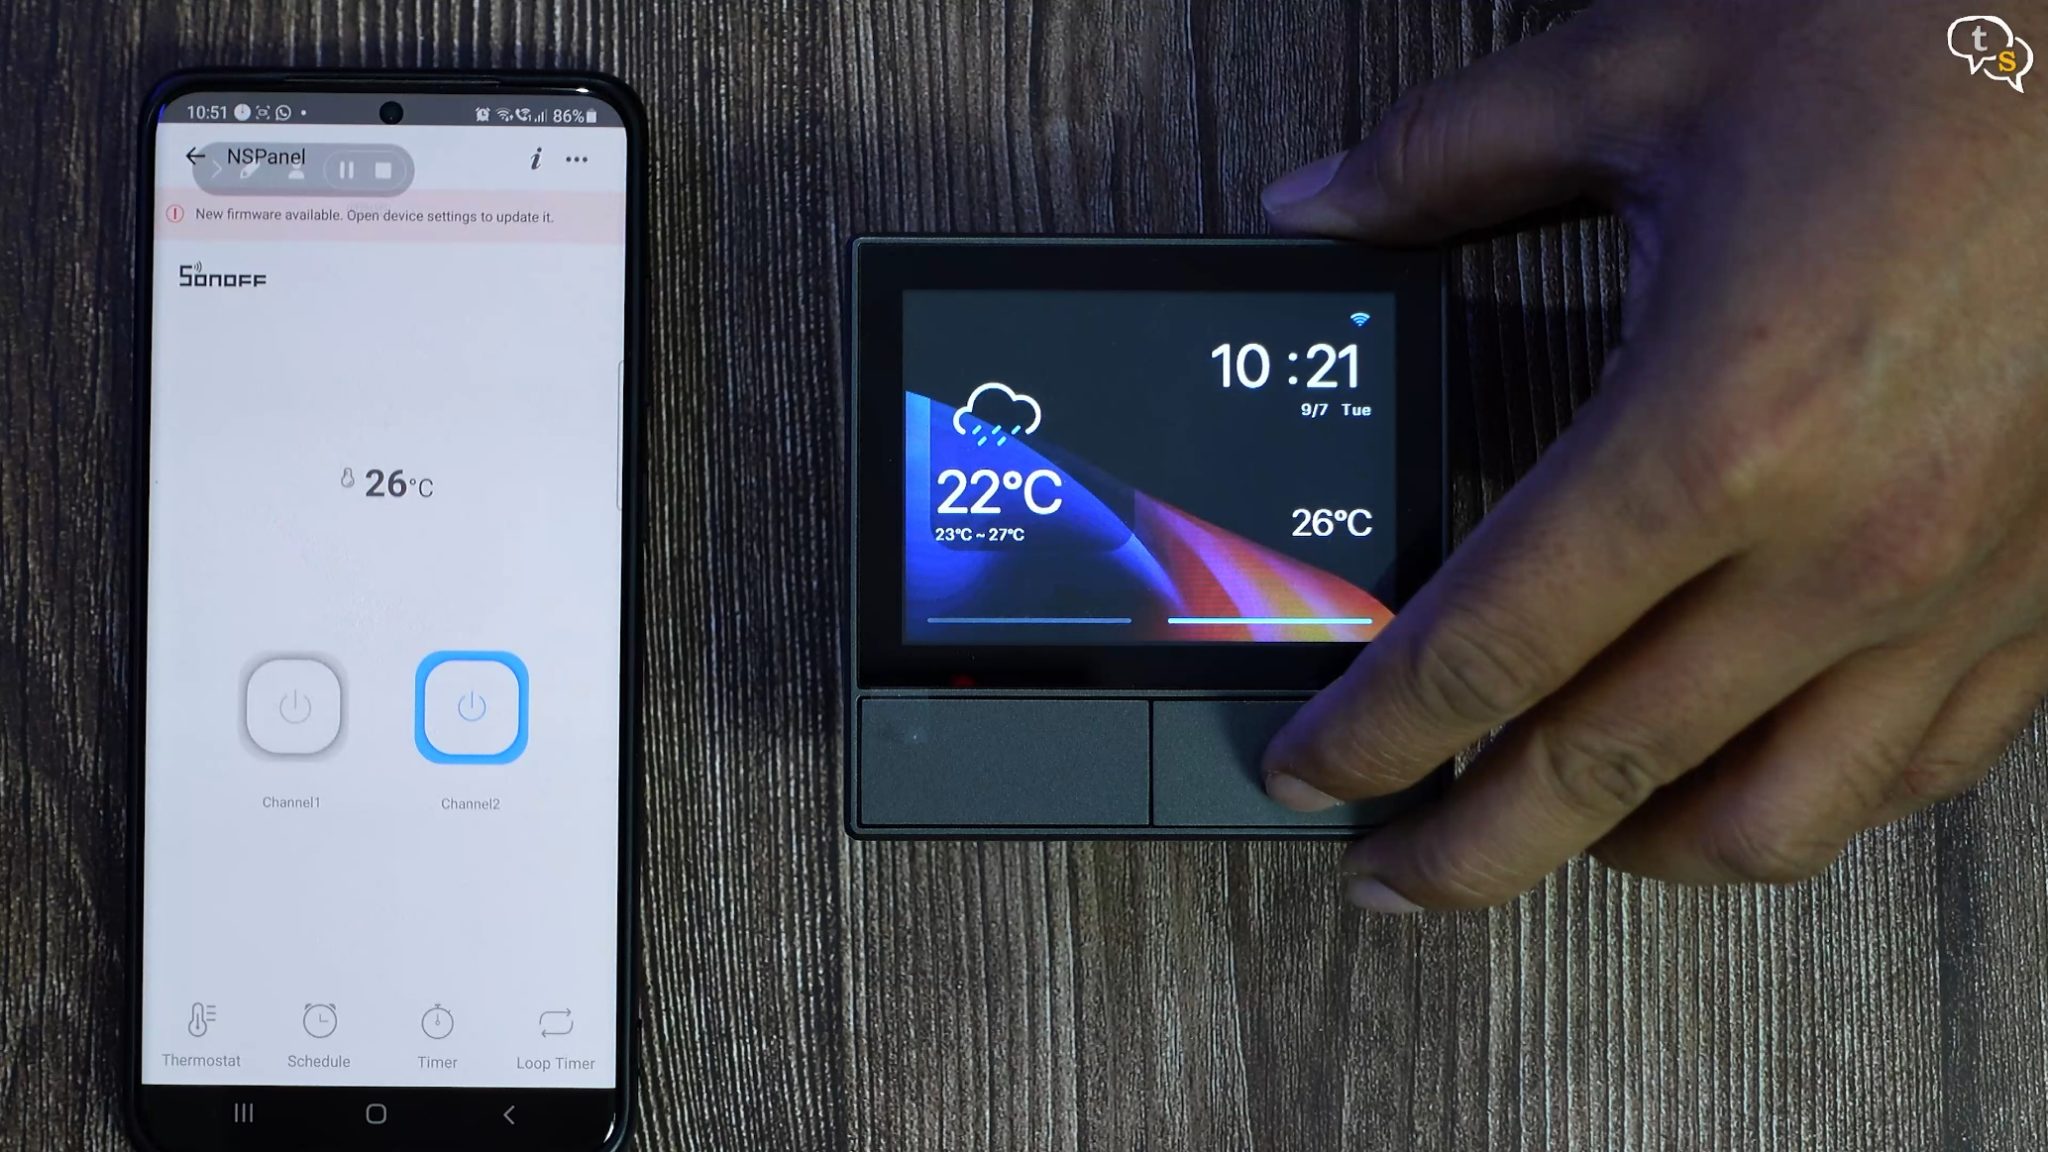
The switches can be controlled via the app, you can see it toggle between on/off states on the app and also on the screen. You can see the same happen when toggling the on/off state via the physical switch too.
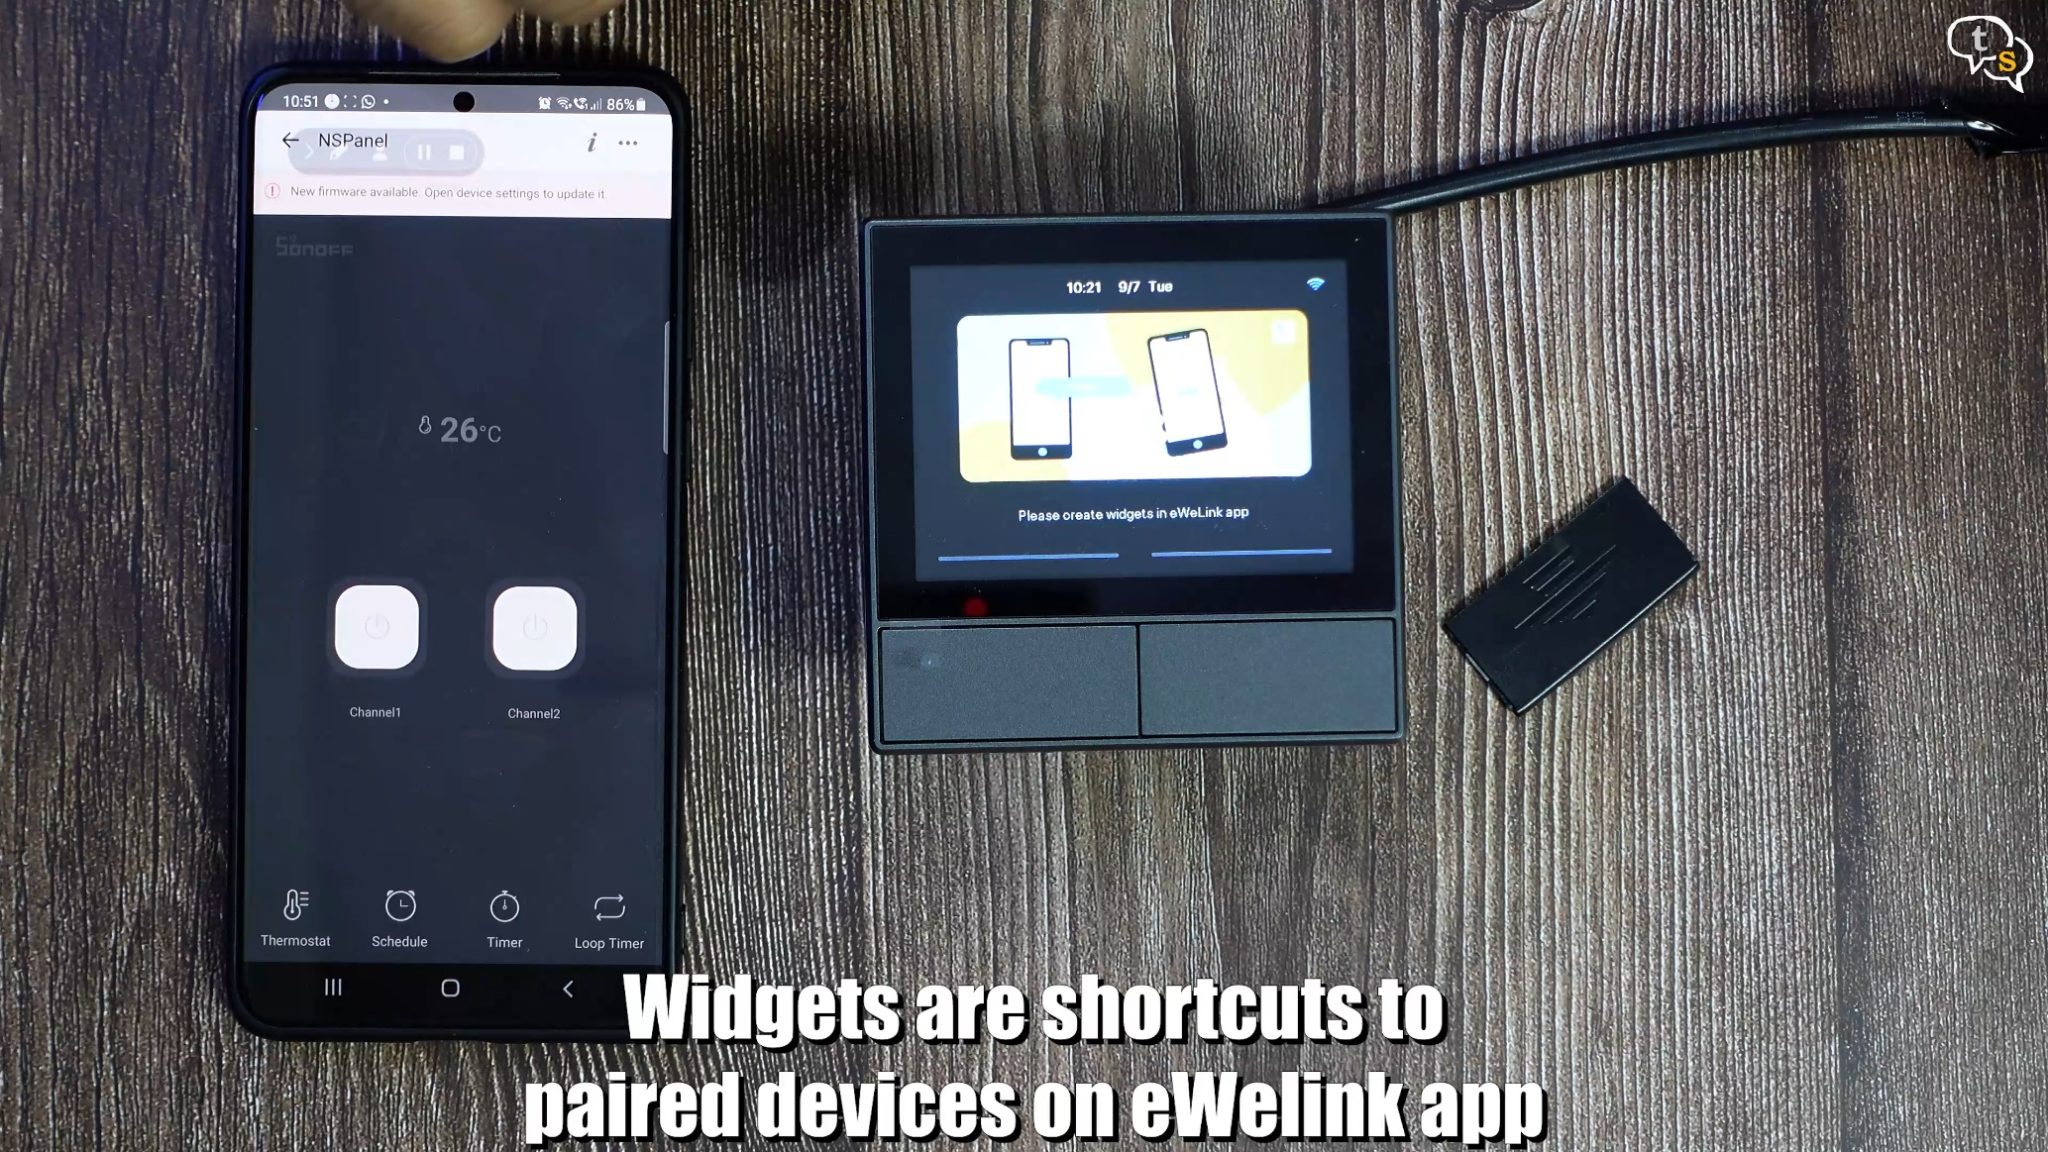
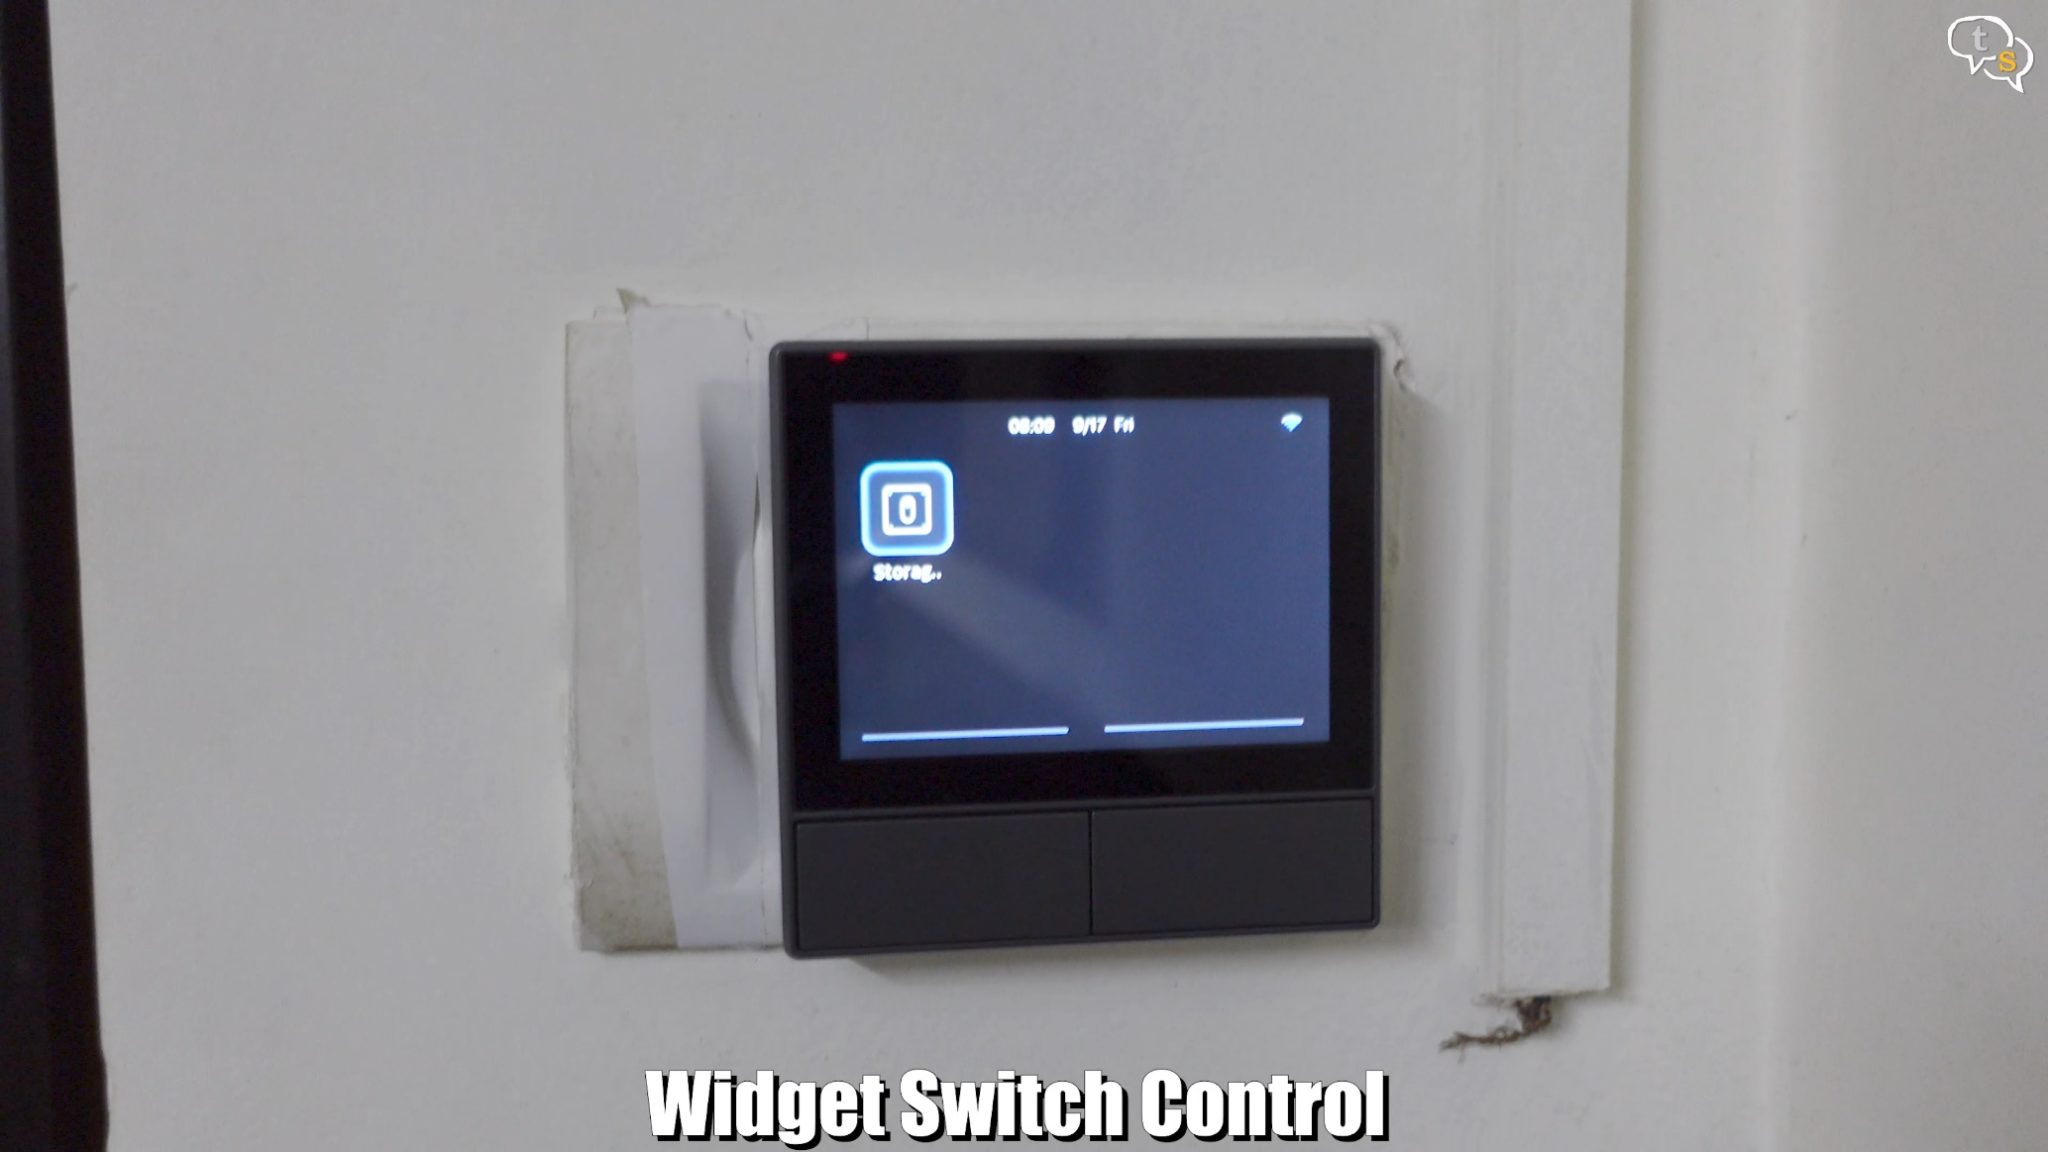
The screen is a touchscreen, so swipe left to add widgets, which are existing Sonoff devices you have already paired to the eWelink app.
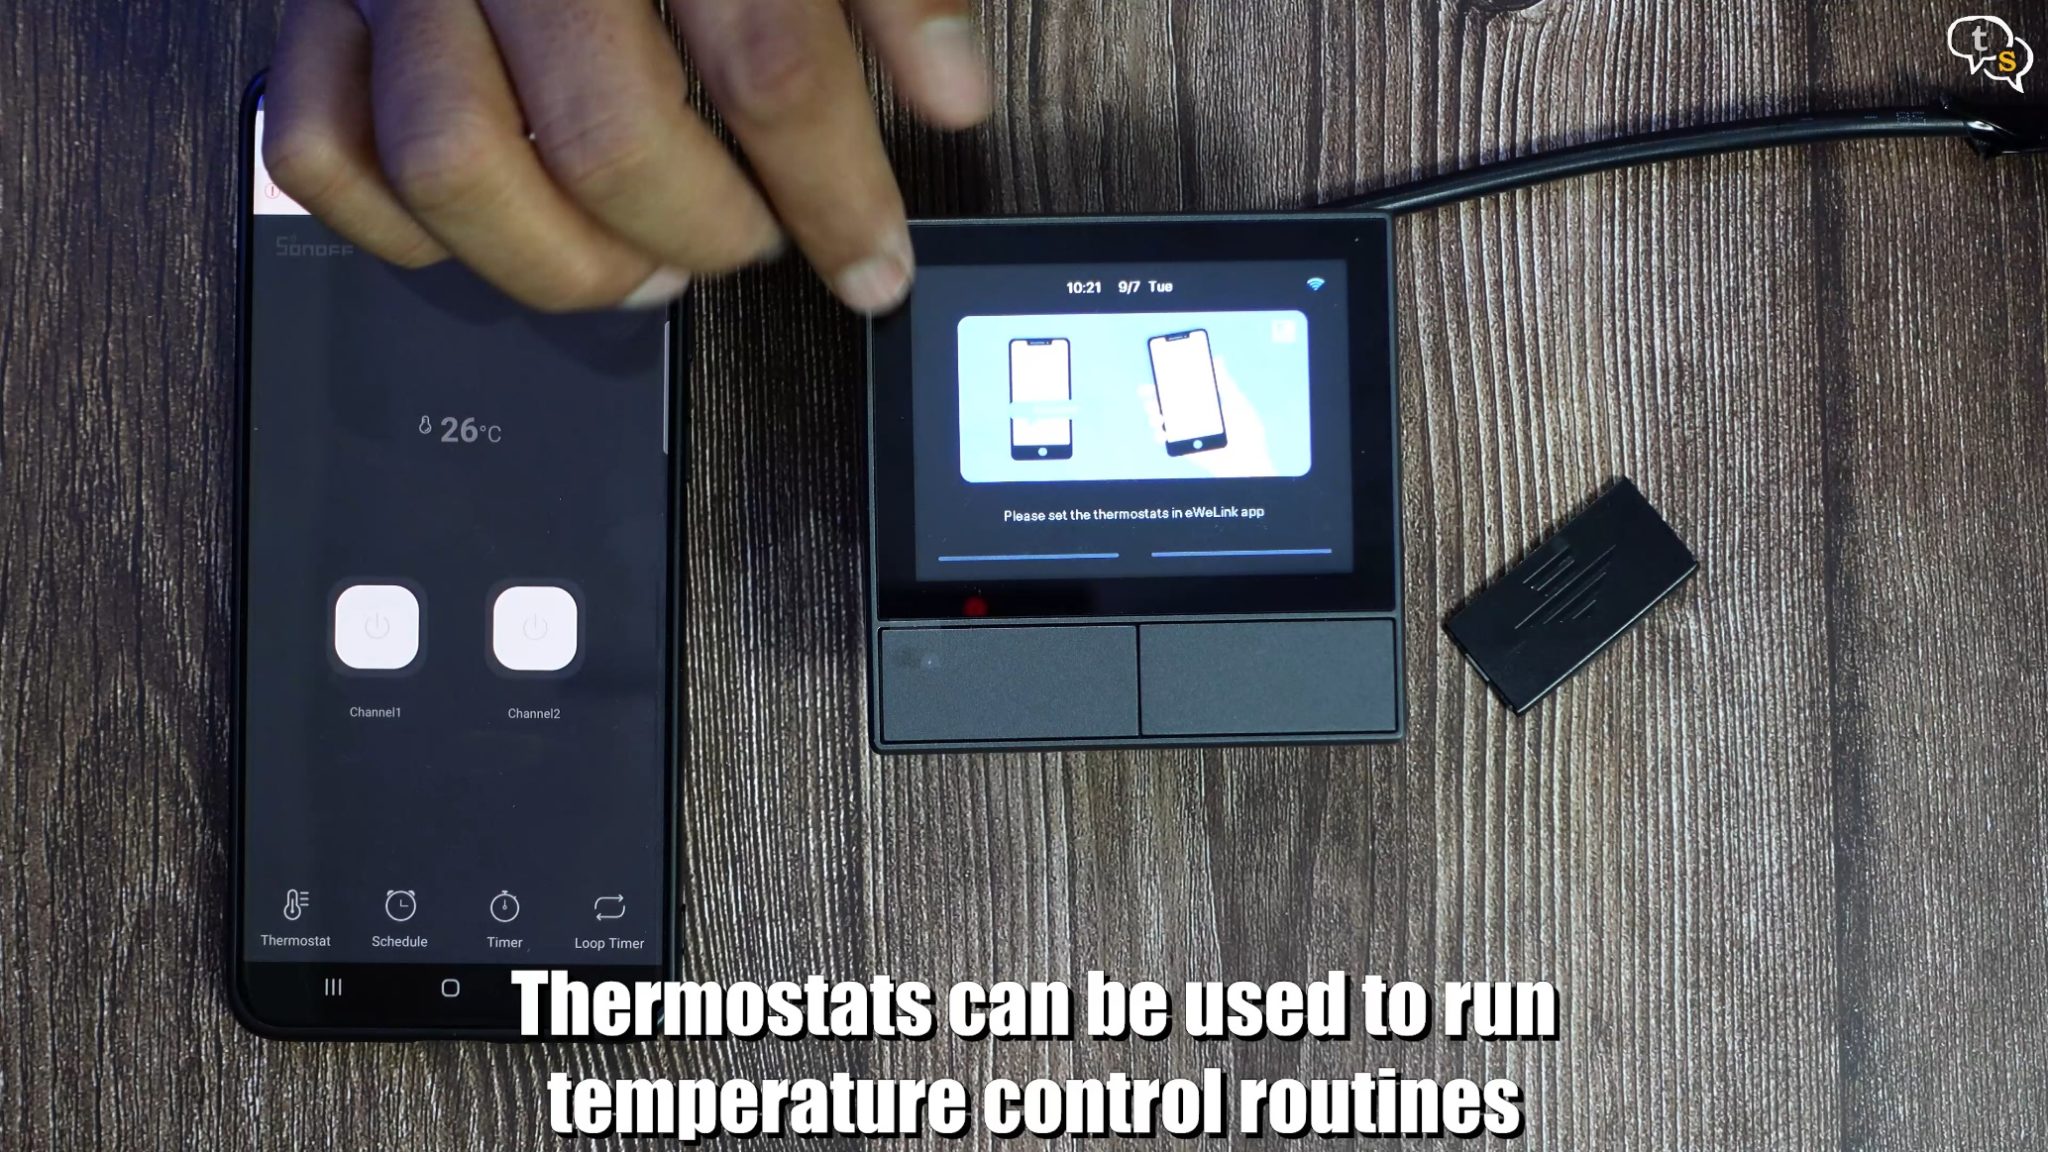
Swipe left once again or right if you are on the home screen you can add existing thermostats, if you have another thermostat you can display the reading on this screen. I don’t have one. These options can also be set via the App.
I’m going to add one of my existing Sonoff switches to the widget screen, I have this storage area light, which I’m linking right now.
And it’s now visible on screen. The light can be controlled by tapping on the widget. If you have more Sonoff devices, they can be added as widgets.
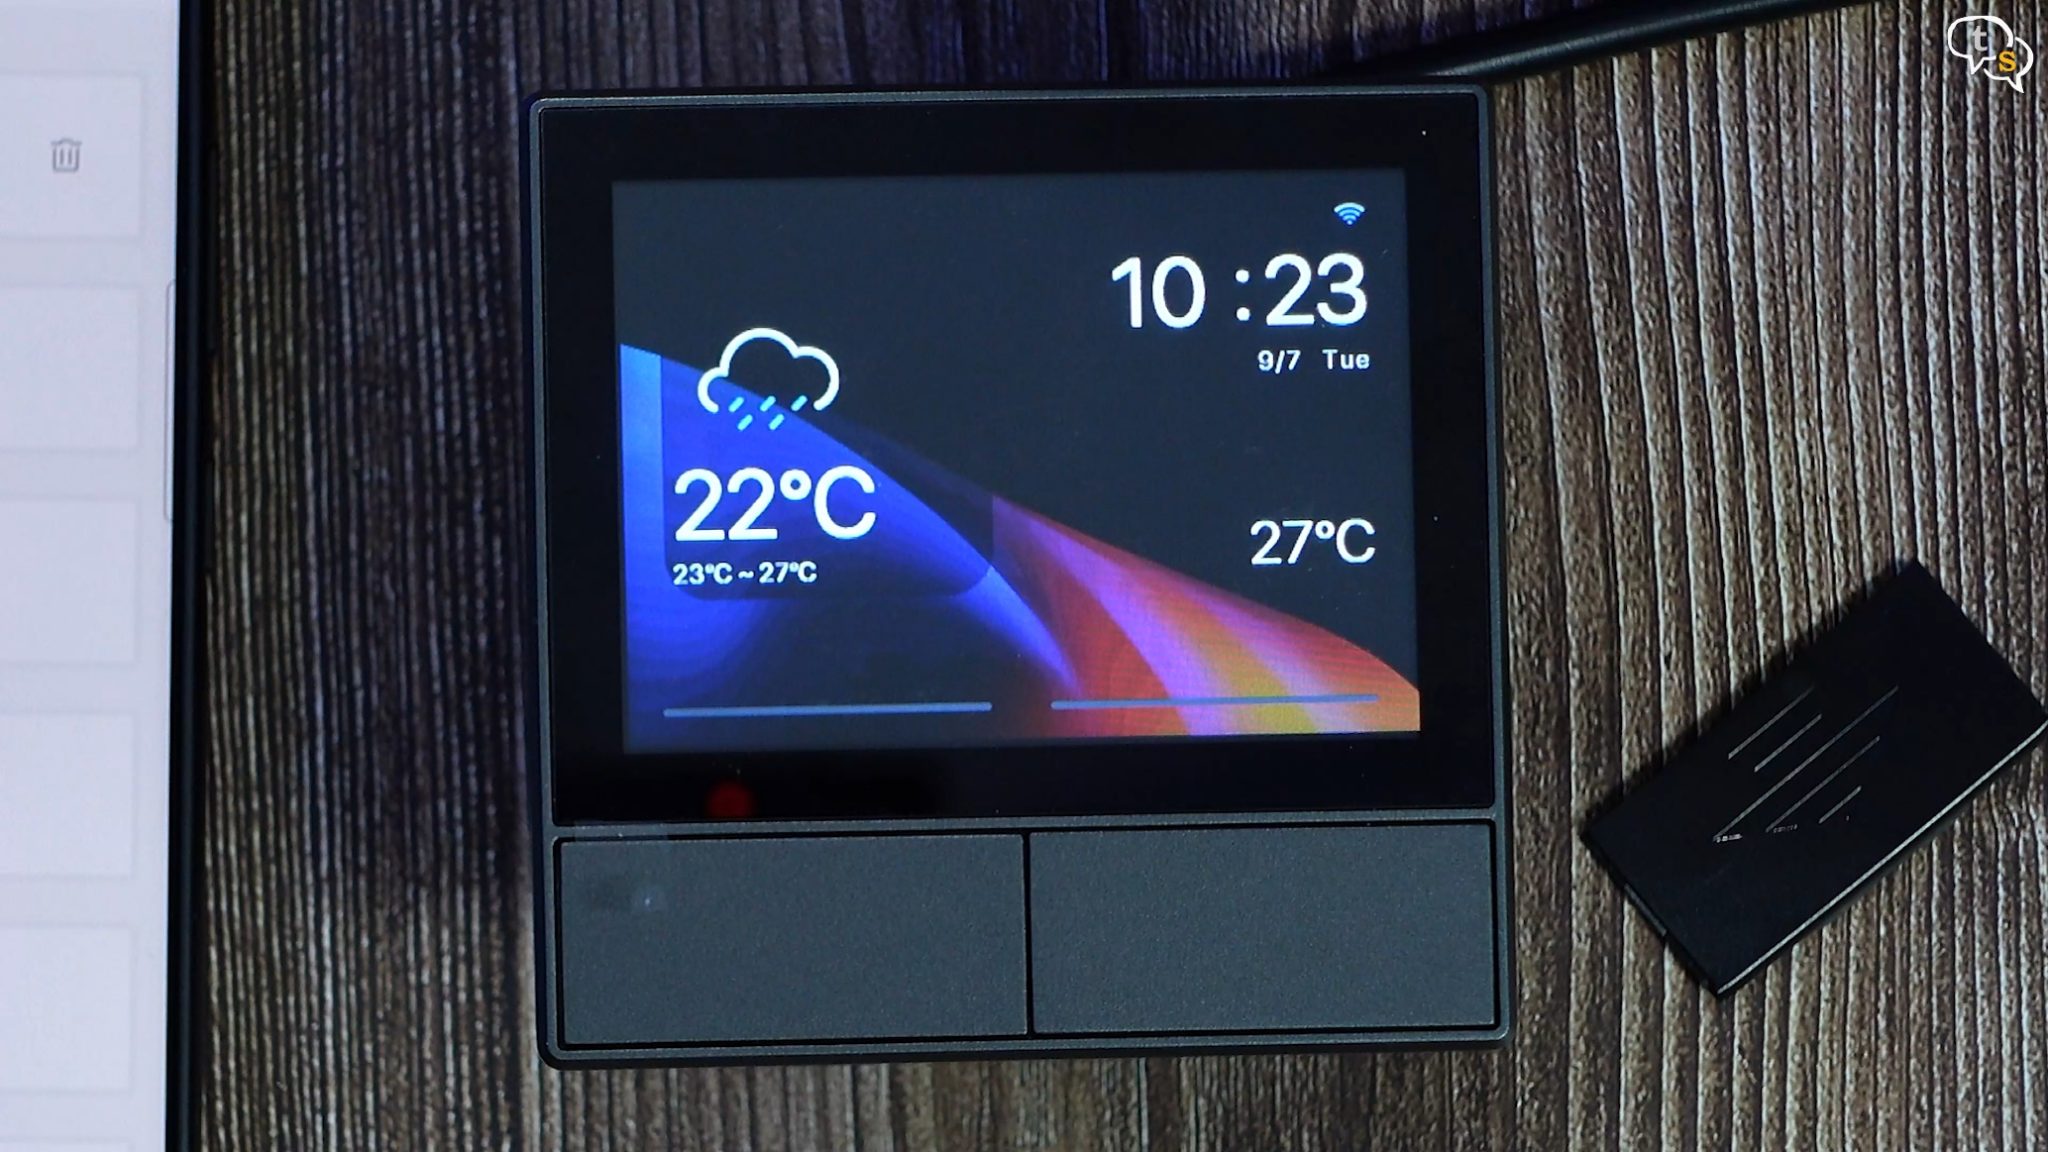
Now on the home screen you can see two temperatures being displayed, one is weather from the internet with the rain cloud displayed above, the second is the temperature reading from the sensor below.
Now the device is set.
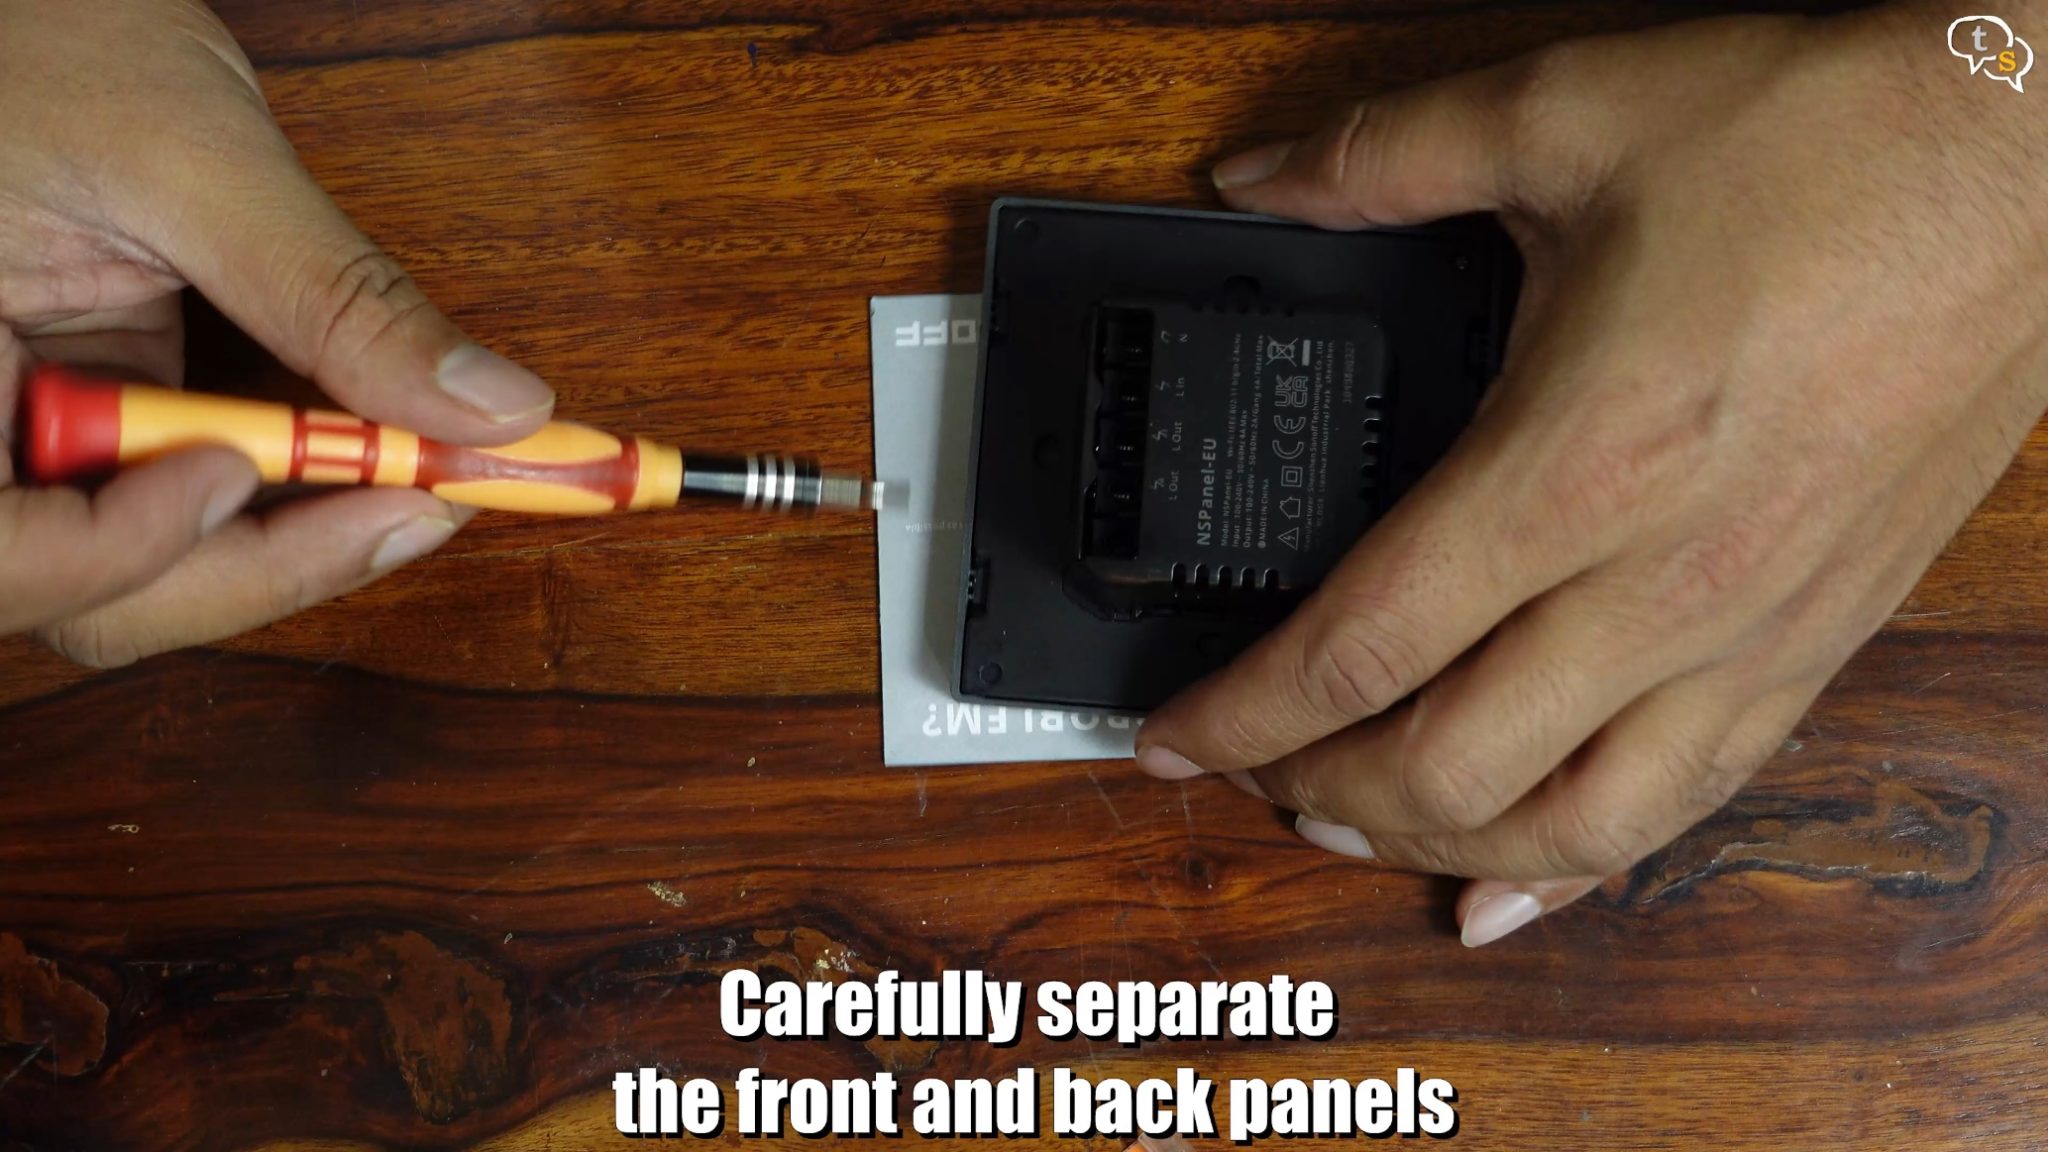
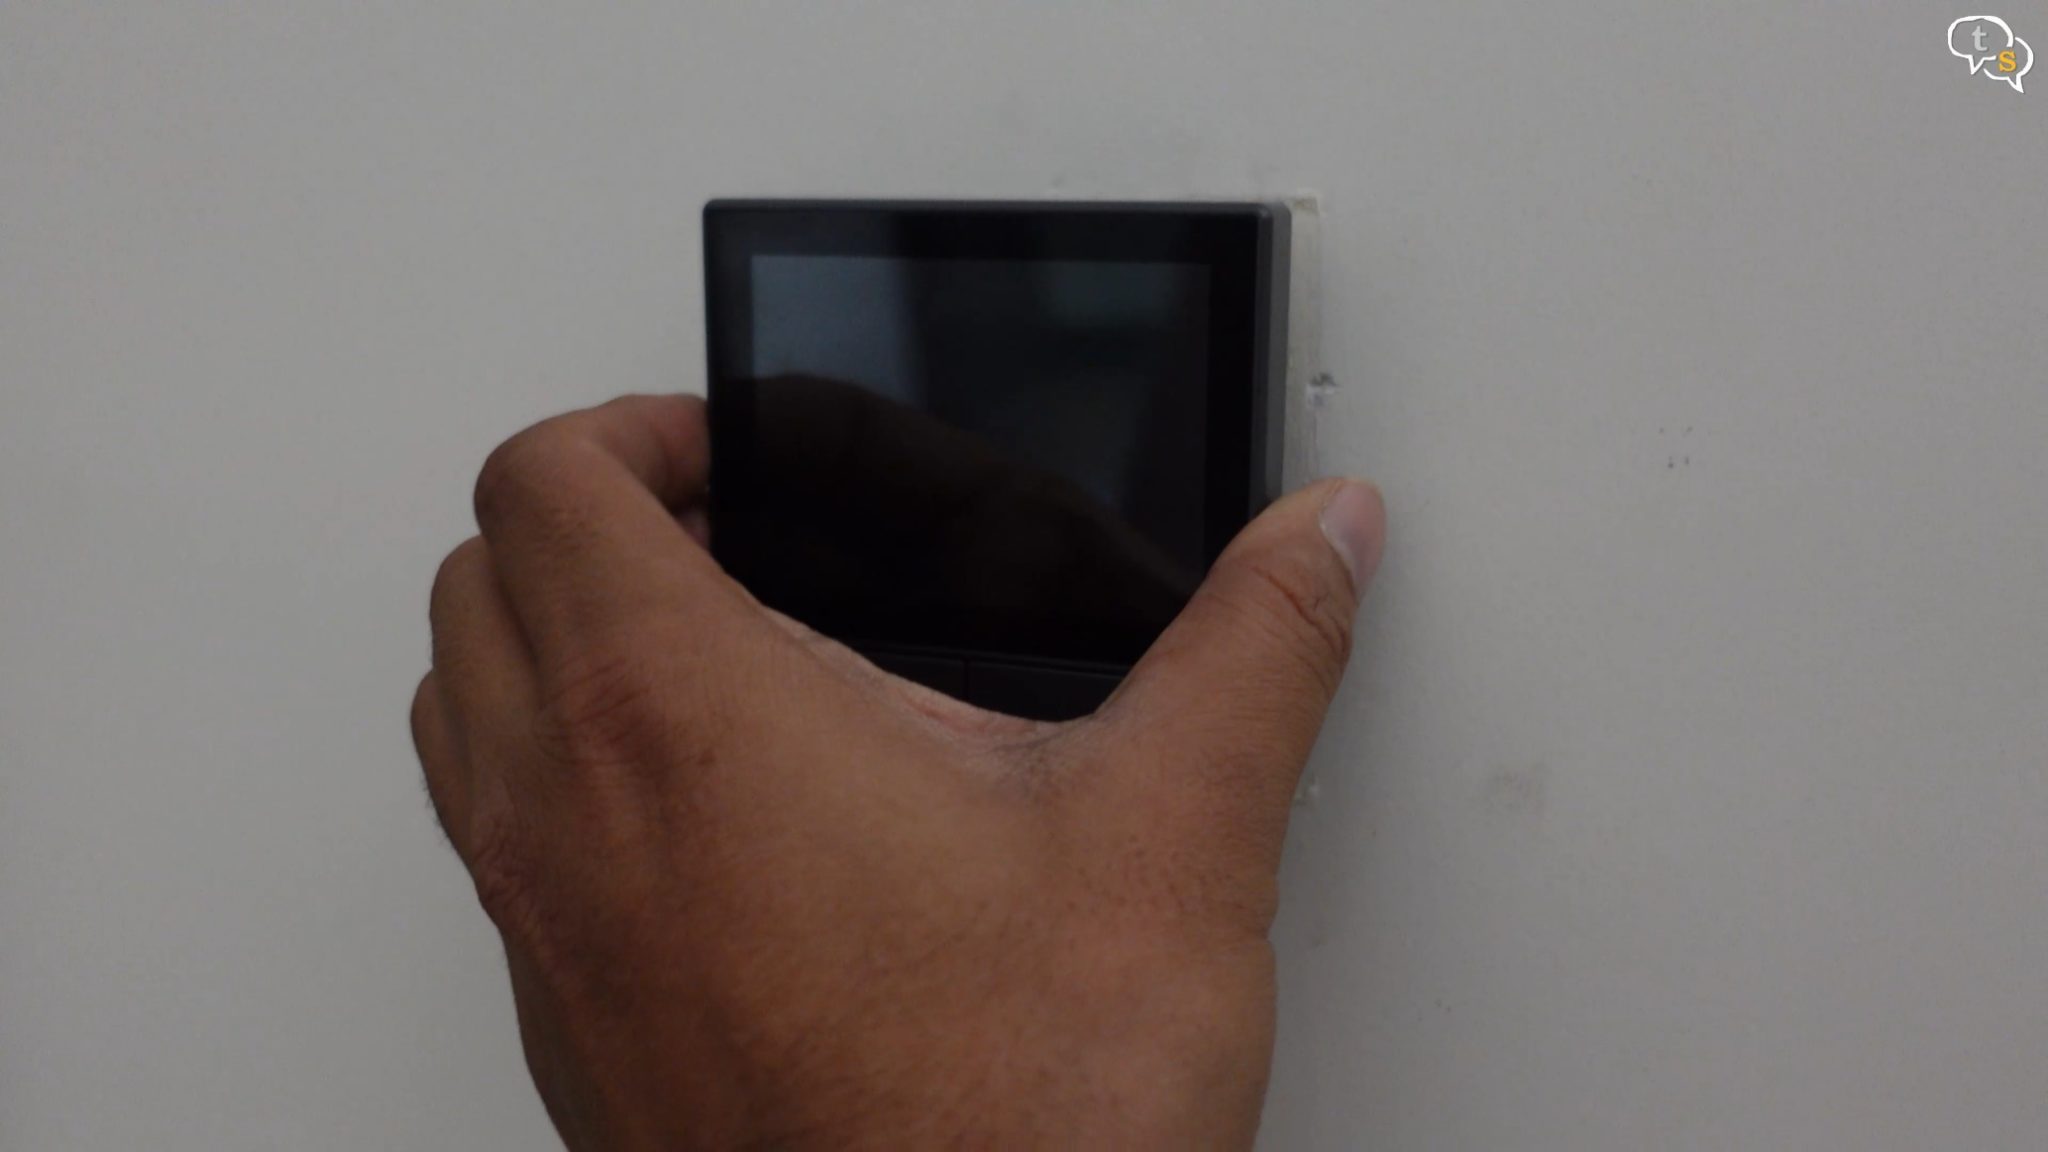
To mount it to the wall, or the electrical box we first need to remove the front face. This was not shown in the manual or anywhere else, so you guys can thank me for this, as I was really worried, I’m going to damage the device. Just use a small flat head screwdriver to unclip the front panel.
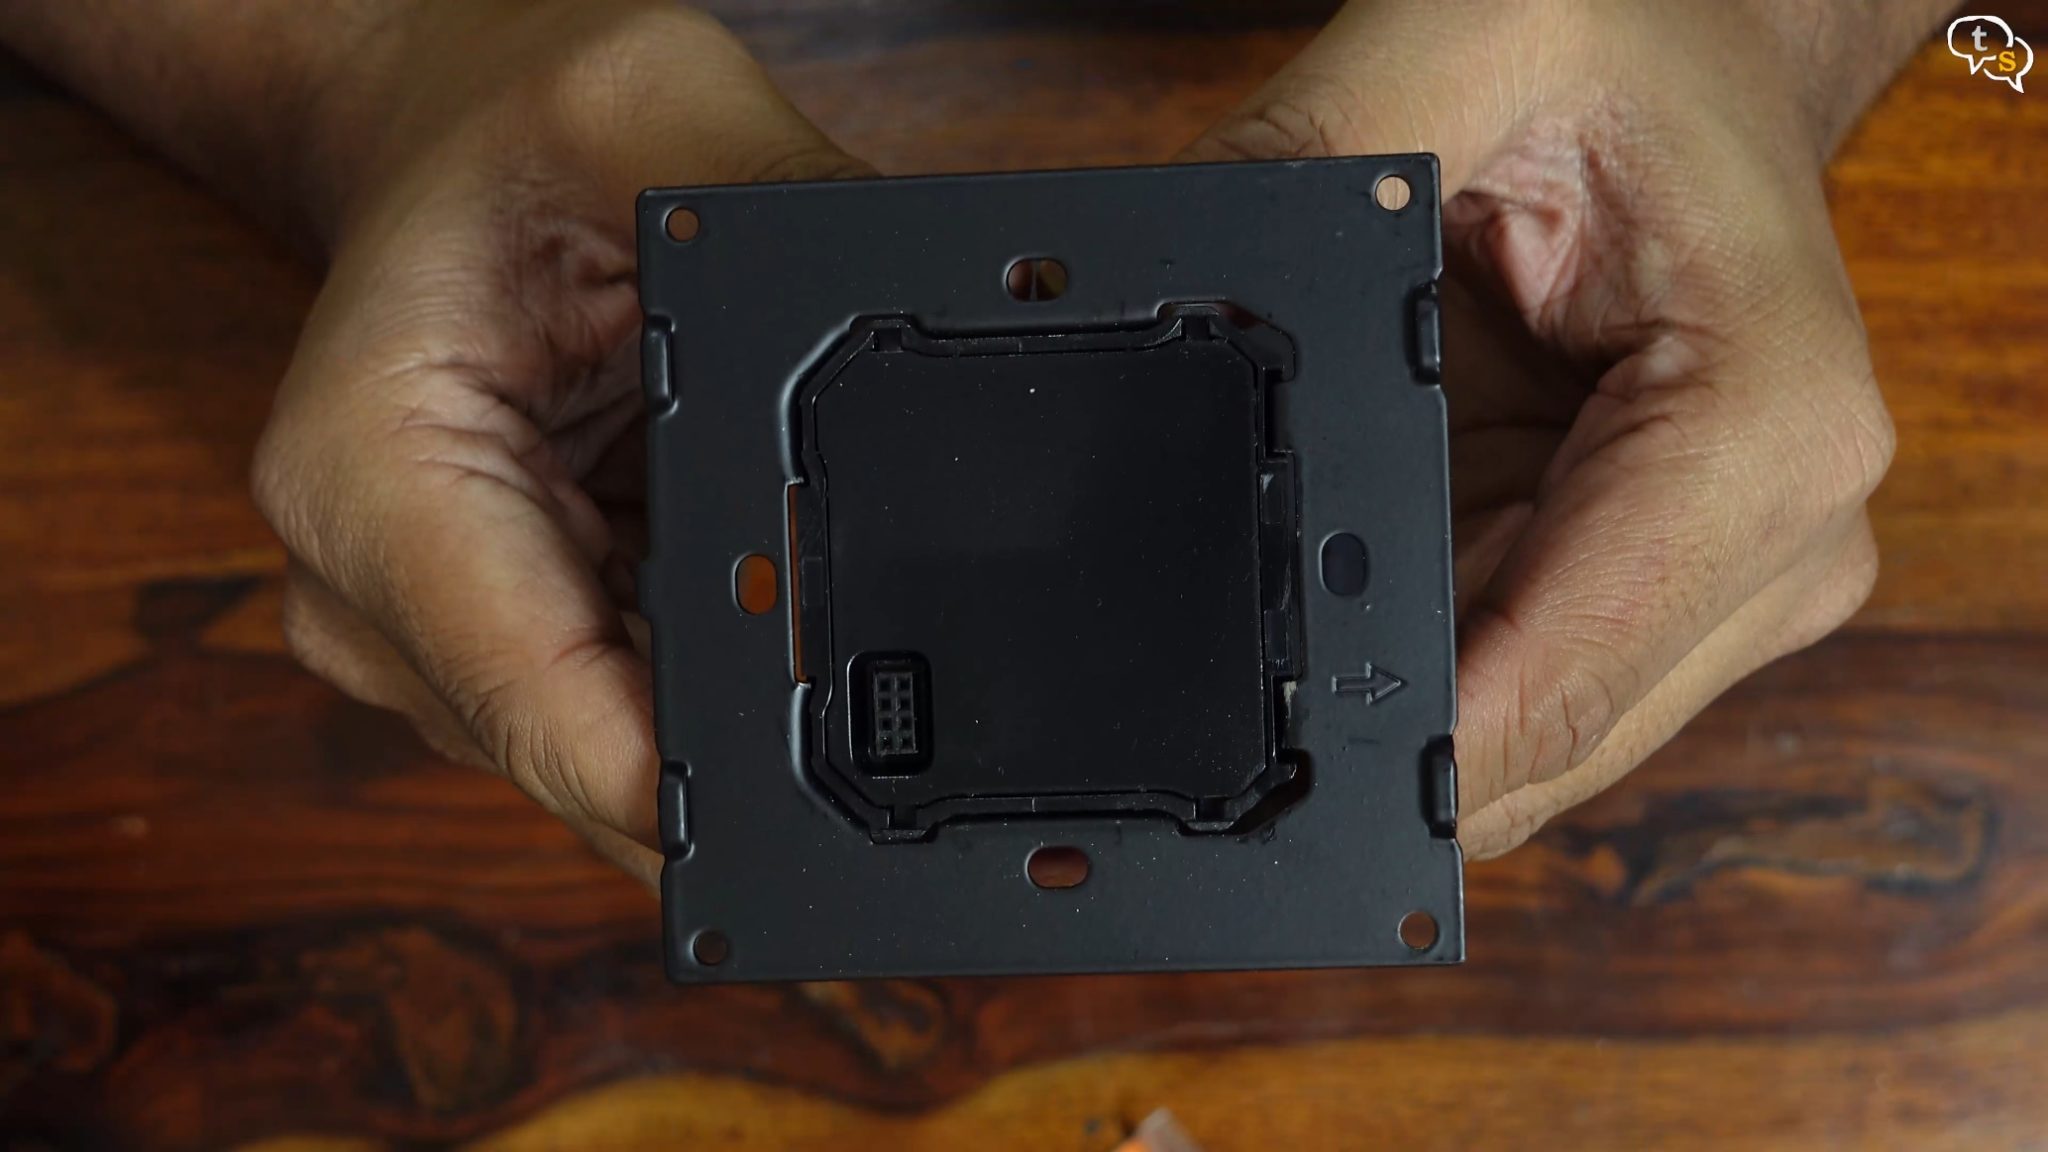
This is the back, and you can see this small connector, make sure to orient the front panel to connect to it when snapping it back on. So that’s it, now to install the NSPanel.

Not the neatest installation, I installed it in a three-switch box as that’s the only other smaller box I have.
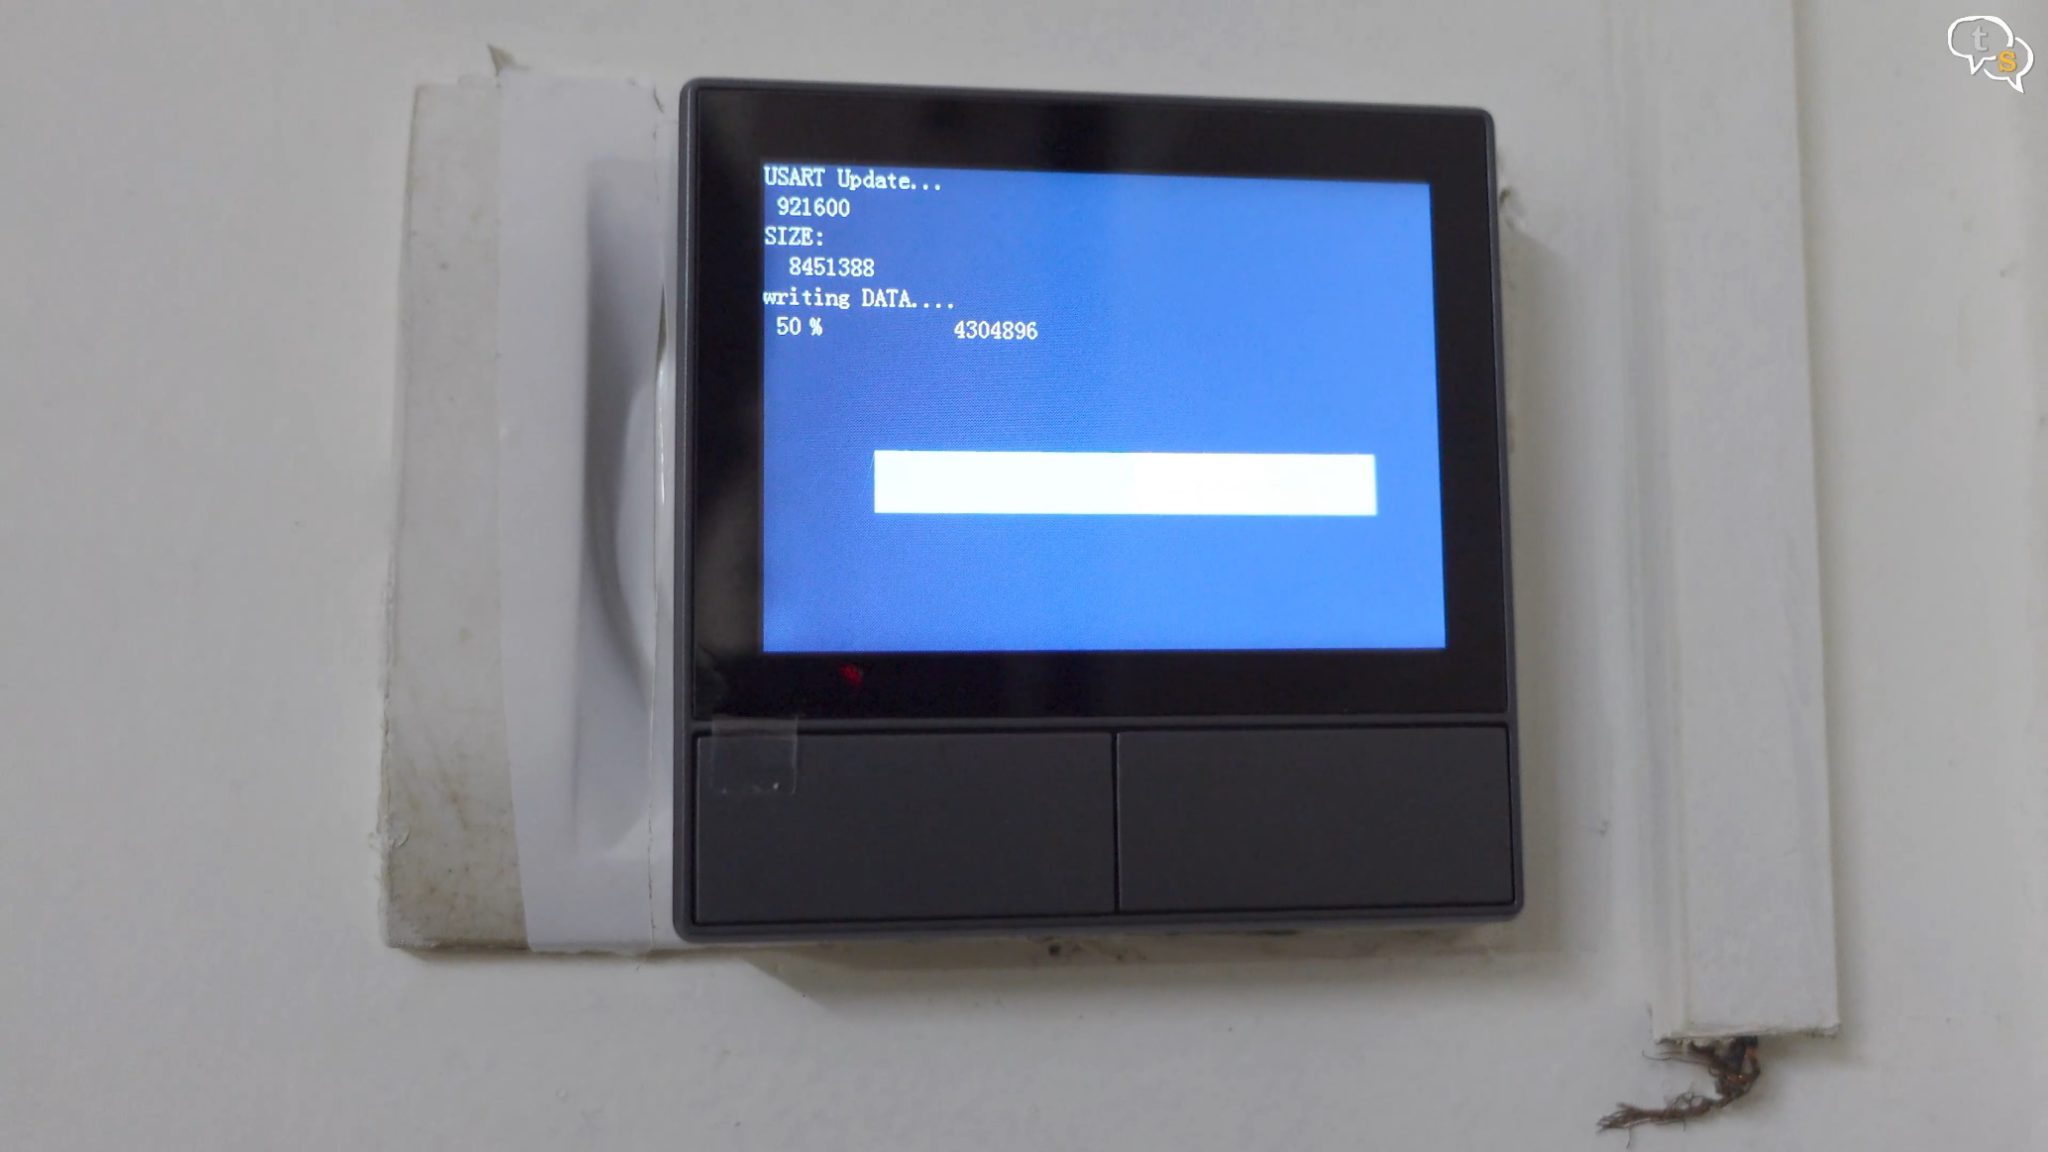
We have an update being displayed on the app, so It’s updating now.
This is the part of the house where I do a lot of experimentation as it’s a small storage area.
The device has been updated and has now rebooted, and it’s working.
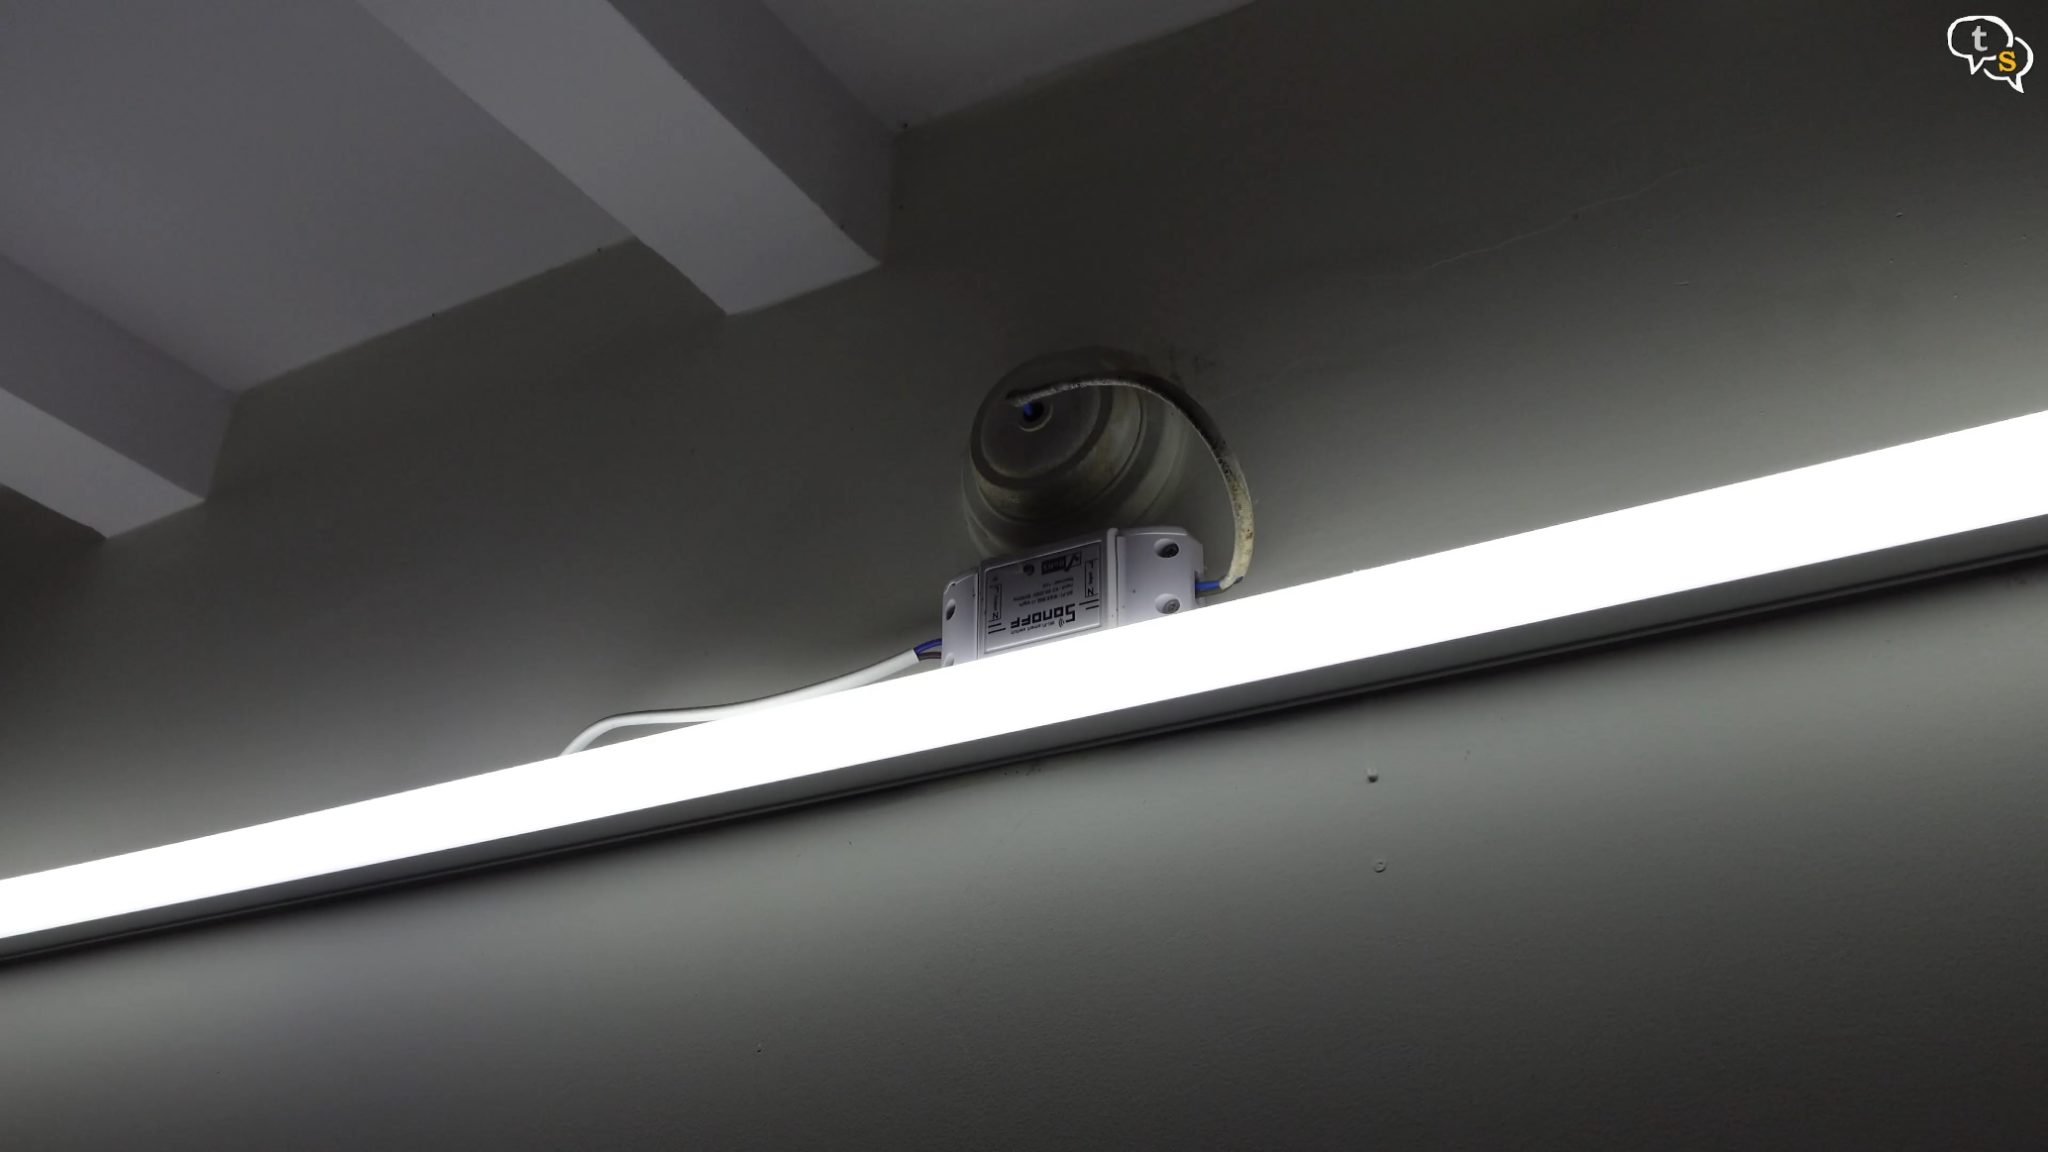
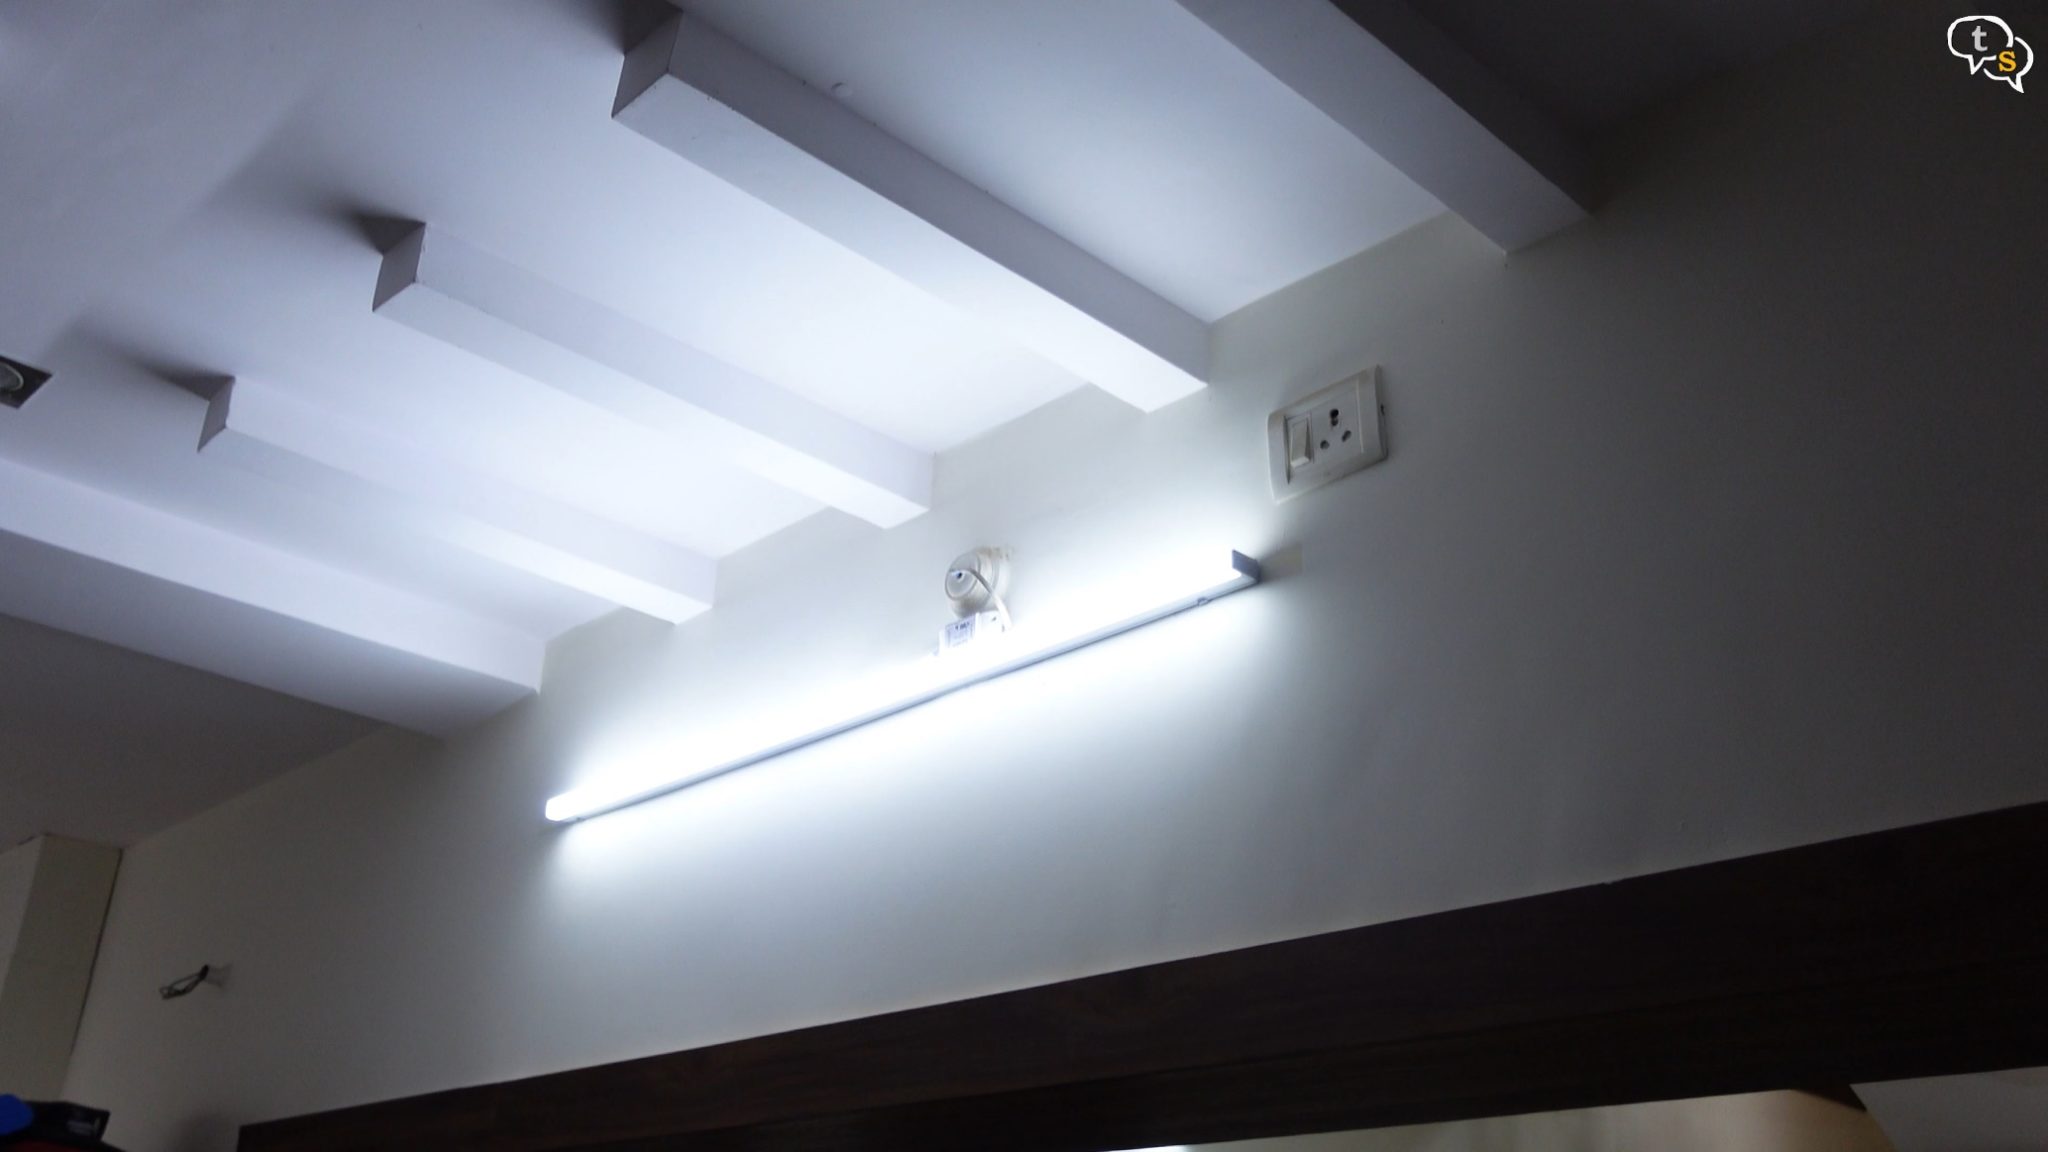
I can control the light found here using the touch panel. The tube light has a Sonoff switch which I had installed years back.
Swipe left to access the widgets and tap on the widget to control the device, so tap once to off, and on the light.
You can swipe down to set the brightness
If you have more Sonoff devices they can be added as widgets using the app.
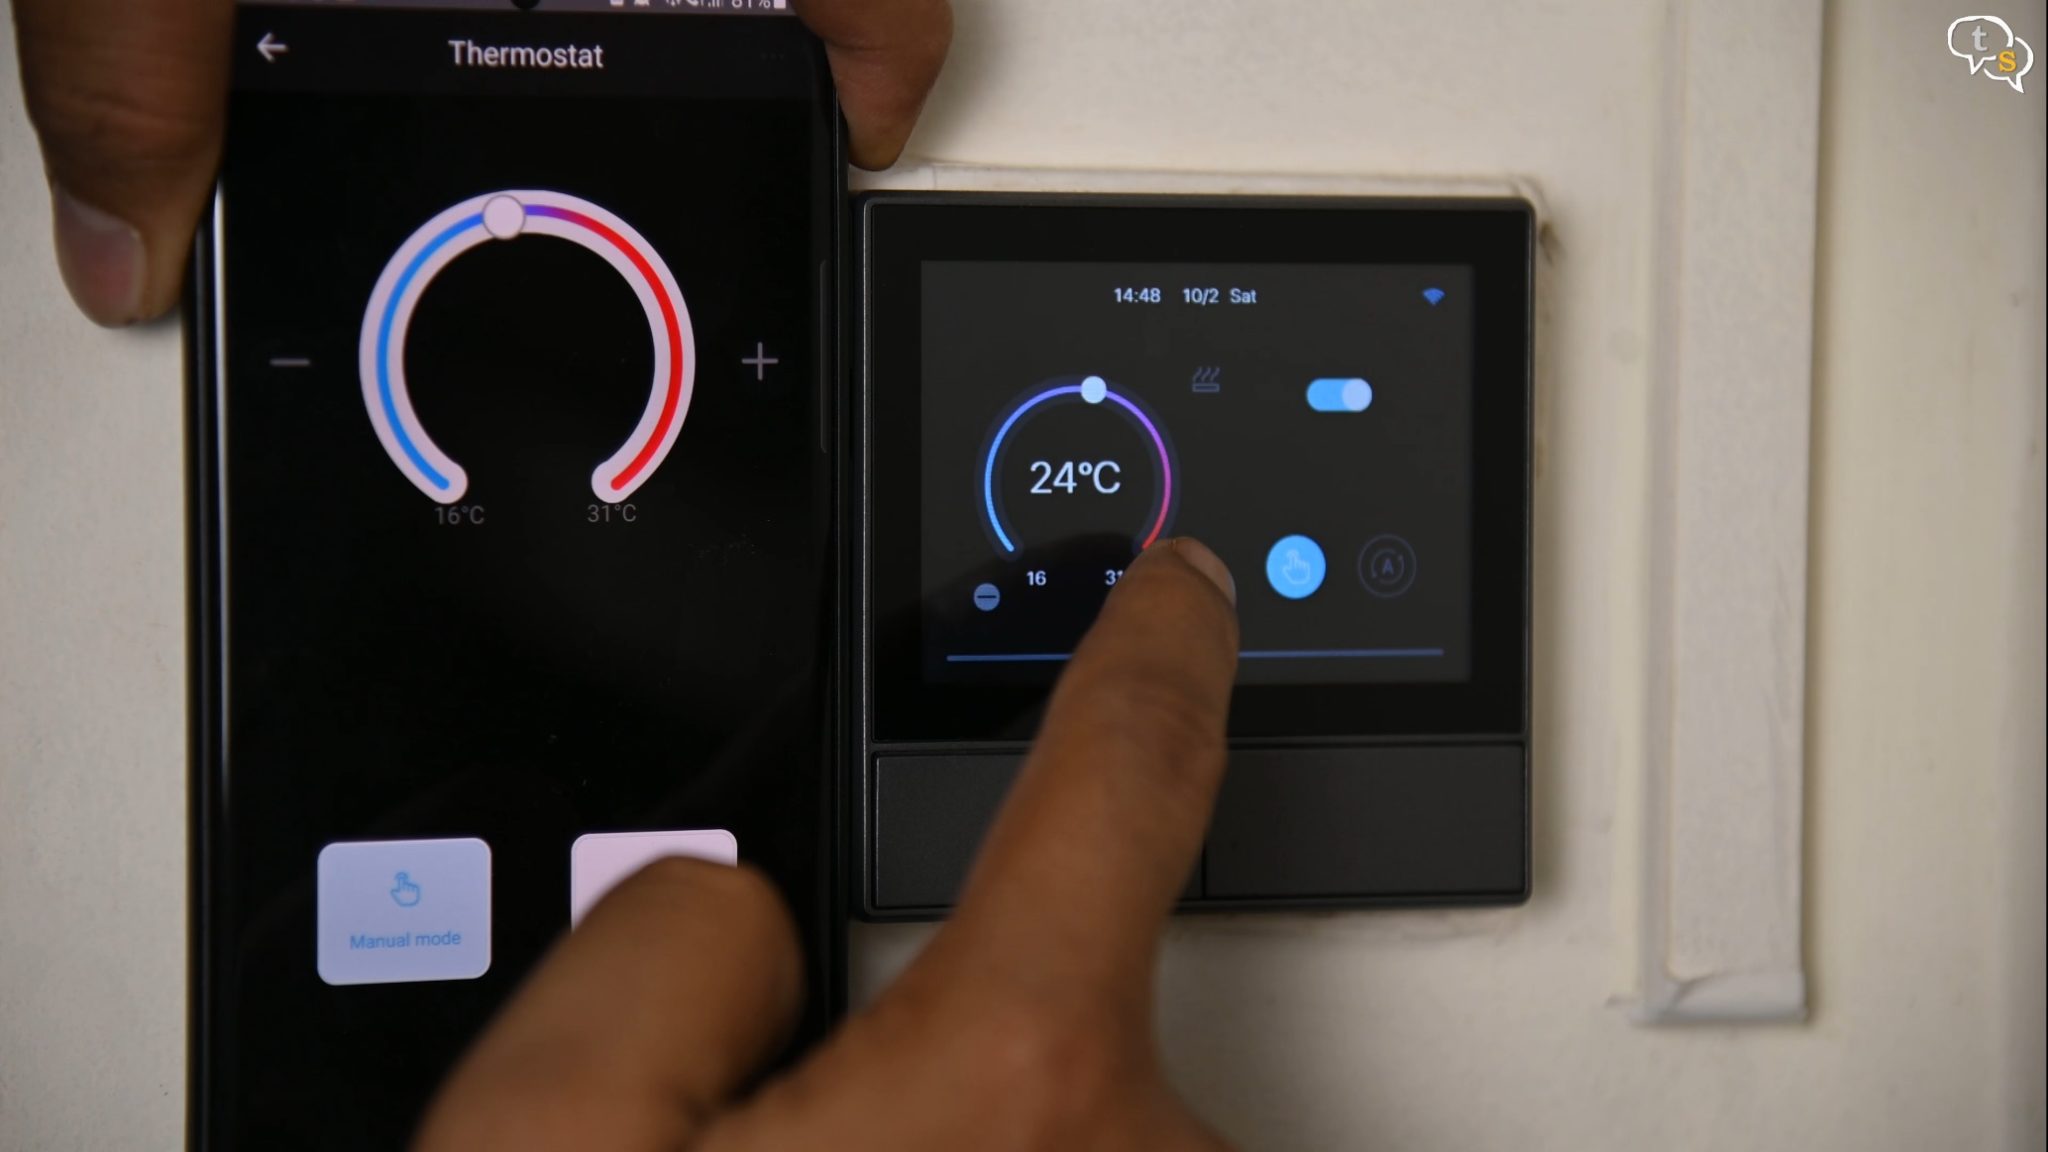
Select which switch is connected to the thermostat. If you have a Sonoff smart plug which is connected maybe to an Air conditioner, you can set it to automatically turn it on or off.
Similar to how a NEST thermostat would work.
You can set schedules, start every day, certain days of the week, what time and at what temperature.
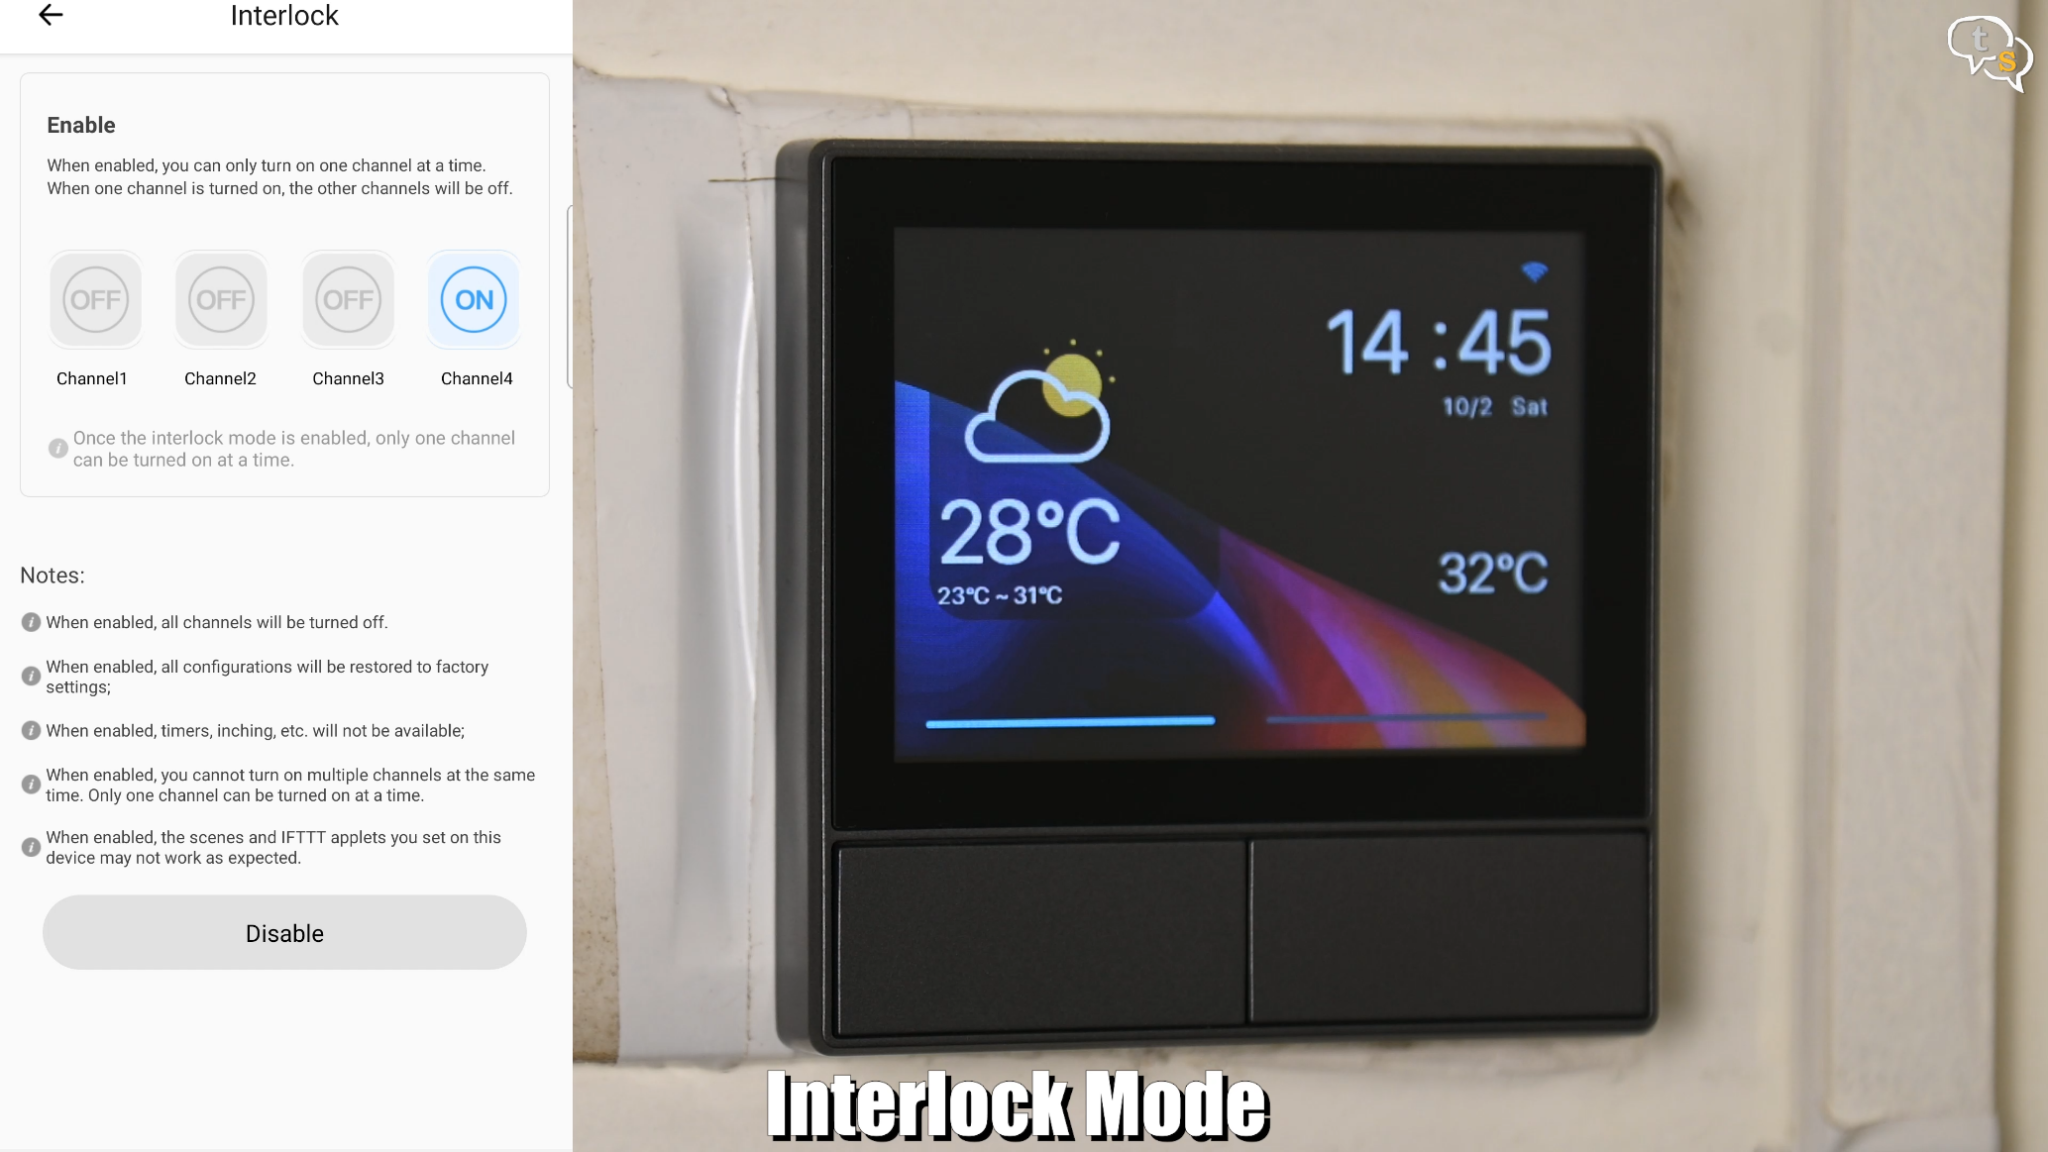
Interlock mode allows only one switch to be active at a time, so turn one on the others turn off.
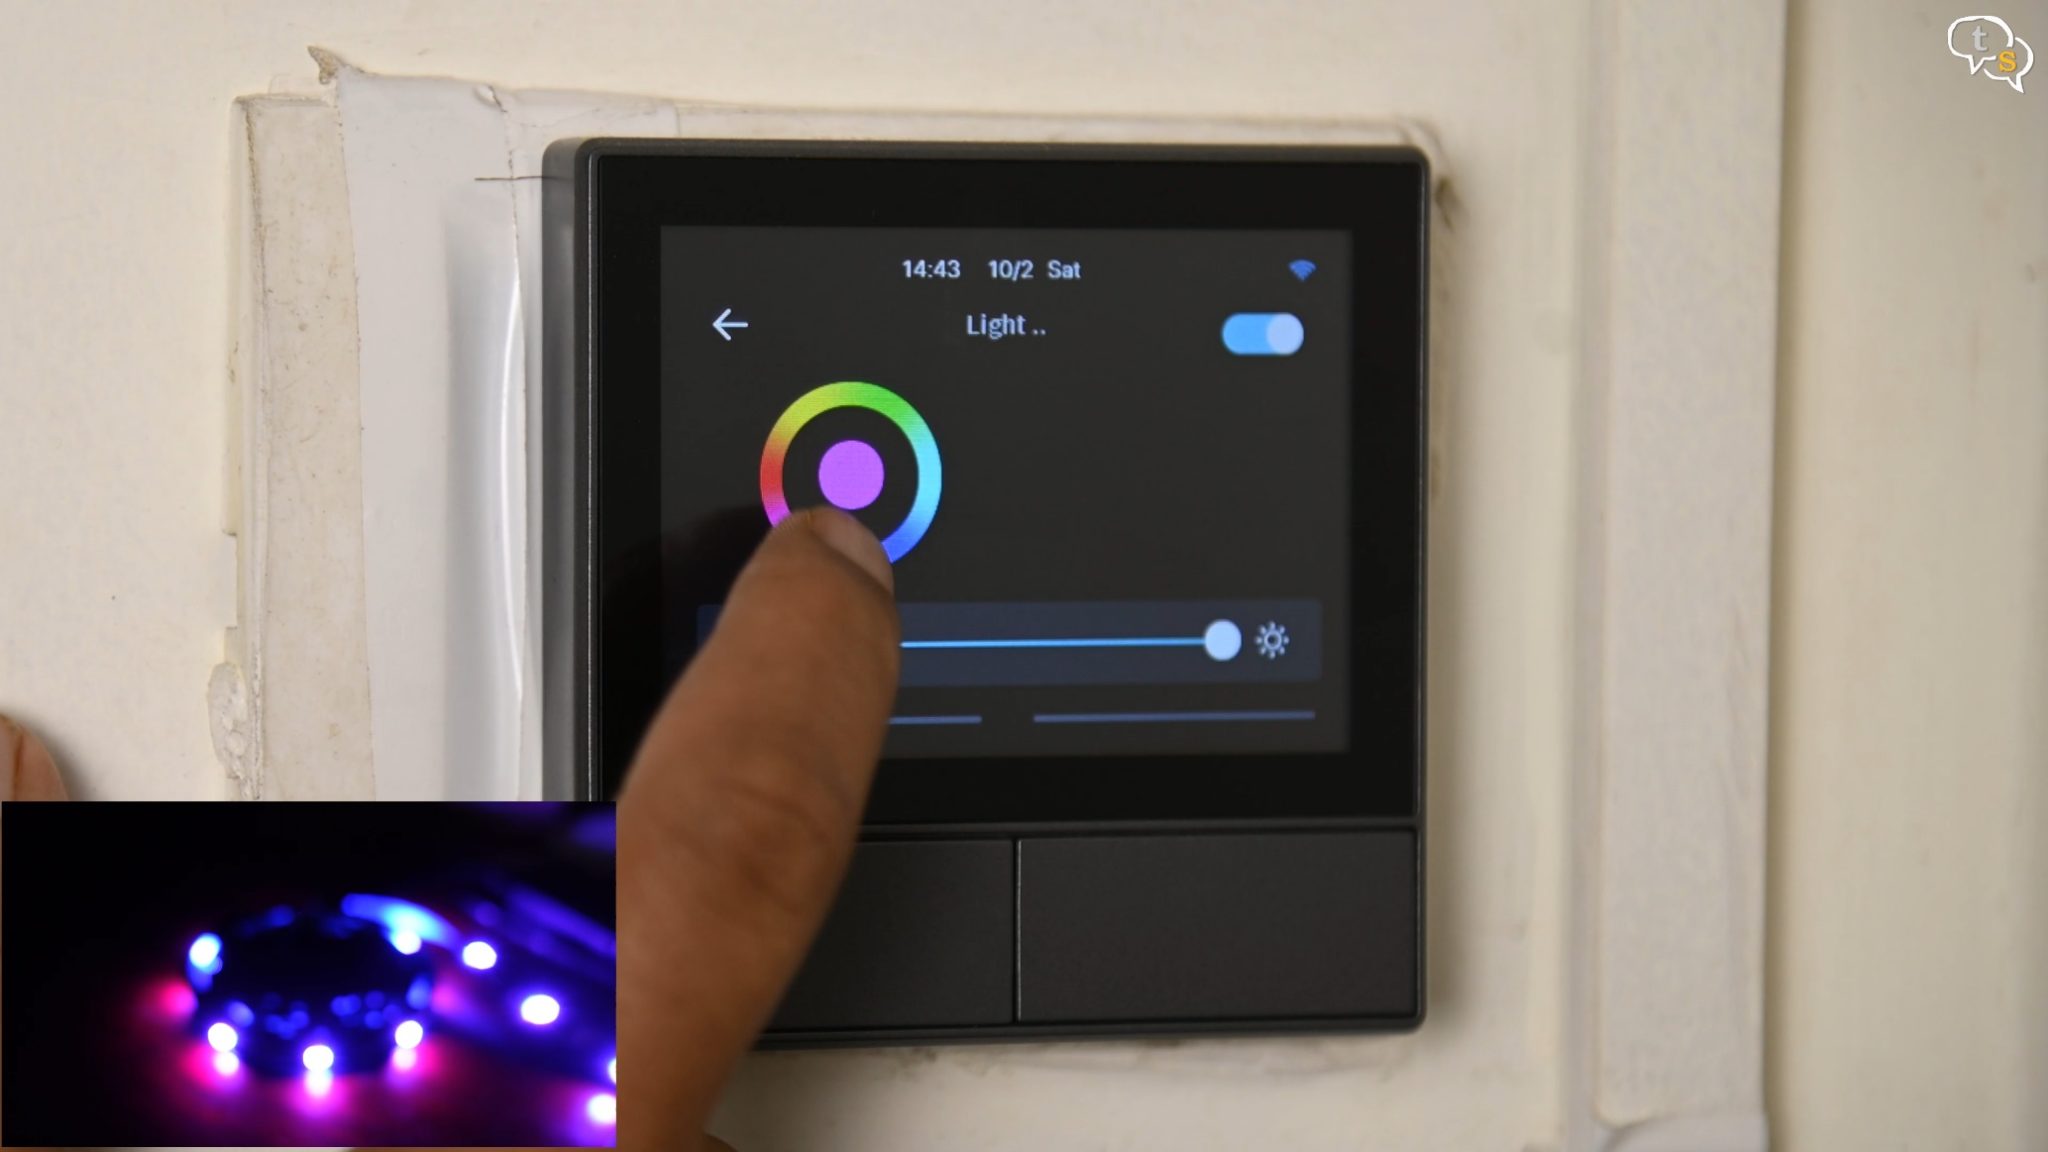
In widgets, if you have a smart bulb or led strip we can control the on/off state, colour and brightness of the device.
The NSPanel is a great addition to the Sonoff line, the touchscreen looks great and is bright. It does go into sleep mode if there’s no interaction for a few minutes. The EU size fits perfectly into Indian electrical boxes.
I’m using anchor Roma switches for your reference, so you can understand the size of the box.
A two-switch box fits the device perfectly and the two switches can be wired to L1 and L2 on the device.
The touch screen is smooth and responds well.
All in all, a great addition to the Sonoff smart device line.