In an earlier video I had put together a tank water level sensor using an Arduino. If you haven’t seen the video, click on the video above.
The video has been well received, but one recurring question I get is how to use an ultrasonic sensor instead of the water level sensor.
Well, let’s do that in this project.
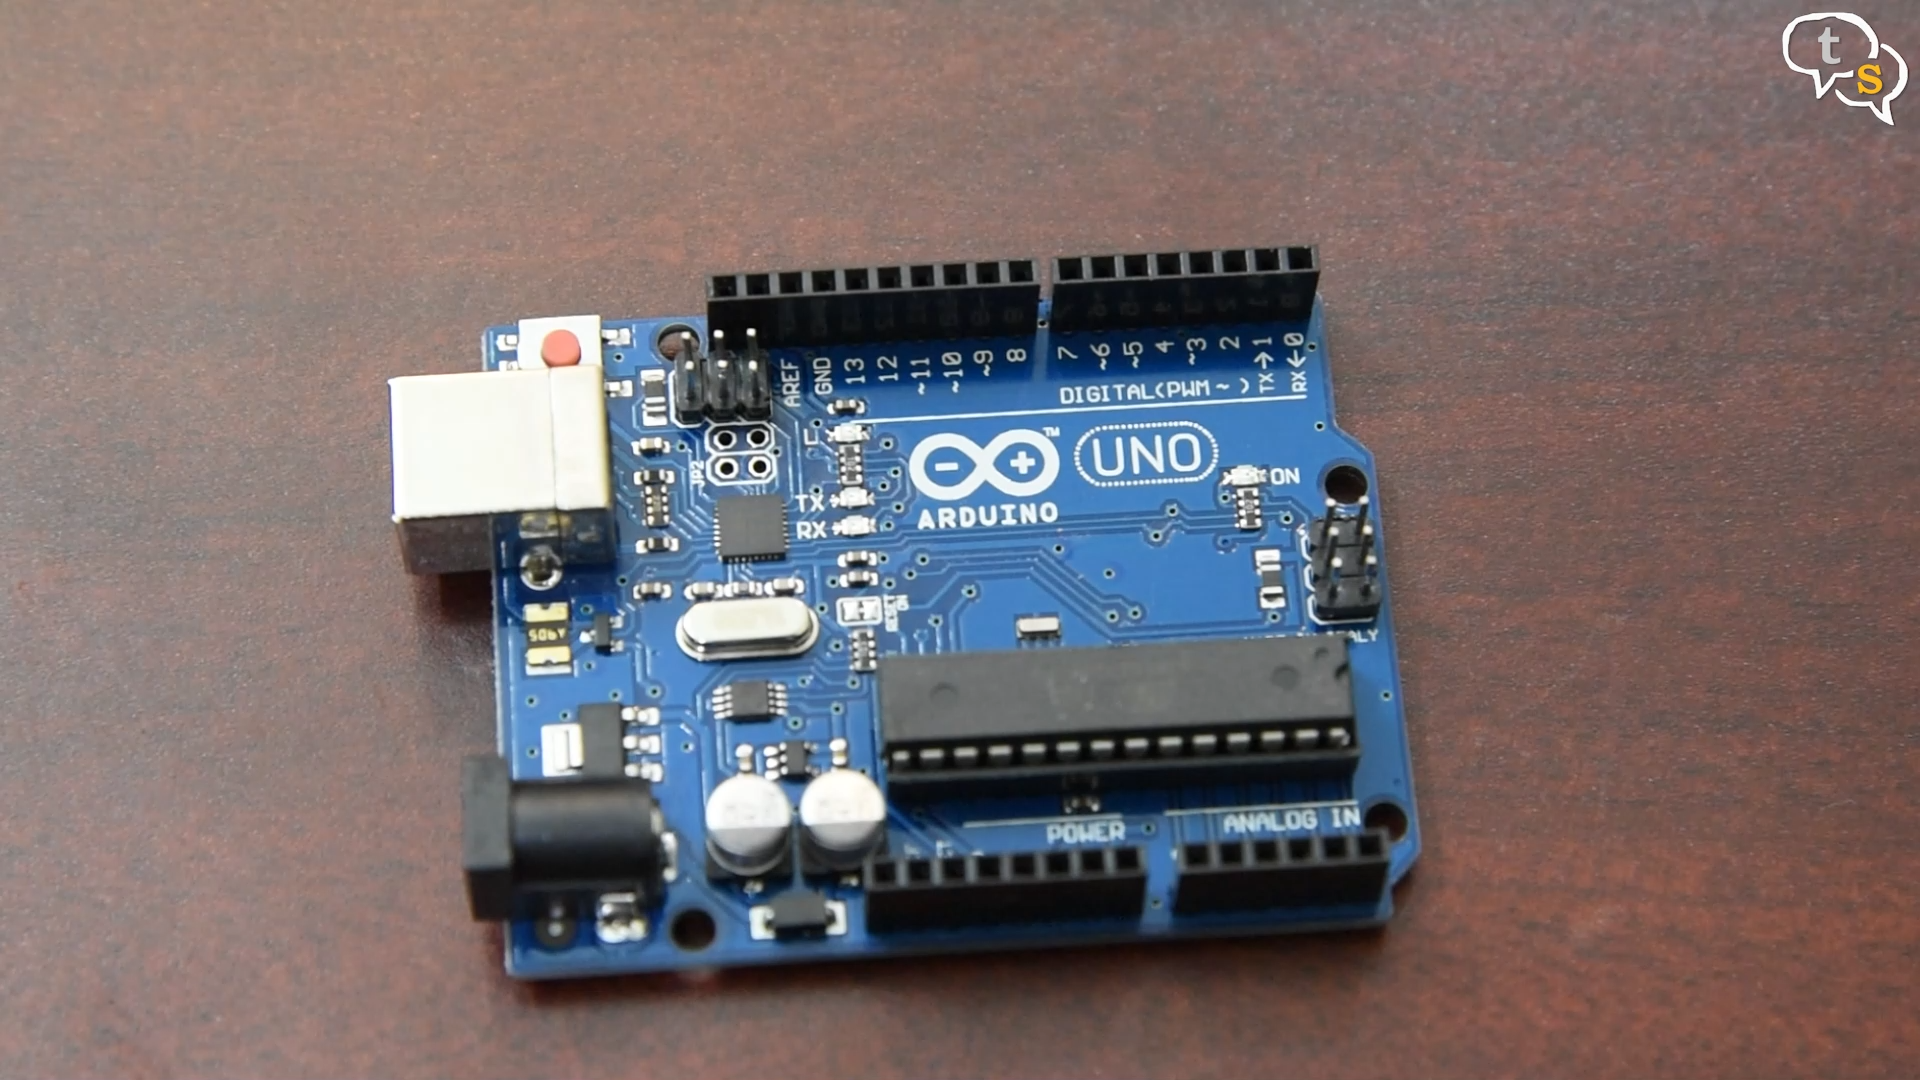
This is the same Arduino Uno I used last time. What I like about the Arduino Uno is that it’s quite small and is easy to code for.
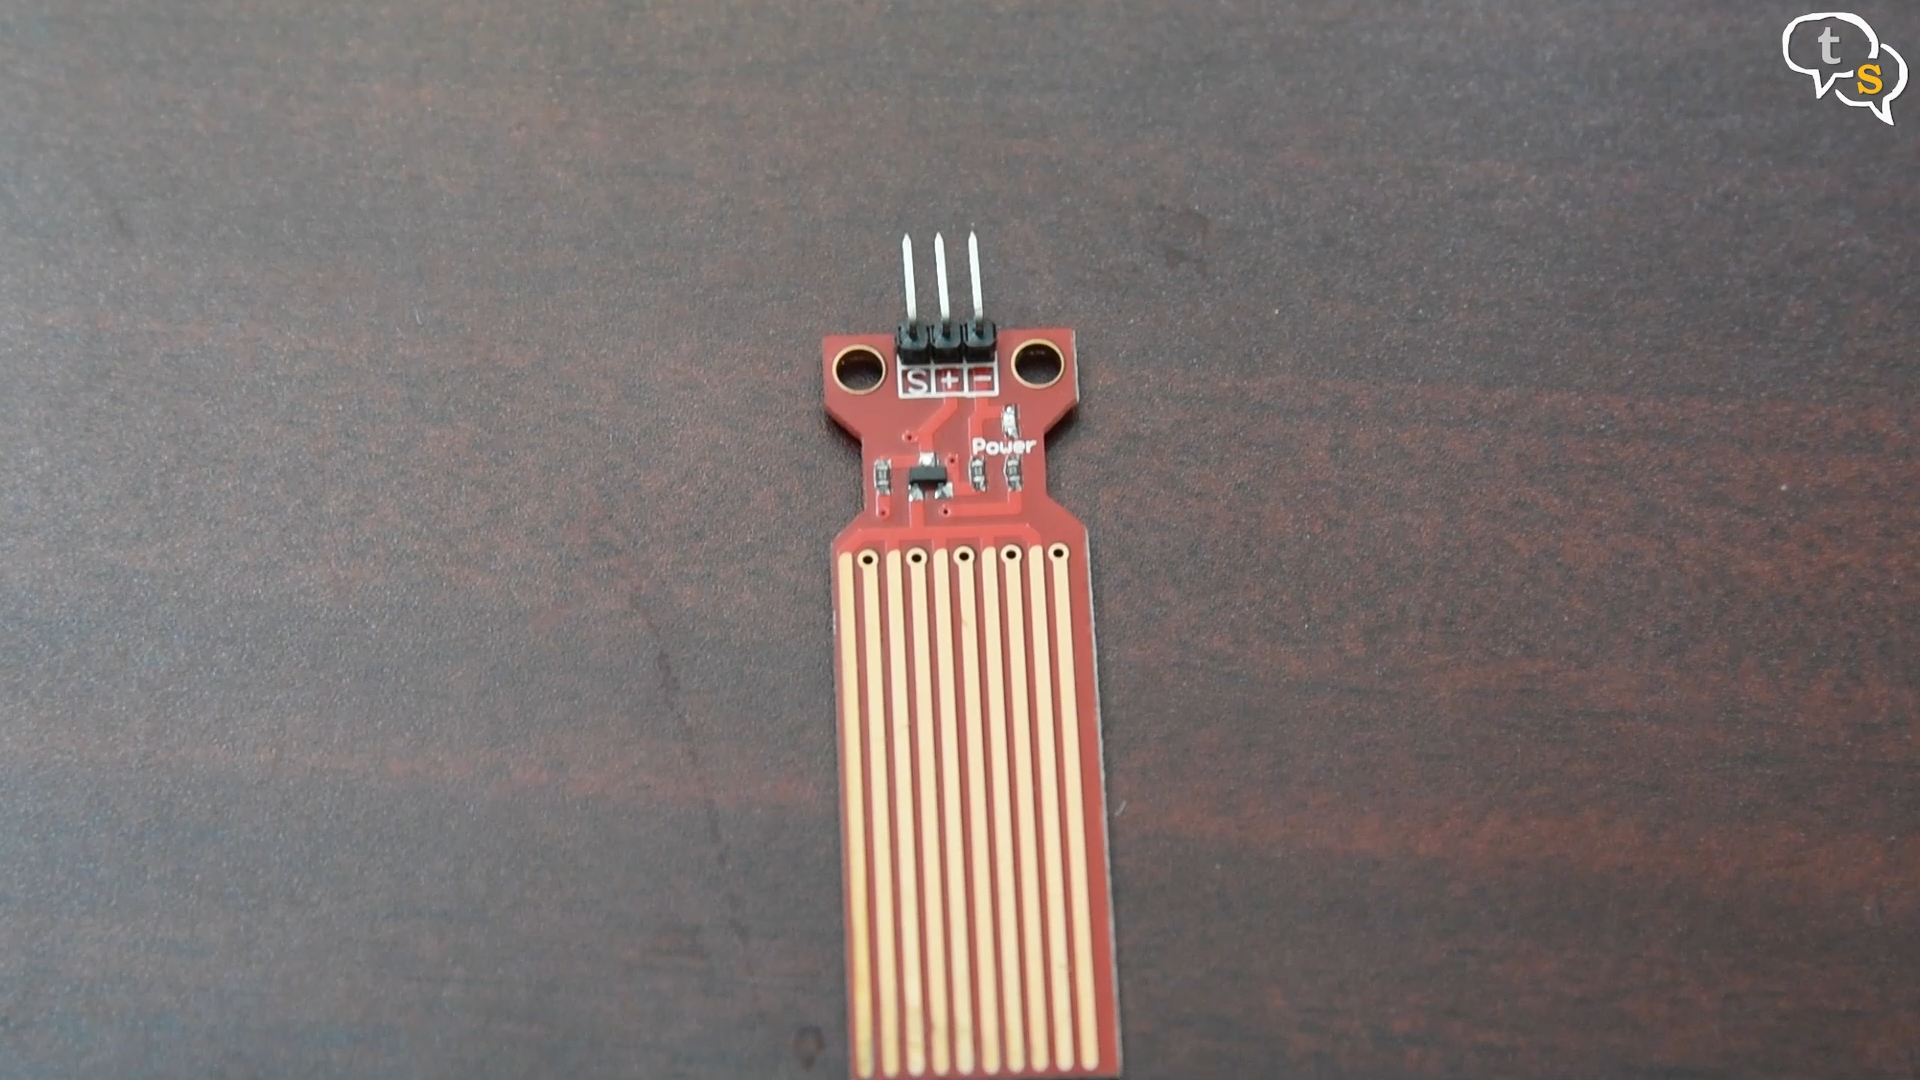
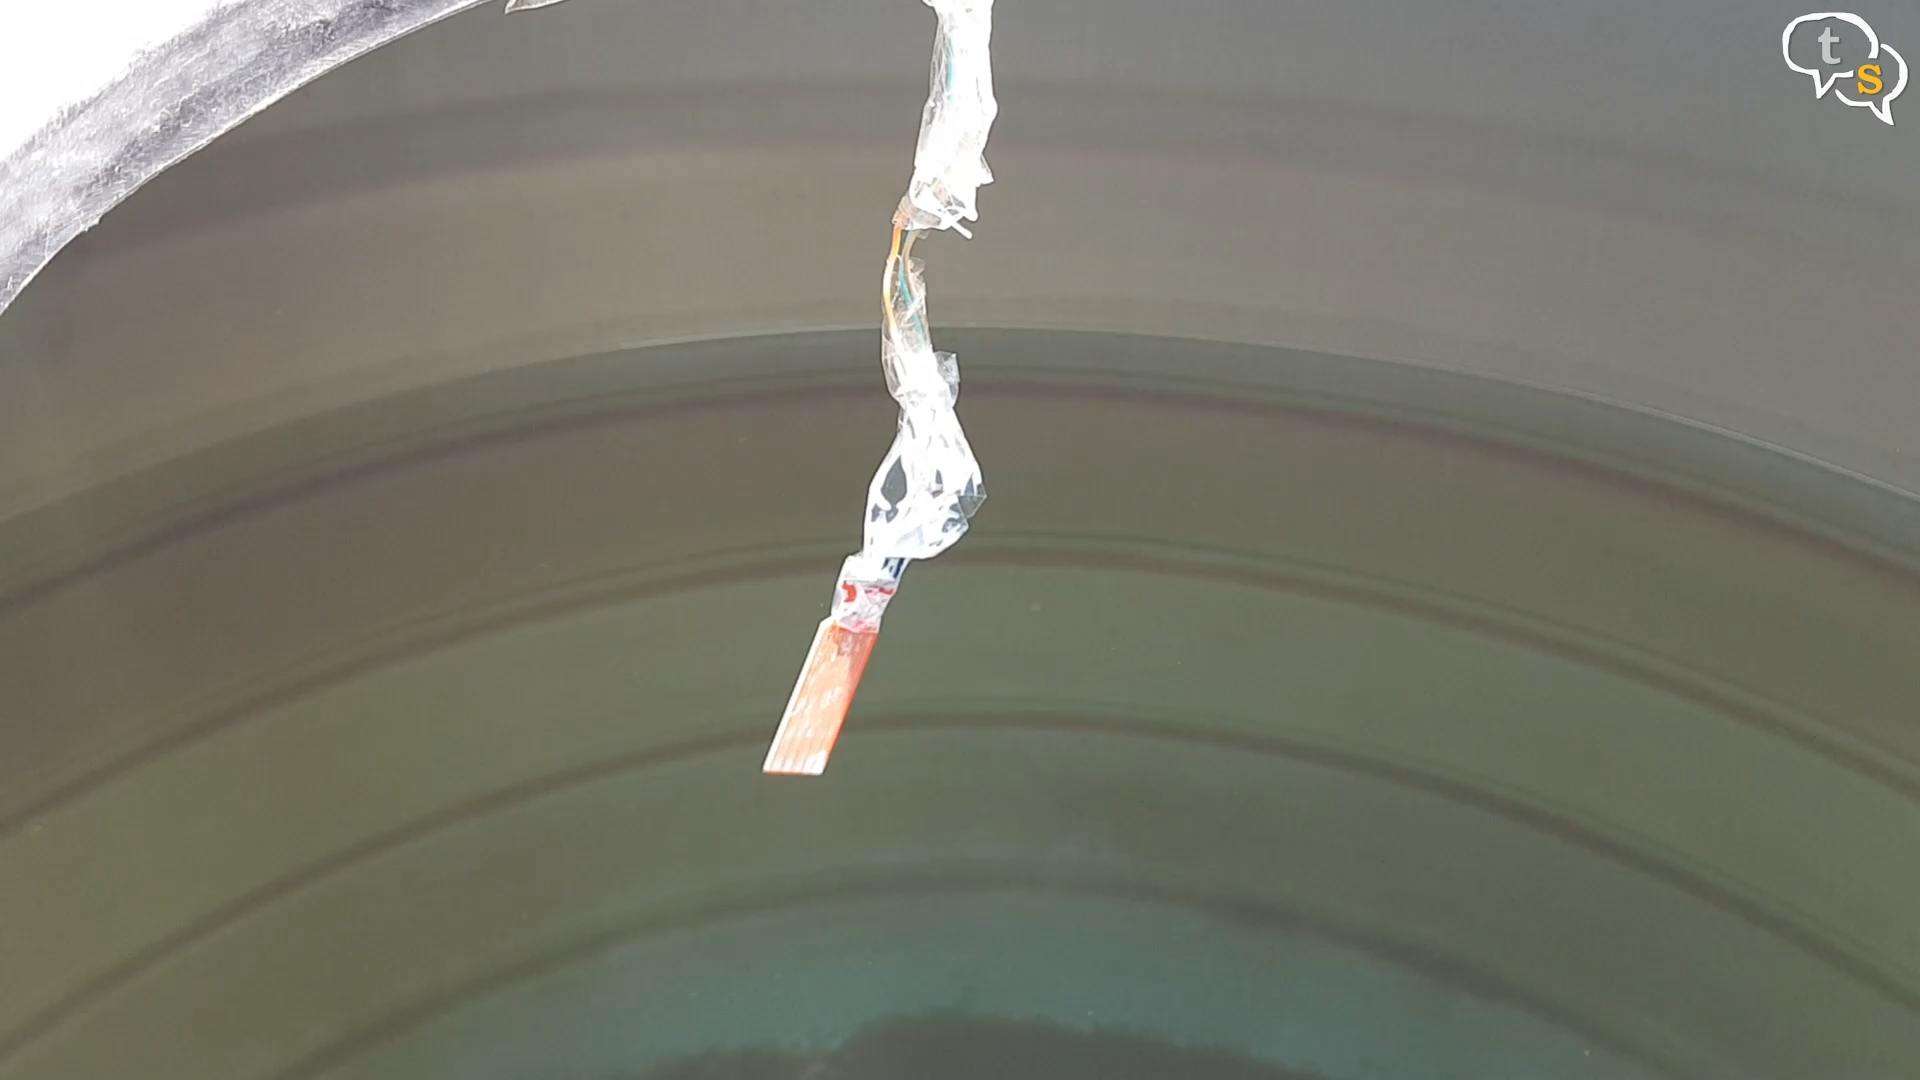
My earlier water level sensor method had the sensor dip into the water, which corroded the sensor making it fail.
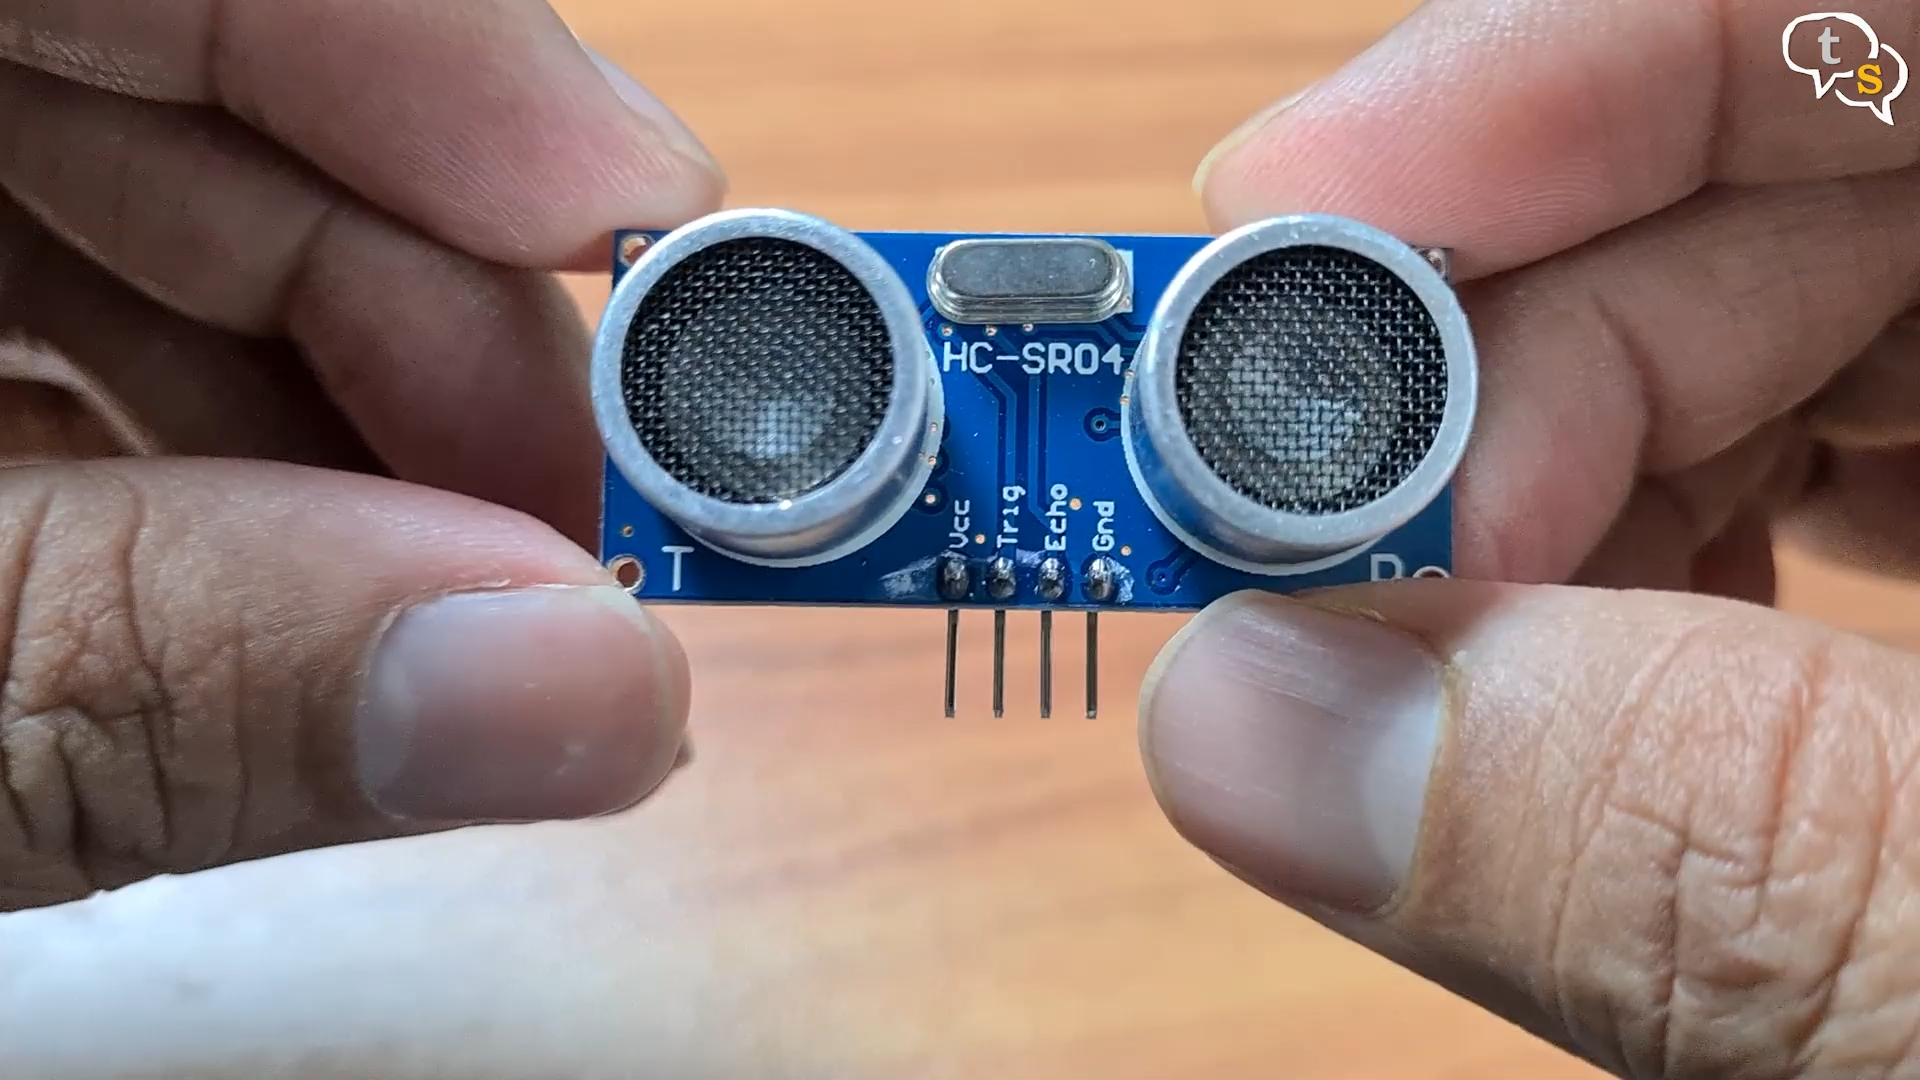
We are switching to an ultrasonic sensor now as it can be placed a distance away from the water and the fear of it getting corroded is removed. The ultrasonic sensor is not waterproof though, so we will need to keep it protected. We connect the sensor to an Arduino, and as per the changing water level new signal readings would be sent letting us know the level.
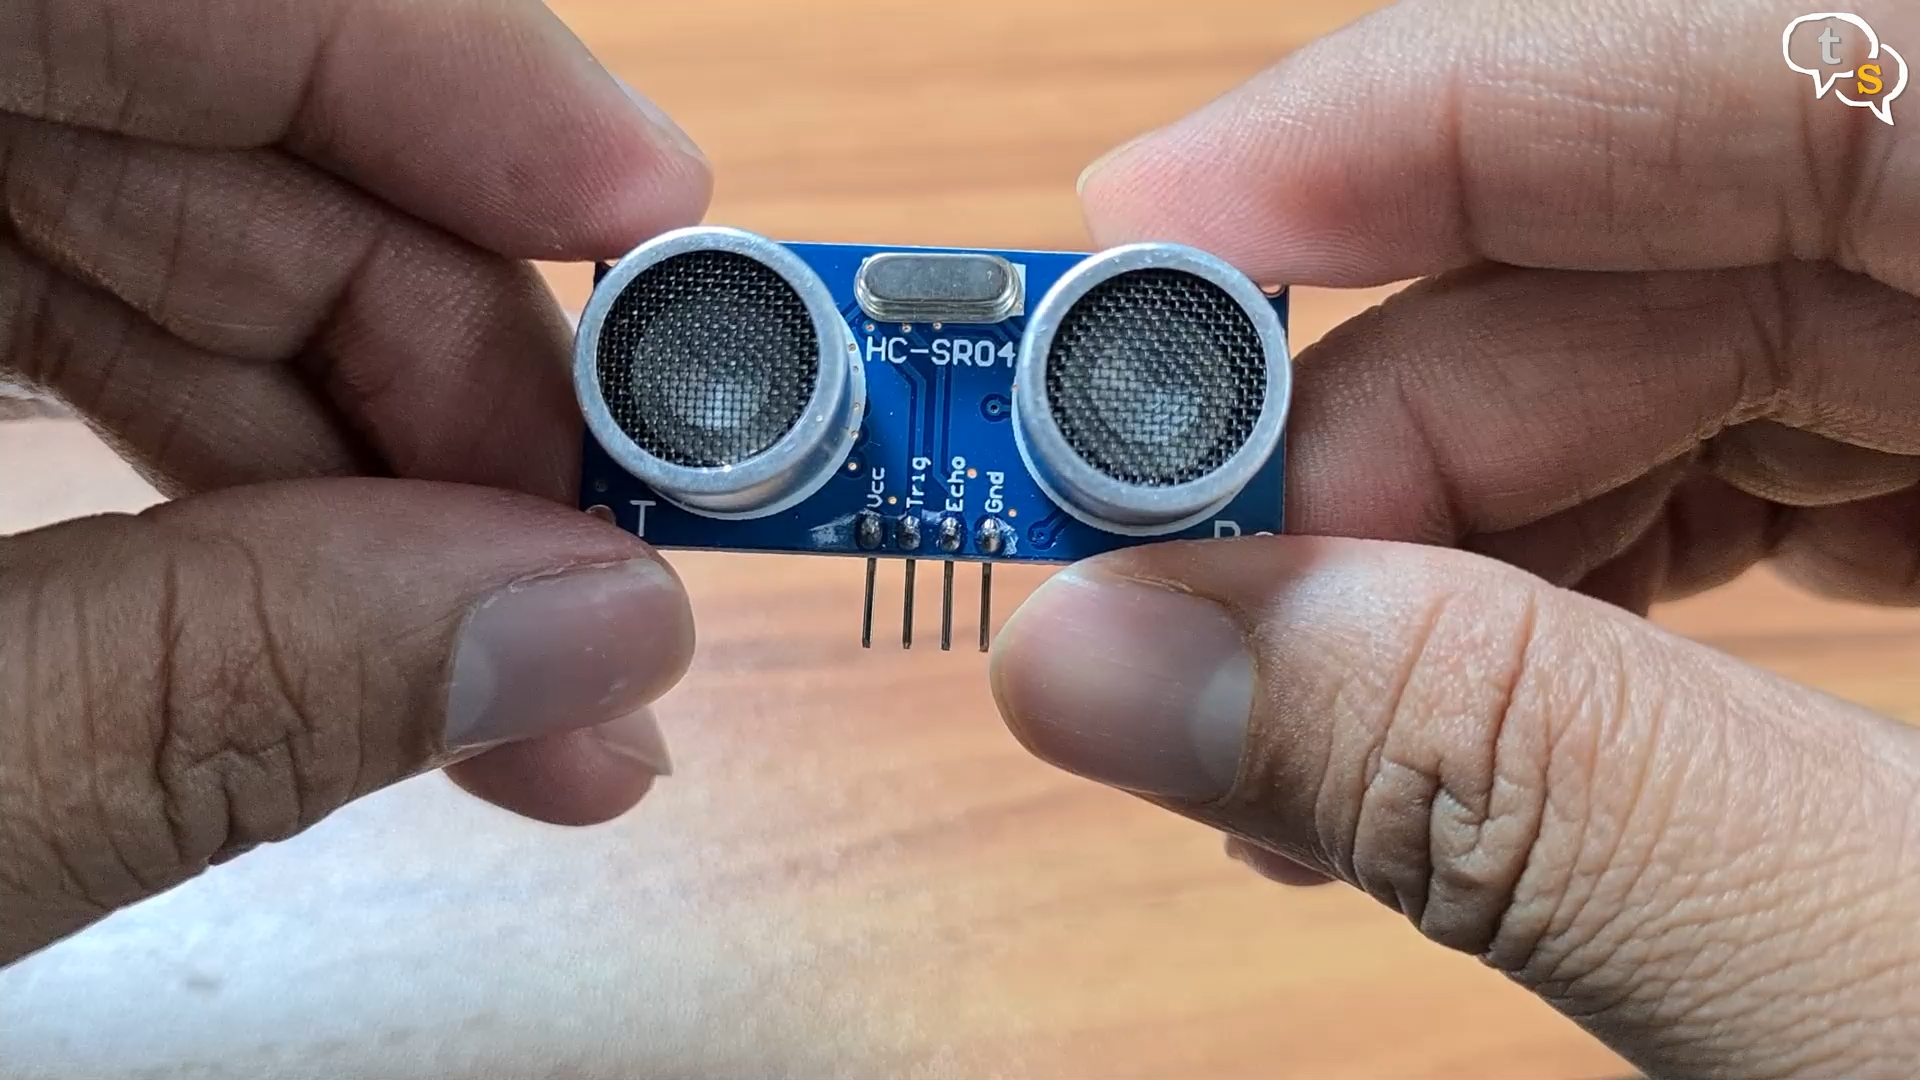
The Ultrasonic sensor we’re using is the HCSR04, which is quite common and easy to find in electronic stores and also online (link in the description).
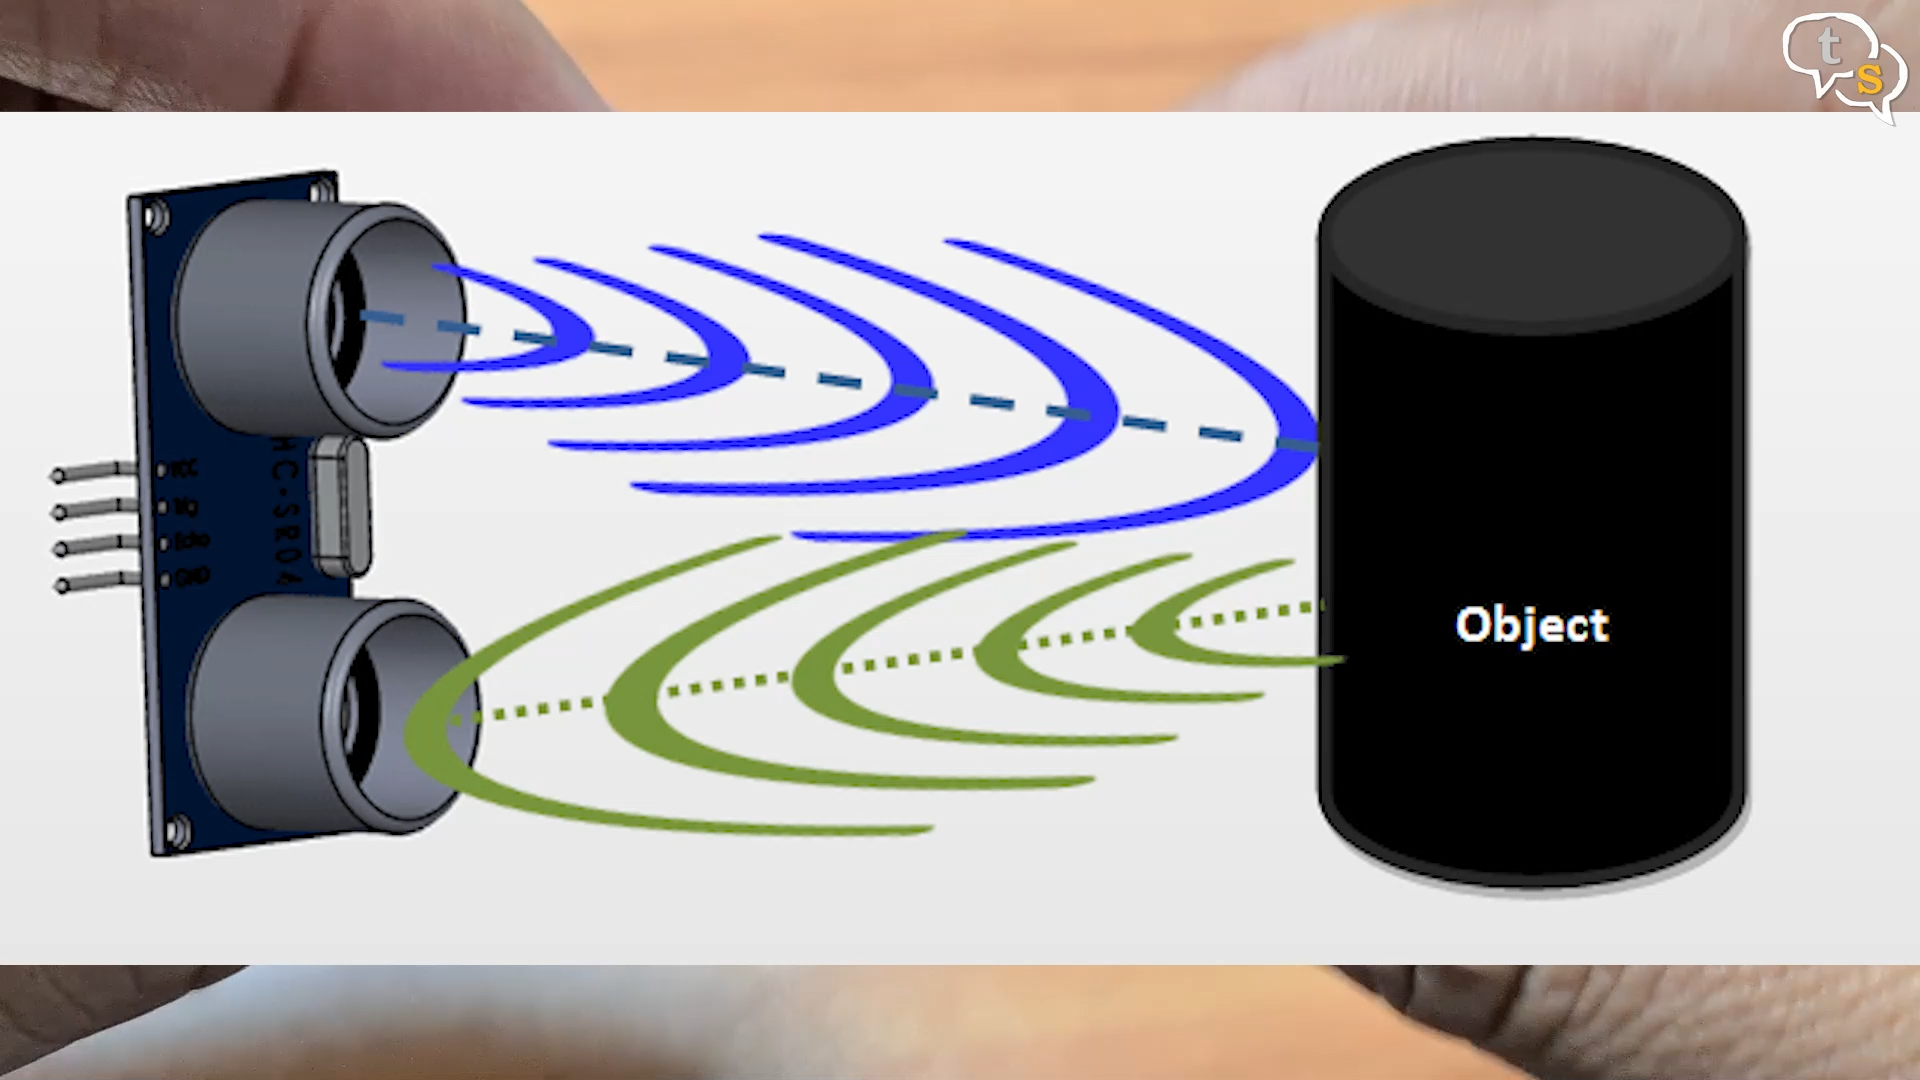
The ultrasonic sensor works similar to how a SONAR works. It sends out a pulse of ultrasonic waves, these waves are reflected back when it hits an obstacle.
The time it takes for the reflected waves to return is used to calculate the distance.
Let’s list out the components we’re using.
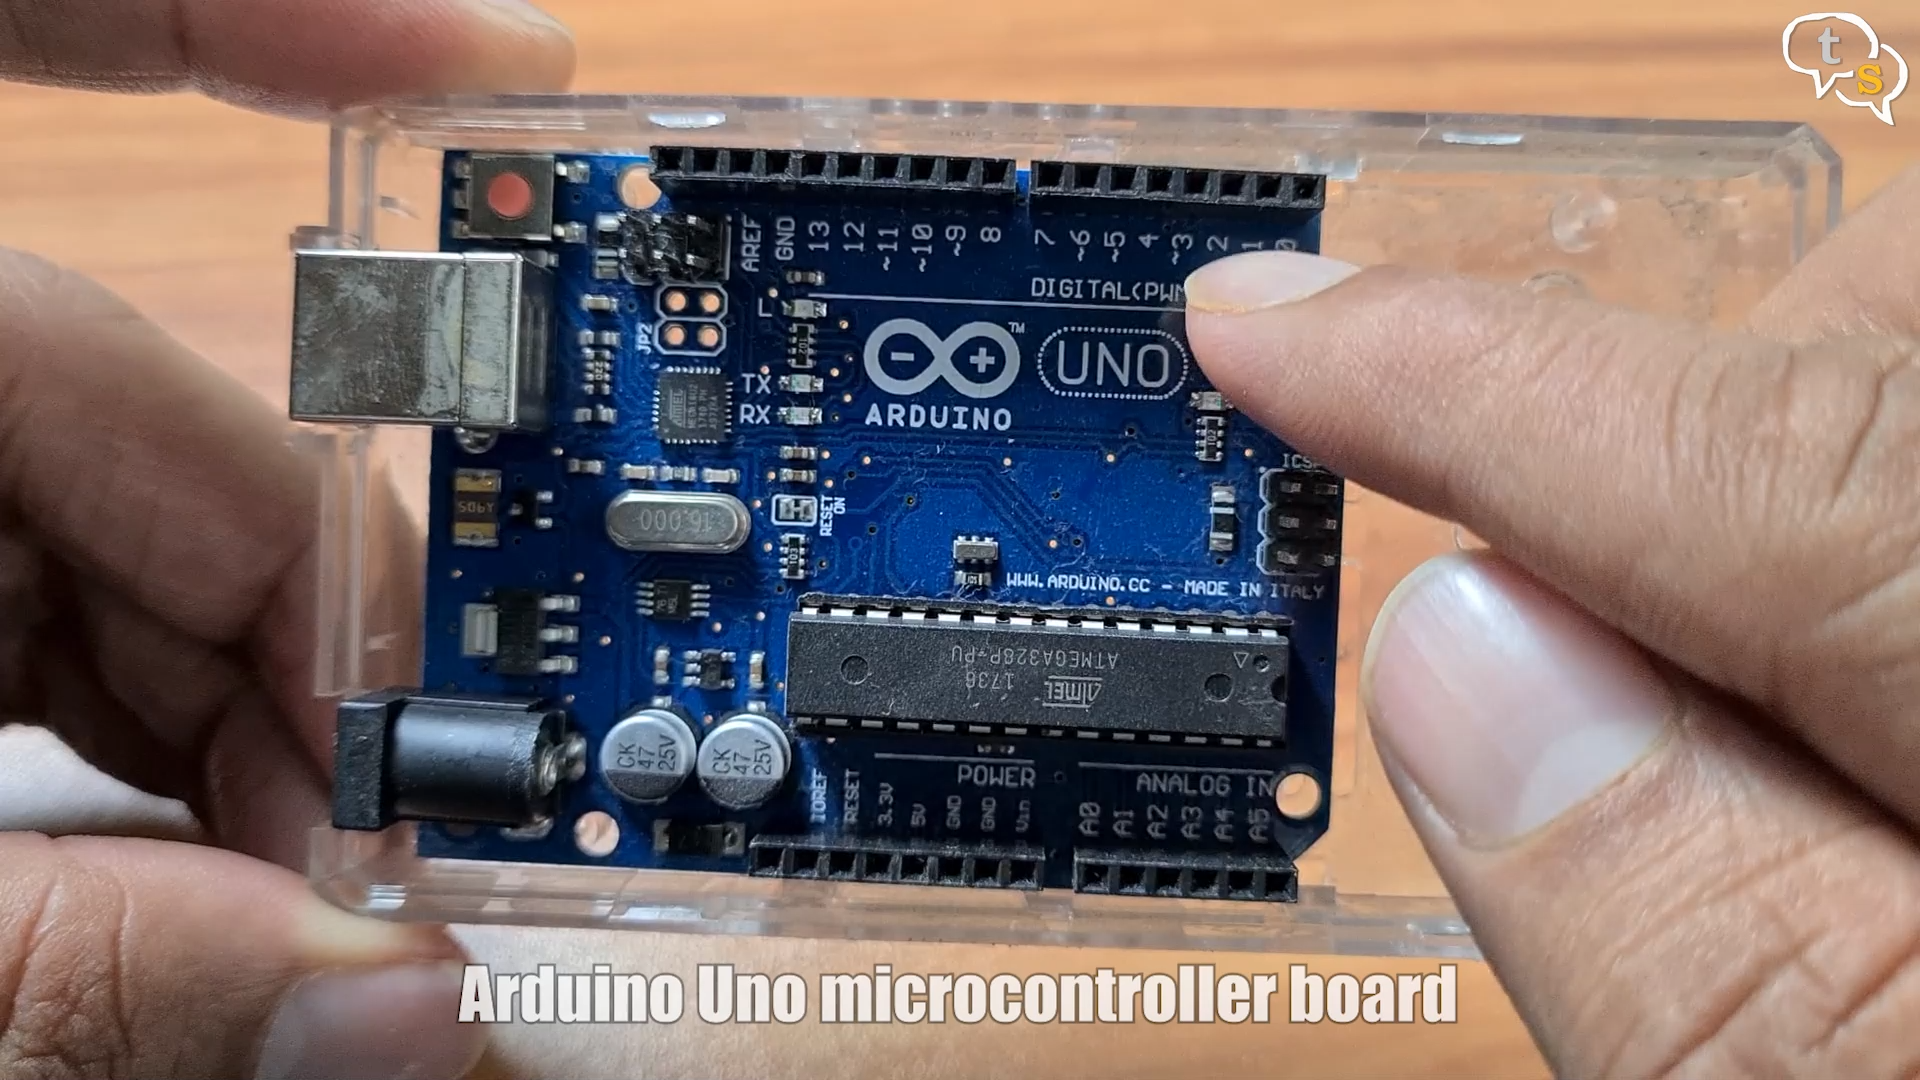
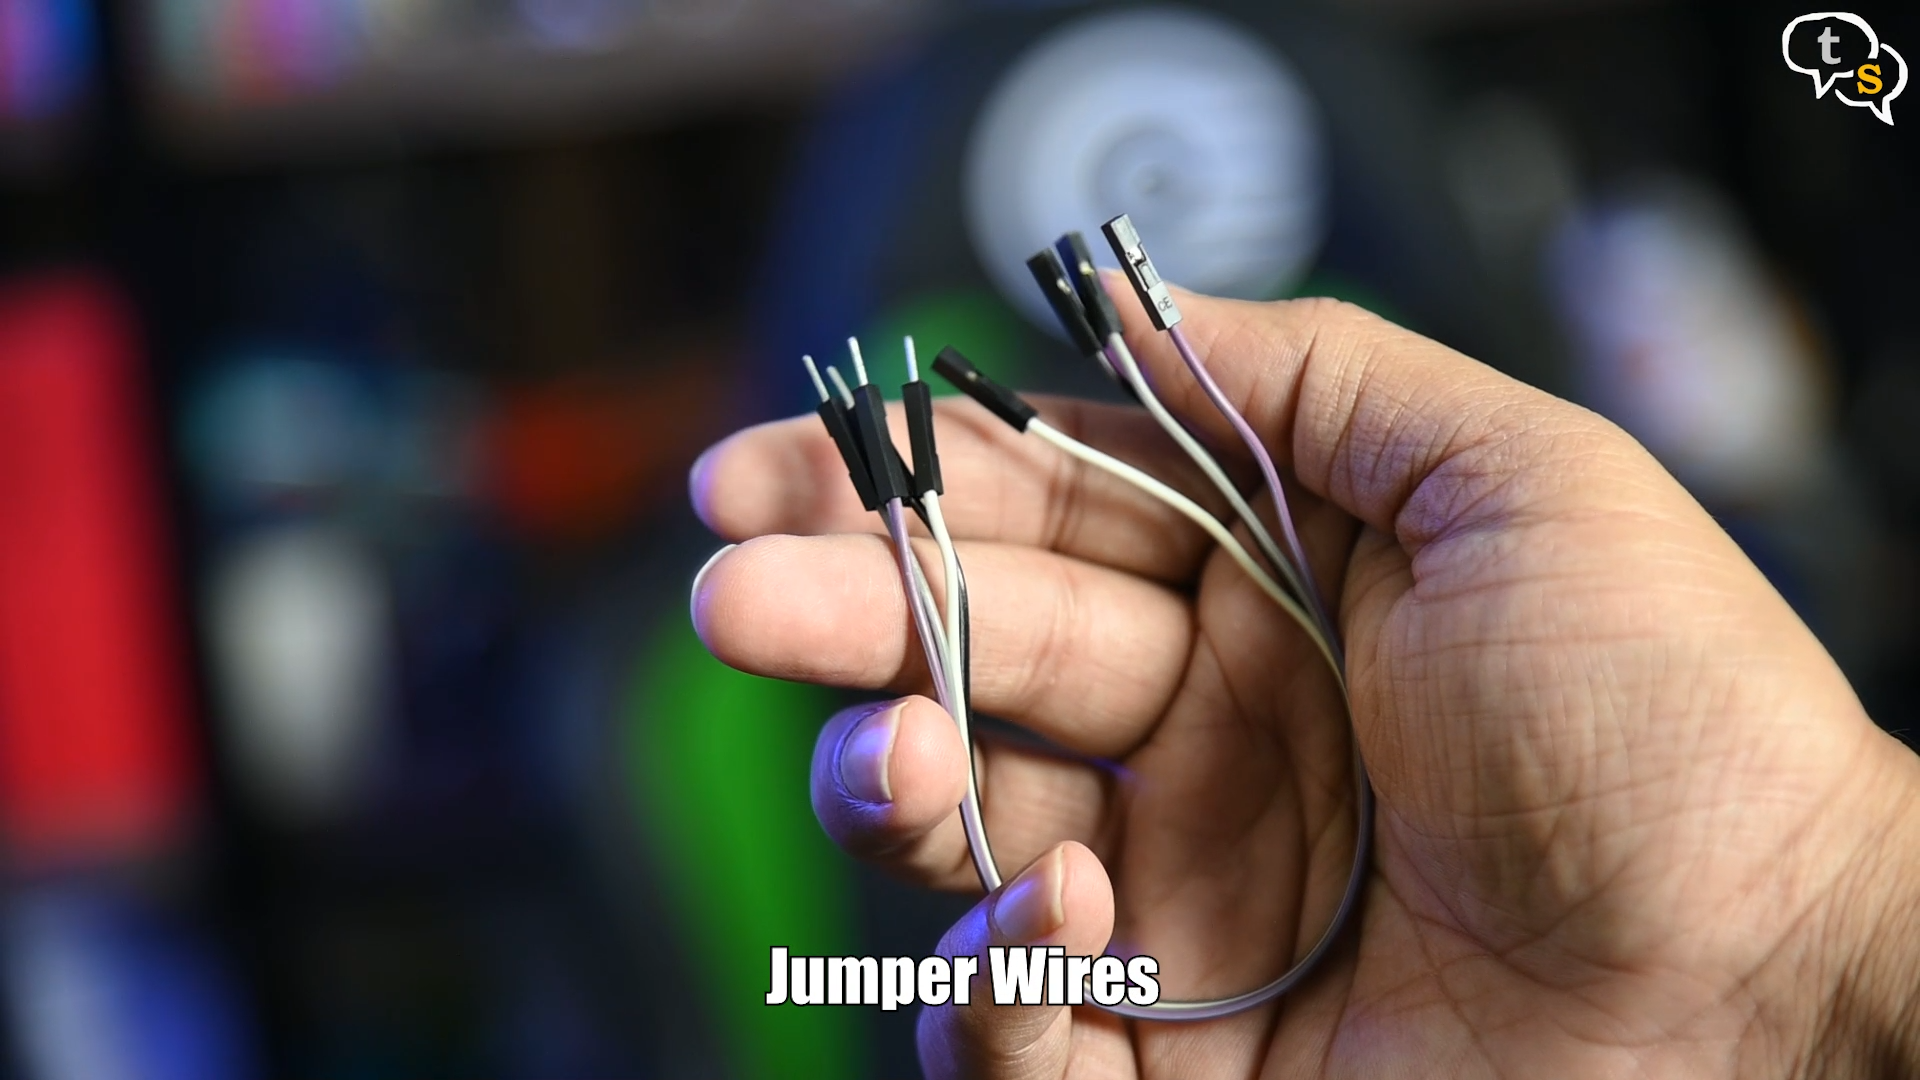
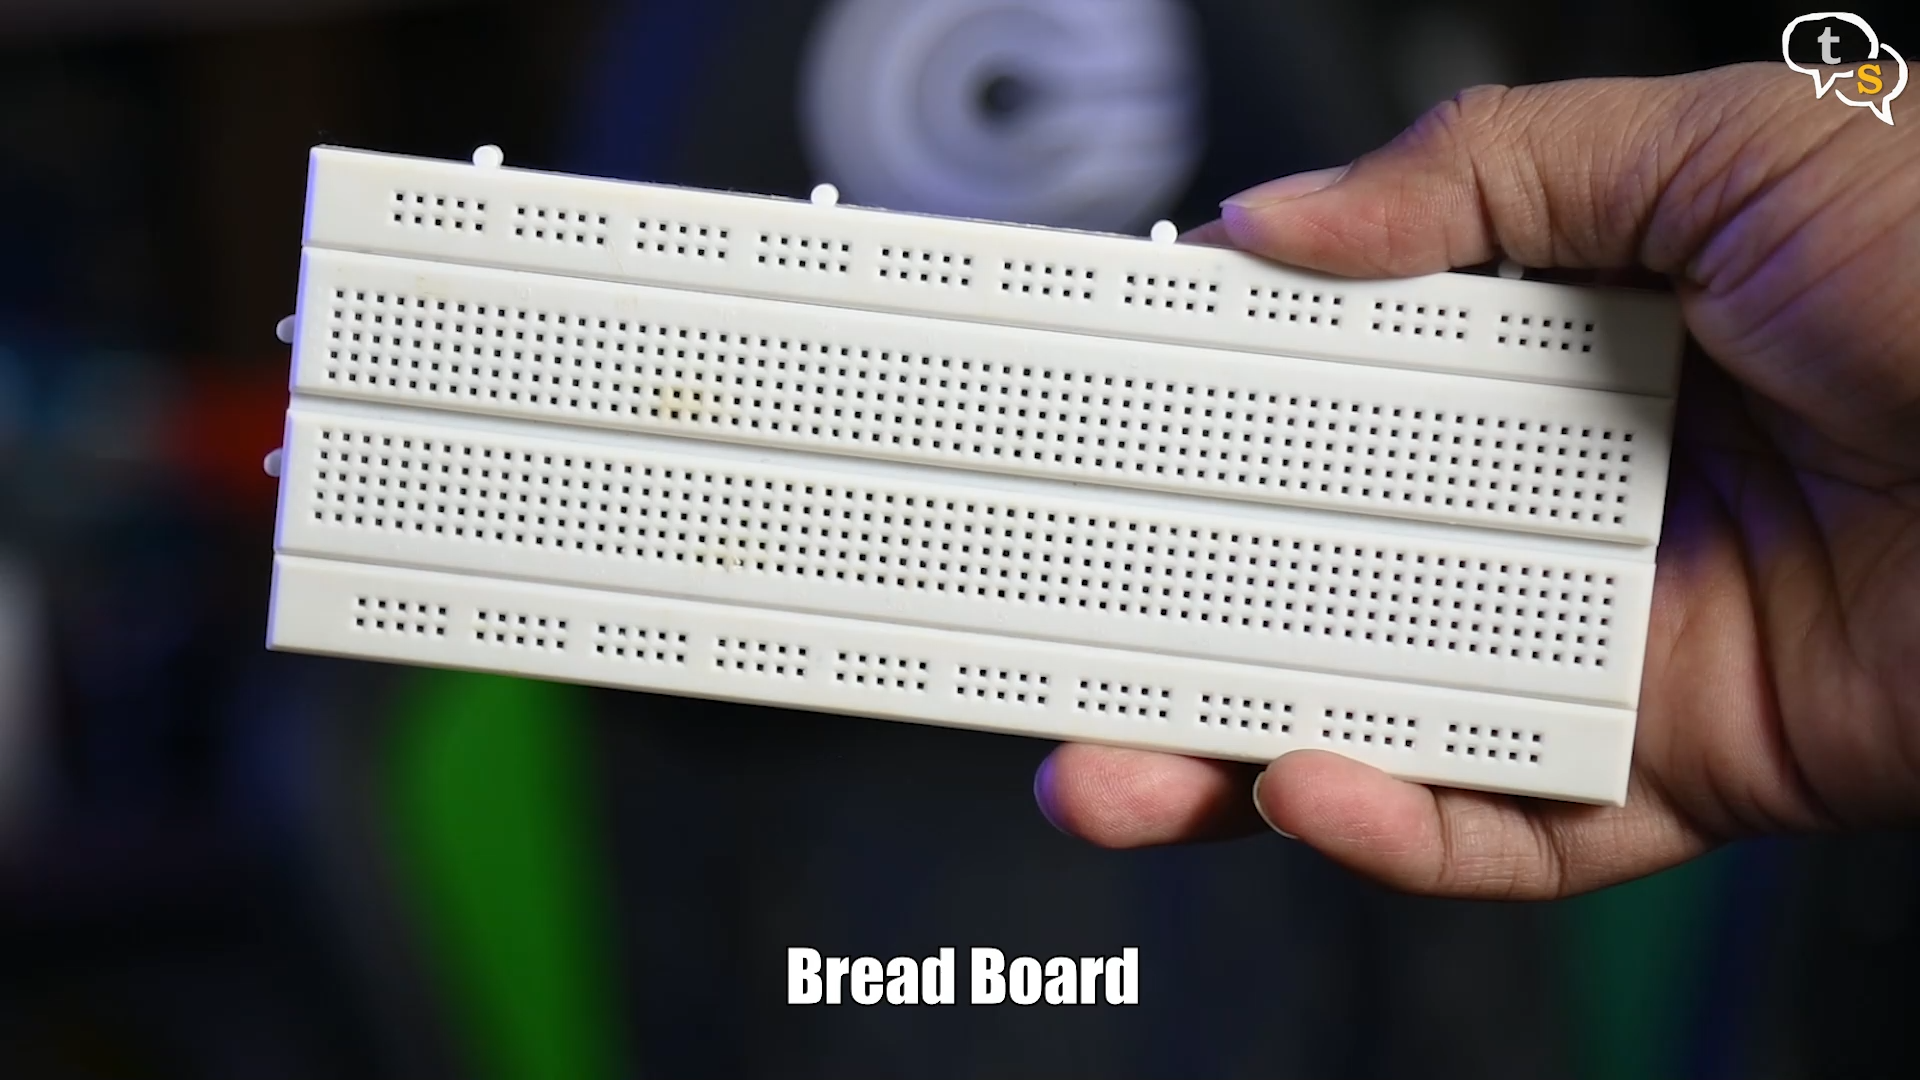
- Arduino Uno
- HCSR04 Ultrasonic sensor
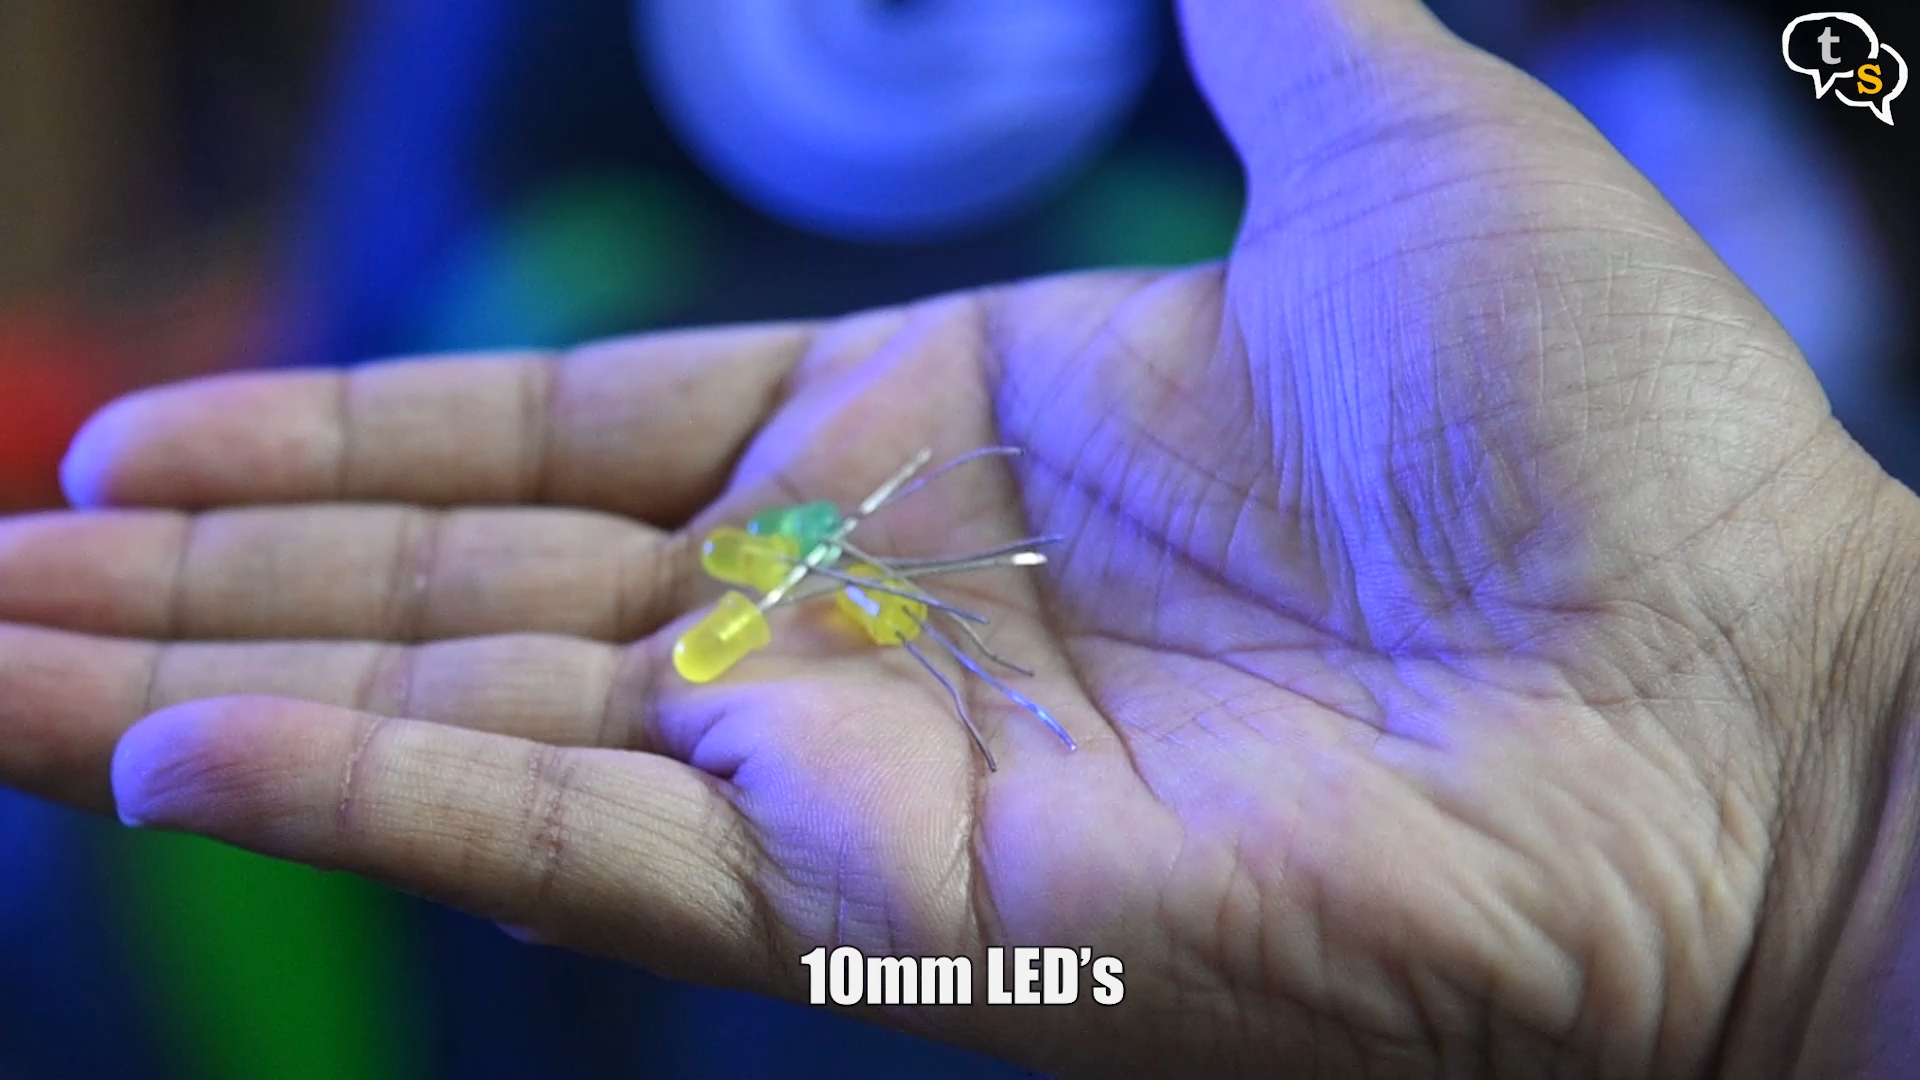
- LEDS which are used to display the level of water
- Connecting wires
- Bread board
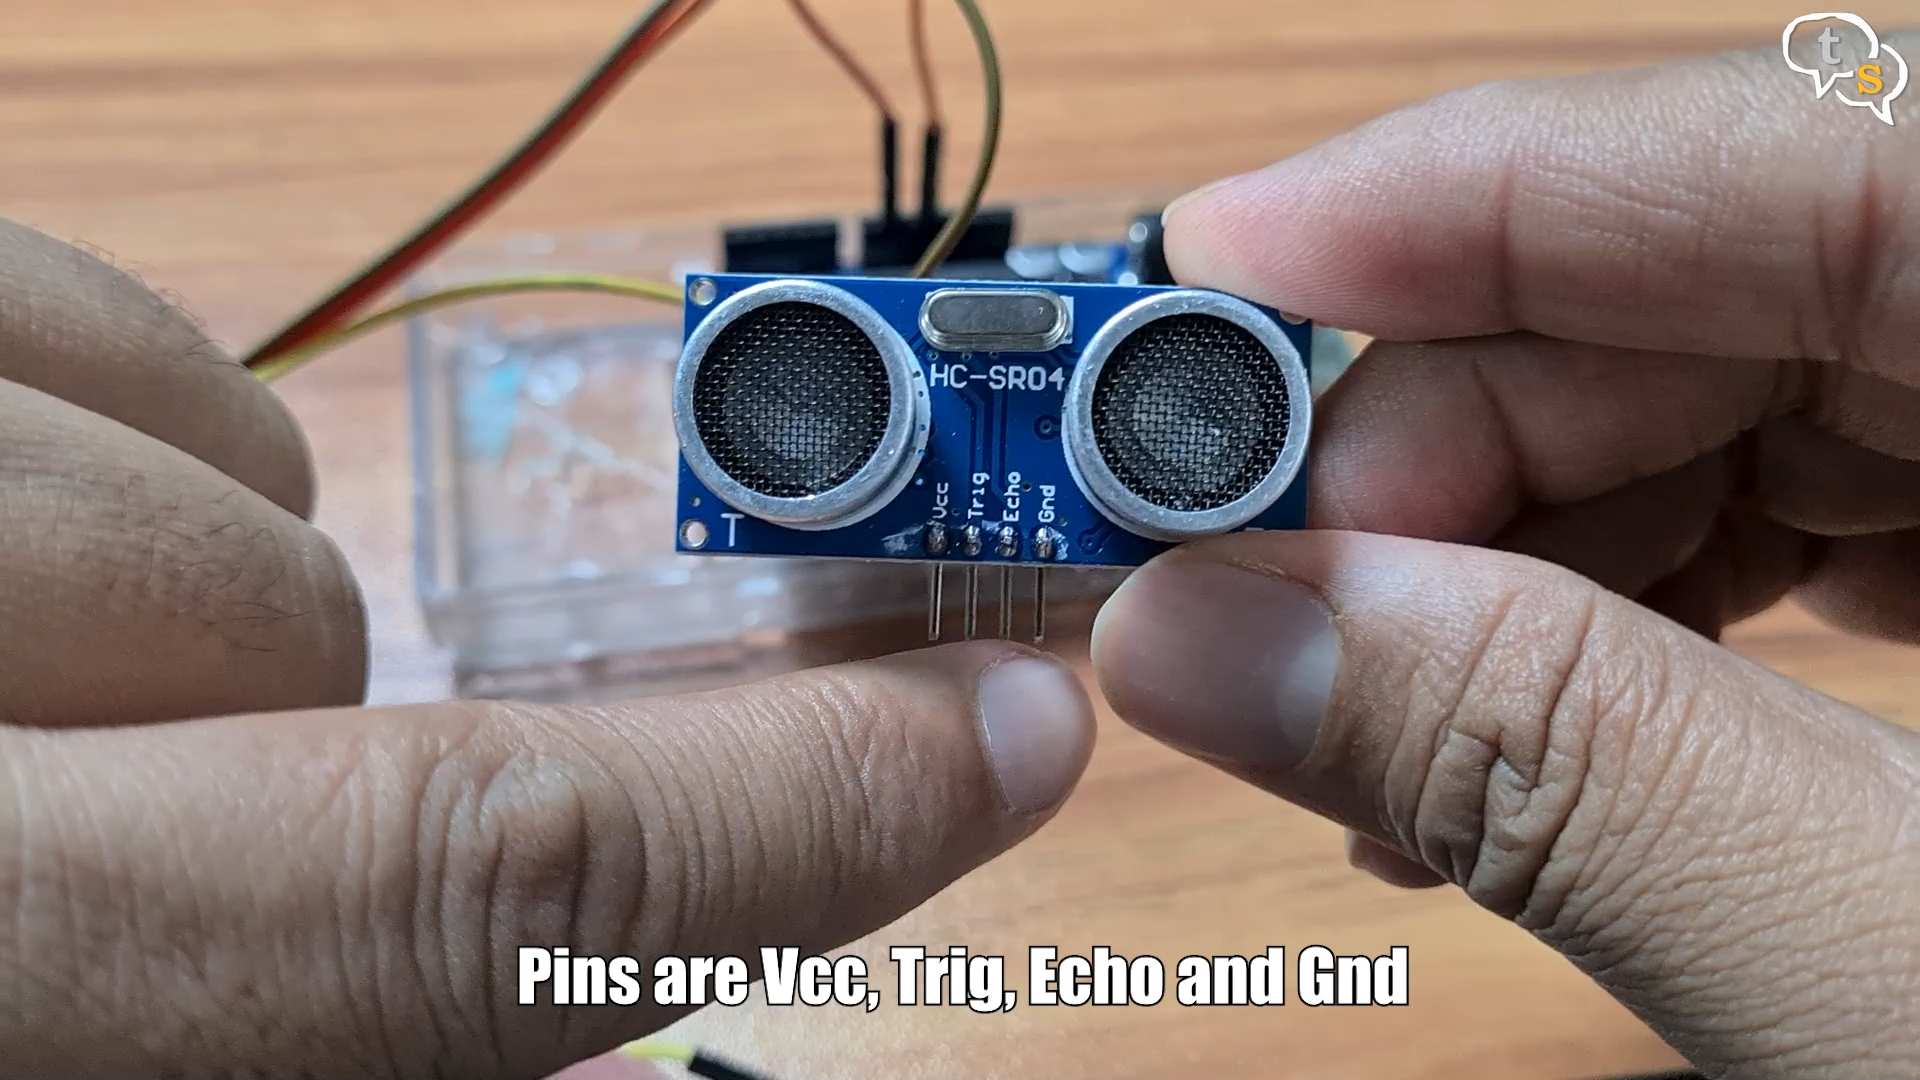
The HCSR04 has four connecting pins below it. The first and fourth pin are VCC which needs a +5V voltage to work and GND, these pins are used to provide power to the sensor.
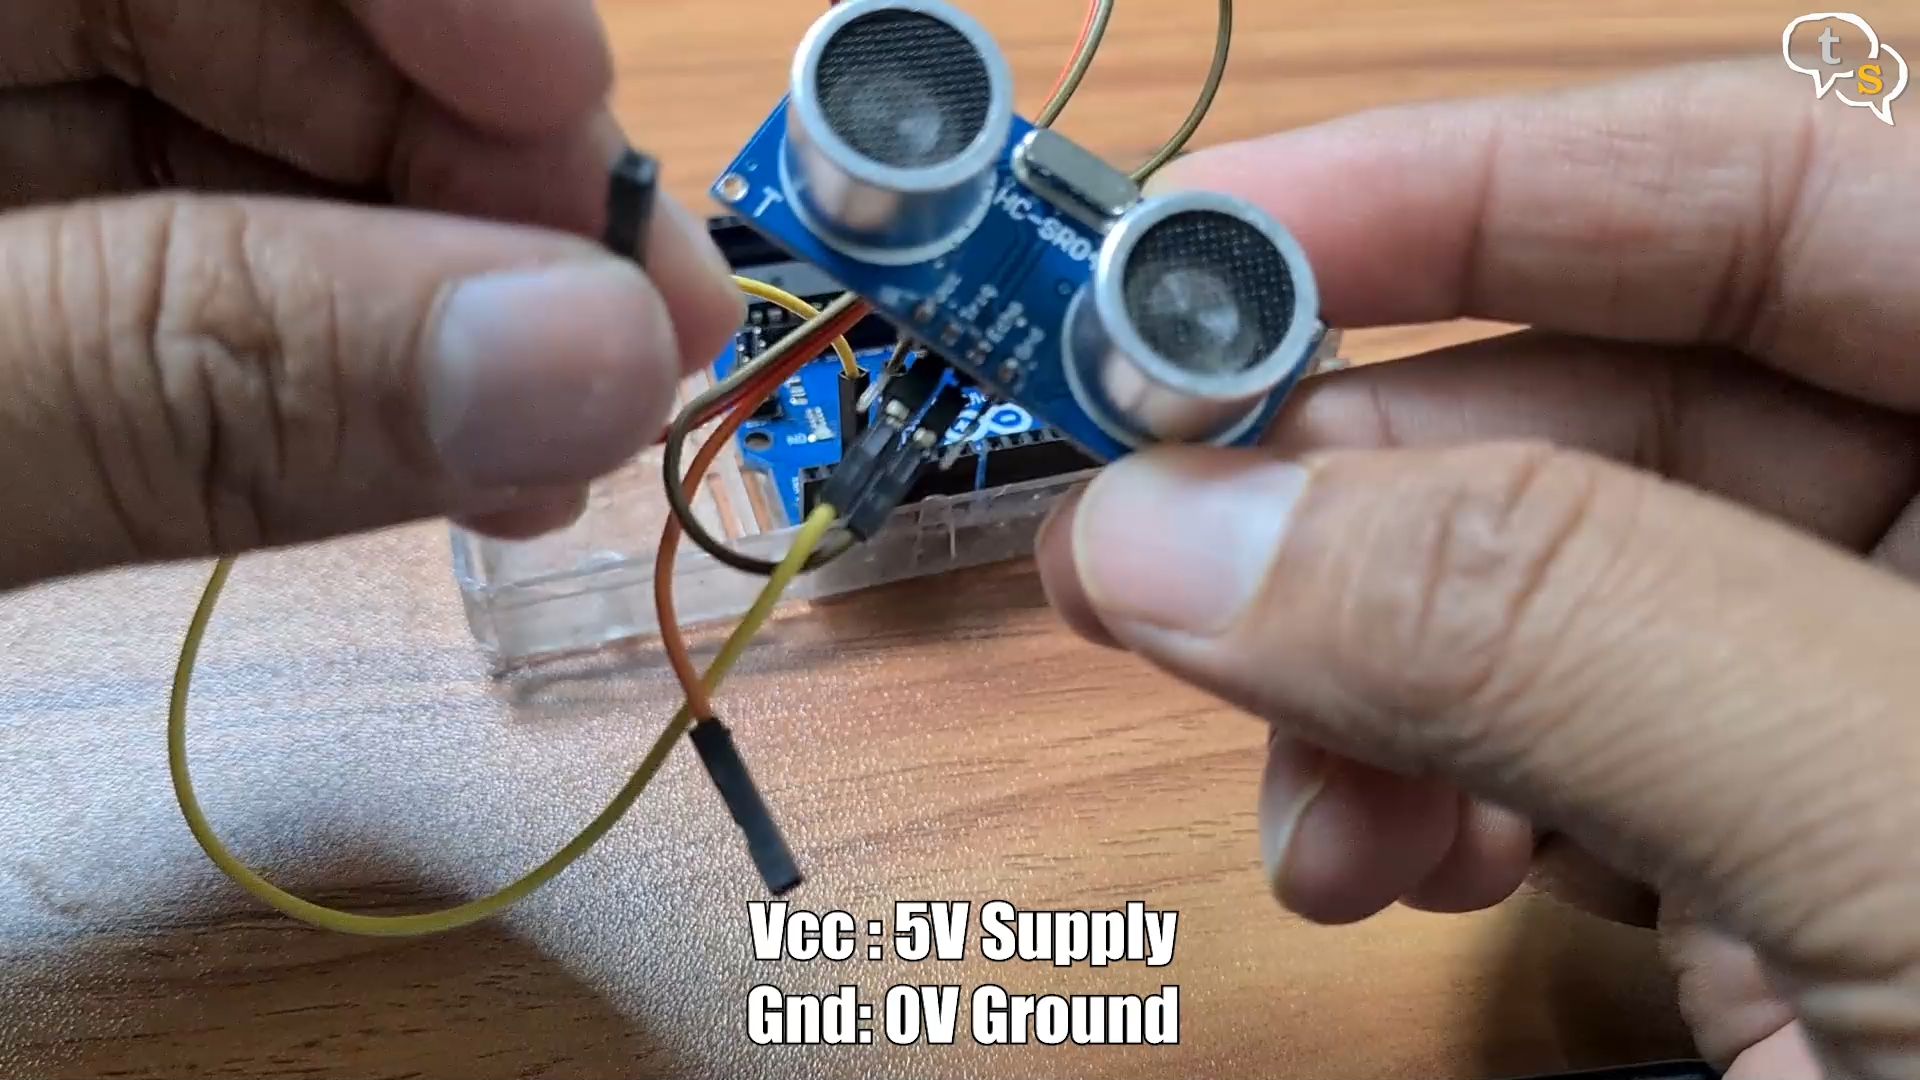
These wires are connected to the corresponding power output pins on the Arduino Uno. Make sure each wire is of a different colour, making it easy to identify which wire is to be connected where.
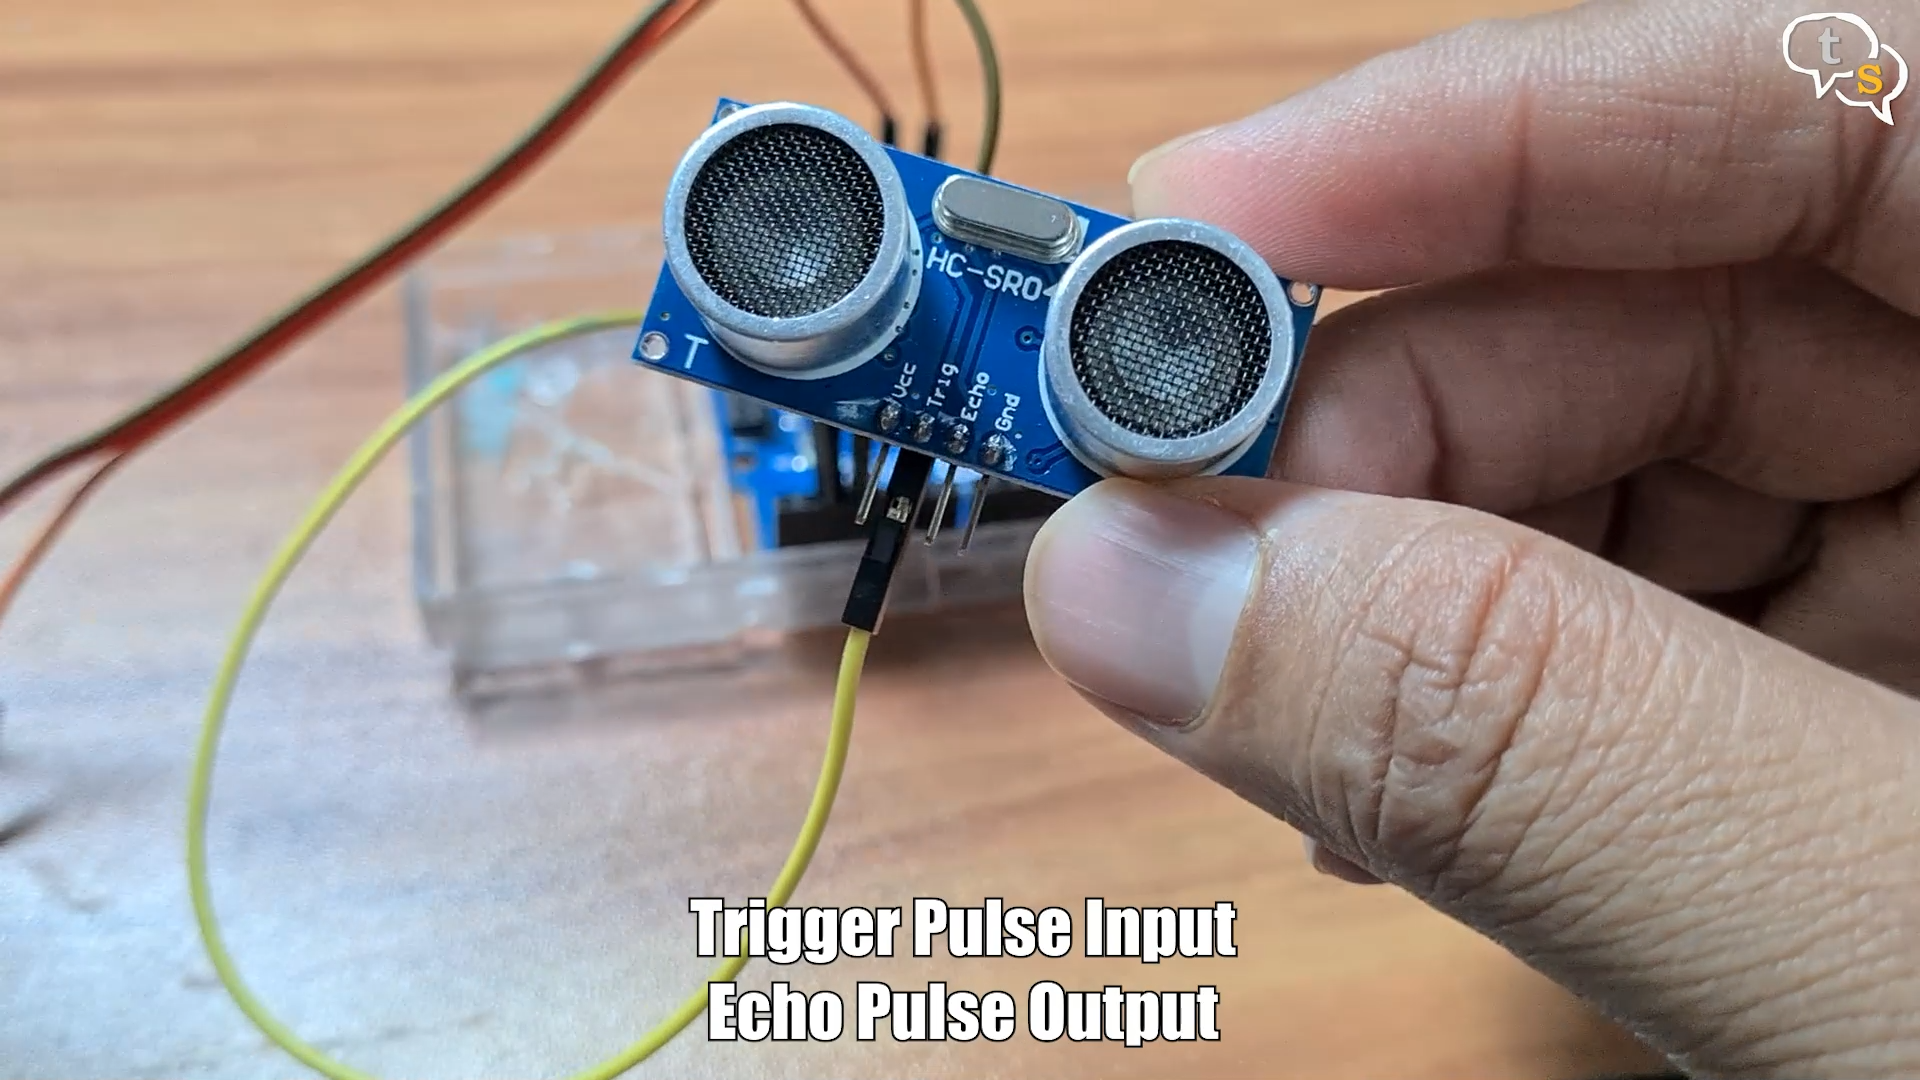
The centre two connectors are Trigger pulse input and echo pulse output, connect the jumper wires and we’re ready to do the necessary connections on the Arduino.
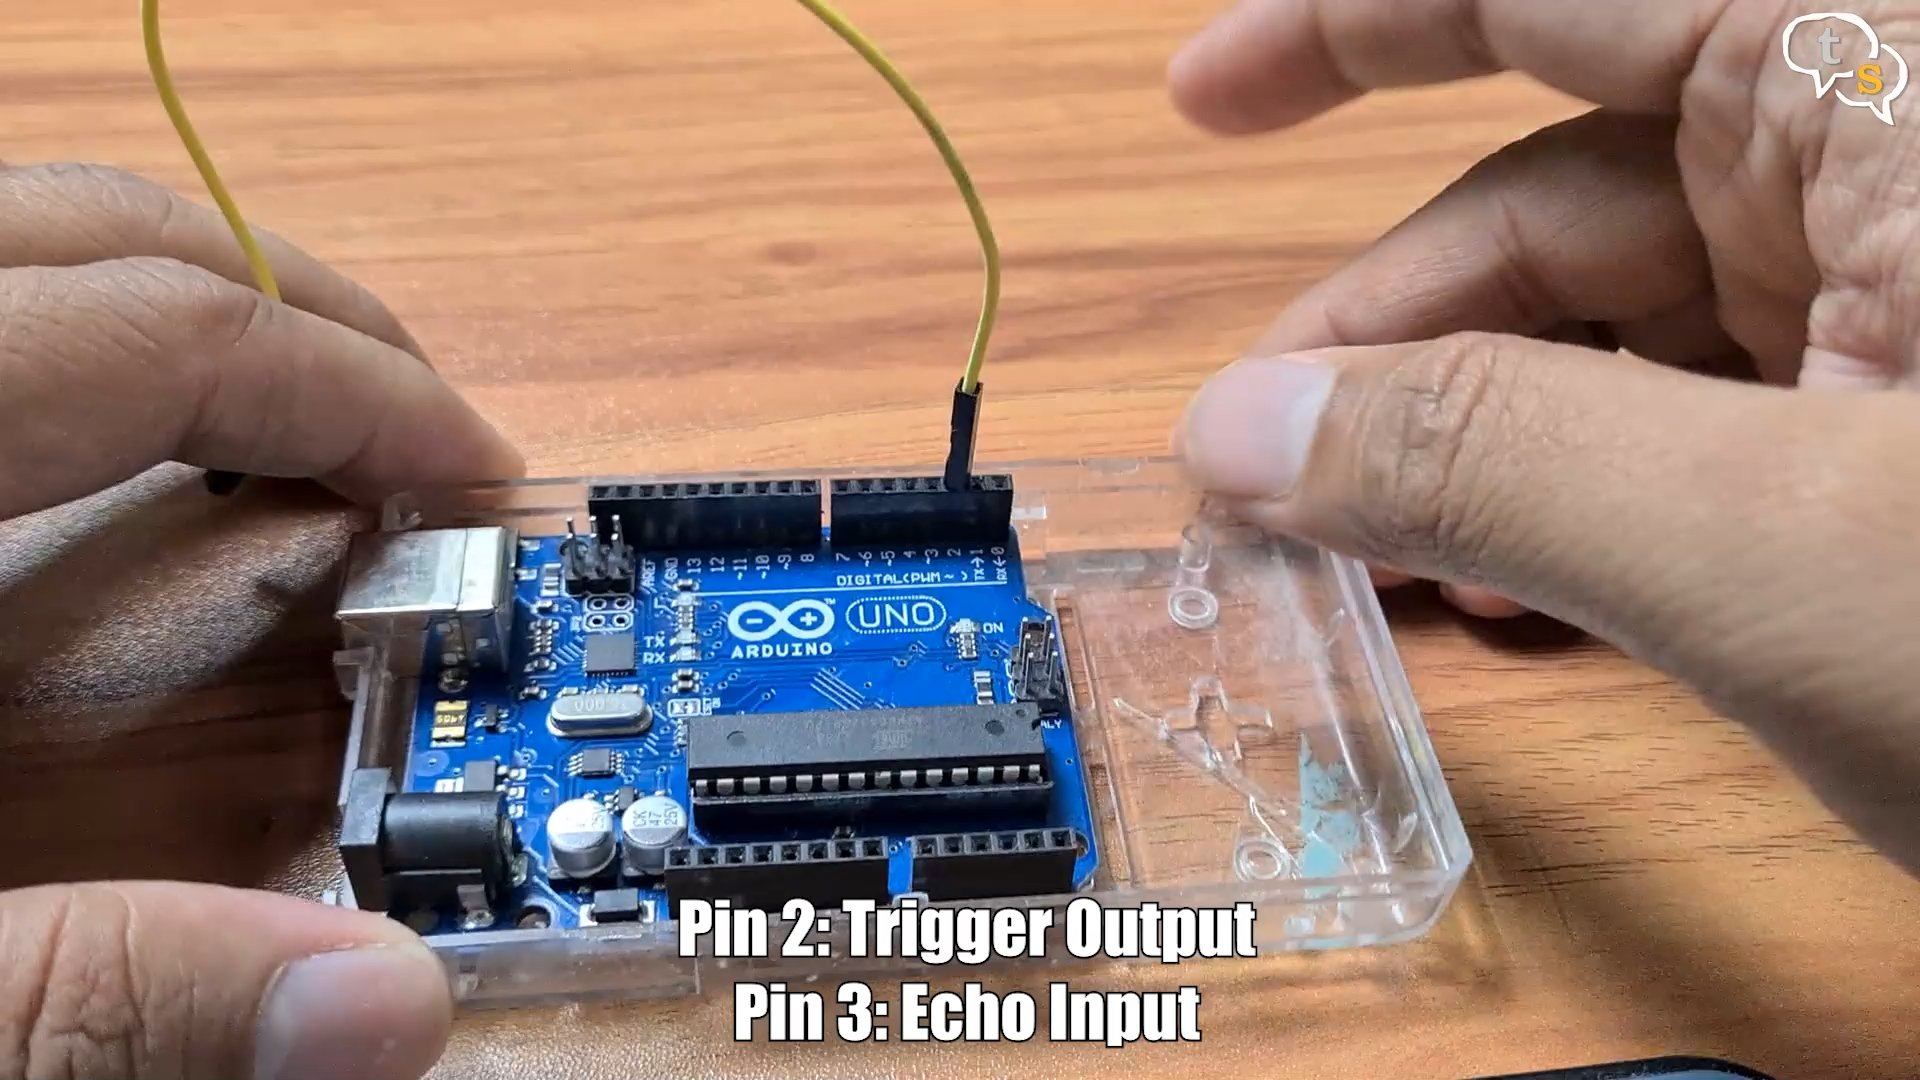
On the Arduino we choose where we would want to connect the wires. We choose 2 as trigger and 3 as echo.
 .
. 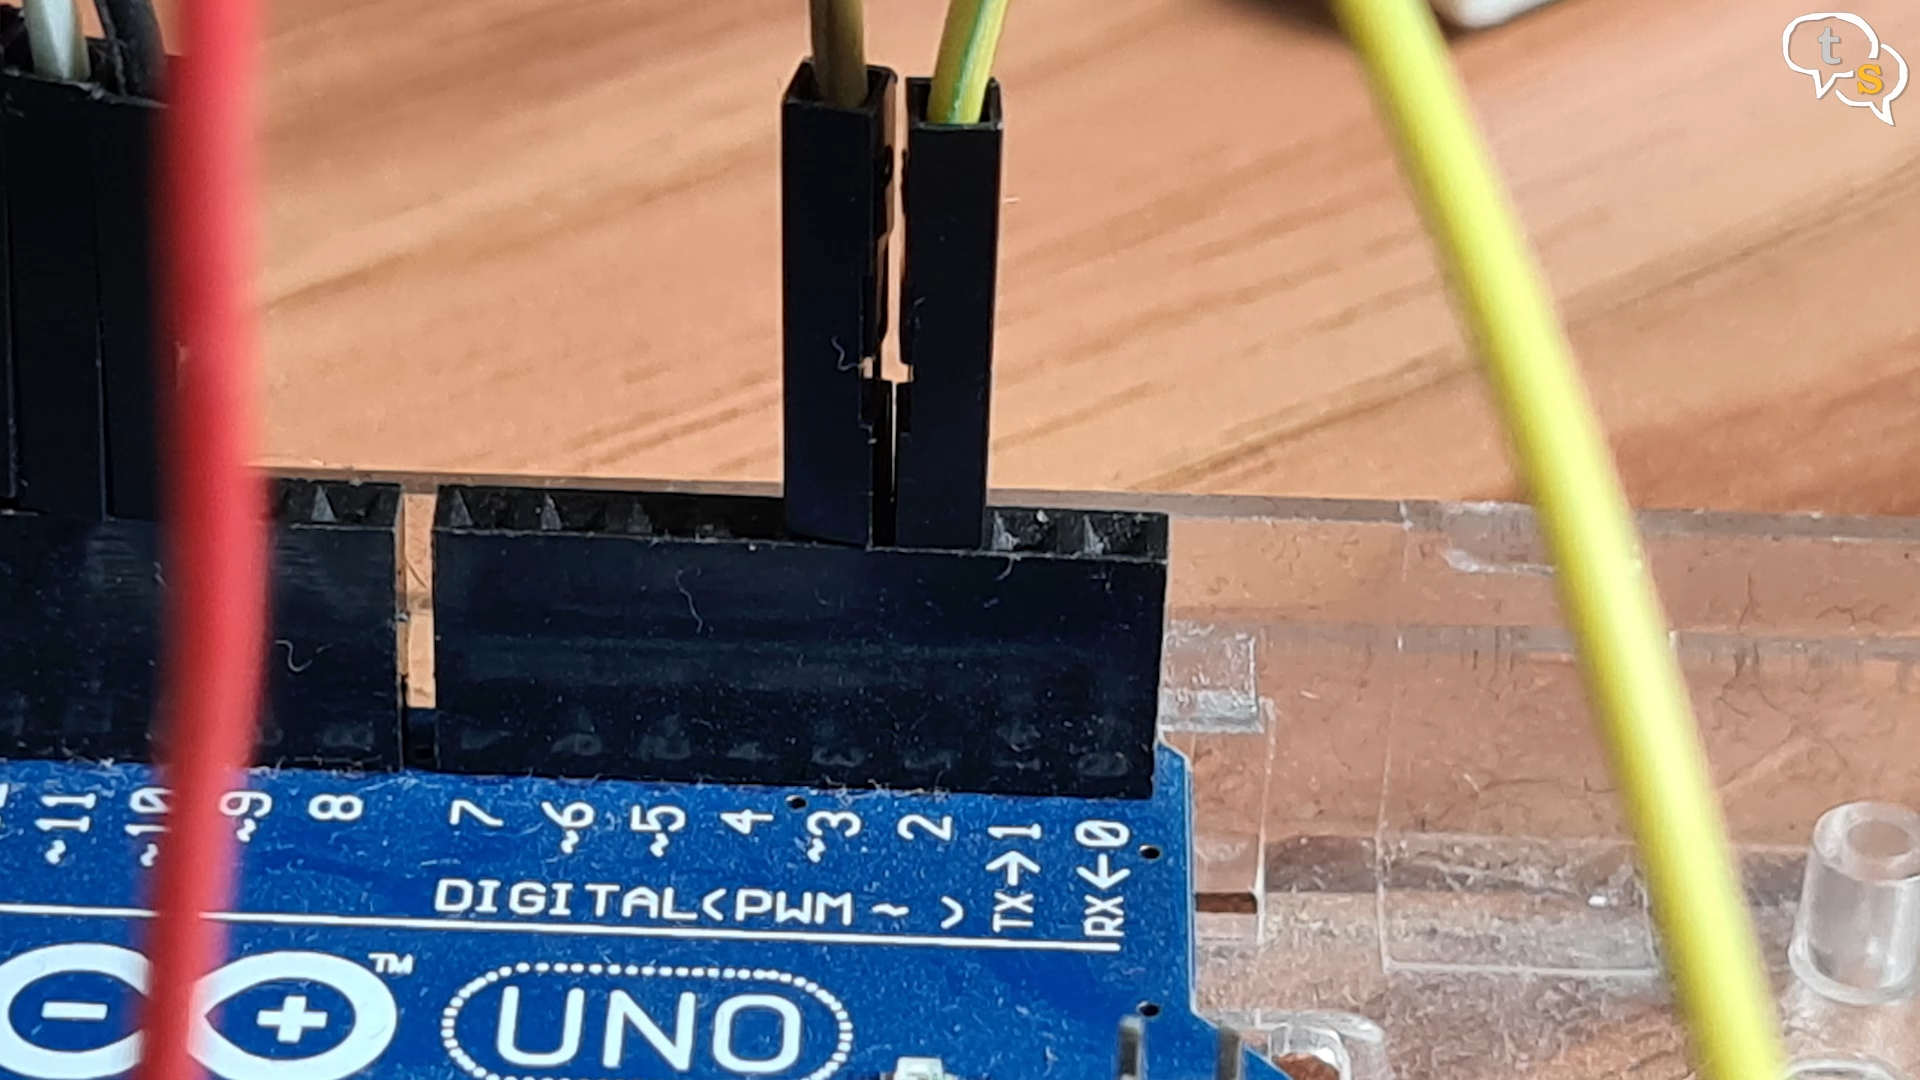
So, we connect the sensor wires, connect trigger and echo to 2 and 3.
Next, we take care of the power supply connectors. VCC would go to +5V, and the other power wire is connected to GND which is marked in white.
Now that we have the basic connections complete, we need to add the LED’s to indicate the current water level.
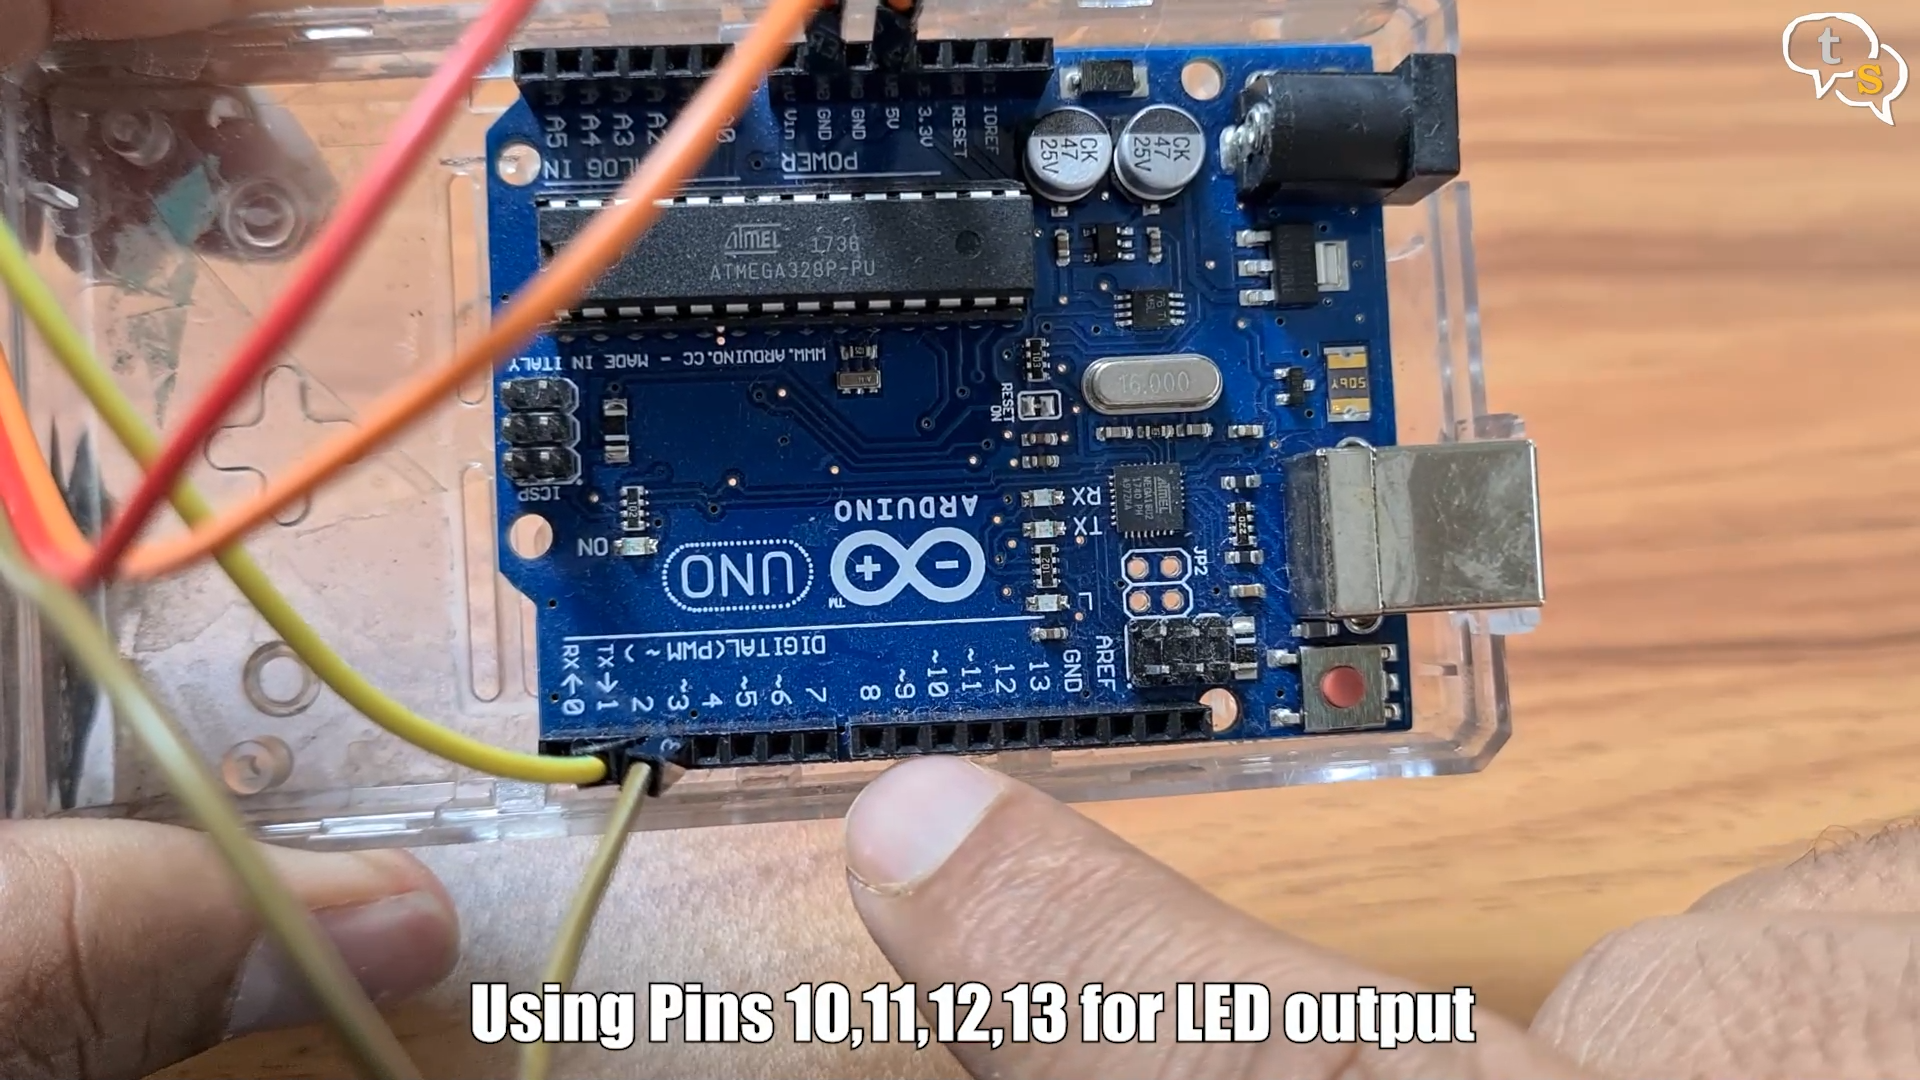
For output we’re selecting 10,11,12,13 for the LED’s
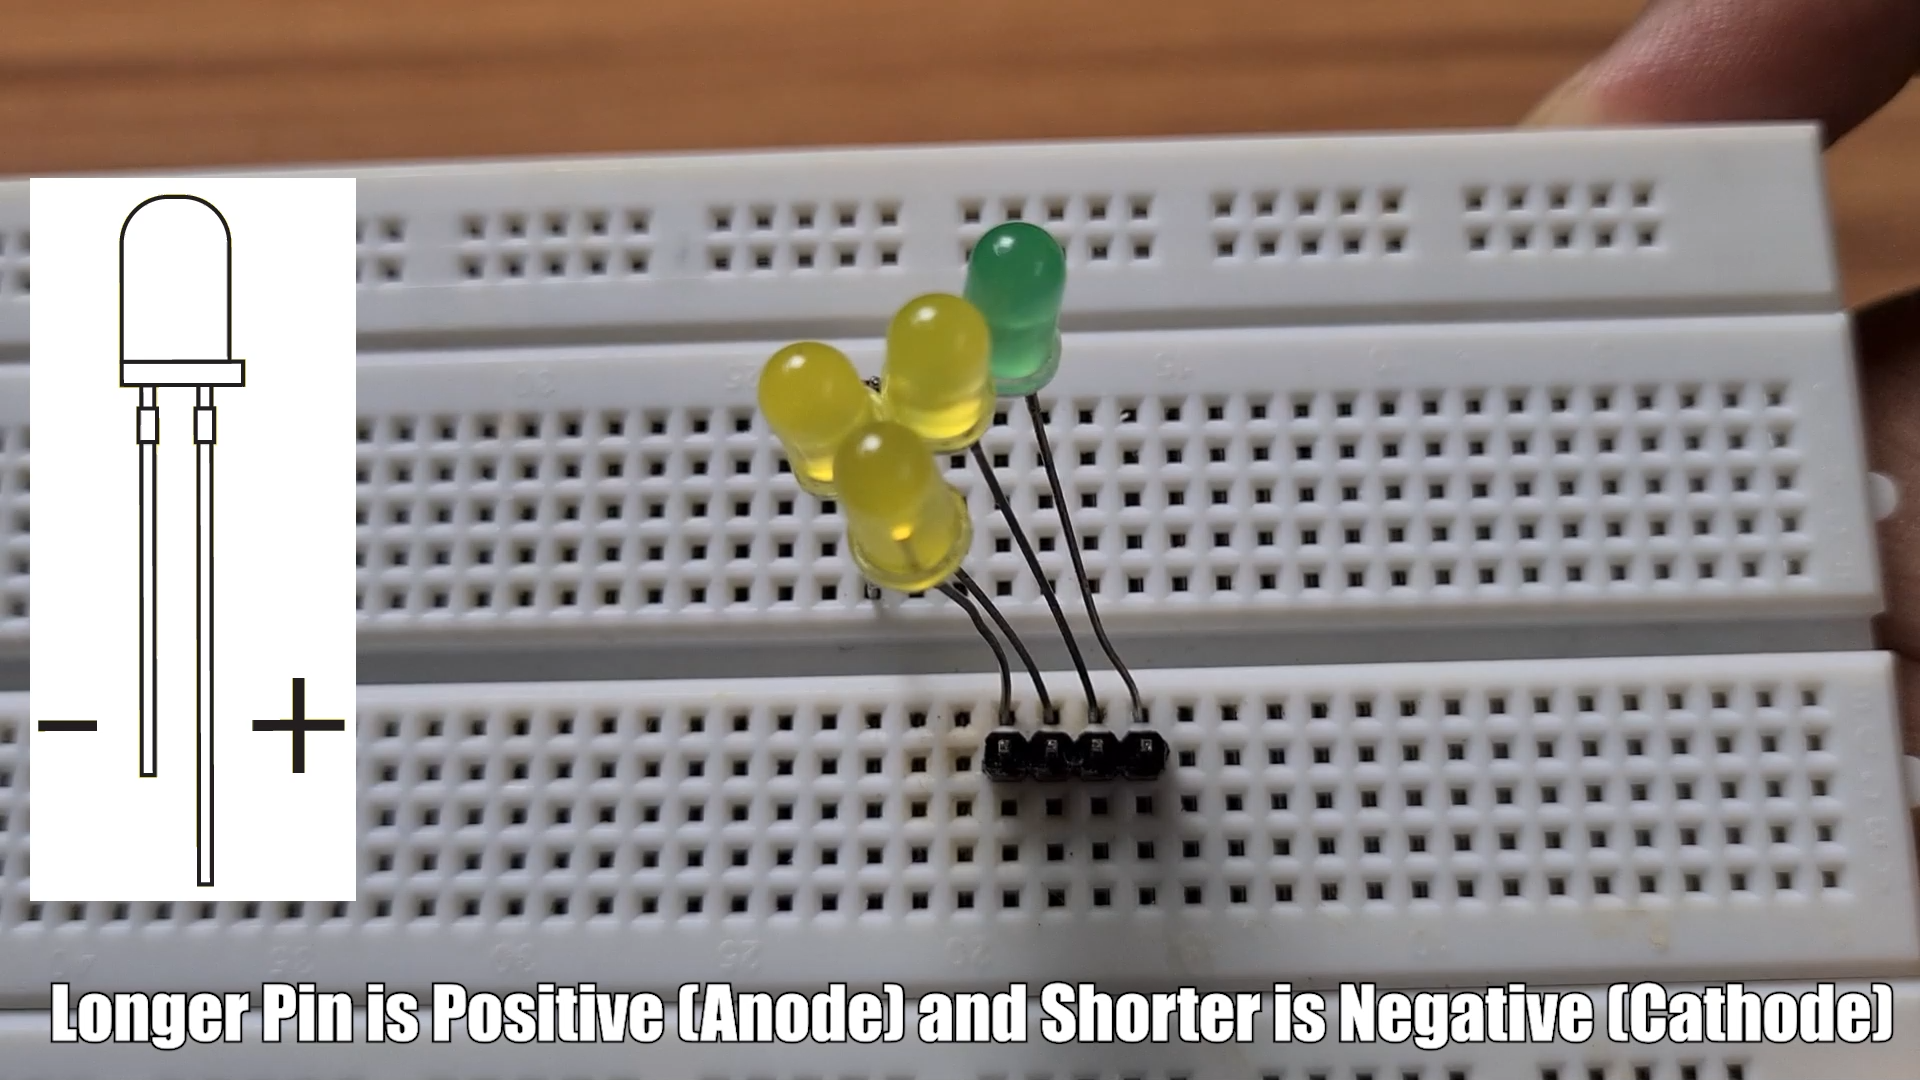
The LED’s positive terminal needs to be connected to the output pins. Which are 10,11,12 and 13.
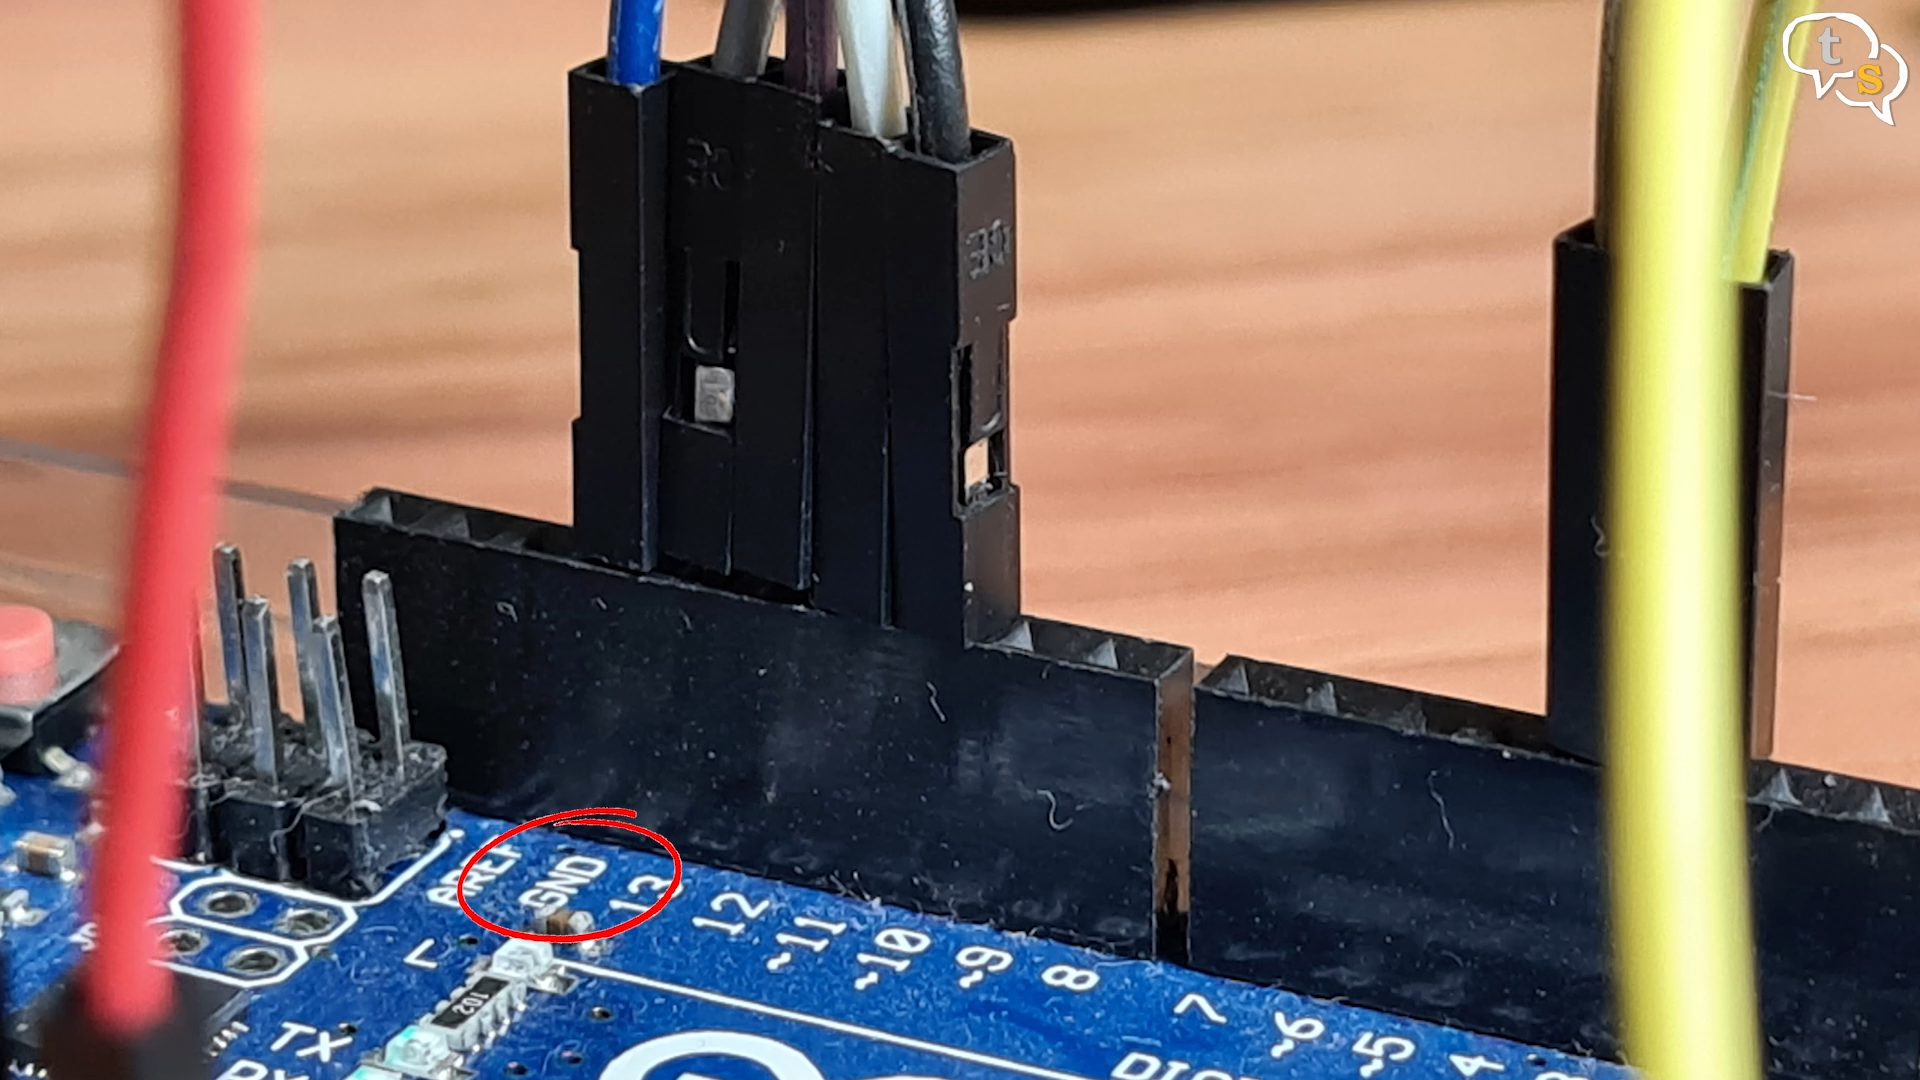
The negative terminals are connected to the gnd terminal on the Arduino.
The connections are done, now let’s write the code.
Ultrasonic Sensor Code:
const int trigPin = 2;

const int echoPin = 3;

int ledA=13;

int ledB=12;

int ledC=11;

int ledD=10;

int a=4;

int b=3;

int c=2;

int d=1;

int max_distance = 200;

void setup() {

// put your setup code here, to run once:

Serial.begin(9600);

pinMode (ledA,OUTPUT);

pinMode (ledB,OUTPUT);

pinMode (ledC,OUTPUT);

pinMode (ledD,OUTPUT);

digitalWrite(ledA, LOW);

digitalWrite(ledB, LOW);

digitalWrite(ledC, LOW);

digitalWrite(ledD, LOW);

}

void loop() {

// put your main code here, to run repeatedly:

long duration, inches, cm;

pinMode(trigPin,OUTPUT);

digitalWrite(trigPin, LOW);

delayMicroseconds(2);

digitalWrite(trigPin, HIGH);

delayMicroseconds(10);

digitalWrite(trigPin, LOW);

pinMode(echoPin, INPUT);

duration = pulseIn(echoPin, HIGH);

//cm = ( duration / 29 ) / 2;

//inches = cm * 0.393701;

inches = microsecondsToInches(duration);

cm = microsecondsToCentimeters(duration);

if (inches <max_distance){ Serial.print(inches); Serial.print(" in"); Serial.print(cm); Serial.print(" cm"); Serial.println(); delay(100); } //digitalWrite (ledA,HIGH); if (inches >=a) {digitalWrite (ledA,HIGH);digitalWrite (ledB,LOW); digitalWrite (ledC,LOW); digitalWrite (ledD,LOW); }

else if (inches >=b){digitalWrite (ledA,LOW);digitalWrite (ledB,HIGH); digitalWrite (ledC,LOW); digitalWrite (ledD,LOW); }

else if (inches >=c){digitalWrite (ledA,LOW);digitalWrite (ledB,LOW); digitalWrite (ledC,HIGH); digitalWrite (ledD,LOW); }

else if (inches >=d){digitalWrite (ledA,LOW);digitalWrite (ledB,LOW); digitalWrite (ledC,LOW); digitalWrite (ledD,HIGH); }

//else {digitalWrite (ledA,HIGH);digitalWrite (ledB,HIGH); digitalWrite (ledC,HIGH); digitalWrite (ledD,HIGH); }

}

long microsecondsToInches(long microseconds) {

// According to Parallax's datasheet for the PING))), there are

// 73.746 microseconds per inch (i.e. sound travels at 1130 feet per

// second). This gives the distance travelled by the ping, outbound

// and return, so we divide by 2 to get the distance of the obstacle.

// See: http://www.parallax.com/dl/docs/prod/acc/28015-PING-v1.3.pdf

return (microseconds / 74) / 2;

}

long microsecondsToCentimeters(long microseconds) {

// The speed of sound is 340 m/s or 29 microseconds per centimeter.

// The ping travels out and back, so to find the distance of the

// object we take half of the distance travelled.

return (microseconds / 29) / 2;

}
Let’s initialize the variables first,
The trigger pulse output pin or
trigPin lets set it to 2 as we have connected it that way on the Arduino.
Next, we have the echo pulse input, which is the reading from the ultrasonic sensor and the value returns to the Arduino.
Next, we need to initialize the LED’s
Simply name them
Int ledA which is 13
Int ledB which is 12
Int ledC which is 11
Int ledD which is 10
Next we need to set the distances at which the appropriate led’s need to light up, so 2,4,6 and 8 inches stored in variables a,b,c,d.
These values need to be calculated as per the height of the container you’re filling up.
I will show you how to calculate these values in a bit.
Here’s the main code,
Serial.begin(9600); // opens serial port, sets data rate to 9600 bps
pinMode (ledA,OUTPUT); Configures the specified pin to behave either as an input or an output
Lets init the leds to off by sending a LOW status
digitalWrite(ledA, LOW);
As the pin has been configured as an OUTPUT with pinMode(), its voltage will be set to the corresponding value: 5V (or 3.3V on 3.3V boards) for HIGH, 0V (ground) for LOW
So that was for the setup, now let’s get to the main loop.
We have our variables duration, which is the echo back from the sensor, inches for the height in inches and cm for centimetres.
The inch and centimetre values need to be calculated as per the value returned to the duration variable which would be in milliseconds.
First, we have the trigPin set as an output using pinMode as we did earlier.
We send a Low parameter to the pin, basically 0V to reset the sensor.
delayMicroseconds(2) waits for two microseconds before executing the next line.
digitalWrite(trigPin, HIGH); this sends a +5V to the trigger activating it.
delayMicroseconds(10); waits for 10 microseconds
digitalWrite(trigPin, LOW); then a low or 0V is sent
This causes the ultrasonic sensor to release pulses in 10 microsecond intervals
pinMode(echoPin, INPUT); the echopin is set as an input which would read the returning value.
The duration is then calculated using the value returned to the echoPin,
pulseIn command Reads a pulse (either HIGH or LOW) on a pin. For example, if value is HIGH, pulseIn() waits for the pin to go from LOW to HIGH, starts timing, then waits for the pin to go LOW and stops timing.
Returns the length of the pulse in microseconds or gives up and returns 0 if no complete pulse was received within the
Now we have the value in microseconds, but we need to convert it to a unit of length, if we need to get actual height.
Sound travels at 343 meters per second, which means it needs 29.155 microseconds per centimeter. So, we have to divide the duration by 29 and then by 2, because the sound has to travel the distance twice. It travels to the object and then back to the sensor.
1 cm = 0,393701 in
This is written in the function microsecondsToCentimeters which is “microseconds / 29 / 2”
Next, we calculate the inch value using the microsecondsToInches function, which is done by “microseconds / 74 / 2”
In both functions microseconds is the “duration” value, when passed to the function it’s renamed microseconds, which is what the actual value is.
We need to monitor the values so to do that I’m printing it to the serial monitor.
That is what these commands are for.
Next, we set the logic cases for if the distance is between the sensor and the values we had set earlier.
We can remove these low statuses if you want more than one LED to light up as the water fills. Now compile and send to the Arduino. We are ready.
Let’s test the circuit, this is how it works, here I’m using my hand, but similarly if the water level got closer to the sensor the appropriate lights would light up.
Let us test it with a jar of water.
This jar is empty at present, we install the sensor perpendicular to the water surface. Yes, there is no water here at present, but make sure it’s as perpendicular as possible. The sensor can still detect if it is at a 15-degree angle, but straighter the better and less errors.
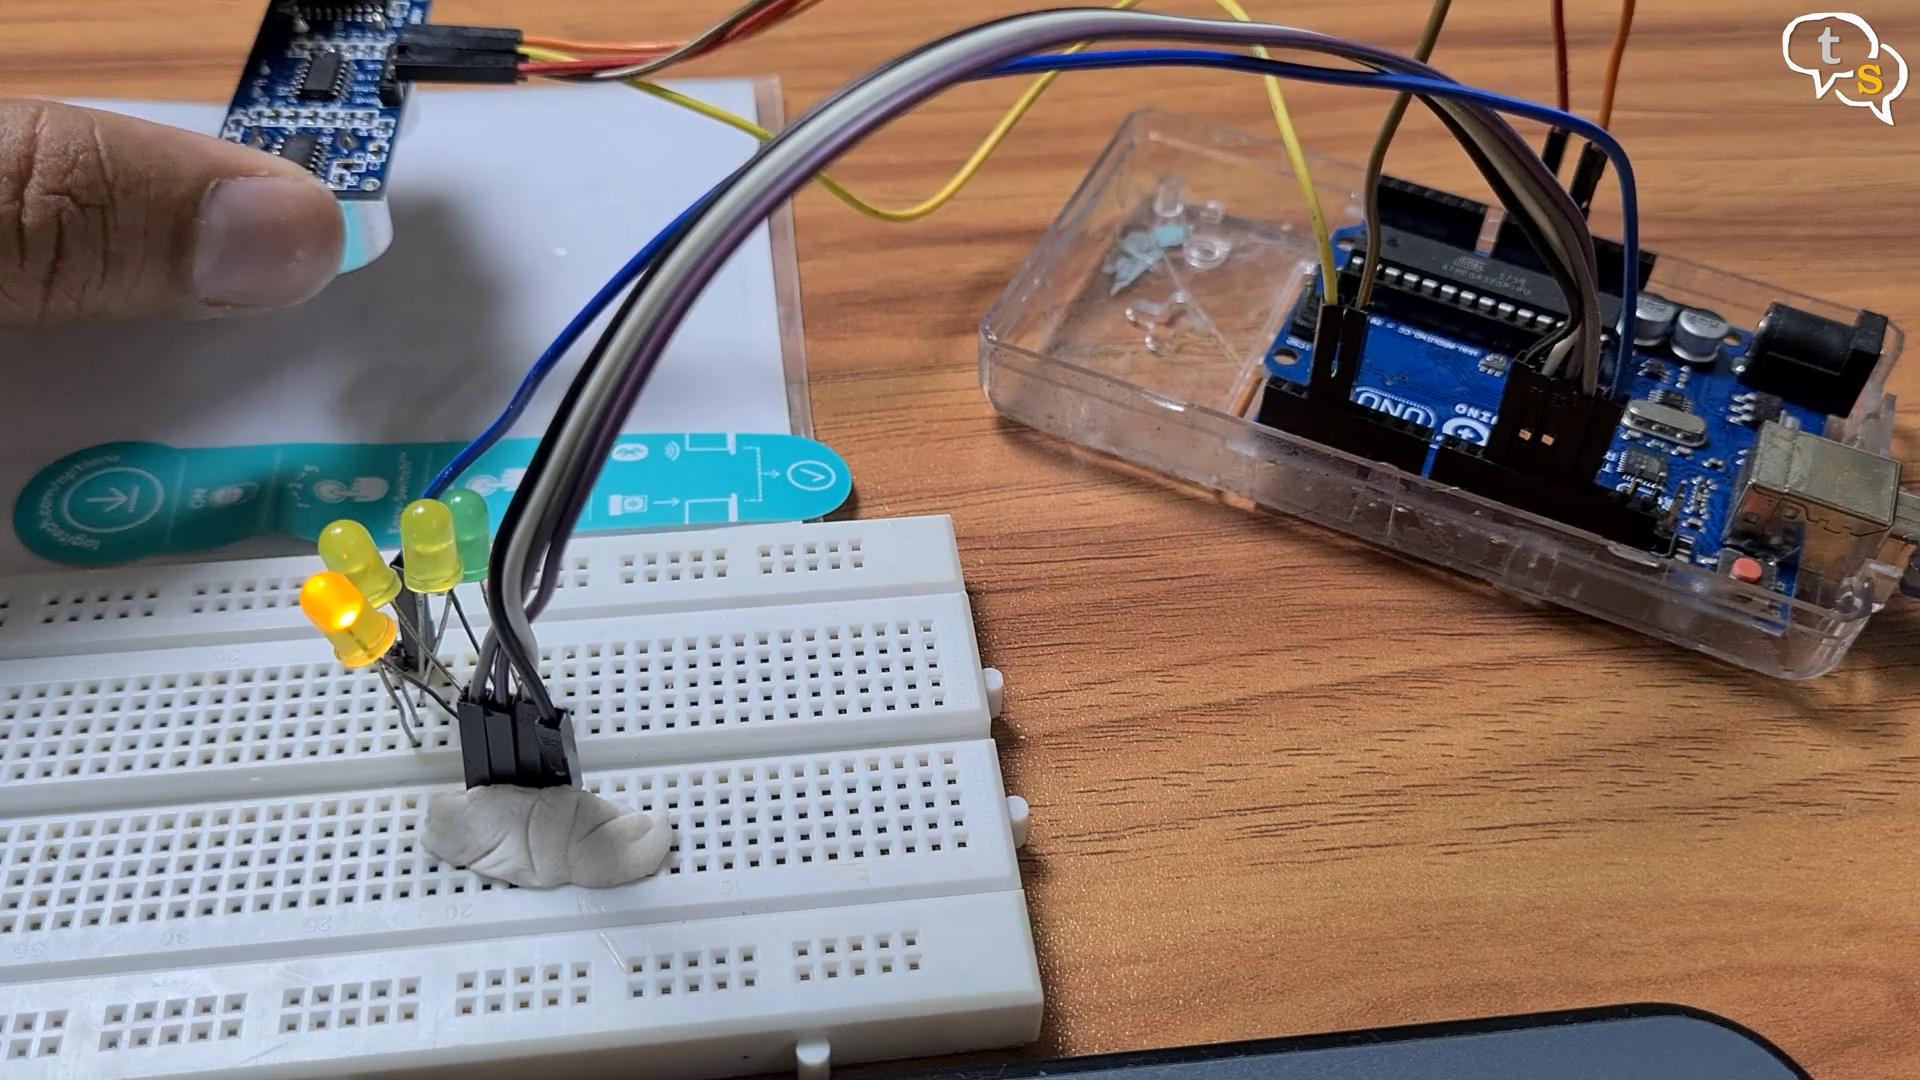
Let us test it out. It works, and it lights up the appropriate LED as per the distance from the water level.
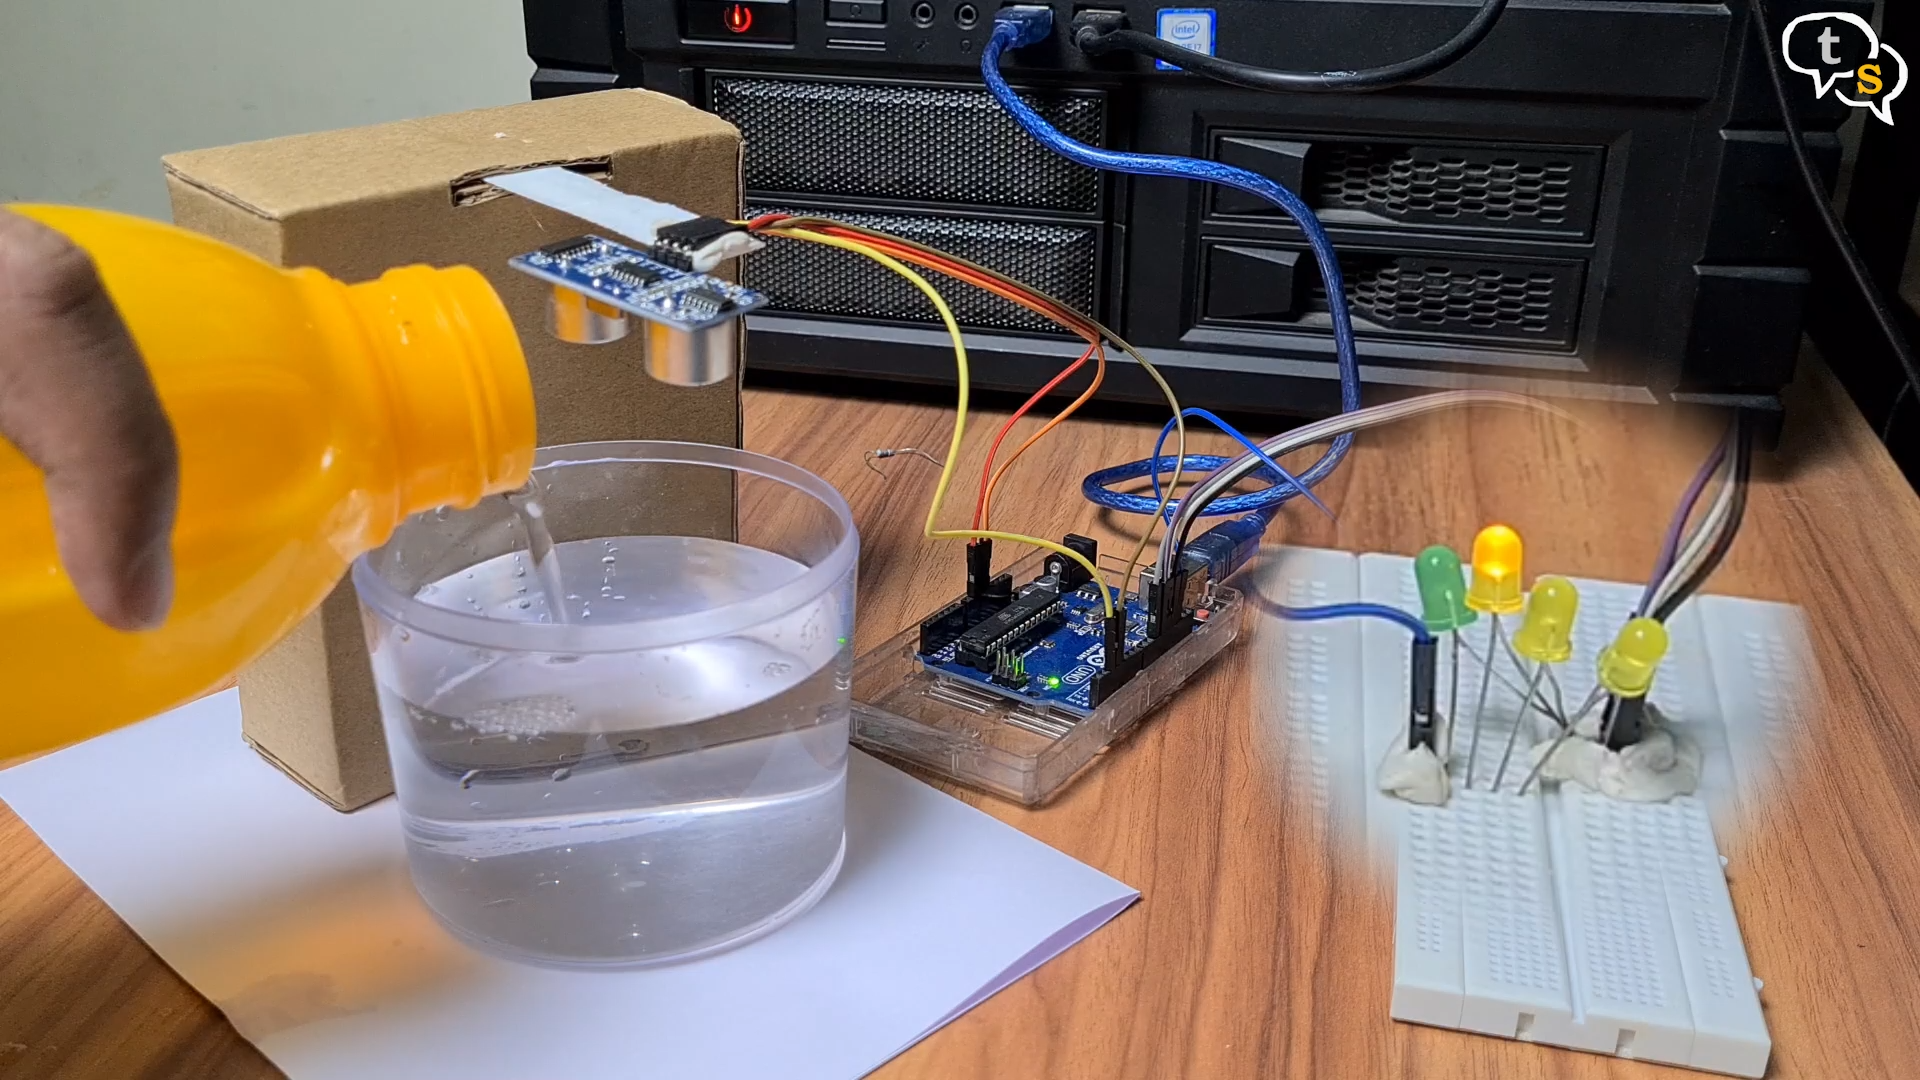
I have mounted the sensor up a bit so that it doesn’t come in contact with water.
This setup will not work when exposed to the elements, if you would like to use it with your water tank, you will need to place it in a protective housing.
Well that was it, I hope this video helps you understand how the ultrasonic sensor works and how to set up an ultrasonic water level sensor yourselves. The code is available on our website talkingstuff.net, the link to it is provided in the description.
If you don’t have the parts necessary i have the links to them in the description too.
Also any questions you have can be directed to tech@talkingstuff.net and you can also reach us on WhatsApp at 9652578833.
Ultrasonic sensor only:
Aruduino only:
Arduino Kit, has ultrasonic sensor, Arduino, wires LED’s and more:


