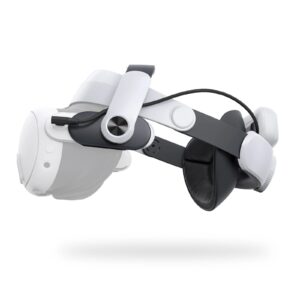
The quest 3 is a fantastic VR headset and is great value for the price. The only downside if we can call it that is the battery life of around 2 hours. Also the default head strap provided with the headset is not that great of a quality, so to kill two birds with one stone I have the BOBOVR m3 pro battery head strap. It provides the support of a premium head strap and also enables adding a battery to the mix allowing for longer game play.
But how good is it really? Let’s find out in this video.

This is the BoboVR m3 pro battery head strap, I purchased it off mx2games, they delivered an original product, only problem was they took 2 months to deliver it. But now I’m happy it has arrived.
In the box, we have the head strap,

This section would mount the battery, and it attaches magnetically.

Here’s the cushion.

The box has installation instructions on it, so make sure to read it.

This is the main strap, we have the BoboVR branding here,
Looks quite nice.

We also have a choice of this hexagonal cushion, not sure why I’ll move from the super soft cushion, but it’s there.
This dial here, allows expanding and contracting the strap to get the best fit for your head.
I’m already using a custom strap with my quest 3, which is quite comfortable. I have instructions on how to install it in my other video and the link can be found here.

Have to remove it, it just pops off like so.
Do the same on both sides.

Now for the BoboVR M3 pro headstrap, attach the cushion at the back, make sure to align the markings , R for right and L for left.
It clips on easily.

Now for the strap, this is a bit different. Open up the strap flat. Each side slides into each section instead of snapping.
Slide it into the sections. One each side. It will stop just before the usb-c and headphone jack.
Connect the USB-C cable to the UCB-C port on the headset.
You should hear a beep, indicating that it’s connected.

The top supports are just these two disconnected sections. No strap across, maybe as it can open up in an angle.

Here’s the battery,

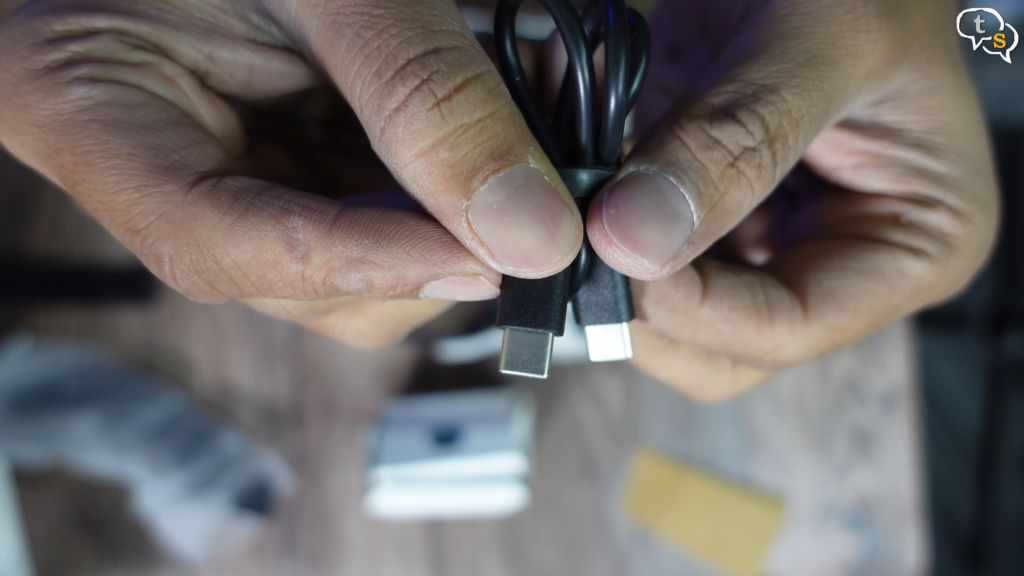
we get a USB-C cable within to charge it.
We also have a manual within.

And here’s the battery , it has magnets, which would align it with the back of the headset.

The center contacts are for power.
Use the USB-C port to charge the battery.

The battery attaches magnetically, the magnet is so powerful. We see the ring on the battery illuminate, indicating it’s active.

My quest 3 is already at full charge that’s why the led light up green, else it lights up amber.

Not much weight is added, the weight distribution is well thought of.

We can remove the battery like so and it mounts back like this. We can see the current battery level via these led’s in front.

There’s a support strap in front too, we need to attach it to the headset. It works without it, but better to attach it too. It can be removed from the top by removing the cushion and it’s now easy to install.

Now everything’s ready and we can wear the headset by adjusting the strap size front and back and once you wear it, tighten down the strap using this dial at the back.

This is quite comfortable, the top support feels like it’s floating and doesn’t touch the head, getting it to the right angle it will.
The battery charges the quest 3 via the USB-C cable, and it works seamlessly. There are the occasional beeps, when the headset is connected to the Quest 3, or we insert the battery. At least we get an audible confirmation that the battery is mounted properly.
Multiple users do complain that there are sounds that they hear when the battery is connected to the headset, it’s there only when the battery on the headset is 100%. If you play a bit and bring down the level, maybe to 80%, then connect the battery, there are no sounds anymore. Its only audible if you’re using the inbuilt speakers and not any headphones or earbuds, and your room is extremely quiet.
The internal battery and the bobovr battery have the same capacity. We get around double the battery life.
The headset can be used without the need for mounting the battery, it could be charging somewhere and when required can be mounted magnetically. This is so cool, I like the way the battery attaches.
Battery life we can expect upto 4 hours as life per the complexity of the game you’re playing. I feel 2 hours in VR is still too much, but if you’re playing with friends in tow one by one, then we will need more battery.
The battery can be charged using the quest 3 charger via the usb-c port.
The battery takes 3 hours to charge up to 100 %.

We can see the current battery level by tapping on the button in front. If you want to turn the battery off, double tap the button and it turns off. We get a beep after a few seconds indicating that it’s off.
We can also charge the quest 3 through the battery, so connect power to the battery and it charges the quest 3.

The headset stays in place, i can move front and back, side to side, it stays put.
How about fast movements, no problem at all. It feels well balanced, the weight distribution is designed really well, even if there’s no battery it still feels good.
This strap is so much more comfortable compared to the default Y strap.

We can also open it up at an angle from the front, so you can peek out without having to remove the headset, or loosening the strap. But this does not work if you have your glasses on, and will need to loosen the strap.
Oh, yeah it works with glasses, except for the opening bit.
The ports are easily accessible, of course the usb-c port is occupied for charging, but the 3.5 mm jack is accessible.
When the face shield is removed, its recommended this way for mixed reality content. But I like more VR content so I have the face shield installed.

The rear cushion is removable, as it’s attached using velcro, just remove and clean, or replace with the other strap provided. Being removable you can replace it easily, if it starts to shed, as these generally start to, once it’s wet and used for some time. Not sure how easy it would be to procure replacement cushions, but at present it’s still good.
Build quality of the headset is great, feels solid

This is the M3 pro model and there’s a new S3 model available, figures, there’s always a newer version of hardware available only after I purchase this generation’s tech.
The prices for the band are all over the place, from 7k to 18k. I managed to get it at a good price from mx2games, but it does take time to deliver, which is 2 months.
I purchased it for personal use, and It’s a great headstrap, it’s totally comfortable and the added battery is a plus.
But if you’re not looking for a battery strap, then the LEQTRONIQ Elite Comfort Strap i reviewed in an earlier video, is a cheaper option for a comfortable strap.
So what do you guys feel, is it a worthy accessory or is 2 hours of gameplay give or take , already too much, make sure to comment below.

Vinayak Nair is a self-confessed geek from the days when computer memory was measured in Kilobytes. I create YouTube videos on 3D Printing, DIY Projects, Everyday tech reviews and also delve into gaming.


